1. Introduction
Thank you for choosing the TENDOVO Automatic Chicken Coop Door Opener V9-TPX. This device is designed to provide a convenient and secure solution for managing your poultry, offering automated opening and closing of your coop door. Featuring solar power, multiple operating modes, and a durable, weatherproof design, this system helps protect your flock from predators and simplifies daily routines.
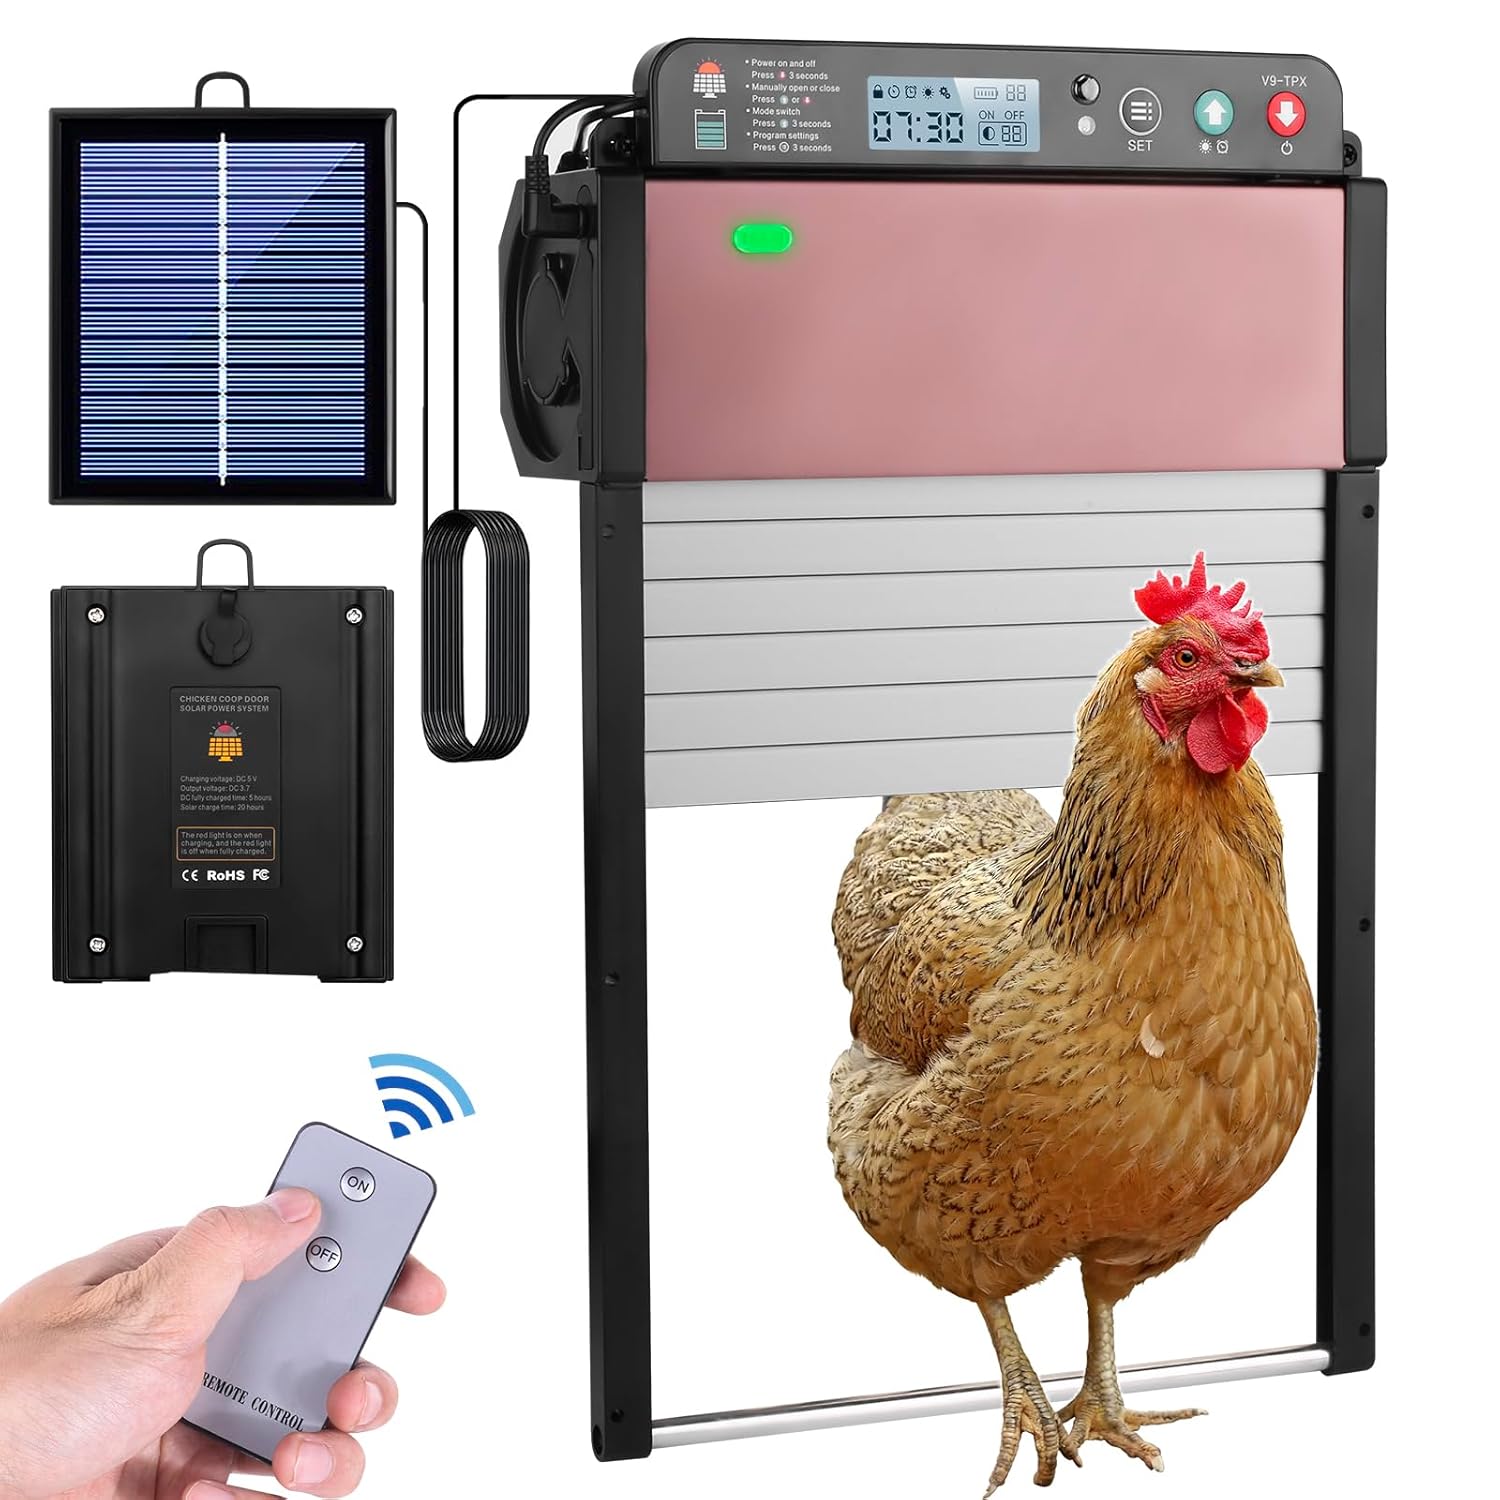
Image 1.1: The TENDOVO Automatic Chicken Coop Door Opener V9-TPX, showcasing the main unit, solar panel, remote control, and a chicken near the door.
2. Safety Instructions
- Read all instructions carefully before installation and operation.
- Ensure the installation area is stable and secure to prevent the door from falling.
- Keep hands and loose clothing away from the moving door mechanism during operation.
- Do not attempt to modify or disassemble the unit. Contact customer support for assistance.
- Keep children and pets away from the door during operation to prevent injury.
- Use only the provided USB cable and solar panel for power.
3. Package Contents
Verify that all components are present in the package:
- Automatic Chicken Coop Door Unit (V9-TPX)
- Solar Panel with connecting cable
- Remote Control
- USB Charging Cable
- Mounting Hardware (screws, anchors)
- User Manual (this document)
4. Product Features
- Dual Power Supply: Equipped with a high-efficiency solar panel and a built-in 2400mAh rechargeable lithium battery. Can also be charged via USB cable.
- Four Control Modes: Offers Light Sensor, Timer, Manual, and Remote Control modes for flexible operation.
- Smart Anti-Pinch Design: The door automatically stops and reopens if an obstruction (e.g., a chicken) is detected during closing, then attempts to close again once the path is clear.
- Upgraded LCD Display: Features a clear LCD screen for easy setup and monitoring of settings, time, and battery status.
- All-Weather Resistant: Constructed from durable aluminum and AES material, designed to withstand harsh weather conditions including rain, wind, and snow. Operates effectively in temperatures from -22°F to 150°F (-30°C to 65°C).
- Roller Shutter Door: Utilizes a smooth roll-up mechanism for reliable operation and adaptability to various coop designs.

Image 4.1: A visual comparison highlighting the upgraded roller shutter door design of the TENDOVO unit against a less durable, direct-rise plastic door.

Image 4.2: The TENDOVO chicken coop door shown functioning reliably in diverse weather, emphasizing its waterproof, snowproof, and scratch-proof properties.
5. Setup and Installation
Proper installation is crucial for the optimal performance of your automatic chicken coop door.
5.1 Mounting the Door Unit
- Choose a flat, vertical surface on your chicken coop where the door will be installed. Ensure there is enough clearance for the door to open and close fully.
- Position the door unit and mark the drilling points for the mounting screws.
- Drill pilot holes and secure the door unit firmly to the coop using the provided mounting hardware.
5.2 Mounting the Solar Panel
- Select a location for the solar panel that receives maximum direct sunlight throughout the day. This is typically on the roof or a south-facing wall of the coop.
- Mount the solar panel securely using the provided hardware, ensuring it is angled for optimal sun exposure.
5.3 Connecting Power
- Connect the solar panel cable to the designated port on the chicken coop door unit.
- For initial charging or if solar power is insufficient, connect the USB charging cable to the unit and a 5V USB power source.
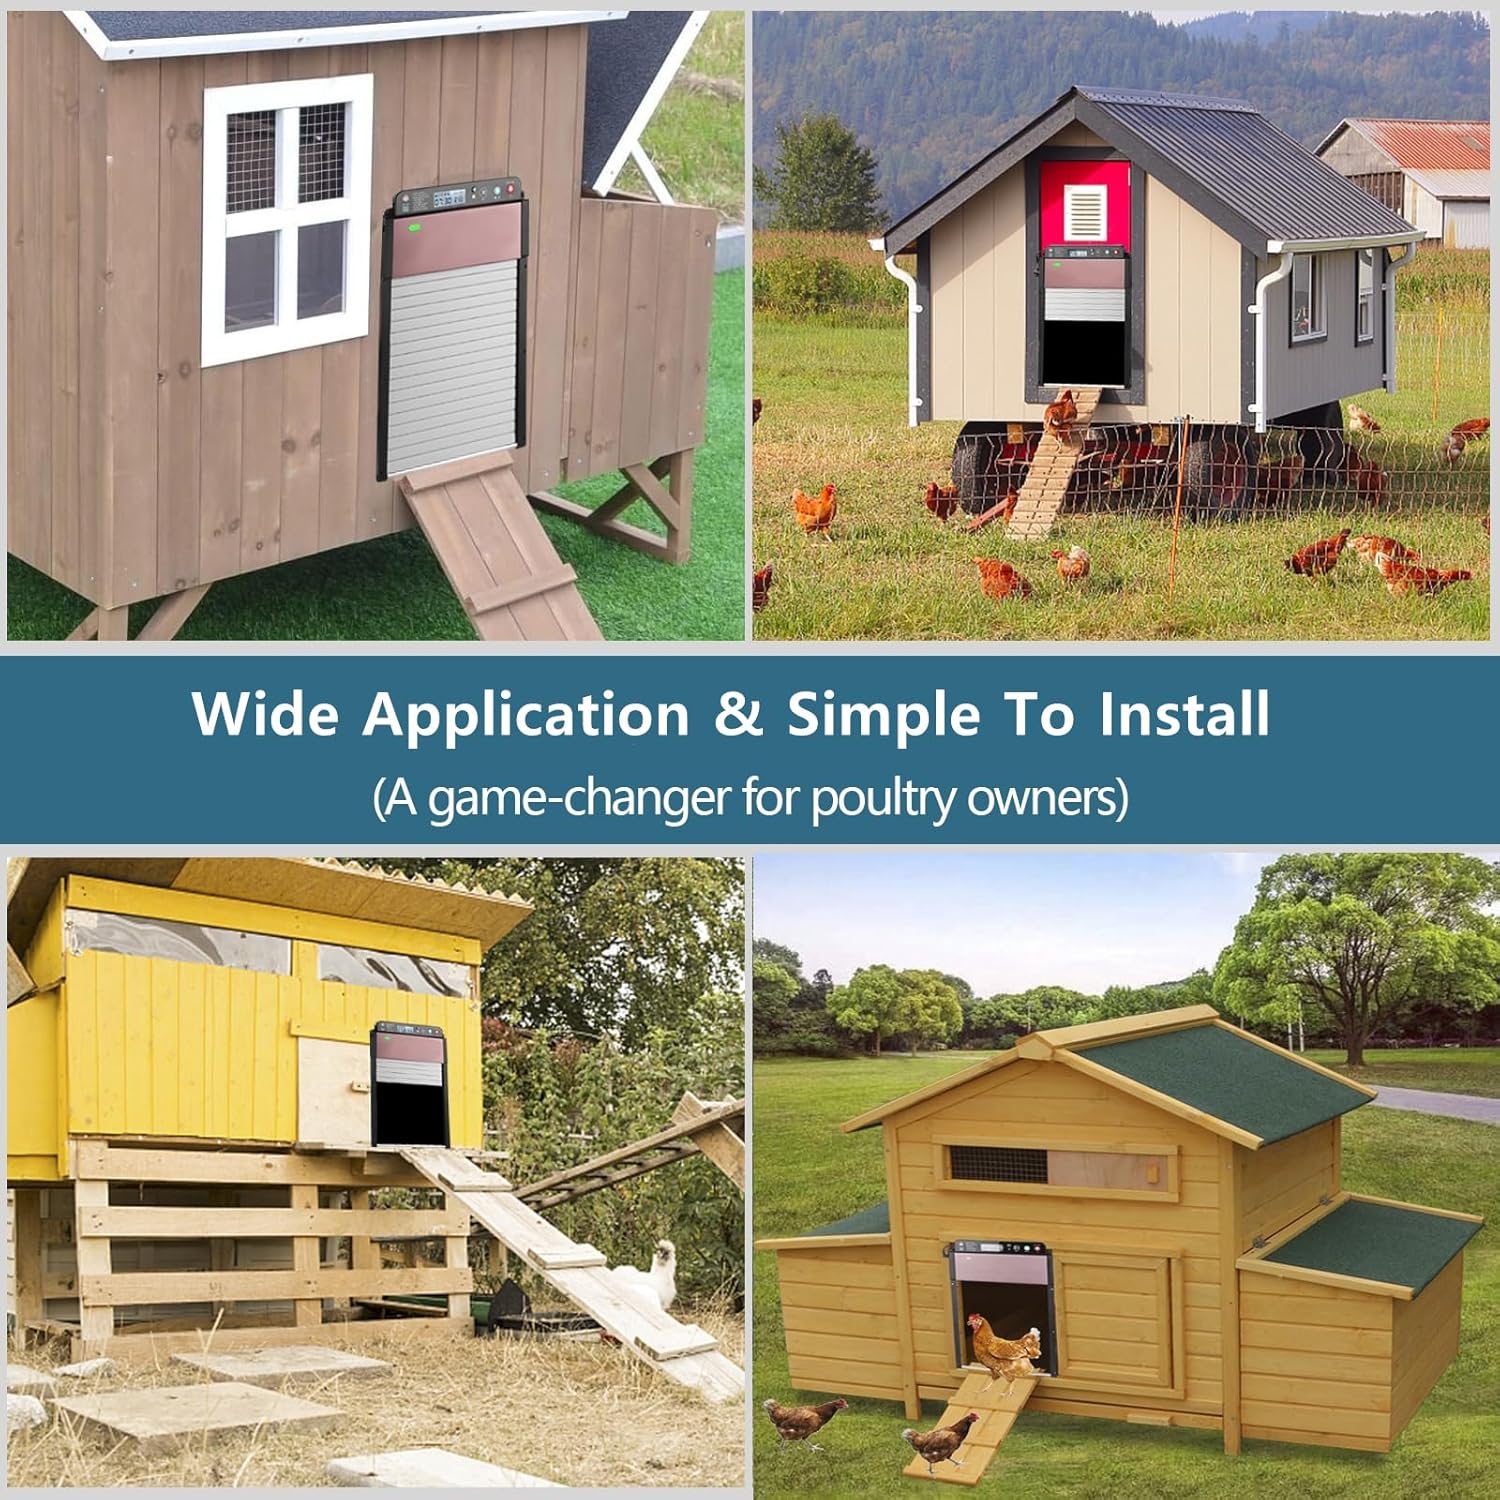
Image 5.1: Examples of the TENDOVO chicken coop door installed on various coop designs, demonstrating its wide application and ease of installation.

Image 5.2: An illustration detailing the three power supply methods: solar charging, USB charging from a power bank, and USB DC5V input charging from a wall adapter.
6. Operating Modes
The TENDOVO V9-TPX offers four distinct operating modes. Use the LCD screen and control buttons to configure your preferred settings.

Image 6.1: A detailed view of the upgraded HD LCD display and control panel, showing the time, battery indicator, and setting buttons.
6.1 General LCD Operation
- Power On/Off: Press and hold the power button for 3 seconds.
- Mode Switch: Press the 'SET' button briefly to cycle through modes (Light Sensor, Timer, Manual).
- Program Settings: Press and hold the 'SET' button for 3 seconds to enter programming mode for the selected mode.
- Manual Open/Close: Use the up/down arrow buttons for immediate door control.
6.2 Light Sensor Mode
In this mode, the door opens automatically at dawn and closes at dusk based on ambient light levels. This mode adapts to seasonal changes in daylight.
- To activate: Select Light Sensor mode via the 'SET' button.
- Sensitivity adjustment: If available, adjust light sensitivity in program settings (refer to on-screen prompts).
6.3 Timer Mode
This mode allows you to set specific times for the door to open and close. It is recommended for precise scheduling.
- To activate: Select Timer mode via the 'SET' button.
- To set times: Press and hold 'SET' for 3 seconds. Use arrow buttons to adjust hours and minutes (24-hour format) for both opening (ON) and closing (OFF) times. Press 'SET' to confirm each setting.
- Important Note: The clock may lose a small amount of time over extended periods. Periodically check and adjust the time to maintain accuracy.
6.4 Remote Control Mode
Use the provided remote control to open or close the door manually from a short distance (typically 5-10 meters).
- Press the 'ON' button on the remote to open the door.
- Press the 'OFF' button on the remote to close the door.
6.5 Manual Mode
Manually operate the door using the up/down arrow buttons directly on the unit.
- Press the up arrow to open the door.
- Press the down arrow to close the door.
- Critical Information: If you manually open or close the door using the unit's buttons, the automatic (Light Sensor or Timer) function will be temporarily suspended. It will resume either after 24 hours or once the reverse manual operation has been performed (e.g., if you manually opened, you must manually close for automation to resume). Using the remote control for manual override does not affect the automatic schedule.

Image 6.2: A visual guide to the four available operating modes: Light Sensor (dawn/dusk), Timer (set specific times), Remote Control, and Manual Control via unit buttons.
7. Maintenance
Regular maintenance ensures the longevity and reliable operation of your chicken coop door.
- Solar Panel Cleaning: Periodically wipe the solar panel with a soft, damp cloth to remove dust, dirt, or debris that may reduce charging efficiency.
- Door Track Cleaning: Inspect the door tracks for any accumulation of dirt, feathers, or other obstructions. Clean as needed to ensure smooth door movement.
- Battery Care: While the battery is rechargeable, ensure the solar panel receives adequate sunlight or use the USB cable for charging, especially during prolonged cloudy periods or winter months.
- General Inspection: Regularly check all mounting points and connections to ensure they remain secure.
8. Troubleshooting
If you encounter issues with your TENDOVO Automatic Chicken Coop Door, refer to the following troubleshooting guide:
| Problem | Possible Cause | Solution |
|---|---|---|
| Door does not open or close automatically. |
|
|
| Battery indicator always shows low charge. |
|
|
| Door stops and reopens during closing. |
|
|
| Clock loses time. |
|
|
9. Specifications
| Parameter | Value |
|---|---|
| Item Name | Automatic Chicken Coop Door |
| Model | V9-TPX |
| Material | Aluminum, AES |
| Operation Modes | Light sensor, Timer, Manual, Remote controller |
| Power Supply | Solar powered & USB cable |
| Working Voltage | 5V |
| Built-in Lithium Battery | 2400mAh |
| Working Temperature | -22°F to 150°F (-30°C to 65°C) |
| Remote Control Distance | 5-10 meters |
| Door Size (Opening) | 9.8” x 8” (24.9 cm x 20.3 cm) |
| Product Dimensions (Unit) | 35.56 x 8.13 x 24.13 cm |
| Item Weight | 1.46 kg |
| Applicable Poultry | Chickens, ducks, hens, geese |
10. Warranty and Support
For warranty information, technical support, or any questions not covered in this manual, please contact TENDOVO customer service through your original purchase platform or the contact details provided with your product packaging. Please have your model number (V9-TPX) and purchase date available when contacting support.


