1. Introduction
Thank you for choosing the National Geographic BaroTemp HZ Weather Station. This device is designed to provide accurate indoor and outdoor temperature and humidity readings, atmospheric pressure trends, and weather forecasts. It also includes a radio-controlled clock with alarm functions, moon phase display, and sunrise/sunset times.
Please read this manual carefully before operating the device to ensure proper setup and functionality. Keep this manual for future reference.
2. Product Overview
The BaroTemp HZ Weather Station consists of a main display unit and a wireless outdoor sensor. The main unit displays various environmental data, time, and forecast information. The outdoor sensor transmits temperature and humidity data wirelessly to the main unit.

Figure 1: Main Display Unit and Wireless Outdoor Sensor
Key Features:
- Indoor/Outdoor Temperature and Humidity Measurement
- Atmospheric Pressure History and Graphical Weather Forecast
- Radio-Controlled Clock (DCF signal) with Automatic Time Adjustment
- Dual Alarm Clock with Snooze Function
- Moon Phase Display
- Sunrise and Sunset Times
- Tide Information
- Indoor Comfort Indicator
- Wireless Outdoor Sensor with its own display (up to 80m range)
3. Package Contents
- National Geographic BaroTemp HZ Main Display Unit
- Wireless Outdoor Sensor
- Instruction Manual
Note: Batteries are not included. The main unit requires 3x AAA batteries, and the outdoor sensor requires 2x AAA batteries.
4. Setup
4.1 Battery Installation
- Outdoor Sensor: Open the battery compartment cover on the back of the outdoor sensor. Insert 2x AAA batteries, observing the correct polarity (+/-). Close the cover.
- Main Display Unit: Open the battery compartment cover on the back of the main unit. Insert 3x AAA batteries, observing the correct polarity (+/-). Close the cover.

Figure 2: Wireless Outdoor Sensor

Figure 3: Back of Main Display Unit
4.2 Sensor Pairing
After inserting batteries into both units, the main unit will automatically search for the outdoor sensor. The outdoor temperature and humidity should appear on the main unit's display within a few minutes. If the data does not appear, press and hold the 'CHANNEL' button on the main unit to initiate a manual search.
4.3 Initial Configuration
Upon initial power-up, the main unit will attempt to receive the DCF radio signal for automatic time setting. This process may take several minutes or up to 24 hours depending on your location and signal strength. During this time, you can manually set the time, date, and other preferences.
- Time Zone: Adjust the time zone if necessary.
- Units: Select preferred units for temperature (°C/°F) and atmospheric pressure (hPa/inHg).
- City Setting: Set your city for accurate sunrise/sunset and tide information.

Figure 4: Main Display Unit Interface
5. Operation
5.1 Display Overview
The main display is divided into several sections showing:
- Top Section: Time, date, weather forecast icons.
- Middle Section: Indoor temperature and humidity, outdoor temperature and humidity (from sensor).
- Bottom Section: Atmospheric pressure, moon phase, sunrise/sunset times, tide information, comfort indicator.

Figure 5: Weather Station in a Home Environment
5.2 Button Functions
The main unit features several buttons on the side for navigation and settings:
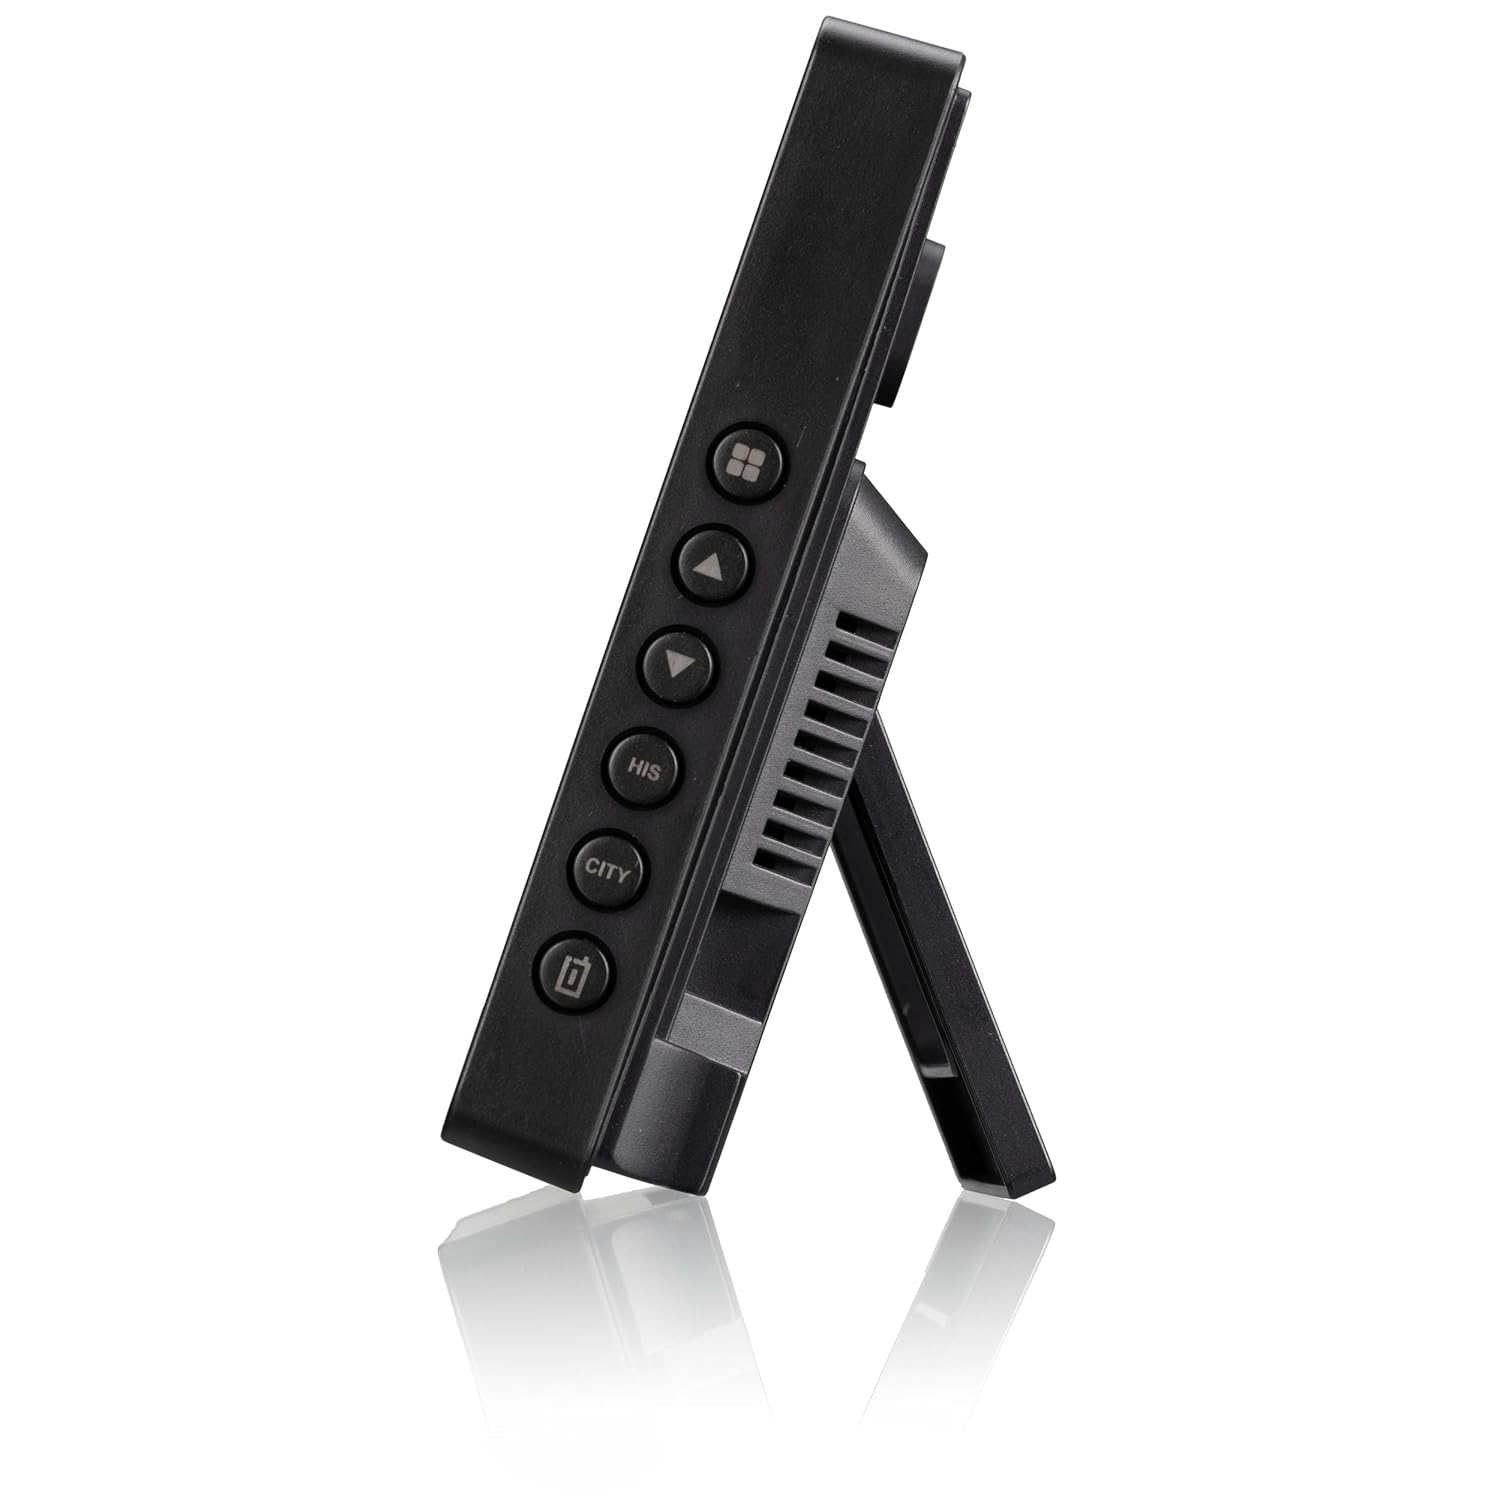
Figure 6: Side Buttons of the Main Unit
- MODE: Switches between display modes, enters setting mode.
- UP/DOWN (▲/▼): Adjusts values in setting mode, cycles through channels.
- ALARM: Sets and activates/deactivates alarms.
- HISTORY (HIS): Displays historical atmospheric pressure data.
- CITY: Sets city for sunrise/sunset and tide information.
- SNOOZE/LIGHT: Activates snooze function during an alarm, adjusts backlight brightness.
5.3 Setting Time and Date
- Press and hold the MODE button to enter time setting mode.
- Use the UP/DOWN buttons to adjust the flashing value (e.g., hour, minute, year, month, day).
- Press MODE again to confirm and move to the next setting.
- Exit setting mode by pressing MODE after the last setting or waiting for automatic exit.
5.4 Setting Alarms
- Press the ALARM button to view Alarm 1. Press again for Alarm 2.
- Press and hold the ALARM button to enter alarm setting mode.
- Use UP/DOWN buttons to set the alarm time.
- Press ALARM to confirm and move to the next setting.
- To activate/deactivate an alarm, press the ALARM button repeatedly until the alarm icon appears/disappears.
6. Maintenance
6.1 Cleaning
Wipe the device with a soft, damp cloth. Do not use abrasive cleaners or solvents. Ensure no liquid enters the device.
6.2 Battery Replacement
When the low battery indicator appears on the display, replace the batteries in the respective unit (main unit or outdoor sensor). Always replace all batteries in a unit at the same time with new ones of the same type.
7. Troubleshooting
- No outdoor data displayed: Ensure the outdoor sensor is within range (max 80m) and has fresh batteries. Press and hold the 'CHANNEL' button on the main unit to re-establish connection.
- Incorrect time: Check if the DCF signal icon is displayed. If not, try moving the main unit to a location with better reception, away from electronic interference. You can also set the time manually.
- Inaccurate readings: Ensure both units are placed in appropriate locations (main unit indoors, sensor outdoors but protected from direct sunlight and rain). Allow some time for readings to stabilize after setup.
- Display is dim or blank: Replace batteries in the main unit.
8. Specifications
- Model Number: 9070110
- Dimensions (Main Unit): 15.7 x 11 x 2.7 cm
- Weight: 499 grams
- Power Source (Main Unit): 3x AAA batteries (not included)
- Power Source (Outdoor Sensor): 2x AAA batteries (not included)
- Wireless Frequency: Radio Frequency (RF)
- Wireless Range: Up to 80 meters (open area)
- Material: Plastic
- Special Features: Weather forecast, moon phase, sunrise/sunset, tide, room climate indicator, alarm, snooze, historical data storage.
9. Warranty and Support
This product is covered by a manufacturer's warranty. Please refer to the warranty card included in your package or contact your retailer for specific warranty terms and conditions.
For technical support or inquiries, please contact National Geographic customer service through their official website or the contact information provided with your purchase.