Introduction
Thank you for choosing the Avalo 3D Display Frame. This frame is designed to elegantly showcase and protect your valuable sports jerseys, memorabilia, or other cherished items. Crafted from robust materials, it offers a secure and stylish display solution. Please read this manual carefully before setup and use to ensure proper installation and longevity of your frame.
Package Contents
Verify that all components are present in the package:
- 1 x Avalo 3D Display Frame (60 x 80 cm, Black)
- 1 x Cardboard Hanger (for jersey display)
- Integrated Hanging System (on the back of the frame)
- Instruction Manual

Image: The package contents include the 60x80 cm frame with a jersey inside, the product packaging, and the instruction manual.

Image: A close-up view of the black clothing hanger designed for jersey display within the frame.
Features
- Premium Materials: Constructed with durable black MDF for a sleek appearance and plexiglass for protection.
- UV Protection: The plexiglass front panel offers 98% UV protection, safeguarding your items from fading.
- Versatile Display: Suitable for sports jerseys, puzzles, clothing, sports memorabilia, and other precious objects.
- Flexible Orientation: Can be hung horizontally or vertically.
- Easy Framing: Includes a suspension system for jerseys, eliminating the need for glue or pins.
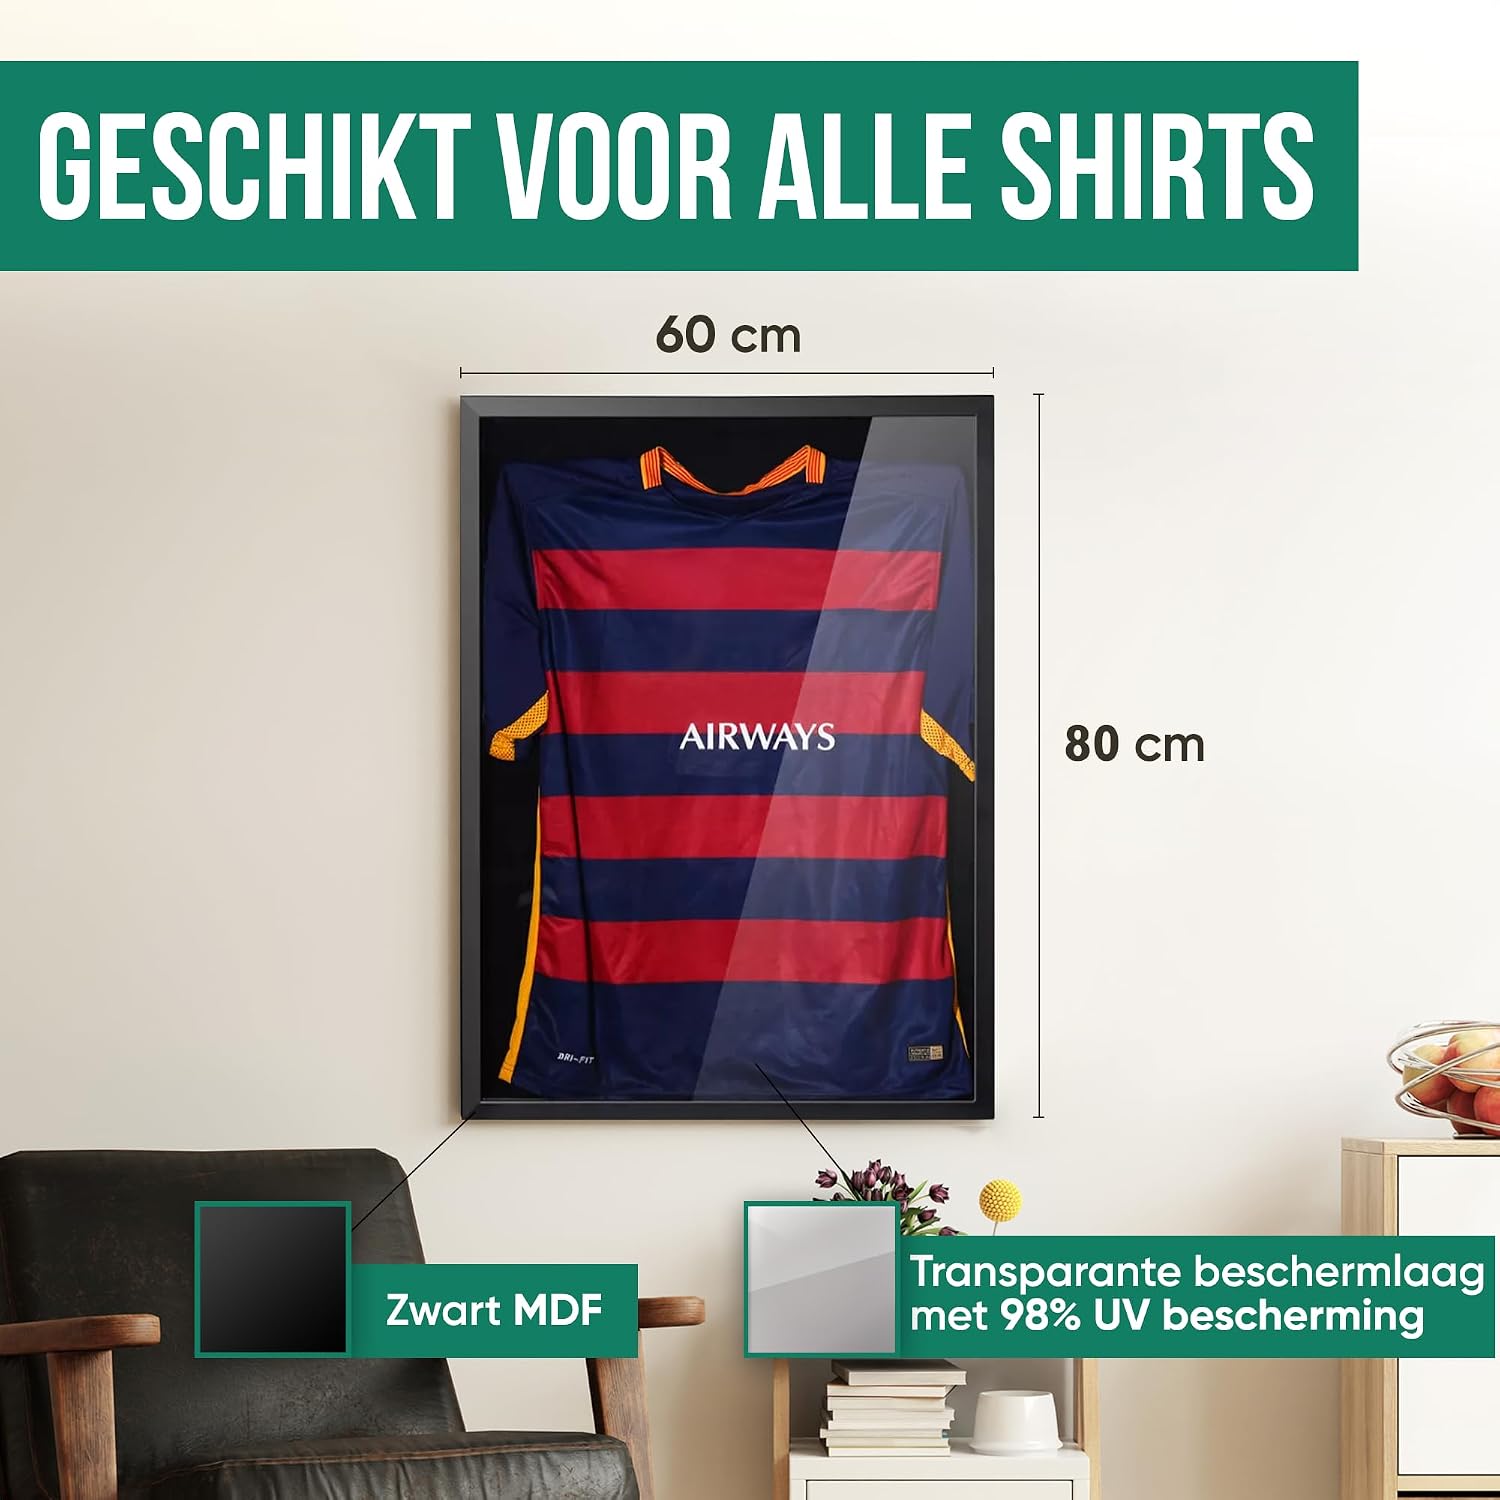
Image: The frame with its dimensions (60x80 cm), indicating the black MDF material and the transparent protective layer with 98% UV protection.

Image: A detailed view of the stylish black MDF material used for the frame construction.

Image: A close-up showing the crystal clear protective plexiglass, ensuring visibility and protection for displayed items.
Setup & Installation
1. Preparing the Frame
- Carefully unclip the closure strips on the back of the frame to remove the back panel.
- Remove any protective films from both sides of the plexiglass panel.
2. Inserting Your Item (e.g., Jersey)
- Place your jersey onto the provided cardboard hanger. Adjust the jersey to ensure it hangs neatly and is centered.
- Position the jersey and hanger within the frame, ensuring it lies flat against the back panel. The integrated suspension system will help hold the hanger in place.

Image: The frame's front displaying a jersey and its back showing the hanging hooks and closure system for easy setup.
3. Closing the Frame
- Carefully place the back panel back onto the frame, ensuring the item is not creased or damaged.
- Secure the back panel by clipping all the closure strips firmly into place.

Image: A close-up of the sturdy closure strips that secure the back panel of the frame.
4. Mounting the Frame
The frame can be mounted horizontally or vertically using the integrated hanging hooks.
- Determine your desired orientation (horizontal or vertical).
- Identify the appropriate hanging hooks on the back of the frame for your chosen orientation.
- Using suitable wall anchors and screws (not included), securely mount the frame to your wall. Ensure the wall can support the weight of the frame and its contents.

Image: A close-up view of the built-in hanging hooks on the frame's back, ready for wall mounting.
Operating Instructions
Once installed, your Avalo 3D Display Frame serves as a protective and aesthetic showcase for your items. The frame is designed for displaying a variety of items beyond just sports jerseys.
- Displaying Jerseys: Use the included cardboard hanger to neatly present your sports jerseys.
- Other Memorabilia: The deep box design allows for displaying various 3D objects, such as medals, small collectibles, or even framed puzzles.
- Changing Display Items: To change the item displayed, follow the 'Preparing the Frame' and 'Inserting Your Item' steps in reverse order.

Image: Three frames displaying a football jersey, a baseball jersey, and a basketball jersey, illustrating the frame's versatility.

Image: The frame displaying a landscape picture, highlighting its potential for various display items.
Maintenance
To keep your Avalo 3D Display Frame in optimal condition:
- Cleaning the Frame: Wipe the MDF frame with a soft, dry cloth. Avoid abrasive cleaners or harsh chemicals.
- Cleaning the Plexiglass: For the plexiglass front, use a soft, lint-free cloth and a mild, non-abrasive cleaner specifically designed for acrylic or plastic. Do not use glass cleaners, as they may damage the plexiglass.
- Dusting: Regularly dust the frame and plexiglass with a soft cloth to prevent buildup.
Troubleshooting
If you encounter any issues with your Avalo 3D Display Frame, please refer to the following common solutions:
- Plexiglass appears cloudy or scratched: Ensure all protective films have been removed from both sides of the plexiglass. If scratches are present, they may have occurred during handling; minor scratches can sometimes be buffed out with specialized acrylic polish (not included).
- Frame not hanging straight: Verify that the wall anchors and screws are level and securely installed. Adjust as necessary.
- Item inside is shifting: Ensure the item is properly secured with the internal suspension system or other appropriate methods. Re-open the frame and adjust the item's position.
Specifications
| Brand | Avalo |
| Model Number | AP3 |
| Dimensions (L x W x H) | 80 x 60 x 2.51 cm |
| Item Weight | 1 kg (1000 Grams) |
| Color | Black |
| Frame Material | MDF (Medium-Density Fiberboard) |
| Cover Material | Plexiglass (Acrylic) |
| Backing Material | Medium-Density Fiberboard |
| Mounting Type | Wall Mount |
| Orientation | Horizontal or Vertical |
| Special Feature | Interchangeable Mat, Integrated Hanging System |
| Care Instructions | Wipe with a dry cloth |
Warranty & Support
Avalo products are manufactured to high-quality standards. For specific warranty information or technical support, please refer to the documentation included with your purchase or contact Avalo customer service through their official website. Keep your proof of purchase for any warranty claims.


