Introduction
This manual provides essential information for the proper installation, operation, and maintenance of your Diydeg Smart Security Camera. Please read this manual thoroughly before using the product to ensure optimal performance and safety.

Figure 1: Front view of the Diydeg Smart Security Camera, showcasing its compact design.
Safety Information
WARNING: Do not attempt to disassemble, modify, or repair the product yourself to avoid personal injury or equipment damage.

Figure 2: Important safety warnings regarding product disassembly and modification, presented in various languages.
- Ensure the power source is stable and meets the product's requirements.
- Keep the camera away from water and high humidity environments.
- Avoid placing the camera in direct sunlight or near heat sources.
- Use only the provided charging cable and accessories.
Package Contents
Verify that all items listed below are present in your product packaging:
- 1 x Diydeg Smart Camera
- 1 x Charging Cable (Type-C)
- 1 x Base
- 1 x User Manual
- 1 x Double-Sided Adhesive

Figure 3: All components included in the product package, ready for setup.
Product Overview
Familiarize yourself with the physical components of your smart camera.
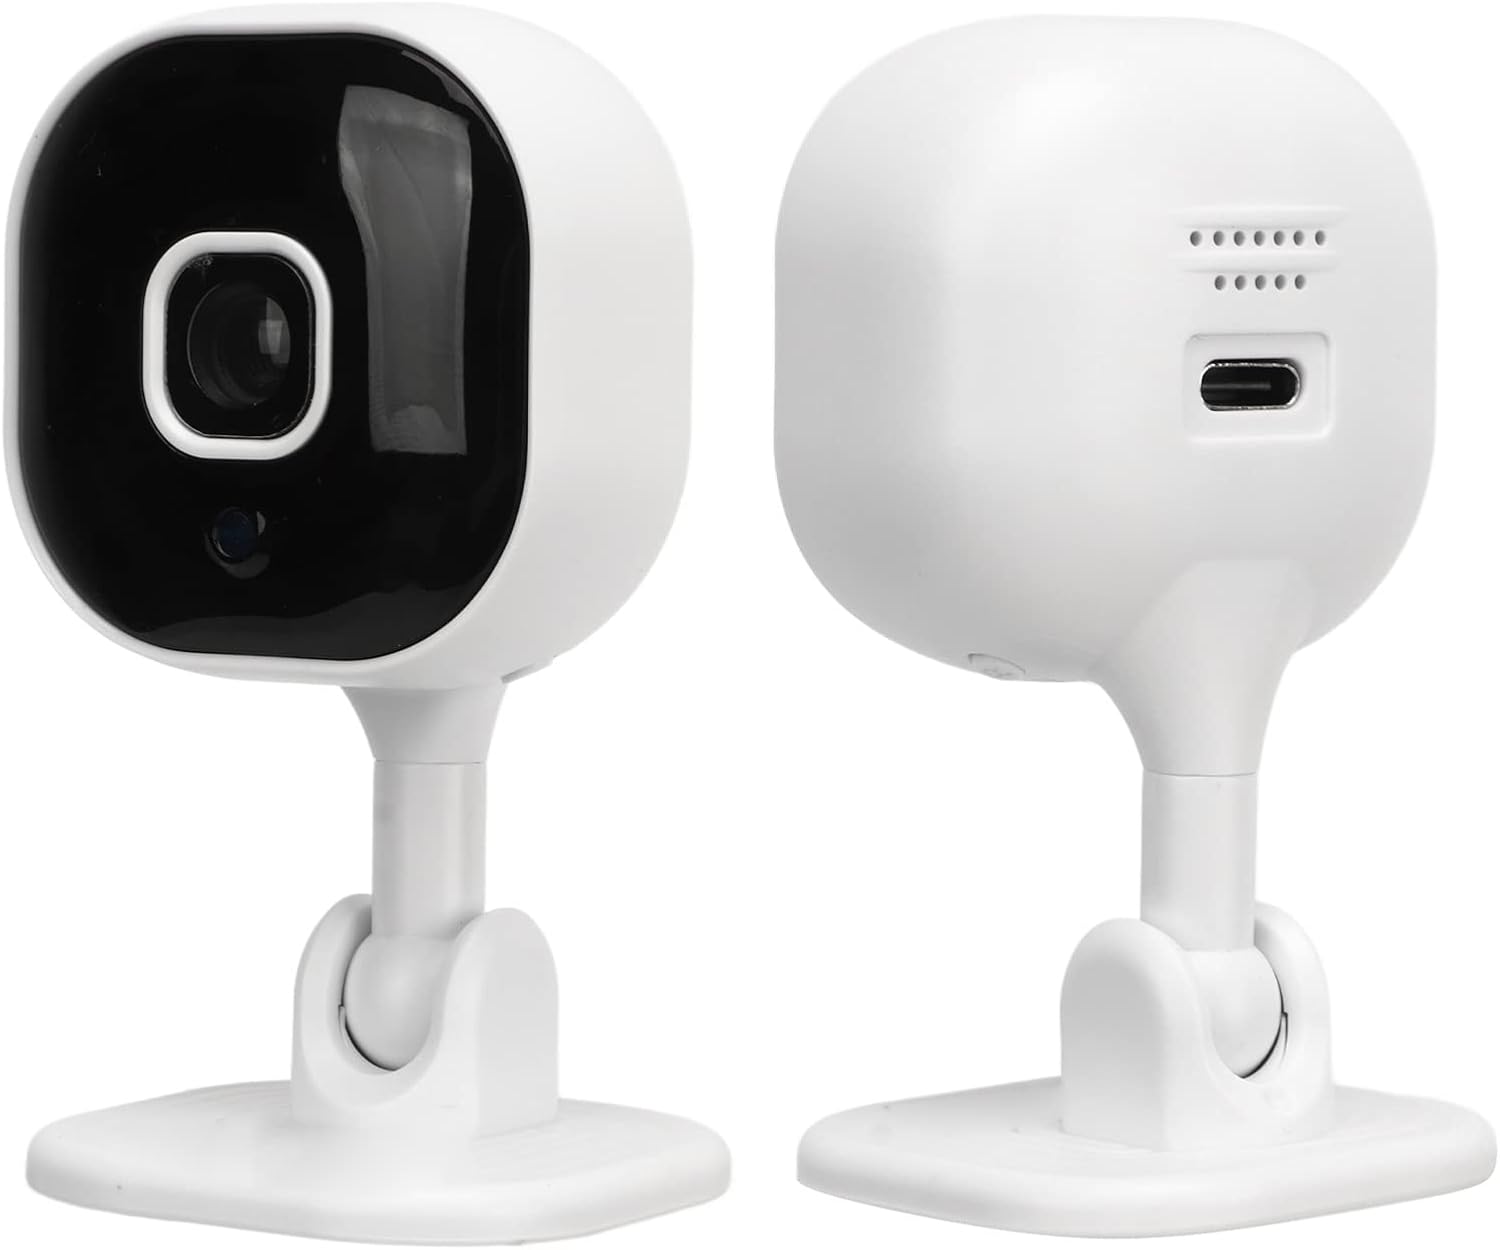
Figure 4: Front and rear views of the camera, highlighting the lens, microphone, and Type-C charging interface.
- Camera Lens: Captures 1080P Full HD video.
- Microphone: For two-way audio communication.
- Speaker: For two-way audio communication.
- Type-C Interface: For power connection.
- Micro SD Card Slot: For local video storage (card not included, supports up to 128GB).
- Base: Provides stability and mounting options.

Figure 5: Physical dimensions of the Diydeg Smart Security Camera, showing its compact size.
Setup
1. Powering On the Camera
- Connect the provided Type-C charging cable to the camera's Type-C interface.
- Plug the other end of the charging cable into a suitable USB power adapter (not included) and then into a power outlet.
- The camera will power on automatically.
2. App Installation and Account Creation
Download the dedicated mobile application to manage your camera. Search for the app name (usually mentioned in the included manual or packaging) in your device's app store (Google Play Store for Android, Apple App Store for iOS).
- Download and install the app on your smartphone.
- Open the app and follow the on-screen instructions to create a new user account or log in if you already have one.
3. Connecting the Camera to Wi-Fi
Follow the in-app instructions to connect your camera to your home Wi-Fi network. This typically involves:
- Selecting "Add Device" or a similar option in the app.
- Choosing your camera model from the list.
- Entering your Wi-Fi network name (SSID) and password.
- Scanning a QR code generated by the app with the camera lens, or listening for an audio prompt.
- Wait for the camera to connect to the network. A confirmation sound or light indicator will typically signal a successful connection.
The camera also features a self-contained AP hotspot, allowing recording even when the main network is disconnected. This feature is managed through the mobile application.
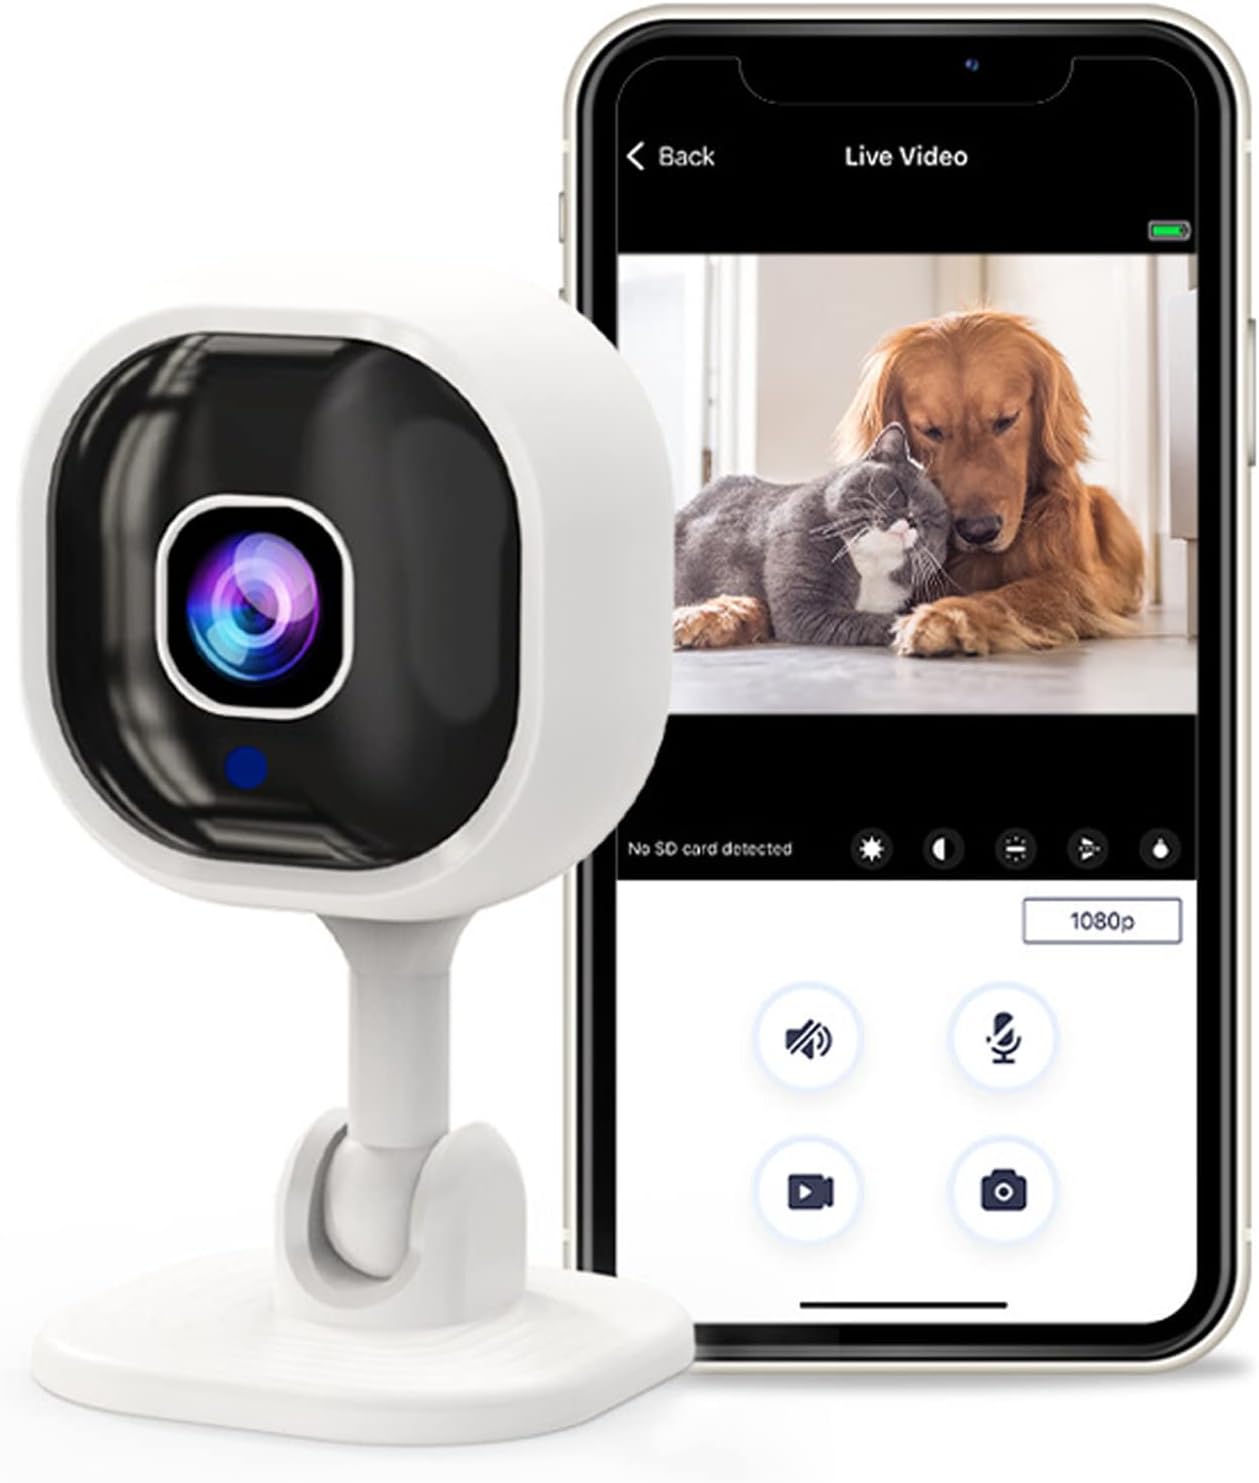
Figure 6: The camera connected to a smartphone app, showing live monitoring capabilities for pets.
Operating Instructions
1. Live Viewing
Once connected, open the mobile app and select your camera to view the live feed. The 1080P Full HD image quality provides clear and vivid details.

Figure 7: Demonstration of 1080P Full HD image quality provided by the camera, highlighting superior clarity.
2. Two-Way Audio Intercom
The camera features a built-in microphone and speaker, enabling real-time two-way voice communication. Tap the microphone icon in the app to speak, and listen through the camera's speaker.

Figure 8: Illustrates the two-way intercom function, allowing interaction with family or pets remotely.
3. Motion Detection and Alerts
The camera can detect abnormal movement within its shooting area. When motion is detected, an alarm message is immediately triggered and sent to your mobile phone app.
- Enable motion detection in the camera settings within the app.
- Adjust sensitivity levels as needed.
- Ensure app notifications are enabled on your smartphone to receive real-time alerts.

Figure 9: The camera's mobile detection system sending an alert to a smartphone upon detecting movement.
4. Infrared Night Vision
The camera automatically switches to infrared night vision mode in low-light conditions. This allows for clear viewing up to 5-10 meters in complete darkness.
- Night vision is typically automatic.
- Verify the night vision settings in the app if manual control is desired.

Figure 10: Automatic infrared night vision capability, ensuring clear visibility in dark environments.
5. Video Recording and Storage
The camera supports local storage via a Micro SD card (up to 128GB, not included). Insert the Micro SD card into the designated slot on the camera. Recording settings can be configured within the mobile app, including continuous recording or event-triggered recording.
Maintenance
- Cleaning: Use a soft, dry cloth to clean the camera lens and body. Avoid abrasive cleaners or solvents.
- Placement: Ensure the camera is placed in a stable location, away from extreme temperatures, direct sunlight, and moisture.
- Firmware Updates: Regularly check the mobile app for available firmware updates to ensure optimal performance and security.
Troubleshooting
| Problem | Possible Cause | Solution |
|---|---|---|
| Camera fails to power on. | No power, faulty cable, or adapter. | Check power connection. Ensure the adapter is working and the cable is securely connected. |
| Cannot connect to Wi-Fi. | Incorrect Wi-Fi password, weak signal, or camera too far from router. | Verify Wi-Fi password. Move camera closer to the router. Ensure your router is 2.4GHz compatible. |
| No motion detection alerts. | Motion detection disabled, incorrect sensitivity, or app notifications off. | Enable motion detection in the app. Adjust sensitivity. Check phone notification settings for the app. |
| Two-way audio not working. | Microphone/speaker muted in app, or network issues. | Ensure microphone and speaker are enabled in the app. Check network stability. |
| Poor image quality. | Dirty lens, poor lighting, or network bandwidth issues. | Clean the camera lens. Ensure adequate lighting. Check your internet speed. |
Specifications
| Feature | Detail |
|---|---|
| Product Model | A3 (Diydege6rhzdifwt) |
| Product Material | ABS |
| Video Resolution | 1080P Full HD |
| Charging Interface | Type-C Interface |
| Two-Way Voice | Supported |
| Infrared Night Vision | Automatic Switching (5-10 meters irradiation distance) |
| Product Size | Approx. 45x85mm / 1.8x3.3in |
| Storage Mode | Micro SD Card (up to 128GB, not included) |
| Weight | Approx. 92g / 3.2oz |
| Connectivity Protocol | Wi-Fi |
| Power Source | Corded Electric |
| Controller Type | Android (and iOS via app) |
| Mounting Type | Wall Mount (with included base and adhesive) |
| Alert Type | Motion Only |
| International Protection Rating | IP65 |
Note: While rated IP65, this camera is primarily designed for indoor use as a home security, baby, or pet monitor.
Warranty and Support
For warranty information and technical support, please refer to the contact details provided in the product packaging or visit the official Diydeg website. Keep your purchase receipt for warranty claims.