
1. Product Overview
The TECKEEN XH-W1209 is a compact digital temperature controller module designed for precise temperature management. It features a 3-digit LED display, control buttons, and a 10A relay output, making it suitable for various heating and cooling applications. The module comes with a waterproof NTC sensor probe for accurate temperature measurement.
Key Features:
- Wide Temperature Measuring Range: -50°C to 110°C
- High Control Precision: 0.1°C
- Bright 3-digit LED Display
- Supports both Heating and Cooling operations
- Microprocessor-controlled output for precision
- Waterproof NTC Sensor Probe (0.5M)
- 10A Relay Output Capacity
- Input Power: 12V DC

2. Setup and Wiring
Before connecting the module, ensure the power supply is disconnected. Incorrect wiring can damage the device.
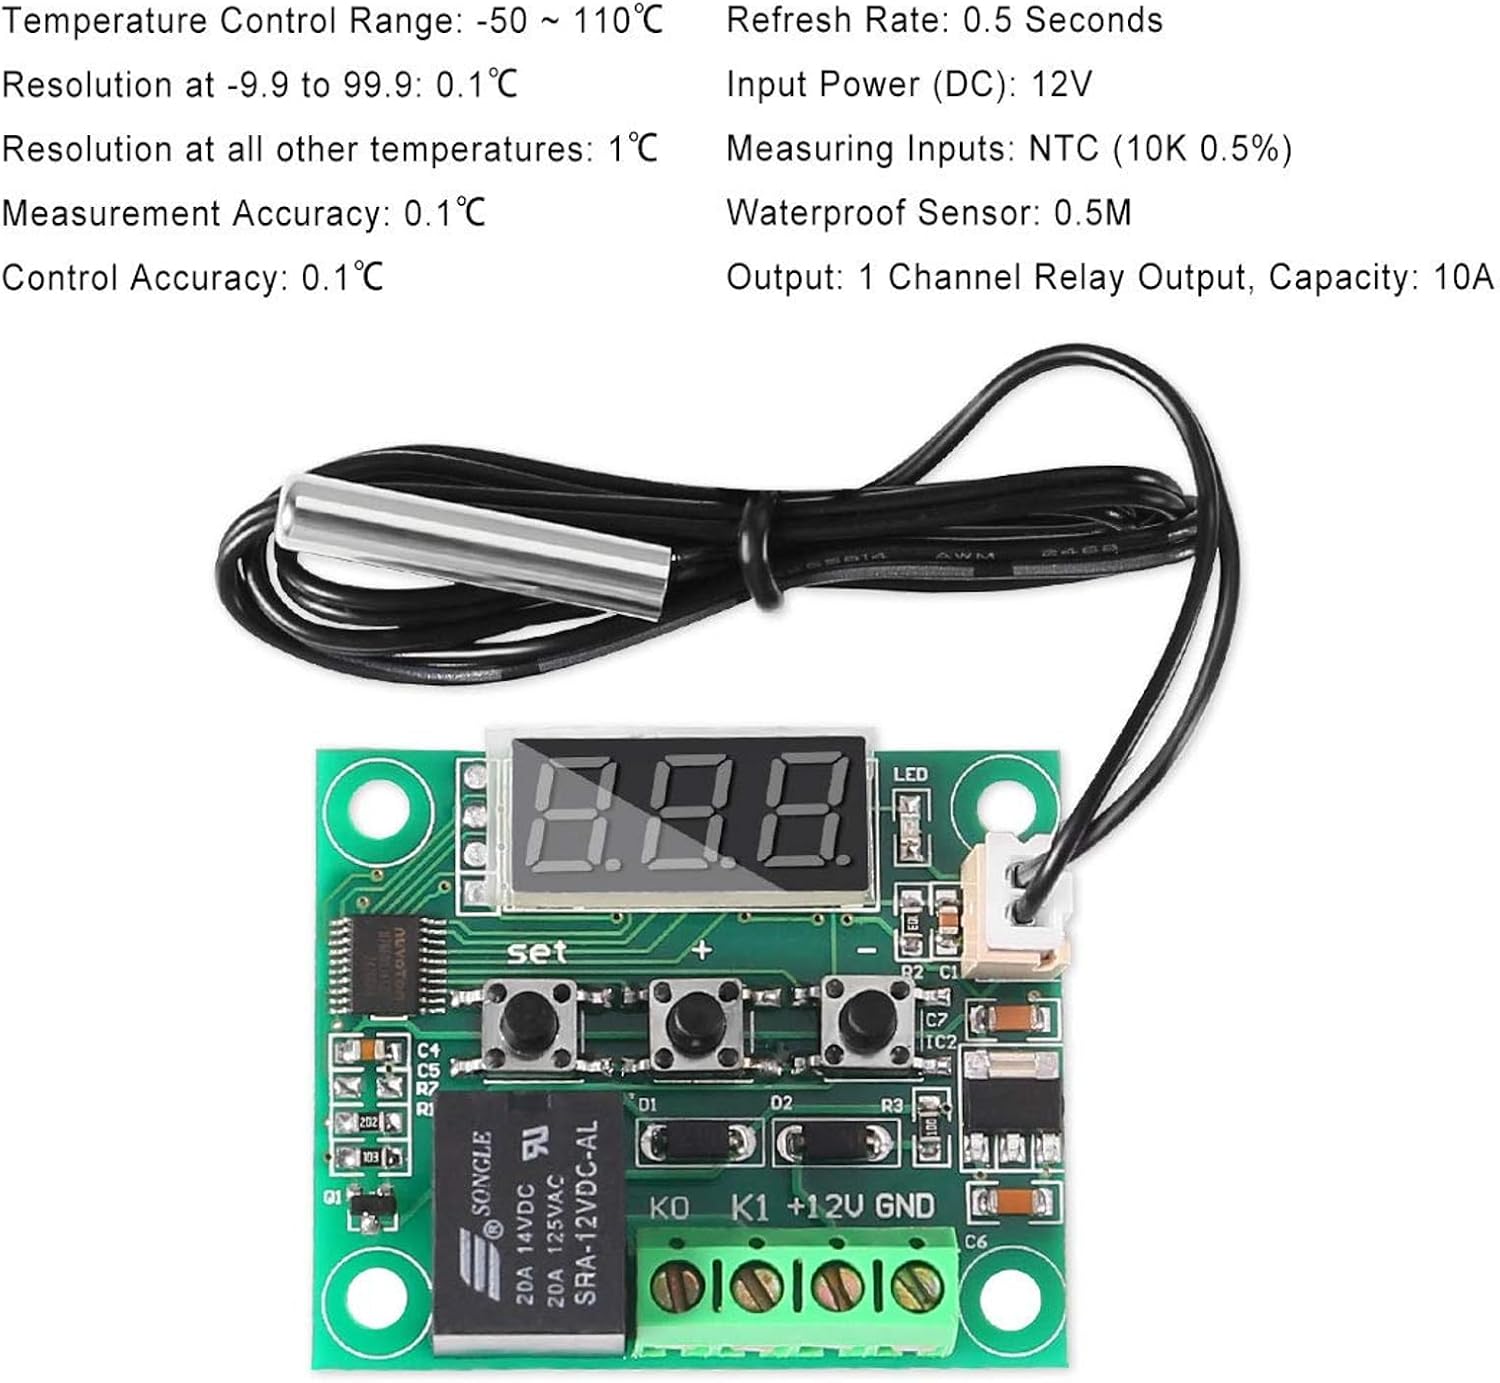
2.1 Component Identification

2.2 Wiring Instructions
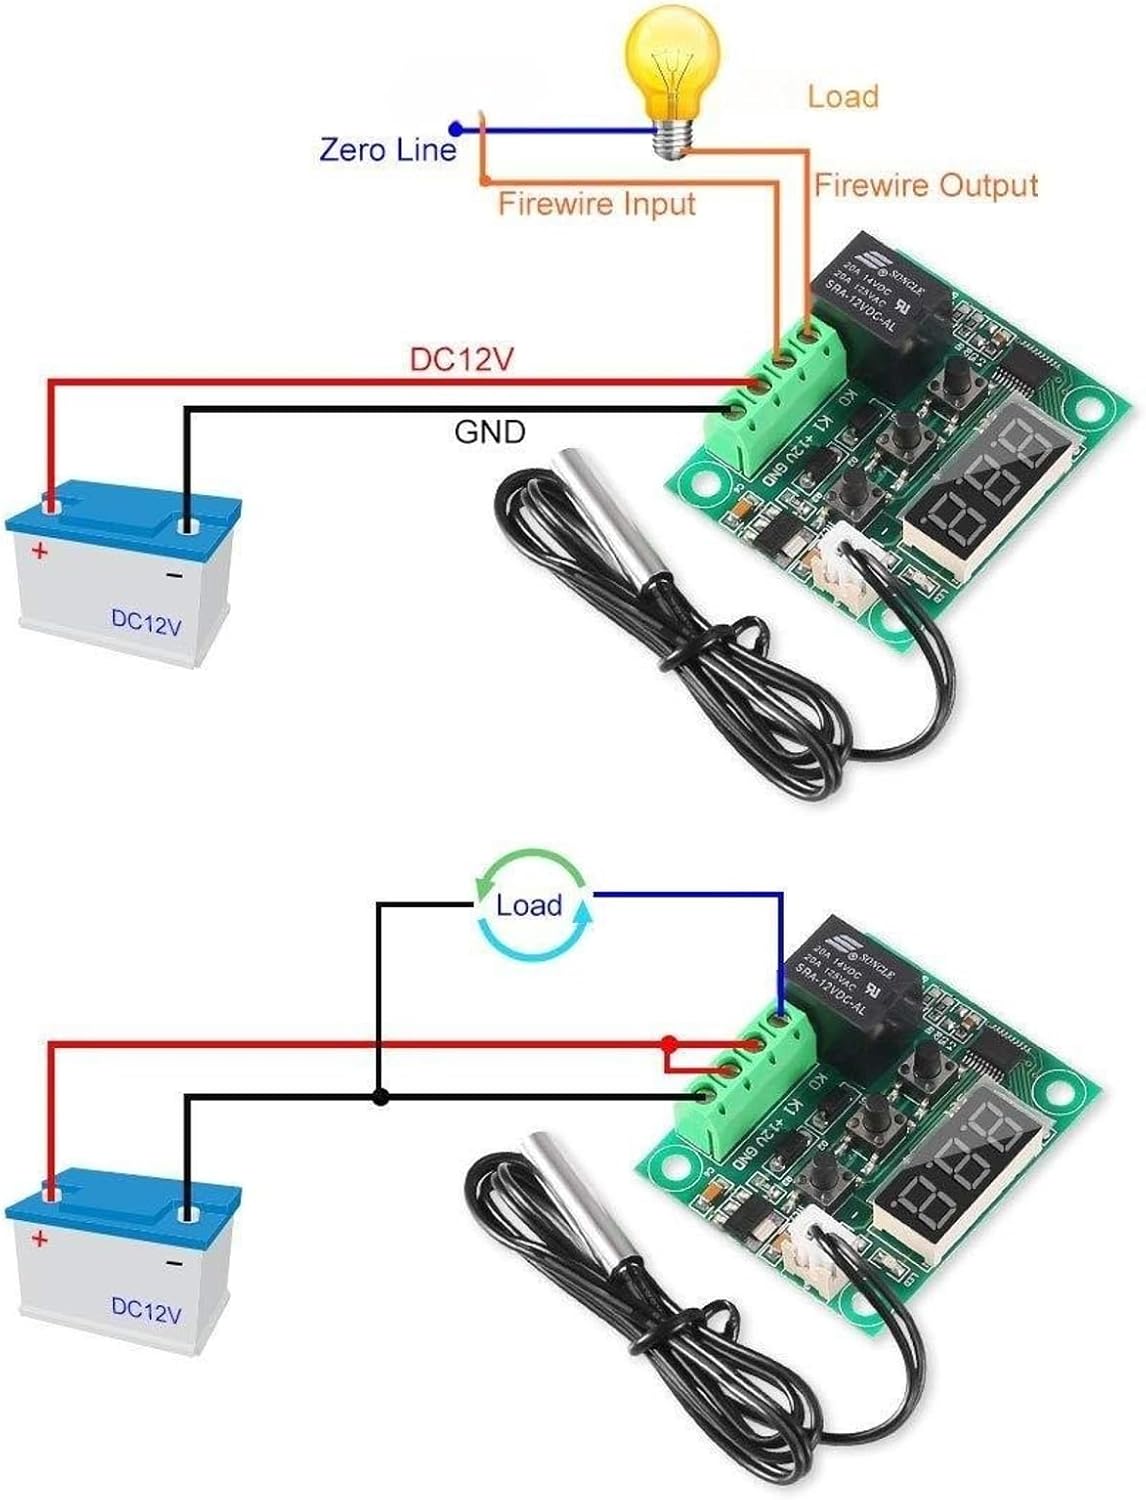
The module requires a 12V DC power supply. The load (heating or cooling device) is connected via the relay output terminals.
- Power Supply (DC12V): Connect the positive (+) terminal of your 12V DC power supply to the +12V terminal on the module. Connect the negative (-) terminal (GND) of your power supply to the GND terminal on the module.
- Sensor Probe: Connect the NTC waterproof sensor probe to the 2-pin white connector labeled Sensor interface.
- Load Connection: The relay output terminals are labeled K0 and K1. These act as a switch for your load.
- For Heating Mode: Connect your heating device between the power source and the K0/K1 terminals. When the temperature drops below the set point, the relay will close, supplying power to the heating device.
- For Cooling Mode: Connect your cooling device between the power source and the K0/K1 terminals. When the temperature rises above the set point, the relay will close, supplying power to the cooling device.
3. Operating Instructions
Once wired correctly and powered on, the module will display the current temperature detected by the sensor.
3.1 Setting the Target Temperature
- Press the SET button once. The displayed temperature will flash.
- Use the + and - buttons to adjust the desired target temperature.
- Press SET again to confirm the setting, or wait a few seconds for the display to stop flashing and save automatically.
3.2 Parameter Settings (P0-P6)
To access advanced settings, press and hold the SET button for approximately 5 seconds. The display will show "P0". Use the + or - buttons to navigate through the parameters (P0 to P6). Press SET again to enter a specific parameter's setting, then use + or - to change its value. Press SET to confirm, or wait for automatic saving.

| Parameter | Description | Default Value |
|---|---|---|
| P0 | Heating/Cooling Mode (H/C) | C (Cooling) |
| P1 | Hysteresis Setting (0.1-15°C) | 2°C |
| P2 | Upper Temperature Limit (Max 110°C) | 110°C |
| P3 | Lower Temperature Limit (Min -50°C) | -50°C |
| P4 | Temperature Correction (-7 to 7°C) | 0°C |
| P5 | Delay Start Time (0-10 minutes) | 0 minutes |
| P6 | High Temperature Alarm (OFF/-50 to 110°C) | OFF |
3.3 Restoring Factory Settings
To restore the module to its factory default settings, power off the module. Then, press and hold both the + and - buttons simultaneously while powering the module back on. The display should show "888" or "---" indicating a reset.
4. Maintenance
Proper maintenance ensures the longevity and accuracy of your temperature controller module.
- Cleaning: Gently wipe the module with a dry, soft cloth. Avoid using abrasive cleaners or solvents. Ensure no liquids enter the module.
- Sensor Care: The NTC sensor probe is waterproof, but avoid excessive bending or pulling of the cable. Ensure the sensor tip is clean for accurate readings.
- Environmental Conditions: Operate the module within its specified temperature and humidity ranges. Avoid exposure to direct sunlight, extreme temperatures, or high humidity.
- Connections: Periodically check all wiring connections to ensure they are secure and free from corrosion.
5. Troubleshooting
If you encounter issues with your TECKEEN XH-W1209 module, refer to the following common problems and solutions:
- Display is blank or not powering on:
- Check the 12V DC power supply connection. Ensure correct polarity (+12V and GND).
- Verify the power source is providing 12V DC.
- Temperature reading is inaccurate or shows "LLL" / "HHH":
- "LLL" indicates an open circuit or sensor damage. Check the sensor connection to the module.
- "HHH" indicates a short circuit or temperature exceeding the upper limit. Check the sensor for damage.
- Ensure the sensor probe is correctly immersed or placed in the area where temperature needs to be measured.
- Consider applying temperature correction (P4 parameter) if there's a consistent offset.
- Relay is not switching the load:
- Check the wiring of the load to the K0/K1 terminals.
- Verify that the set temperature and hysteresis (P1) are configured correctly for your desired heating or cooling action.
- Ensure the P0 parameter (Heating/Cooling mode) is set appropriately.
- Check if the delay start time (P5) is active and preventing immediate switching.
- Display shows "--- ":
- This usually indicates that the module is in a parameter setting mode or has just been reset. Wait a few seconds for it to return to temperature display.
6. Specifications
| Feature | Specification |
|---|---|
| Temperature Measurement Range | -50°C to 110°C |
| Control Precision | 0.1°C |
| Resolution (-9.9 to 99.9°C) | 0.1°C |
| Resolution (all other temperatures) | 1°C |
| Measurement Accuracy | 0.1°C |
| Input Power (DC) | 12V |
| Measuring Inputs | NTC (10K 0.5%) / B3950 Waterproof Sensor |
| Waterproof Sensor Length | 0.5M |
| Output | 1 Channel Relay Output |
| Relay Capacity | 10A |
| Power Consumption (Static) | 35mA |
| Power Consumption (Operating) | 65mA |
| Manufacturer Part Number | 90#E004800000 |
| Dimensions (approx.) | 1.89 x 1.57 x 0.63 inches |
| Item Weight (approx.) | 1.41 ounces |
7. Warranty and Support
For warranty information and technical support, please refer to the specific terms provided by your retailer or contact the manufacturer directly. Keep your purchase receipt as proof of purchase.