1. Product Overview
The Dpofirs Dash Cam is a dual-channel car recording system designed to capture video footage from the front and rear of your vehicle. It features 1080P Full HD front recording, a 2-inch display, wide-angle lenses, loop recording, and G-sensor functionality for comprehensive vehicle monitoring.
Key features include:
- Synchronized HD recording from front, interior, and rear cameras.
- Loop recording to ensure continuous recording by overwriting older files.
- 6-layer high transparency glass lens for clear image quality.
- Wide vision angles: 170° front, 110° cabin, and 110° rear.
- Wide Dynamic Range (WDR) image processing for optimal recording in various lighting conditions.
2. Package Contents
Please verify that all items listed below are included in your package:
- 1 x Dpofirs Dash Cam (Main Unit)
- 1 x Rearview Camera with Cable
- 1 x Car Charger with Cable
- 1 x Suction Cup Bracket
- 2 x Screws (for rear camera mounting)
- 1 x Adhesive Tape (for rear camera mounting)
- 1 x User Manual
Note: A Micro SD memory card (up to 32GB) is required for recording and is not included in the package.

Image: Dpofirs Dash Cam main unit, rear camera, car charger, suction cup mount, screws, and adhesive tape.
3. Setup and Installation
3.1 Inserting the Memory Card
- Ensure the dash cam is powered off.
- Locate the Micro SD card slot on the side of the main unit.
- Insert a Class 10 or higher Micro SD card (up to 32GB) into the slot until it clicks into place.
- To remove, gently push the card in again until it springs out.
3.2 Mounting the Front Dash Cam
- Clean the windshield area where you intend to mount the dash cam.
- Attach the suction cup bracket to the dash cam.
- Press the suction cup firmly against the windshield, ensuring it does not obstruct your view.
- Adjust the camera angle to ensure a clear view of the road ahead.

Image: Front view of the Dpofirs Dash Cam with its suction cup mount.
3.3 Installing the Rear Camera
- Identify a suitable location on your rear windshield or license plate area for the rear camera.
- Use the provided adhesive tape or screws to securely mount the rear camera.
- Connect the rear camera cable to the main dash cam unit. Route the cable neatly along the vehicle's interior trim to avoid interference.

Image: Dpofirs Dash Cam main unit and the rear camera, illustrating the dual camera setup.
3.4 Connecting Power
- Plug the car charger into your vehicle's 12V power outlet (cigarette lighter socket).
- Connect the other end of the car charger cable to the USB power input port on the dash cam.
- The dash cam will automatically power on and begin recording when the vehicle's ignition is turned on.
4. Operating Instructions
4.1 Basic Controls
The dash cam features several buttons for navigation and control:
- Power Button: Press and hold to turn the device on/off. Short press to toggle screen display.
- Menu Button (M): Press to enter the menu settings. Press again to cycle through menu options.
- OK Button: Confirm selections in the menu or start/stop recording.
- Up/Down Buttons: Navigate through menu options or adjust settings.

Image: Front view of the Dpofirs Dash Cam showing the display screen and control buttons (OK, M, Power, Up, Down).
4.2 Recording Modes
The dash cam supports various recording functionalities:
- Loop Recording: This feature automatically overwrites the oldest video files when the memory card is full, ensuring continuous recording without manual intervention. Video segments are typically recorded in 1, 3, or 5-minute intervals.
- G-Sensor (Emergency Lock): The built-in G-sensor detects sudden impacts or collisions. When triggered, the current video segment is automatically locked and saved to prevent it from being overwritten by loop recording.
- Parking Monitor: When enabled, the dash cam will automatically start recording if it detects motion or impact while the vehicle is parked. This feature requires a constant power supply (e.g., hardwire kit, not included) to function continuously.

Image: Visual explanation of Loop Recording, Emergency Lock (G-Sensor), and Parking Monitor functions.

Image: Icons representing Gravity Sensor (G-Sensor) and Loop Recording features.
4.3 Setting Date and Time
- Press the Menu (M) button to enter the settings menu.
- Use the Up/Down buttons to navigate to the 'Date/Time' setting.
- Press OK to enter the setting.
- Use Up/Down to adjust values and OK to move to the next field.
- Once set, press Menu (M) to exit.
4.4 Video Playback
- Stop recording by pressing the OK button if currently recording.
- Press the Mode button (often labeled 'M' or a specific mode button) to switch to playback mode.
- Use the Up/Down buttons to select the desired video file.
- Press OK to play the selected video.
4.5 Understanding Camera Views

Image: Illustration of the comprehensive recording capabilities from the front, interior, and rear lenses.
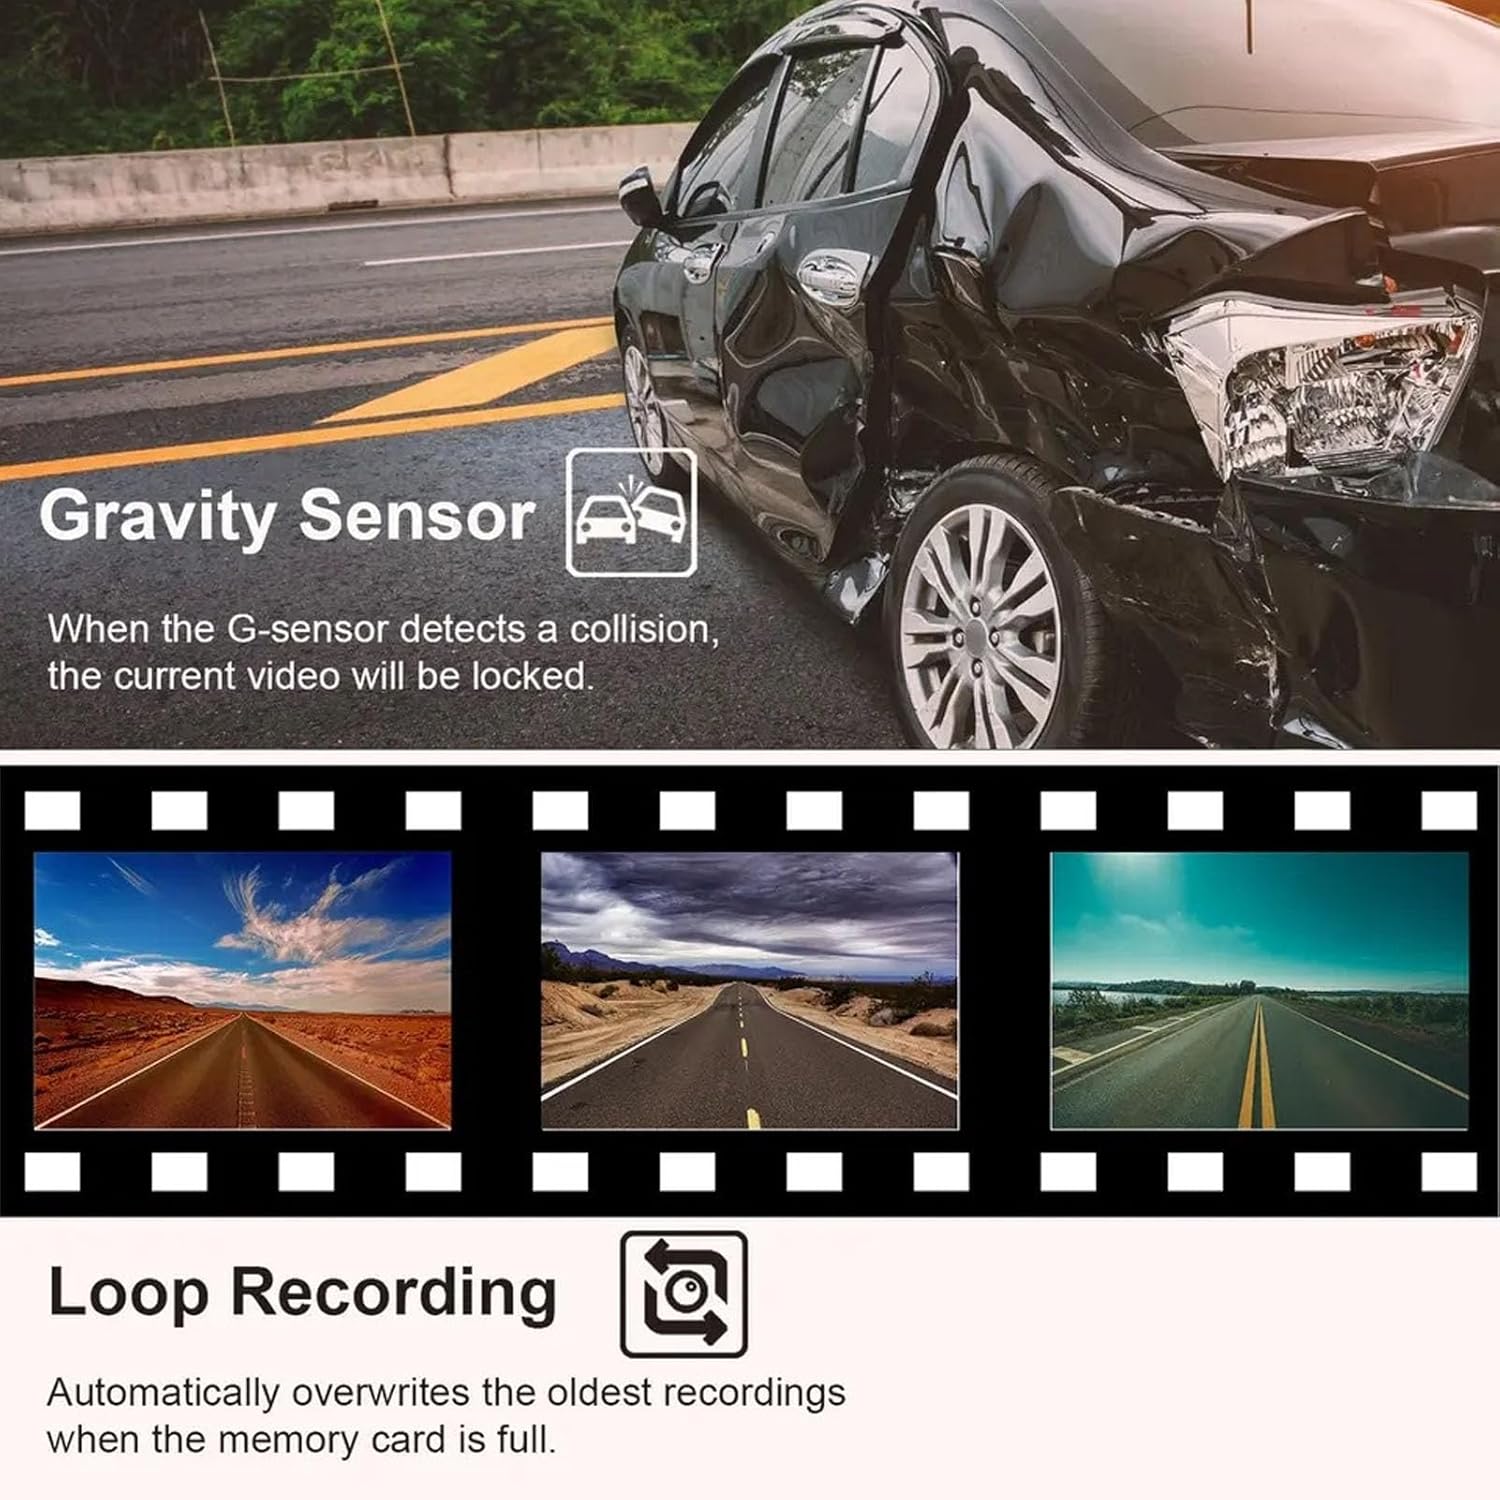
Image: Specific details on the 170° front (1080P), 110° inside (480P), and 110° rear (480P) camera views.
5. Maintenance
5.1 Cleaning the Lenses and Screen
- Use a soft, lint-free cloth to gently wipe the camera lenses and the display screen.
- For stubborn smudges, slightly dampen the cloth with lens cleaning solution. Avoid harsh chemicals.
- Ensure lenses are clean for optimal video quality.
5.2 Memory Card Management
- It is recommended to format the Micro SD card periodically (e.g., once a month) to maintain optimal performance and prevent data corruption.
- To format, navigate to the 'Format' option in the dash cam's menu settings and confirm.
- Replace the memory card if you experience frequent recording errors or data loss.
6. Troubleshooting
6.1 Dash Cam Not Powering On
- Ensure the car charger is securely plugged into both the dash cam and the vehicle's 12V power outlet.
- Check if the vehicle's 12V power outlet is functioning correctly (e.g., by testing with another device).
- Verify that the vehicle's ignition is on, as the dash cam typically powers on with the ignition.
6.2 Recording Stops or Fails
- Check if the Micro SD card is full. Format the card if necessary (back up important files first).
- Ensure you are using a Class 10 or higher Micro SD card. Lower class cards may not support continuous recording.
- The memory card may be faulty. Try replacing it with a new, compatible card.
- Ensure loop recording is enabled in the settings.
6.3 Poor Video Quality
- Clean the camera lenses to remove any dirt or smudges.
- Ensure the protective film has been removed from the lenses.
- Check video resolution settings in the menu; ensure it is set to 1080P FHD for the front camera.
- Verify that the camera is securely mounted and not vibrating excessively.
7. Specifications
| Main Control Model | 3292 |
| Image Sensor | GC1054/0308 |
| Display | 2.0 inch Color Display |
| Video Resolution | Front: 1080P FHD; Interior/Rear: 480P |
| Video File Format | AVI |
| Photo Format | JPG |
| Motion Detection | Supported |
| Recording Function | Supported |
| Parking Wake Up | Supported |
| Time Tag | Supported |
| Memory Card Support | Micro SD, up to 32GB (Class 10 or higher recommended) |
| Battery Type | Built-in 180mAh Polymer Lithium Battery |
| Connectivity Technology | USB |
| Package Dimensions | 5.91 x 4.33 x 2.76 inches |
8. Warranty and Support
Warranty Information: Please refer to your purchase documentation or the retailer's website for specific warranty details and terms applicable to your Dpofirs Dash Cam.
Customer Support: For technical assistance, troubleshooting not covered in this manual, or any other inquiries, please contact Dpofirs customer service through the retailer's platform or the official Dpofirs website.