1. Introduction
The VPFET 8K HDMI KVM Switch (Model SW223) allows two computers to share a single HDMI monitor and up to four USB 3.0 devices. This device supports high-resolution video output up to 8K@60Hz or 4K@120Hz, providing a seamless experience for managing multiple systems with one set of peripherals.
This manual provides detailed instructions for setting up, operating, and maintaining your KVM switch, along with troubleshooting tips and product specifications.

The KVM switch enables two computers to share one monitor and multiple USB devices.
2. Package Contents
Please verify that all items listed below are included in your package:
- 1 x VPFET 8K HDMI KVM Switcher (Model SW223)
- 1 x External Controller Kit
- 2 x USB 3.0 A-A Cables
- 1 x DC12V Power Adapter
- 1 x User Manual

All components included in the VPFET 8K HDMI KVM Switch package.
3. Setup Instructions
Follow these steps to connect your VPFET 8K HDMI KVM Switch:
- Connect the Monitor: Plug your HDMI monitor into the "HDMI OUT" port on the KVM switch.
- Connect Computers (PC1 & PC2):
- Connect the HDMI output of PC1 to the "HDMI IN" port for PC1 on the KVM switch.
- Connect one USB 3.0 A-A cable from a USB 3.0 port on PC1 to the "USB" port for PC1 on the KVM switch.
- Repeat the above steps for PC2, connecting its HDMI output to the "HDMI IN" port for PC2 and its USB 3.0 port to the "USB" port for PC2 on the KVM switch.
- Note: For optimal 8K@60Hz or 4K@120Hz performance, ensure you use SuperSpeed HDMI cables that support these resolutions.
- Connect USB Peripherals: Plug your keyboard, mouse, USB drives, printer, or other USB 3.0 devices into the four "USB 3.0" ports (labeled 1-4) on the front of the KVM switch.
- Connect External Controller (Optional): If desired, plug the external switch button cable into the "Control" port on the KVM switch.
- Connect Power: Plug the DC12V power adapter into the "DC 12V" port on the KVM switch and then into a power outlet. The KVM switch requires external power for stable operation.

Connection diagram for the VPFET 8K HDMI KVM Switch.
4. Operating Instructions
The VPFET 8K HDMI KVM Switch offers two methods for switching between connected computers:
4.1. Front Panel Button Switching
Press the "SW" button located on the front panel of the KVM switch to toggle between PC1 and PC2. The LED indicators (PC1, PC2) will illuminate to show which computer is currently active.
4.2. External Switch Button Switching
If you have connected the external controller, press the button on the external controller to switch between PC1 and PC2. This allows for convenient switching if the KVM switch itself is not easily accessible.
Note: This KVM switch does not support hotkey switching via keyboard commands.
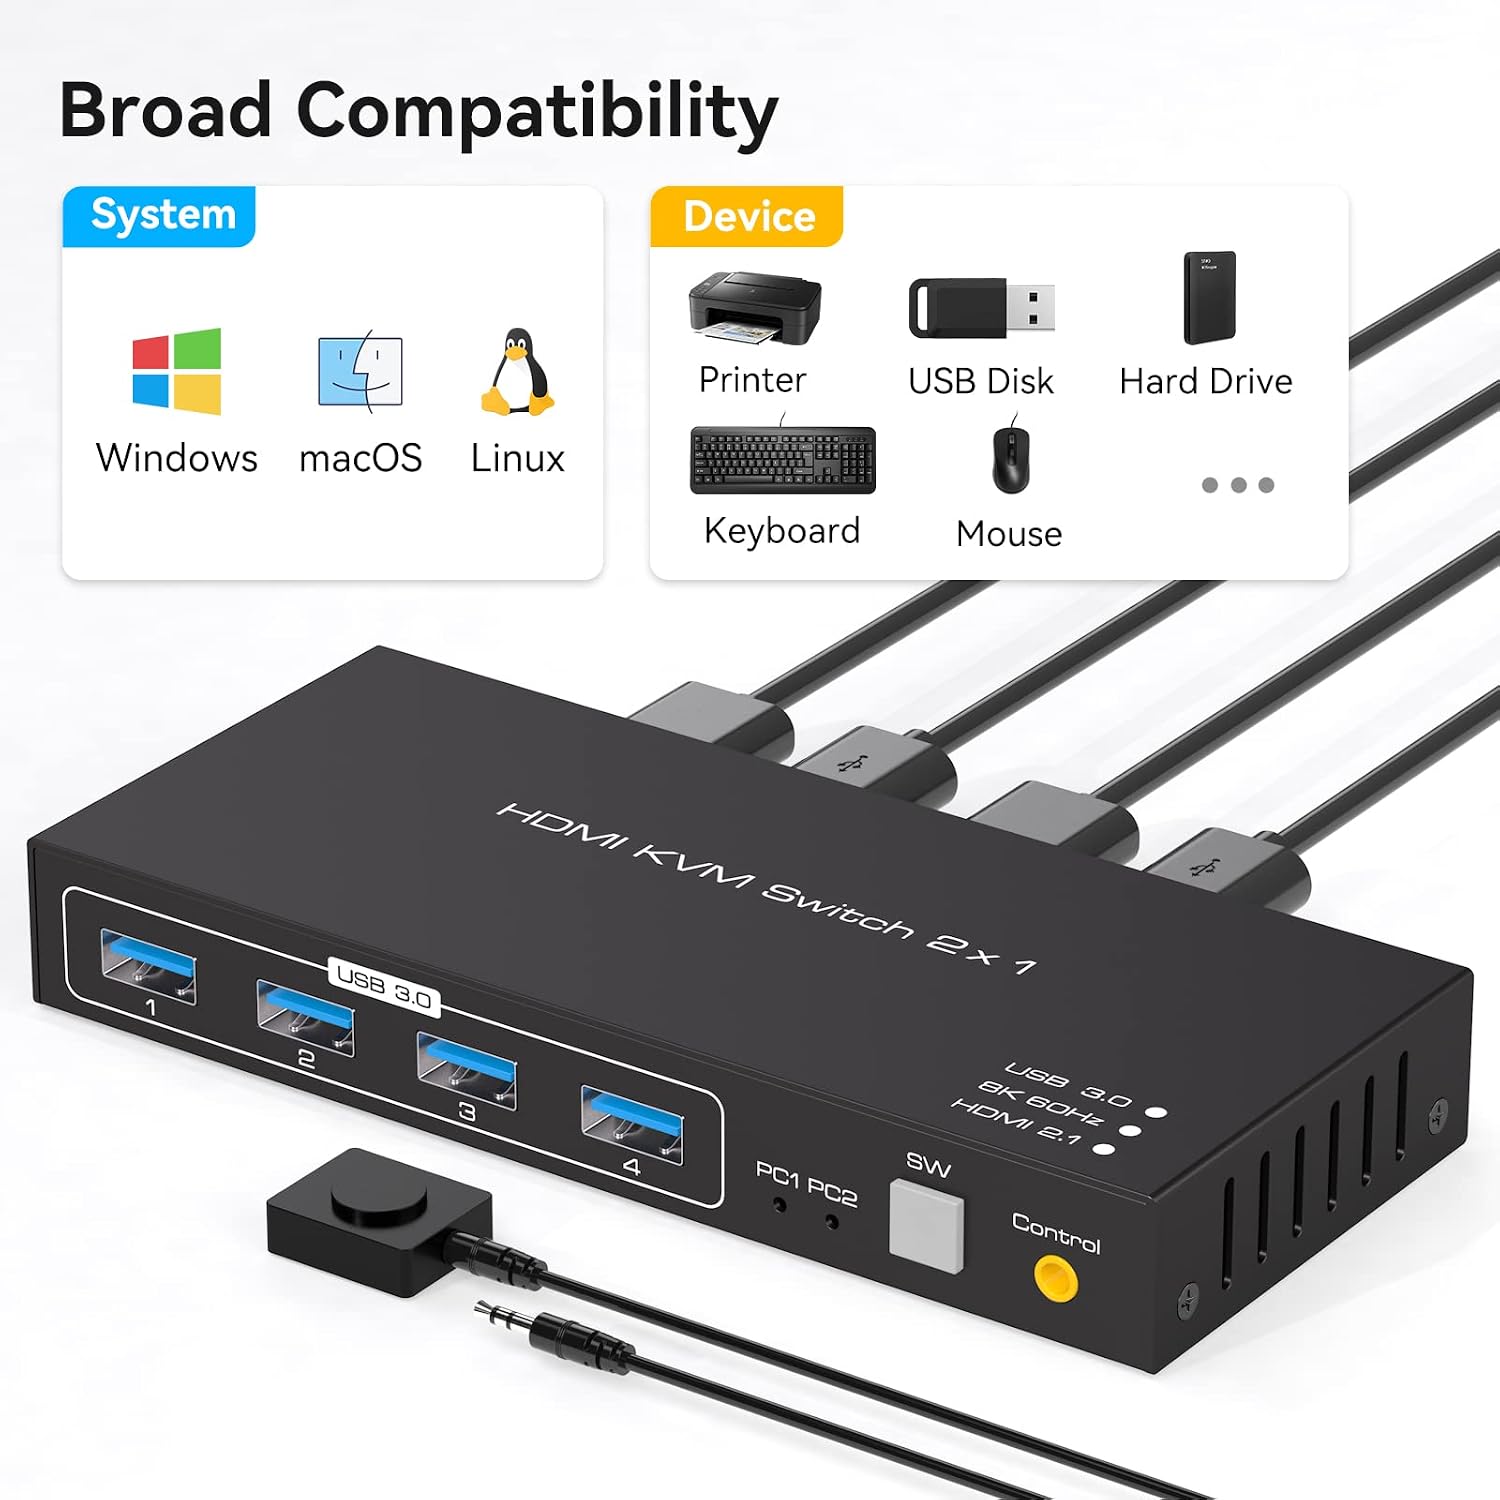
Illustration of the two available switching methods.
5. Maintenance
To ensure the longevity and optimal performance of your KVM switch, follow these maintenance guidelines:
- Cleaning: Use a soft, dry cloth to clean the exterior of the device. Avoid using liquid cleaners or solvents.
- Ventilation: Ensure the KVM switch is placed in a well-ventilated area to prevent overheating. Do not block any ventilation openings.
- Power: Always use the provided DC12V power adapter. Disconnect power when the device is not in use for extended periods.
- Cable Management: Keep cables organized and avoid excessive bending or tension to prevent damage to connectors and ports.
6. Troubleshooting
If you encounter issues with your VPFET 8K HDMI KVM Switch, refer to the following troubleshooting tips:
- No Display or Incorrect Resolution:
- Ensure all HDMI cables are securely connected and support the desired resolution (e.g., 8K@60Hz or 4K@120Hz).
- Verify that your monitor and graphics cards on both PCs support the selected resolution and refresh rate.
- Try restarting the KVM switch by unplugging and re-plugging the power adapter.
- USB Devices Not Working:
- Check that the USB 3.0 A-A cables are securely connected between the KVM switch and both computers.
- Ensure the KVM switch is receiving power from the DC12V adapter.
- Try connecting the USB device directly to the computer to confirm it is functional.
- Some high-power USB devices may require additional power. Ensure the KVM switch's power adapter is connected.
- Switching Issues:
- Confirm that the active PC LED indicator on the KVM switch corresponds to the desired computer.
- Ensure the front panel button or external switch button is pressed firmly.
- Compatibility: The KVM switch is compatible with various operating systems, including Windows, Vista, XP, Mac OS, Linux, and Unix. Ensure your system drivers are up to date.
7. Specifications
Key technical specifications for the VPFET 8K HDMI KVM Switch (Model SW223):
| Feature | Specification |
|---|---|
| Model Number | SW223 |
| Video Resolution Support | Up to 8K@60Hz, 4K@120Hz |
| Video Bandwidth | 48 Gbps |
| USB Ports | 4 x USB 3.0 (for peripherals) |
| USB Data Transfer Rate | Up to 5 Gbps (USB 3.0) |
| Input Ports | 2 x HDMI, 2 x USB 3.0 (for PCs) |
| Output Ports | 1 x HDMI, 4 x USB 3.0 (for peripherals) |
| Switching Method | Front Panel Button, External Switch Button |
| Power Supply | DC 12V (Adapter included) |
| Operating Voltage | 12 Volts |
| Material | Metal |
| Product Dimensions (L x W x H) | 15 x 6.5 x 3.5 cm (5.9 x 2.55 x 0.86 inches) |
| Weight | 500 g |
| Compatibility | Windows, Vista, XP, Mac OS, Linux, Unix |

The KVM switch supports resolutions up to 8K@60Hz.

Broad compatibility with operating systems and USB devices.
8. Warranty and Support
VPFET is committed to providing high-quality products and customer satisfaction. This product comes with an after-sale guarantee.
- Technical Support: If you encounter any problems during the use of this product, please contact our professional technical team. We aim to provide a reply within 12 hours.
- Contact Information: Please refer to the contact details provided with your purchase or on the official VPFET website for support.


