Cheerock A230819
Cheerock Drum Foot Pedal Spring Cam Assembly (Model A230819)
Instruction Manual
1. Product Overview
This manual provides instructions for the Cheerock Drum Foot Pedal Spring Cam Assembly, Model A230819. This assembly is designed as a replacement or upgrade for bass drum pedals, ensuring optimal performance and responsiveness. It includes essential components for maintaining the functionality of your drum pedal.

Image 1.1: Complete set of Cheerock Drum Foot Pedal Spring Cam Assembly components.
2. Package Contents
The Cheerock Drum Foot Pedal Spring Cam Assembly package includes the following components:
- 1x Stainless Steel Tension Spring
- 1x Spring Cam Pulley Hook
- 1x Tensioner Rod with Adjustment Nuts
- 1x Spring Hook Clip
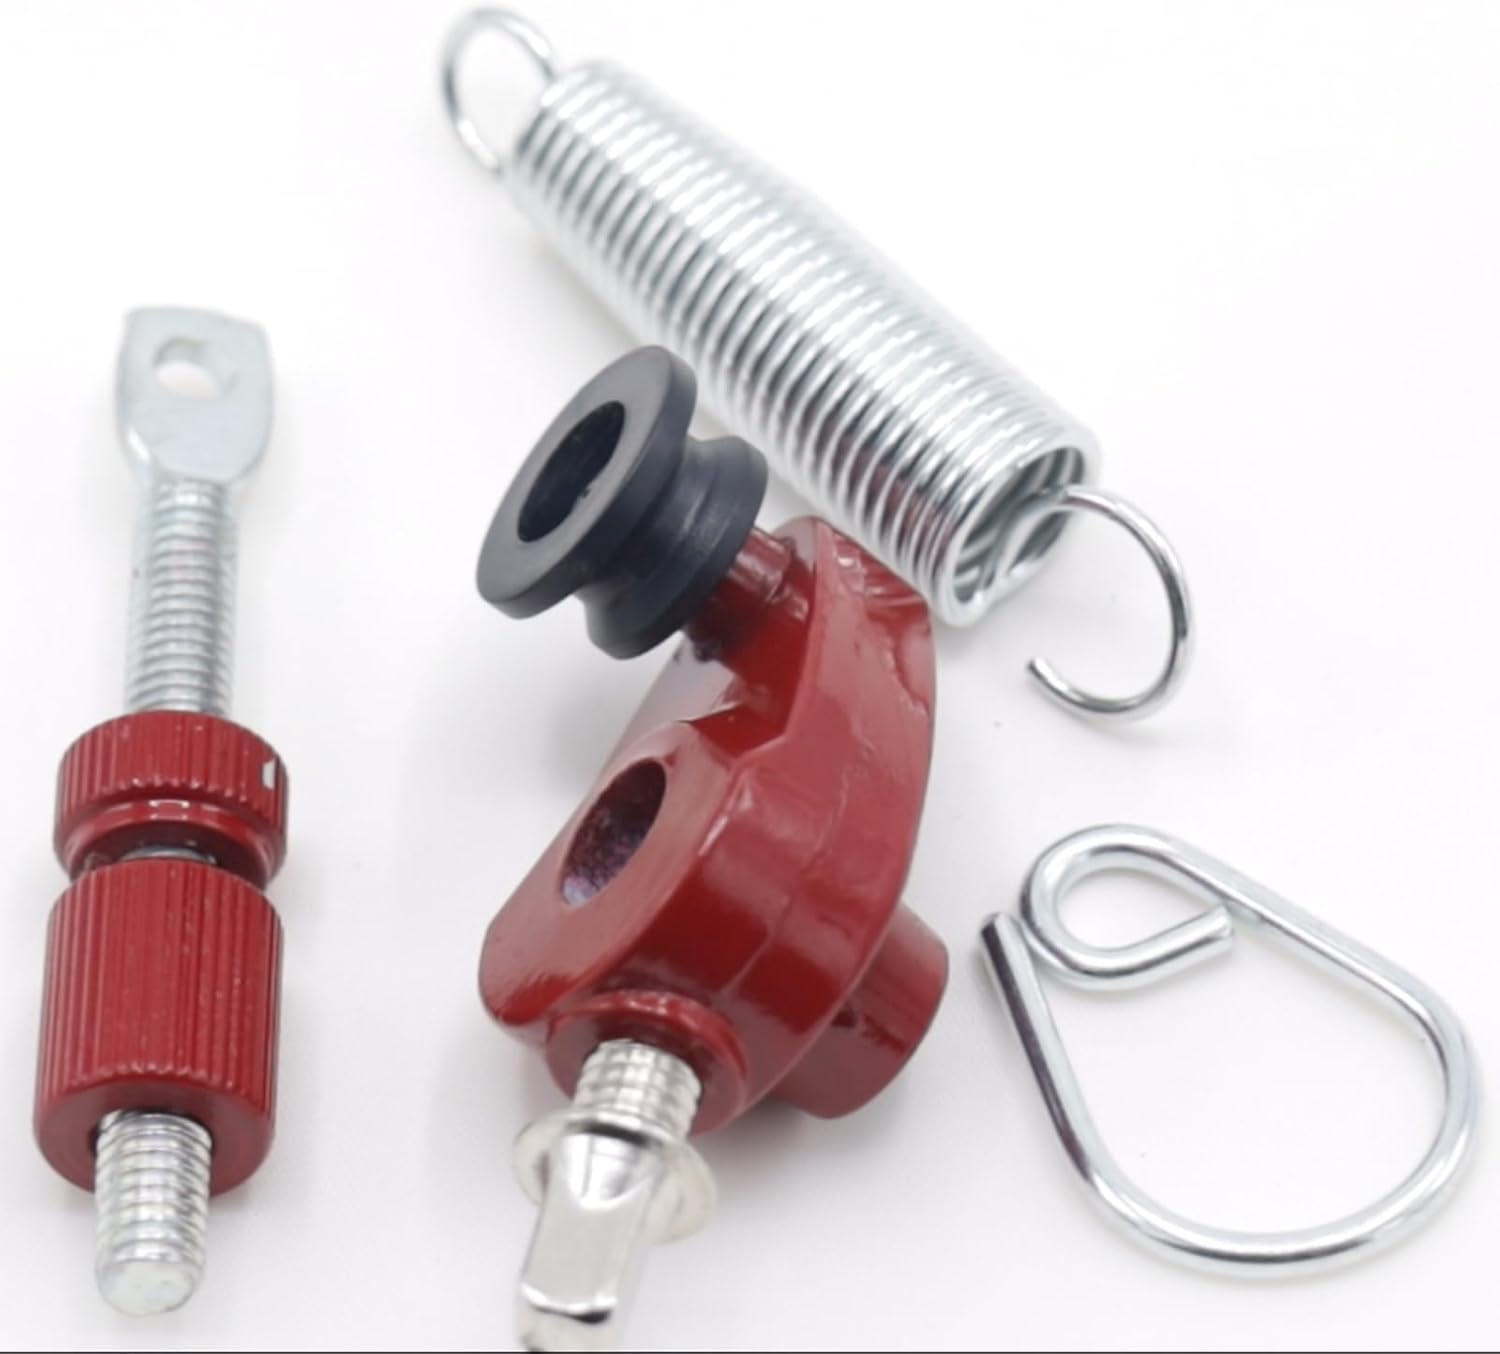
Image 2.1: Detailed view of the individual components included in the assembly kit.
3. Setup & Installation
This section guides you through the process of installing the Cheerock Drum Foot Pedal Spring Cam Assembly onto your bass drum pedal. Ensure your drum pedal is stable before beginning installation.
3.1 Component Identification
Familiarize yourself with each part of the assembly before installation.
Video 3.1: A visual guide demonstrating the assembly of the drum foot pedal spring cam components and their installation onto a bass drum pedal. This video shows the red variant of the assembly.
3.2 Installation Steps
- Prepare the Pedal: Ensure your bass drum pedal is clean and free from debris. If replacing old parts, carefully remove the existing spring and cam assembly.
- Assemble the Tensioner Rod:
- Thread one of the adjustment nuts onto the tensioner rod.
- Attach the spring hook clip to the eyelet of the tensioner rod.
- Thread the second adjustment nut onto the rod, ensuring it can be adjusted for spring tension.
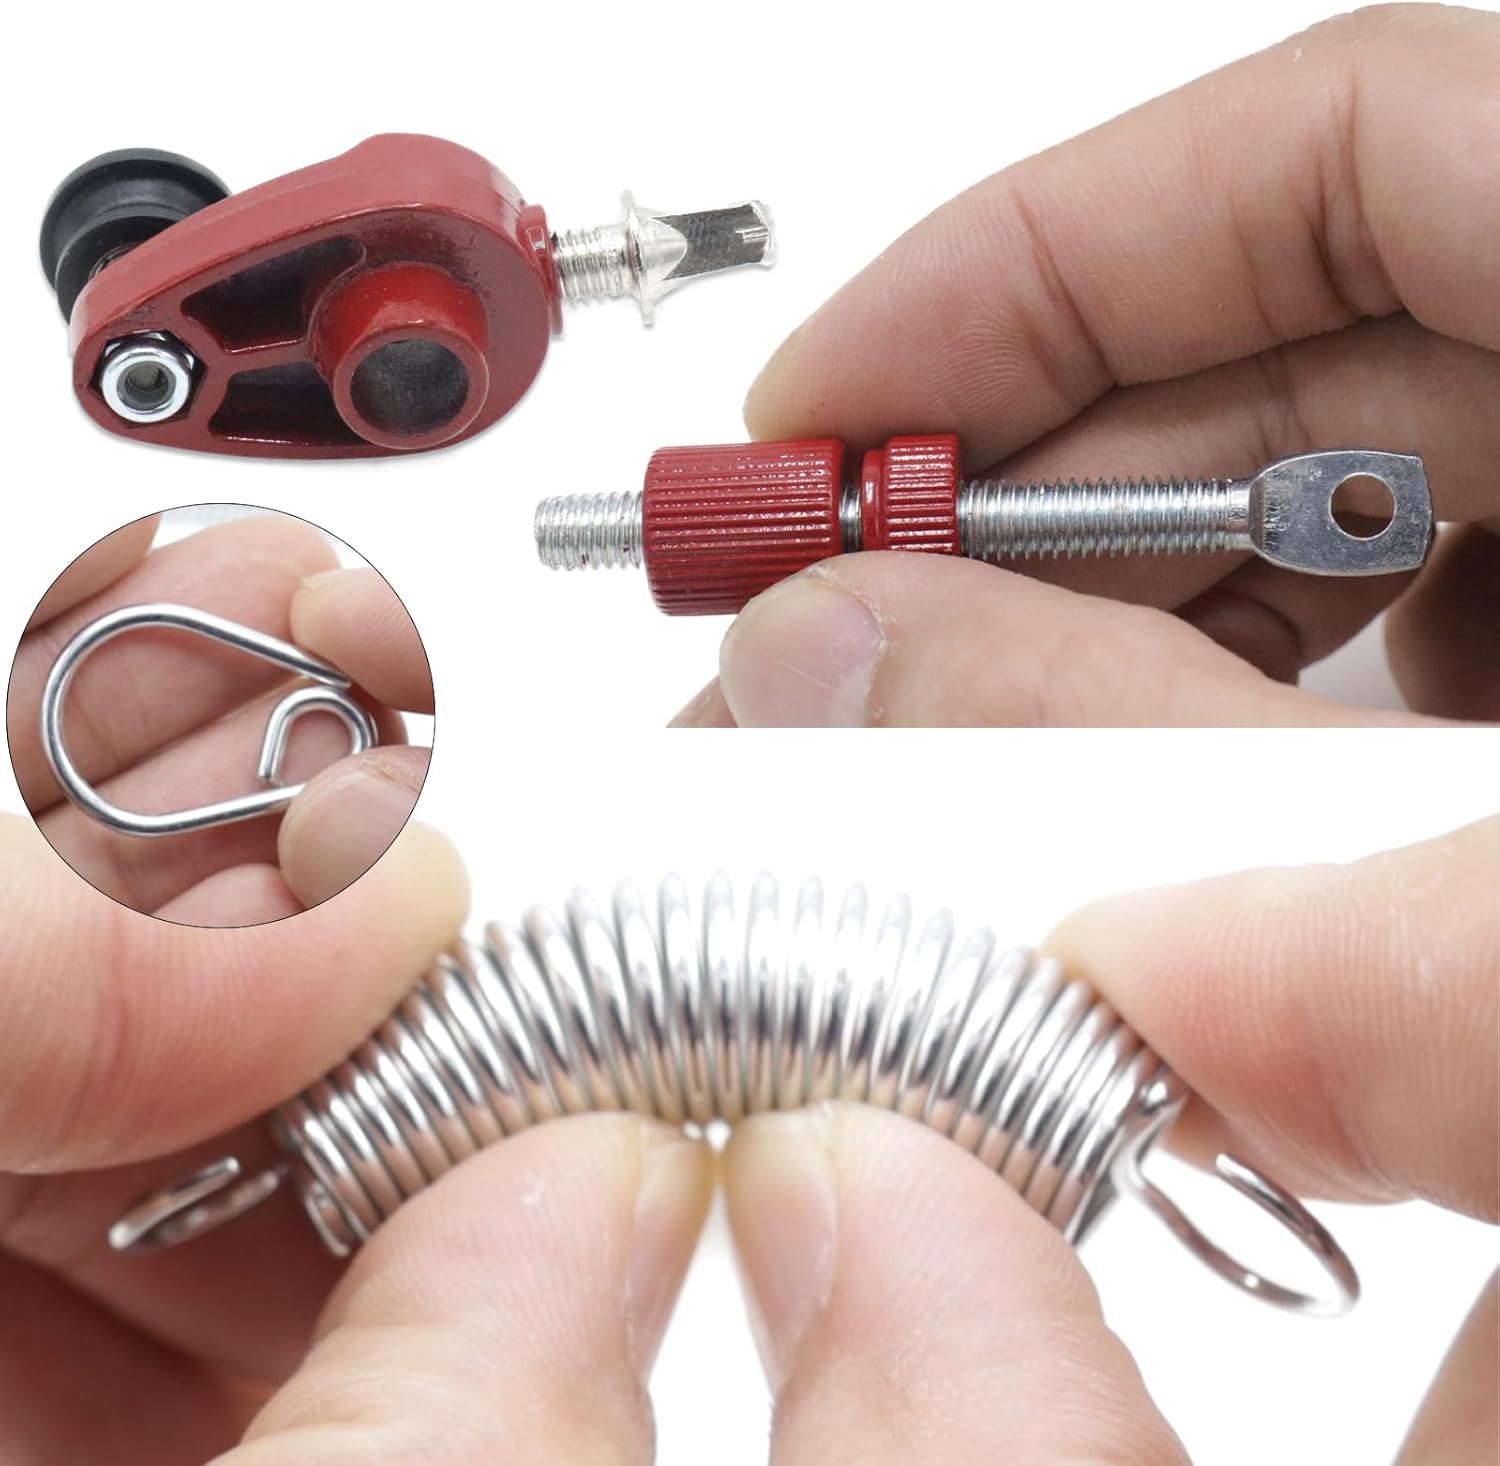
Image 3.2: Close-up of hands demonstrating the assembly of the tensioner rod and spring.
- Attach the Spring: Hook one end of the tension spring to the spring hook clip on the tensioner rod.
- Install the Cam Pulley:
- Locate the cam attachment point on your bass drum pedal.
- Secure the cam pulley hook tensioner to this point. Ensure it is firmly attached and can rotate freely.
- Connect the Spring to the Pedal: Hook the other end of the tension spring to the designated spring attachment point on your bass drum pedal. This is typically located near the base of the pedal.
- Adjust Tension: Use the adjustment nuts on the tensioner rod to set the desired spring tension. Turn the nuts to compress or release the spring, affecting the pedal's feel and rebound. Test the pedal's action to ensure smooth operation.

Image 3.3: The Cheerock spring cam assembly installed on a bass drum pedal, showing the connection points.
4. Operation
Once installed, the spring cam assembly works in conjunction with your bass drum pedal to provide consistent and responsive action. The tension spring assists the pedal in returning to its resting position after each stroke, while the cam ensures a smooth and efficient transfer of power from your foot to the beater.
- Tension Adjustment: Experiment with different spring tension settings to find the feel that best suits your playing style. Higher tension generally results in a faster, more powerful rebound, while lower tension offers a lighter, more fluid response.
- Regular Checks: Periodically check the assembly for any loose components or signs of wear to ensure continued optimal performance.
5. Maintenance
Proper maintenance extends the lifespan and ensures consistent performance of your drum pedal spring cam assembly.
- Cleaning: Keep the components clean from dust, dirt, and drumstick residue. Use a soft, dry cloth.
- Lubrication: Apply a small amount of light lubricant (e.g., silicone-based spray) to the moving parts, such as the cam pulley and tensioner rod threads, to ensure smooth operation and prevent corrosion. Avoid over-lubrication.
- Inspection: Regularly inspect the spring for any signs of stretching, bending, or corrosion. Check the cam for wear or damage. Replace any worn or damaged parts promptly.
- Tightness: Ensure all nuts and screws are securely tightened. Overtightening can strip threads or damage components.
6. Troubleshooting
If you encounter issues with your drum pedal after installing the assembly, consider the following:
- Pedal feels sluggish or unresponsive:
- Check spring tension; it might be too loose. Adjust the tensioner nuts to increase tension.
- Ensure all moving parts are clean and properly lubricated.
- Verify that the cam pulley rotates freely and is not obstructed.
- Unusual noises (squeaking, rattling):
- Lubricate the spring and cam pivot points.
- Check for any loose components and tighten them if necessary.
- Inspect the spring for damage or deformation.
- Spring detaches during play:
- Ensure the spring hook clip and the pedal's attachment points are securely fastened.
- Verify that the spring is not overstretched or damaged.
7. Specifications
| Material | Metal + Plastic |
| Color | Red |
| Spring Length | 6 cm (2.36 inches) |
| Item Weight | 1.6 ounces |
| Package Dimensions | 2 x 1 x 0.75 inches |
| Model Number | A230819 |
8. Warranty and Support
For information regarding warranty coverage, technical support, or replacement parts, please refer to the manufacturer's official website or contact Cheerock customer service directly. Contact details are typically provided with your purchase documentation.
Ask a question about this manual
Ask about setup, troubleshooting, compatibility, parts, safety, or missing instructions. Manuals+ will review the question and use this page’s manual context to help answer it.