RJ-C120201A
6V/12V Smart Battery Charger User Manual
Model: RJ-C120201A
Introduction
This user manual provides essential information for the safe and effective operation of your 6V/12V Smart Battery Charger. This intelligent charger is designed for lead-acid batteries, including AGM, GEL, SLA, and wet batteries, commonly found in cars, motorcycles, lawn mowers, and marine vehicles. It features automatic voltage recognition, pulse repair technology, and multiple safety protections to ensure optimal battery health and longevity. Please read this manual thoroughly before use.
Safety Information
Always prioritize safety when working with electrical devices and batteries. Failure to follow these instructions may result in electric shock, fire, or serious injury.
- Ventilation: Ensure adequate ventilation when charging batteries. Batteries can produce explosive gases.
- Eye and Skin Protection: Wear safety glasses and gloves when handling batteries. Battery acid is corrosive.
- Flammable Materials: Keep the charger and battery away from open flames, sparks, and flammable materials.
- Connection Order: Always connect the charger to the battery terminals before plugging it into the AC power outlet. Disconnect from AC power before disconnecting from the battery.
- Polarity: Connect the red (+) clamp to the positive battery terminal and the black (-) clamp to the negative battery terminal. Reverse polarity connection will trigger a protection warning.
- Indoor Use: This charger is designed for indoor use. Do not expose it to rain or moisture.
- Lithium-Ion Batteries: This charger is not compatible with lithium-ion batteries. Do not attempt to charge lithium-ion batteries with this device.
- Damaged Batteries: This charger can repair slightly damaged lead-acid batteries but cannot revive completely dead or severely damaged batteries.
Product Features
- Automatic Voltage Recognition: Intelligently detects and switches between 6V and 12V battery systems without manual adjustment.
- Smart LCD Display: Clearly shows charging status, battery percentage, voltage, and current.
- Pulse Repair Technology: Helps restore lost performance in old or idle batteries and extends battery life.
- Constant Current Charging: Provides a stable 750mA charging current for efficient and safe charging.
- Comprehensive Protection: Includes short-circuit, overcharge, undervoltage, overvoltage, overload, overcurrent, over-temperature, and reverse connection protection.
- Wide Compatibility: Suitable for various lead-acid battery types (AGM, GEL, SLA, Wet) used in cars, trucks, motorcycles, lawn mowers, and marine applications.
- SAE Dual-Use Adapter: Comes with detachable alligator clips and ring connectors for versatile connection options.
Setup and Connection
Follow these steps to properly connect the battery charger to your battery.
- Prepare the Battery: Ensure the battery terminals are clean and free of corrosion. If necessary, clean them with a wire brush.
- Connect to Battery:

Image Description: This image illustrates the correct connection procedure. The charger's red clip is connected to the positive (+) terminal of the battery, and the black clip is connected to the negative (-) terminal.
Connect the red (+) clip of the charger to the positive (+) terminal of the battery. Connect the black (-) clip of the charger to the negative (-) terminal of the battery. Ensure a secure connection. - Connect to Power: Plug the charger's power cord into a standard 110V-220V AC household power outlet. The charger will automatically begin the charging process.
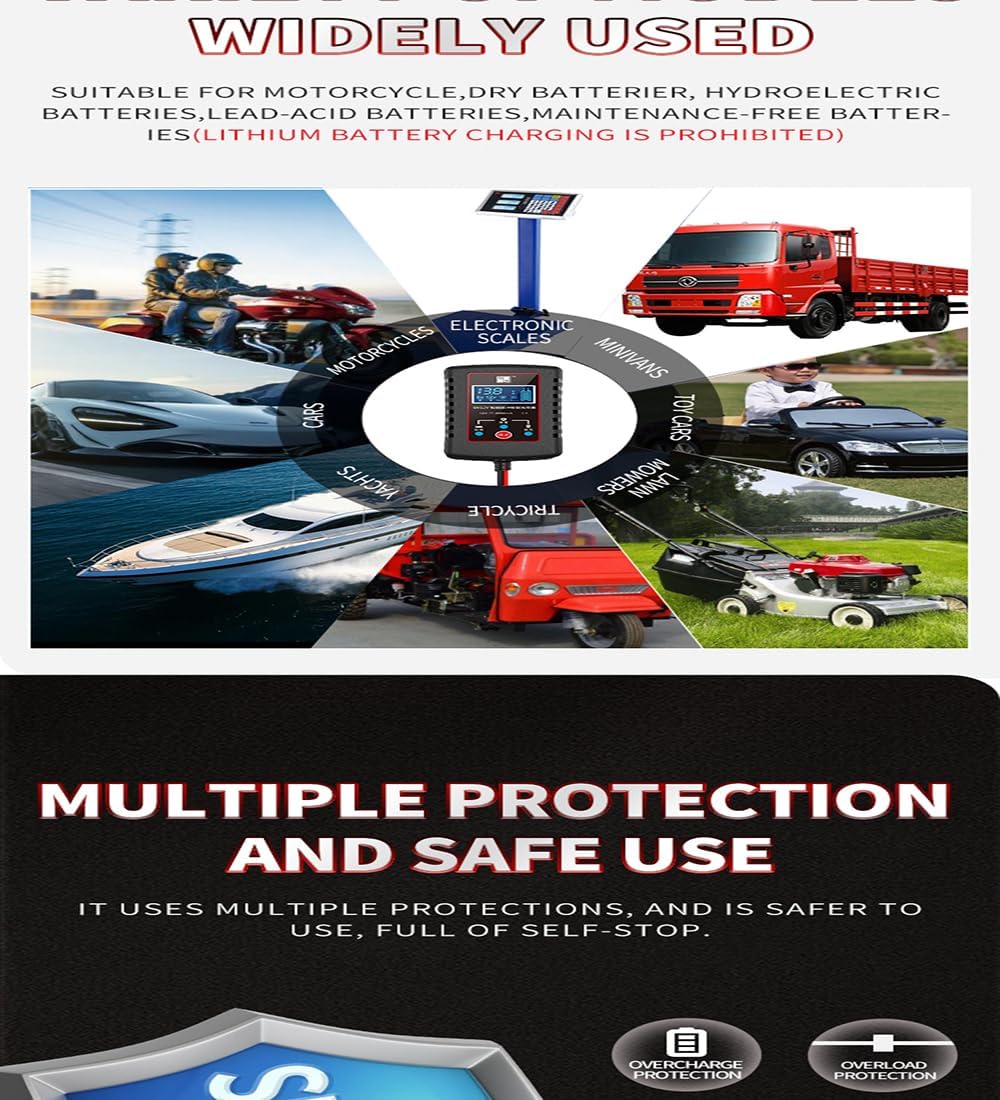
Image Description: This image displays the charger's output cables with both alligator clips and ring terminals, highlighting the versatility of the SAE dual-use adapter for different connection needs.
Operating Instructions
The charger operates automatically once connected. The intelligent LCD display provides real-time information.

Image Description: A close-up of the charger's front panel, featuring the digital LCD screen. The display shows the current voltage (13.8V), charging status, and battery percentage, indicating the charger's intelligent monitoring capabilities.
Automatic Recognition and Charging
Upon connection, the charger will automatically detect whether the battery is 6V or 12V and adjust its charging parameters accordingly. No manual selection is required for voltage.
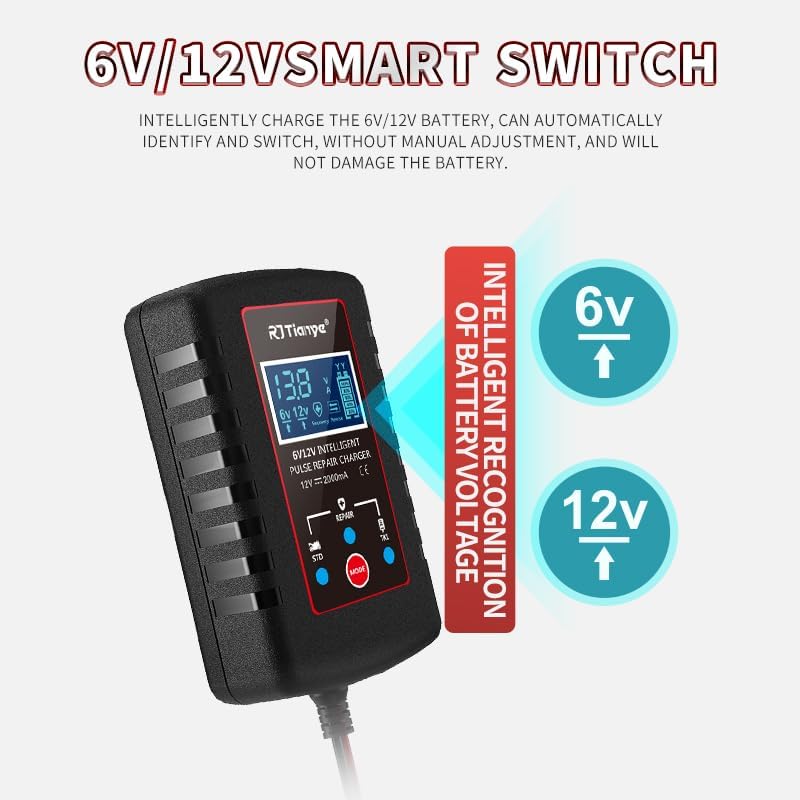
Image Description: This graphic highlights the charger's smart switch feature, visually demonstrating how it intelligently recognizes and adapts to either 6V or 12V battery systems without user intervention.
Charging Process and Display
The LCD display will show the current voltage, charging current, and battery charge percentage. The charger employs a smart charging process that automatically stops when the battery is fully charged, preventing overcharge.

Image Description: This image illustrates the 'Standard Mode' and 'Smart Charging Full of Self-Stop' feature. The charger's display shows 'OFF', indicating that the battery is fully charged and the charging process has automatically ceased for safety and battery longevity.
Pulse Repair Function
The charger includes a repair function designed to activate and maintain batteries that have lost performance due to sulfation or inactivity. This function can help solve issues like inability to charge or high internal resistance.

Image Description: A detailed view of the charger's control panel, specifically pointing out the 'MODE' button and the 'REPAIR' indicator. This highlights the charger's capability to perform battery maintenance and repair functions.
Understanding the Digital Display
The intelligent digital display provides comprehensive information about the battery and charging process at a glance.

Image Description: This composite image showcases the different readouts on the charger's LCD screen, including real-time voltage, charging current, repair mode indication, full charge status, power off status, and indicators for reverse connection or abnormal operation.
Maintenance
Proper maintenance ensures the longevity of your charger and optimal performance.
- Cleaning: Disconnect the charger from power and battery before cleaning. Wipe the exterior with a soft, dry cloth. Do not use harsh chemicals or abrasives.
- Storage: Store the charger in a cool, dry place when not in use. Keep it away from direct sunlight and extreme temperatures.
- Cable Care: Inspect the power cord and output cables regularly for any signs of damage. Do not use the charger if cables are frayed or damaged.
Troubleshooting
| Problem | Possible Cause | Solution |
|---|---|---|
| Charger not turning on/no display | No AC power; Loose connection; Faulty outlet | Check power outlet; Ensure charger is securely plugged in; Try a different outlet. |
| Charger displays error (e.g., 'EFF' or reverse connection icon) | Reverse polarity connection; Short circuit; Battery fault | Disconnect and reconnect battery ensuring correct polarity (+ to +, - to -); Check for short circuits; Test battery condition. |
| Battery not charging or charging slowly | Battery severely discharged/damaged; Incorrect battery type; Poor connection | Ensure battery is lead-acid (not lithium-ion); Check all connections for tightness; Battery may be beyond repair. |
| Charger gets warm during operation | Normal operation; Overload | Slight warmth is normal. If excessively hot, disconnect immediately and check for proper ventilation and battery condition. |
Specifications
| Feature | Detail |
|---|---|
| Brand | Generic |
| Model Number | RJ-C120201A |
| Input Voltage | 110V-220V AC |
| Output Voltage | 6V / 12V (Automatic Recognition) |
| Charging Current | 750mA (Constant Current) |
| Compatible Battery Types | Lead-Acid (AGM, GEL, SLA, Wet) |
| Dimensions | 9.65 x 5.79 x 2.54 cm |
| Weight | 219.99 g |
| UPC | 762715124746 |
Warranty and Support
This product comes with a 1-year warranty. If you encounter any issues or are not satisfied with the product, please contact the seller directly for hassle-free returns and refunds. For technical support or inquiries, refer to the contact information provided with your purchase or on the product packaging.
Ask a question about this manual
Ask about setup, troubleshooting, compatibility, parts, safety, or missing instructions. Manuals+ will review the question and use this page’s manual context to help answer it.