1. Introduction
This manual provides comprehensive instructions for the installation, operation, and maintenance of your ALITOVE WS2811 Addressable Neon LED Strip Light. This 16.4ft (5-meter) flexible LED strip features 420 LEDs and 70 WS2811 ICs, allowing for individual control of every 6 LEDs. It is designed for both indoor and outdoor applications with an IP65 waterproof rating, offering dynamic and customizable lighting effects.

Image 1.1: Overview of ALITOVE Neon LED Strip Light features, highlighting its addressable RGB capabilities, full-color display, DIY decoration potential, IP65 waterproof rating, and bendable design.
2. Package Contents
Please verify that all items listed below are included in your package:
- 1 x ALITOVE WS2811 Addressable Neon LED Strip Light (16.4ft / 5m)
- Mounting Clips (quantity may vary)
Note: A 12V power supply and a compatible WS2811 controller are required for operation and are not included in this package.

Image 2.1: The ALITOVE Neon LED Strip Light coiled, accompanied by a bag of mounting clips, representing the typical package contents.
3. Specifications
| Feature | Specification |
|---|---|
| Model Number | WS2811-5M-Neon-12V |
| Length | 16.4 ft (5 meters) |
| LEDs per Meter | 84 LEDs/meter (Total 420 LEDs) |
| IC Type | WS2811 |
| Control Grouping | 1 IC controls 6 LEDs (70 ICs total) |
| Input Voltage | 12V DC |
| Wattage | 45 Watts |
| Waterproof Rating | IP65 (Silicone sleeve, ends are not waterproof) |
| Special Features | Flexible, RGB IC Addressable, Smooth Even Light |
| Average Life | 50,000 Hours |
4. Setup and Installation
4.1 Required Components (Not Included)
- 12V DC Power Supply: Ensure the power supply has sufficient wattage for the strip (e.g., 45W for 5 meters).
- WS2811 Compatible Controller: A programmable controller is necessary to utilize the addressable features of the LED strip.
4.2 Connecting the LED Strip
The LED strip is equipped with 3-pin JST-SM connectors on both ends for signal and power connections. It also includes separate power and ground wires for injecting additional power if needed, especially for longer runs or higher brightness settings.

Image 4.1: Detailed view of the LED strip's input and output ports, indicating the connections for Ground (GND), Data, and 12V power.
- Connect the Input Port of the LED strip to your WS2811 compatible controller. Ensure the female input connector is used for the signal flow.
- Connect the 12V DC power supply to the controller and the LED strip.
- If connecting multiple strips or experiencing voltage drop, use the additional power/ground wires to inject power at appropriate points along the strip.
4.3 Mounting the LED Strip
The flexible silicone sleeve allows the strip to be bent and shaped. Use the provided mounting clips to secure the strip to your desired surface. Ensure the surface is clean and dry before installation.

Image 4.2: The LED strip's flexibility is showcased by its ability to be bent into various decorative shapes.
4.4 Waterproof Considerations
The LED strip has an IP65 waterproof rating, making it suitable for outdoor use and protection against dust and low-pressure water jets. However, the ends of the light strip are not waterproof. Ensure these connections are protected from moisture if used in wet environments.
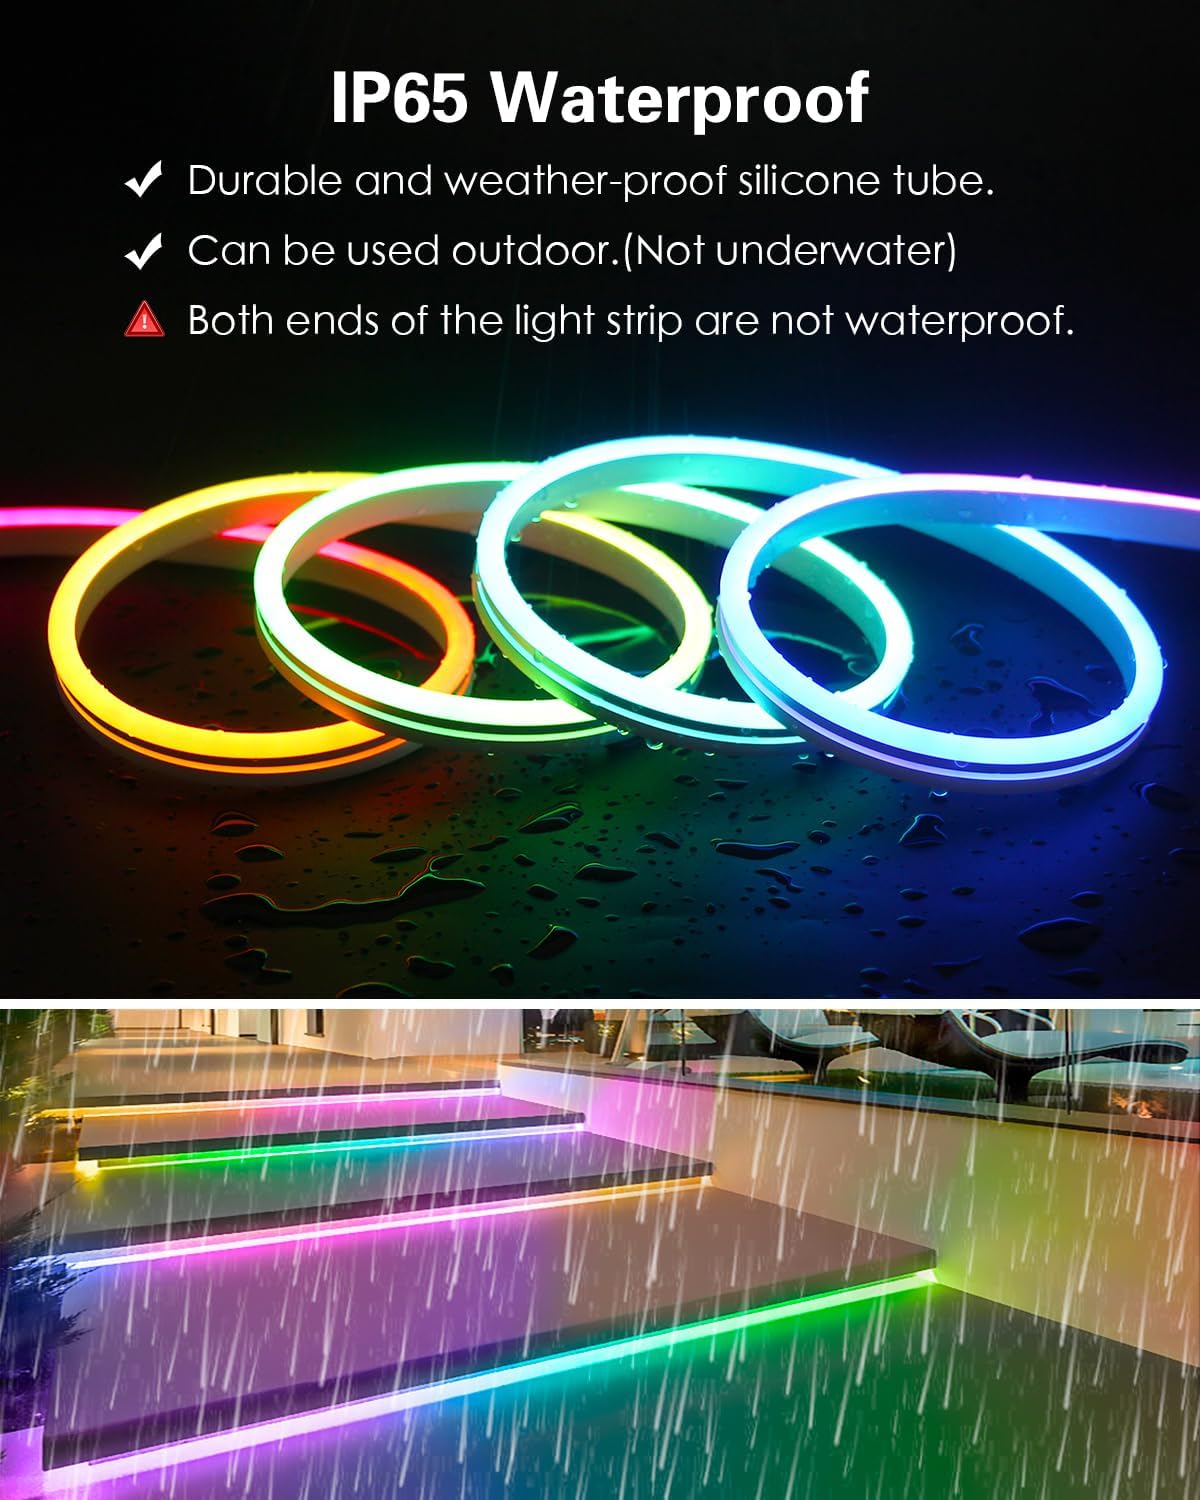
Image 4.3: The LED strip shown in a simulated rainy environment, illustrating its IP65 waterproof feature. A warning highlights that the strip ends are not waterproof.
5. Operating Instructions
5.1 Compatible Controllers
This addressable LED strip is compatible with a wide range of programmable controllers, including:
- Arduino
- Raspberry Pi
- T1000S, K1000C
- App controllers: SP105E, SP601E, SP611E
- Music controllers: SP107E
- Smart WiFi Controllers: SP108E
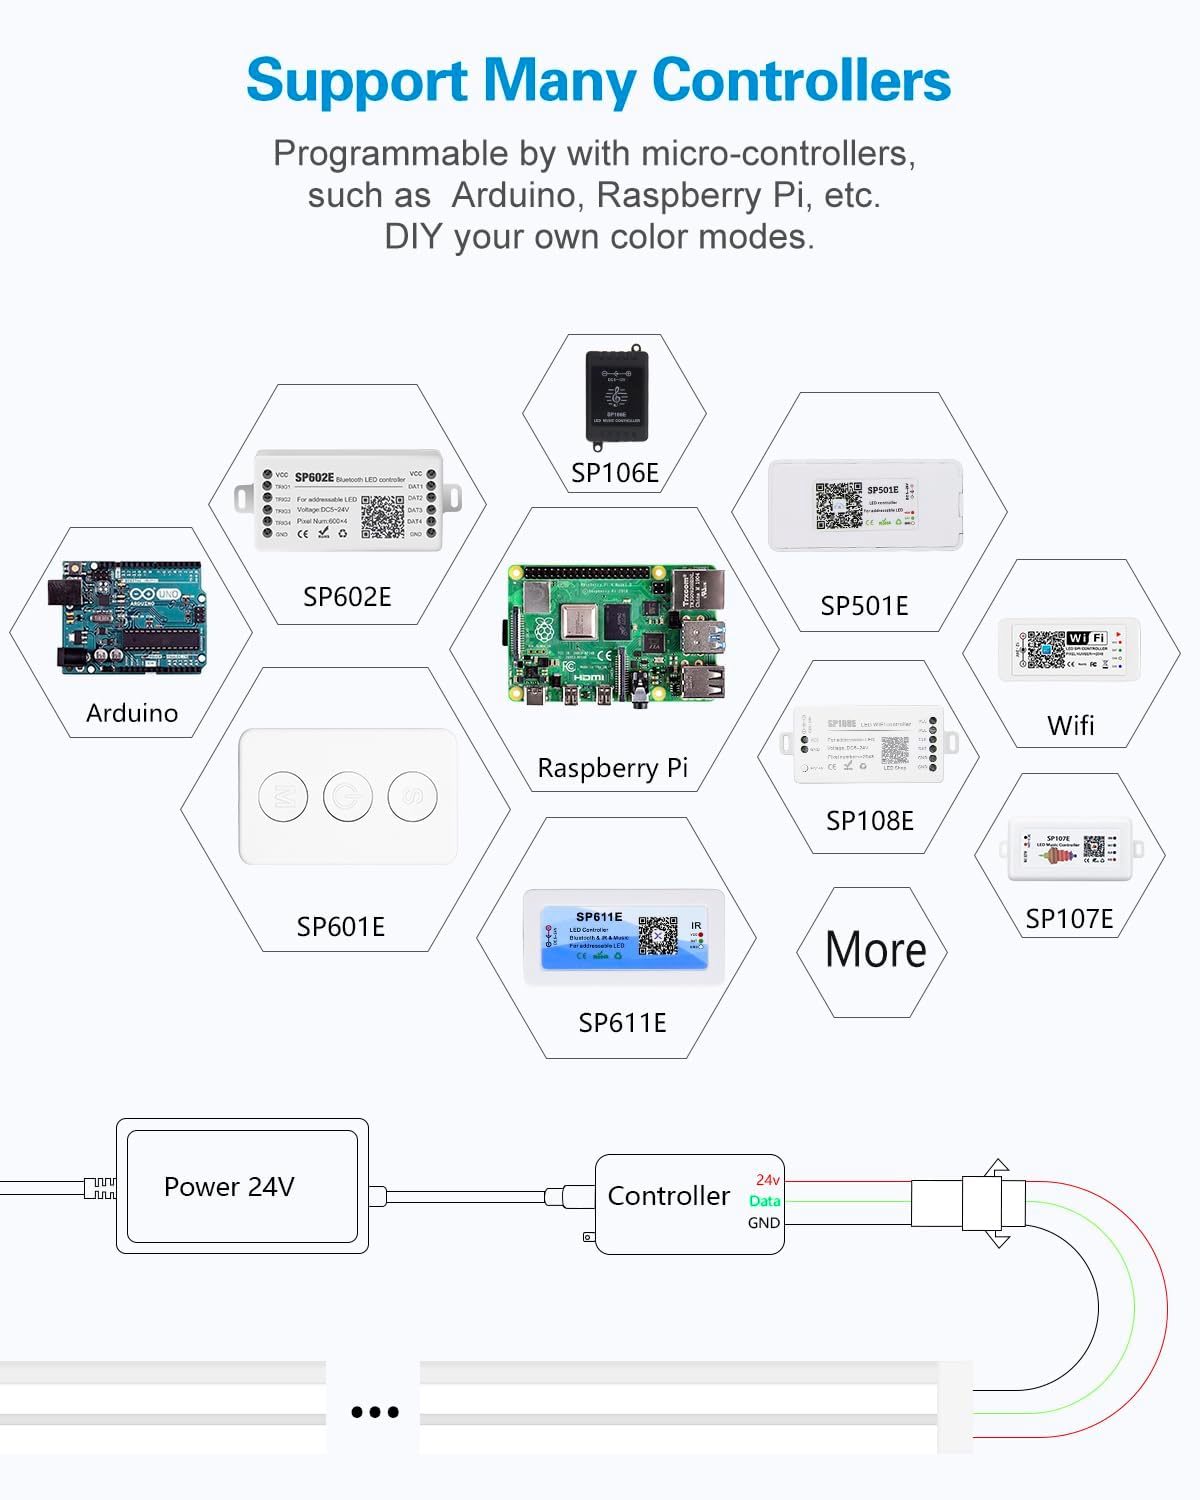
Image 5.1: A visual representation of various controllers compatible with the ALITOVE LED strip, such as Arduino, Raspberry Pi, and different SP series models.
5.2 Programming and Effects
With a compatible controller, you can program the LED strip to display a variety of dynamic and static color effects. Each group of 6 LEDs can be controlled independently, allowing for intricate lighting patterns.
- Dynamic Effects: Rainbow, chasing, breathing, comet, fading, and more.
- Static Colors: Set the strip to any single color.
- Custom Animations: Utilize micro-controllers like Arduino or Raspberry Pi to create your own unique lighting modes and animations.

Image 5.2: The LED strip connected to an Arduino, demonstrating its programmability for custom colors and animations.

Image 5.3: A collection of LED strips showcasing a range of dynamic and static color effects, such as rainbow and chasing patterns.
6. Maintenance
To ensure the longevity and optimal performance of your ALITOVE Neon LED Strip Light, follow these maintenance guidelines:
- Cleaning: Gently wipe the silicone surface with a soft, damp cloth to remove dust or dirt. Avoid using harsh chemicals or abrasive materials.
- Inspection: Periodically check the strip for any signs of damage, especially at the connection points and along the length of the silicone sleeve.
- Connection Integrity: Ensure all connections to the controller and power supply remain secure and free from corrosion.
- Water Protection: If used outdoors, regularly inspect the non-waterproof ends and ensure they remain protected from direct exposure to water.
7. Troubleshooting
7.1 Light Strip Not Lighting Up or Incorrect Display
- Check Controller Connection: The controller must be connected through the female input connector of the LED strip. If the signal flow is reversed (connected to the output), the light strip will not illuminate correctly.
- Power Supply: Verify that the 12V DC power supply is correctly connected and providing adequate power to both the controller and the LED strip. Insufficient power can lead to dimness or partial illumination.
- Data Line: Ensure the data line from the controller is correctly connected to the data input of the LED strip.
- Controller Settings: Confirm that your controller's settings (e.g., LED type, number of pixels, color order) are correctly configured for WS2811 ICs and the length of your strip.
7.2 Inconsistent Brightness or Color
- Voltage Drop: For longer runs, voltage drop can occur, leading to dimmer lights towards the end of the strip. Consider injecting power at multiple points along the strip using the dedicated power/ground wires.
- Controller Output: Ensure the controller is capable of driving the number of LEDs in your setup.
8. Warranty and Support
ALITOVE is committed to providing quality products. If you encounter any issues with your ALITOVE WS2811 Addressable Neon LED Strip Light, please do not hesitate to contact us. Our support team is available to assist with connection problems, operational queries, or any other product-related concerns.
For further assistance, please visit the ALITOVE Store on Amazon or refer to the contact information provided with your purchase.