Introduction
This manual provides comprehensive instructions for the safe and effective use of your NCVI Double Electric Breast Pump. Designed for comfort and efficiency, this pump features multiple modes and suction levels to support your breastfeeding journey. Please read this manual thoroughly before first use and retain it for future reference.
Safety Information
- Always inspect all pump components before each use for any damage or wear. Replace damaged parts immediately.
- Ensure all components are clean and sterilized before first use and after each subsequent use.
- Do not immerse the pump motor unit in water or other liquids. Clean with a damp cloth only.
- Keep out of reach of children. This device is not a toy.
- Use only the provided power adapter and charging cable.
- Do not use while bathing or showering.
- If you experience pain or discomfort during pumping, discontinue use and consult a healthcare professional.
- All components that come into contact with breast milk are made of food-grade, BPA-free materials.
Product Overview
Components

Figure 1: Exploded view of the NCVI Double Electric Breast Pump components.
The NCVI Double Electric Breast Pump system includes the following main components:
- Pump Body (x2): The main collection unit that connects to the flange.
- Motor (x1): The central control unit with the LED touchscreen.
- Air Tube (x2): Connects the pump body to the motor for suction.
- Diaphragm (x2): Essential for creating vacuum and preventing backflow.
- Upper Cover (x2): Protects the diaphragm.
- Flange 24mm (x2): Standard breast shield size.
- Milk Bottle (x2): Collection bottles for breast milk.
- Duckbill Valve (x4): Ensures one-way milk flow.
- Flange Insert 21mm (x2): Reduces the 24mm flange size for smaller nipple diameters.
- Charging Cord (x1): Type-C USB cable for charging.
- Nipple (x2): For feeding directly from the collection bottles.
- Breastmilk Storage Bags (x10): For convenient milk storage.
Key Features
- Hospital-Grade Suction: Powerful and efficient suction for effective milk expression.
- Multiple Modes & Levels: Features 4 distinct pumping modes and 9 adjustable suction levels for personalized comfort and efficiency.
- Intuitive LED Touchscreen: A highly accurate rainbow touch control LED display for easy operation, including memory function and a 30-minute auto shut-off timer.
- Ultra-Quiet Operation: Operates at an ultra-low noise level (as low as 45dB) to ensure discretion and avoid disturbing your baby.
- Long Battery Life: Equipped with a 2200mAh rechargeable battery, providing extended use for home and travel.
- Portable & User-Friendly: Lightweight design, Type-C charging, and included milk storage bags make it convenient for on-the-go use.
- Comfortable & Safe: Includes 21mm and 24mm flanges to fit various breast sizes, and all milk-contact components are made from food-grade, BPA-free materials.
Setup
Assembly
Before first use, disassemble, clean, and sterilize all parts that come into contact with breast milk. Ensure all parts are completely dry before assembly.
- Insert the duckbill valve firmly into the bottom of the pump body.
- Place the diaphragm onto the top of the pump body, ensuring it is seated securely.
- Attach the upper cover over the diaphragm, pressing down until it clicks into place.
- Screw the 24mm flange onto the pump body. If using the 21mm insert, place it inside the 24mm flange before attaching.
- Screw the milk bottle onto the bottom of the pump body, ensuring a tight seal.
- Connect one end of the air tube to the port on the upper cover of the pump body.
- Connect the other end of the air tube to the corresponding port on the motor unit. For double pumping, connect both tubes. For single pumping, connect one tube and ensure the other port on the motor is sealed (if applicable, or use a single-port setup).

Figure 2: Anti-backflow design ensures hygiene and pump longevity.

Figure 3: Double and Single Pumping configurations.
Charging the Battery
The pump motor unit is equipped with a 2200mAh rechargeable lithium-ion battery. Before first use, fully charge the battery.
- Connect the Type-C charging cable to the charging port on the motor unit.
- Connect the other end of the cable to a compatible USB power source (e.g., wall adapter, computer, power bank).
- The battery indicator on the LED screen will show charging status. A full charge provides extended standby time.

Figure 4: Charging options for the pump's rechargeable battery.
Operating Instructions
Familiarize yourself with the LED touchscreen controls for optimal use.

Figure 5: Rainbow Smart Touch Screen layout.
- Power On/Off: Press and hold the power button (usually indicated by a power icon) on the motor unit to turn the pump on or off. A short press will pause/resume pumping.
- Mode Selection: The pump features 4 distinct modes. Press the "M" button (Mode Switch) to cycle through the modes:
- Massage Mode: Gentle, rapid suction to stimulate milk let-down.
- Multitronic Suction Mode: A combination of rapid and slower suctions.
- Suck Simulate Mode: Mimics a baby's natural suckling rhythm.
- Expression Mode: Slower, stronger suction for efficient milk expression.
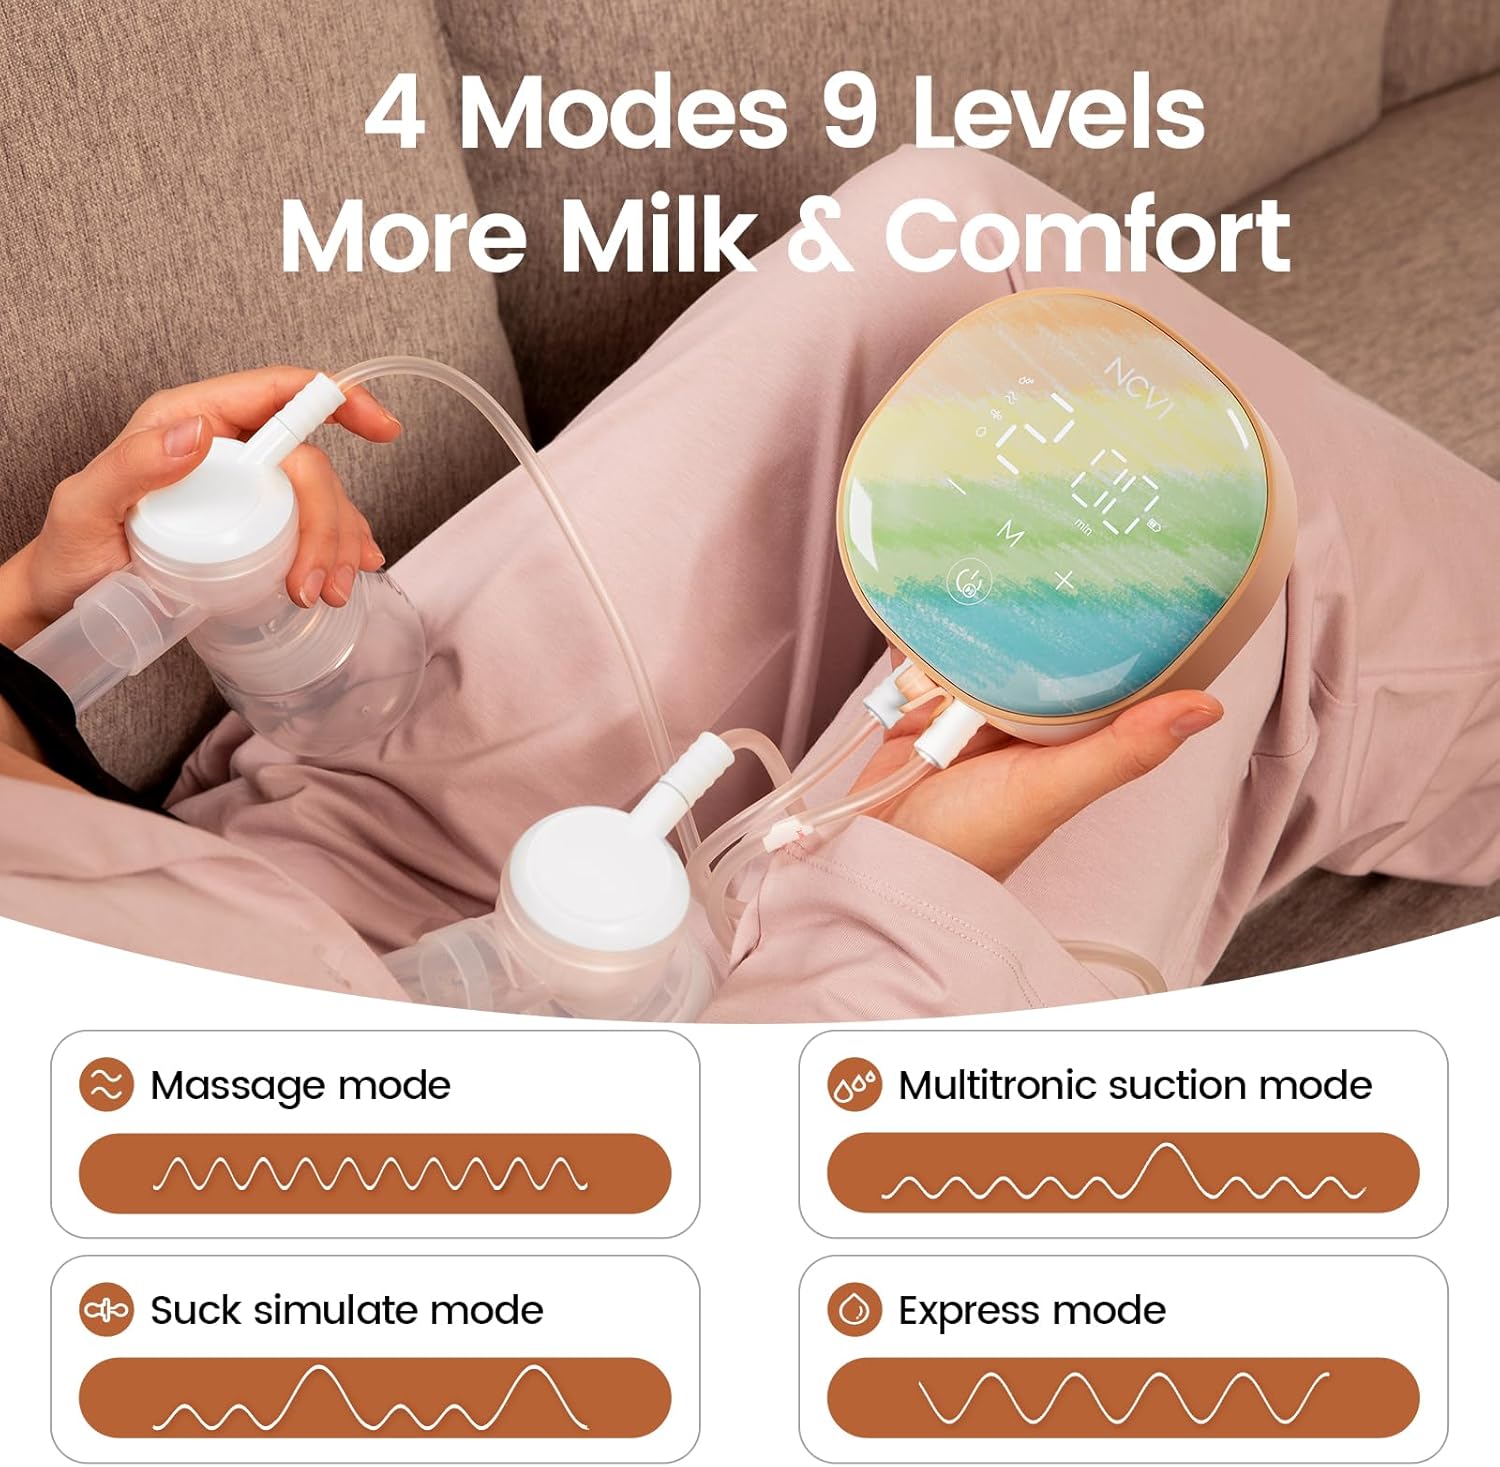
Figure 6: The 4 distinct pumping modes.
- Suction Level Adjustment: Each mode has 9 adjustable suction levels. Use the "+" and "-" buttons to increase or decrease the suction intensity to your comfort level. Start with a lower level and gradually increase.
- Memory Function: The pump automatically remembers your last used mode and suction level for convenience.
- Auto Shut-off: For safety and convenience, the pump will automatically turn off after 30 minutes of continuous operation.
- Pumping Session:
- Ensure flanges are centered on your nipples for proper suction.
- Begin with a massage mode to stimulate let-down for 2-5 minutes.
- Once milk begins to flow, switch to an expression mode and adjust suction to a comfortable yet effective level.
- Pump until breasts feel empty or milk flow significantly slows.
Cleaning and Maintenance
Proper cleaning and maintenance are crucial for hygiene and the longevity of your breast pump.
Disassembly for Cleaning
After each pumping session, immediately disassemble all parts that came into contact with breast milk: flanges, flange inserts, pump bodies, diaphragms, upper covers, duckbill valves, and milk bottles.
Cleaning Instructions
- Rinse: Rinse all disassembled parts under cool running water to remove any residual milk.
- Wash: Wash parts in warm, soapy water using a dedicated brush. Ensure all milk residue is removed.
- Rinse Again: Rinse thoroughly under clean running water.
- Sterilize: Sterilize parts by boiling for 5 minutes, using a steam sterilizer, or a dishwasher with a sanitizing cycle. Follow sterilizer manufacturer instructions.
- Dry: Air dry parts on a clean drying rack or use a clean cloth. Ensure all parts are completely dry before reassembly or storage to prevent mold and bacteria growth.
- Motor Unit: Wipe the motor unit with a clean, damp cloth. Do not immerse in water.

Figure 7: Bottles can be easily converted for feeding.

Figure 8: Use provided storage bags for milk preservation.
Storage
Store the clean and dry pump components in a clean, dry place away from direct sunlight and extreme temperatures.
Troubleshooting
| Problem | Possible Cause | Solution |
|---|---|---|
| No suction or weak suction. |
|
|
| Pump not turning on. |
|
|
| Milk flowing back into tubing. |
|
|
| Unusual noise from motor. |
|
|
Specifications
- Model Number: 81222
- Dimensions: 8.66 x 5.24 x 5.71 inches
- Weight: 10.58 ounces
- Battery: 2200mAh Lithium Ion (included)
- Modes: 4 Pumping Modes
- Suction Levels: 9 Levels
- Noise Level: As low as 45dB
- Auto Shut-off: 30 minutes
- Flange Sizes: 24mm (with 21mm insert)
- Material: Food-grade, BPA-free
- Charging Port: Type-C USB
- Country of Origin: China
Warranty and Support
For warranty information or technical support, please refer to the product packaging or contact NCVI customer service directly. Contact details are typically available on the manufacturer's official website or through the retailer where the product was purchased.
For further assistance, you may visit the official NCVI Store on Amazon: NCVI Store.


