1. Introduction
This manual provides detailed instructions for the safe and effective use of your Mitsubishi Electric Kirigamine Air Conditioner Remote Control, model ADS223. Please read this manual thoroughly before using the remote control and keep it for future reference.
Important Compatibility Note:
This remote control is designed for specific Mitsubishi Electric Kirigamine indoor unit models: MTZ-2222AS, MTZ-2522AS, MTZ-2822AS, MTZ-3622AS, MTZ-4522AS. Ensure your air conditioner model is listed for proper functionality. Remote control holder MAC-200RH and remote control hook MAC-190RF are sold separately.
2. Product Overview
2.1. Remote Control Appearance
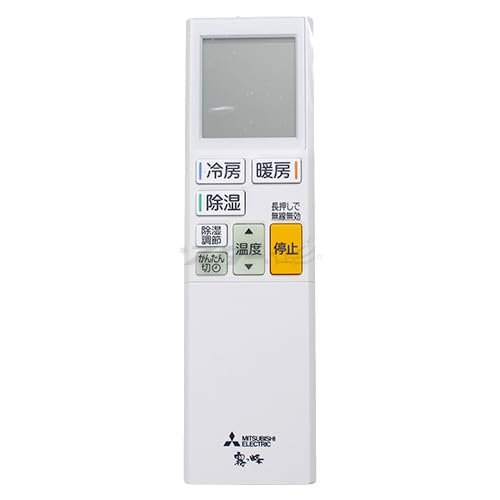
Image: Front view of the Mitsubishi Electric ADS223 remote control, showing the display and main buttons.
2.2. Button Functions and Display

Image: Detailed diagram of the ADS223 remote control, illustrating each button's location and the display panel.
- Display (with backlight): Shows all current settings and operational status.
- Cooling/Heating/Dry Button: Initiates Cooling, Heating, or Dry mode operation.
- Dehumidification Adjustment Button: Adjusts the strength of the dehumidification function.
- Easy Off Timer Button (Fluorescent): Sets the air conditioner to stop automatically after a specified time. Note: Fluorescent buttons store light in bright places and glow in dark places. If the glow is weak, expose them to light for a while.
- Omakase (Auto/Favorite) Section: Memorizes your preferred temperature, airflow direction, and fan speed for quick recall.
- High Power Button: Activates a rapid cooling or heating operation.
- Cooling Sensation Button: During cooling operation, this button enables the airflow to swing up and down.
- Sleep Mode Button: Sets the temperature and dehumidification strength suitable for sleep.
- High Temperature Watch Button: If the room temperature rises while the unit is off, this function automatically starts cooling operation.
- Stop Button: Halts the current operation of the air conditioner.
- Temperature Button (Fluorescent): Adjusts the set temperature during cooling or heating operation.
- Fan Speed Button: Controls and adjusts the fan speed.
- Airflow Up/Down Button: Adjusts the vertical direction of the airflow.
- On/Off Timer Button: Sets a reservation for the air conditioner to turn on or off at a specific time.
- [▲][▼] Buttons: Used to adjust time settings.
- Confirm Button: Confirms time and timer settings.
- Cancel Button: Cancels any active timer reservations.
- Time Adjustment/Reset Button: Press this button to adjust the time or when replacing batteries. If using a wireless LAN adapter (sold separately), press and hold for 5 seconds to disable wireless functionality.
3. Setup
3.1. Battery Installation
The remote control requires two AAA alkaline batteries.
- Slide open the battery cover on the back of the remote control.
- Insert two AAA alkaline batteries, ensuring the correct polarity (+ and -) as indicated inside the battery compartment.
- Close the battery cover securely.
- After installing batteries, press the Time Adjustment/Reset Button to initialize the remote control.
4. Operating Instructions
4.1. Basic Operation
- To Start Operation: Press the Cooling/Heating/Dry Button to select your desired mode.
- To Stop Operation: Press the Stop Button.
4.2. Mode Selection
Press the Cooling/Heating/Dry Button repeatedly to cycle through the available operating modes:
- Cooling Mode: For cooling the room.
- Heating Mode: For heating the room.
- Dry Mode: For dehumidifying the room.
4.3. Temperature Adjustment
Once a mode is selected, use the Temperature Button (up/down arrows) to adjust the desired room temperature.
4.4. Fan Speed Adjustment
Press the Fan Speed Button to cycle through different fan speed settings (e.g., Auto, Low, Medium, High).
4.5. Airflow Direction
- Use the Airflow Up/Down Button to adjust the vertical direction of the air outlet.
- For cooling, press the Cooling Sensation Button to enable automatic vertical airflow swing.
4.6. Timer Functions
- Easy Off Timer: Press the Easy Off Timer Button to set a countdown timer for the unit to turn off.
- On/Off Timer: Press the On/Off Timer Button to set specific times for the unit to turn on or off. Use the [▲][▼] Buttons to adjust the time and the Confirm Button to save.
- To Cancel Timer: Press the Cancel Button.
4.7. Special Functions
- Omakase (Auto/Favorite): Use this feature to store and recall your preferred operating settings (temperature, fan speed, airflow).
- High Power: Activates a powerful operation for quick temperature changes.
- Sleep Mode: Optimizes temperature and dehumidification for comfortable sleep.
- High Temperature Watch: Automatically activates cooling if the room temperature exceeds a set limit while the unit is off.
5. Maintenance
5.1. Battery Replacement
When the remote control display becomes dim or the remote control does not respond, it is time to replace the batteries.
- Slide open the battery cover on the back.
- Remove the old AAA alkaline batteries.
- Insert two new AAA alkaline batteries, observing the correct polarity (+ and -).
- Close the battery cover.
- Press the Time Adjustment/Reset Button to reset the remote control and set the current time.
6. Troubleshooting
If the remote control is not working or responding, please check the following common issues:

Image: Troubleshooting steps for when the remote control is unresponsive.
- Is the remote control compatible with your appliance?
This remote control can only be used with compatible Mitsubishi Electric Kirigamine air conditioner models. Please verify your air conditioner's model number against the compatible list. - Are the batteries depleted?
Replace the batteries with new AAA alkaline batteries. - Are the batteries inserted with correct polarity (+ and -)?
Ensure the batteries are inserted according to the polarity markings inside the battery compartment. - Are there any interfering electronic devices nearby?
Radio equipment, audio equipment, or cooking appliances (e.g., microwave ovens, cordless phones) can cause interference. Try turning off such devices or moving the remote control further away from them. - Have you tried resetting the remote control?
If the remote control still does not work after replacing the batteries, press the Time Adjustment/Reset Button to reset it.
7. Specifications
| Brand | Mitsubishi Electric |
| Model Number | ADS223 (M21 EGJ 426) |
| Compatible Batteries | 2 x AAA Alkaline Batteries |
| Maximum Range | 10 meters |
8. Support
For detailed information regarding product functions or specific technical inquiries, please contact Mitsubishi Electric customer support directly.
If you experience any issues with the product upon arrival or during its initial use, please contact your seller for assistance.