1. Introduction
The ELEGOO PHECDA 20000mW Laser Engraver & Cutter is a high-performance CNC machine designed for precision engraving and cutting across a wide range of materials. Its robust design and advanced features make it suitable for both intricate artistic projects and functional applications.
Key Features:
- 20000mW Output Power: Capable of engraving and cutting materials like wood, bamboo, kraft paper, stainless steel, and aluminum with a 0.06mm*0.06mm focal spot and speeds up to 25,000 mm/min.
- Large Engraving Area: Features a 400 x 400 mm (15.75 x 15.75 inches) workspace, allowing for large projects or multiple smaller pieces.
- Smoke Filtering Exhaust: Equipped with a smoke exhaust filter and dual cooling fans for a clean and safe working environment.
- Multiple Operation Methods: Supports mobile App (remote WIFI), USB cable, TF card, and is compatible with LightBurn and LaserGRBL software.
- Magnetic Shading Plate: Translucent plate shields eyes from UV light and aids in smoke collection. Safety goggles are included.

Figure 1: ELEGOO PHECDA 20000mW Laser Engraver and Cutter with included accessories.
2. Safety Guidelines
Operating a laser engraver requires strict adherence to safety protocols to prevent injury. The ELEGOO PHECDA is a Class 4 laser product. Always prioritize safety.
- Eye Protection: Always wear the provided safety goggles when the laser is in operation. The magnetic shading plate offers additional protection but is not a substitute for goggles.
- Ventilation: Ensure adequate ventilation in your workspace. The built-in smoke exhaust filter helps, but proper air circulation is crucial to dissipate fumes and dust.
- Fire Safety: Do not leave the machine unattended during operation. Keep a fire extinguisher nearby. The machine features a flame monitor that will shut down and beep if a fire is detected.
- Position Protection: The machine includes active position protection, automatically stopping and alarming if moved, tilted, or flipped during operation.
- Material Compatibility: Only engrave or cut materials recommended by the manufacturer. Certain materials can produce toxic fumes or catch fire easily.
- Children and Pets: Keep children and pets away from the operating area.
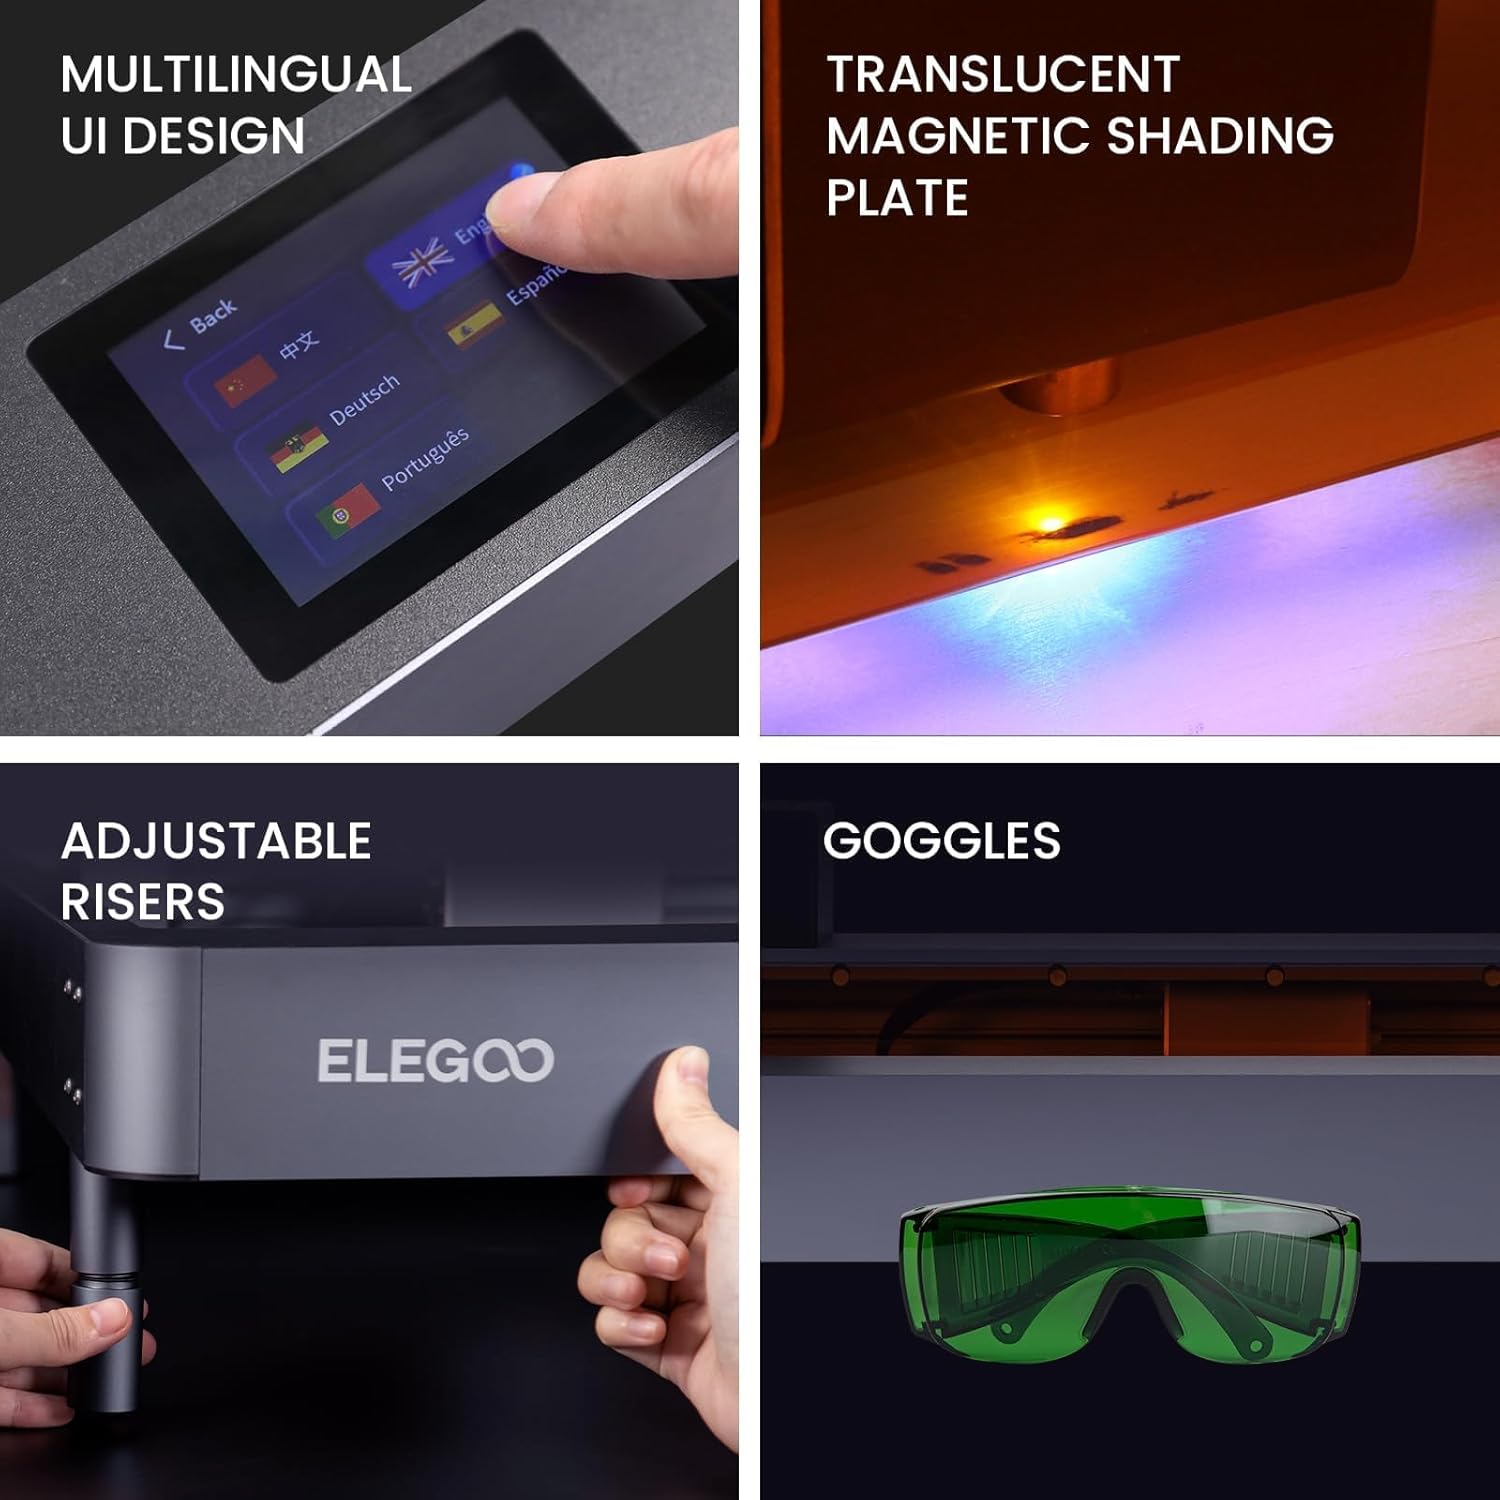
Figure 2: Important safety features including adjustable risers, multilingual UI, magnetic shading plate, and safety goggles.
3. Setup and Assembly
This section guides you through the initial setup and assembly of your ELEGOO PHECDA laser engraver.
3.1 Package Contents
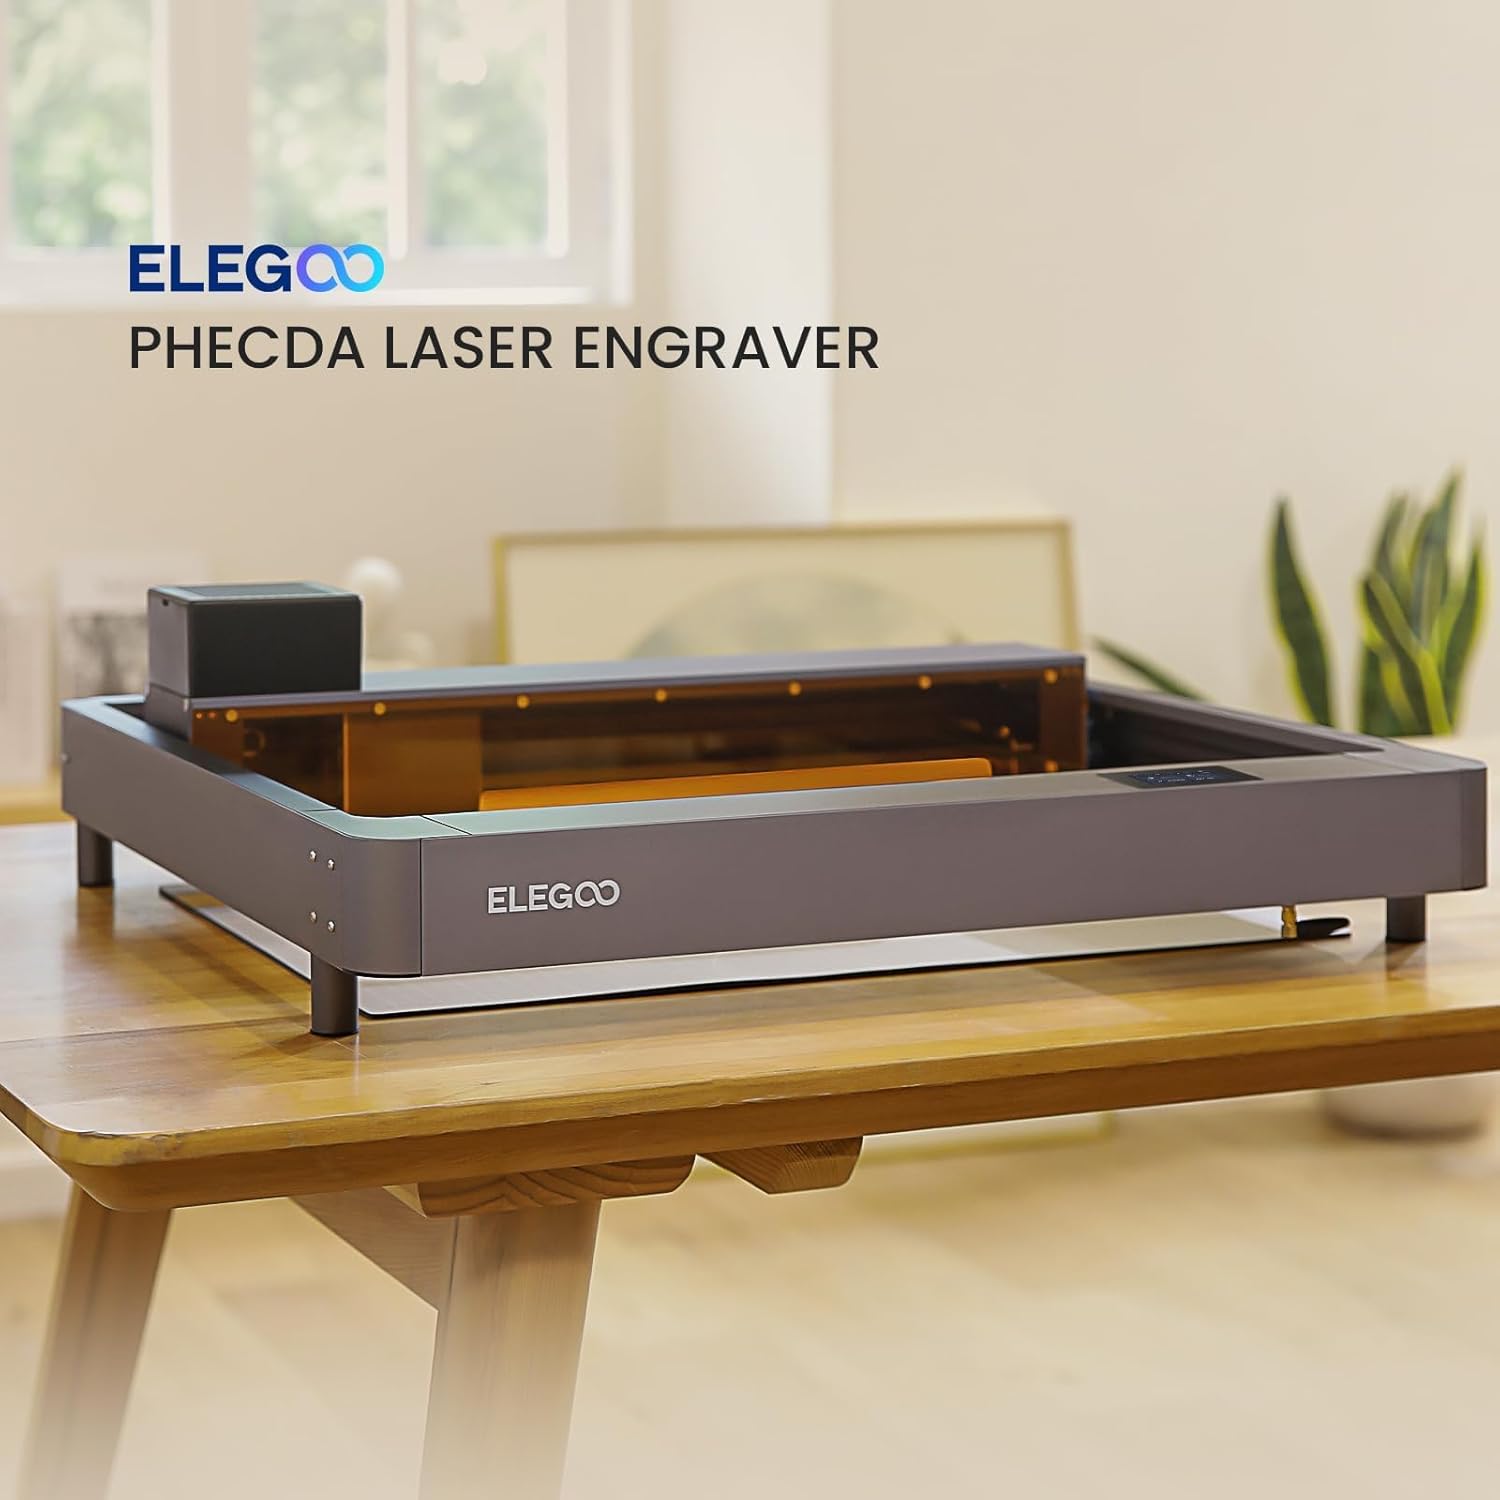
Figure 3: Components included in PHECDA 20W - Package 2.
3.2 Air Assist Installation
The air assist system helps to clear smoke and debris during engraving and cutting, improving results and reducing residue.
Video 1: Installation tutorial for the Air Assist system on the ELEGOO PHECDA 20W Laser Engraver.
Installation Steps:
- Insert the air tube at the air tube end of the laser device.
- Insert the laser device along the groove, and use the side screws to tighten it at the desired height.
- Use a cable tie to fix the air tube and the laser device wire together to prevent the air tube from being scratched during movement.
- Insert the air tube at the end of the air pump to complete the installation.
4. Operating the Machine
The ELEGOO PHECDA offers various methods for operation, including PC software and mobile app connectivity.
4.1 Using LaserGRBL Software with USB Cable
LaserGRBL is a popular, free software for controlling GRBL-based laser engravers. Follow these steps to connect and operate your PHECDA via USB.
Video 2: Guide on how to use LaserGRBL software with the ELEGOO PHECDA via USB cable.
Operating Steps:
- Connect the machine and computer with a USB cable.
- Power on the machine.
- Install the "CH340" driver (found in the SD card offered by ELEGOO).
- Select "This PC-Show more options-Manage-Device Manager" and check the COM port corresponding to the "CH340" driver. (Determine the COM port based on the actual situation.)
- Open LaserGRBL software.
- Set the driver port to COM3 (same as the port displayed on the COM port in the device manager), set Baud to 115200, click Connect, and the connection will be successful.
- The "progress bar" on the operation panel can set the moving distance and moving speed of the machine.
- The arrow function of the operation panel can control the machine's movement. Note: The direction of the arrow corresponds to each orientation of the machine looking down.
- After moving the machine to the specified position, you can set this place as the origin.
- After moving the machine again, click move to zero (small house button), and the machine will return to the original position set before.
- Click the laser icon, and the laser device will turn on the laser. Click the laser icon again, and the laser device will turn off the laser.
- Import the engraved picture into the software, and the raster image dialog box will pop up to adjust the image.
- Brightness, Contrast, White Clip, and B&W can be adjusted to change the brightness and darkness of the image, thus affecting the clarity or blurring of the model-generated results.
- Click Next, the software will pop up a window for setting laser parameters.
- You can set the size of the picture.
- Set the maximum power and minimum power of the laser.
- Set the moving speed of the laser during the engraving process.
- Click Create, and a preview image will appear on the right side of the software.
- Click to run the project, the machine will start engraving from the set origin position.
4.2 Engraving and Cutting Examples
The PHECDA is versatile, capable of producing detailed engravings and clean cuts on various materials.

Figure 4: Diverse applications of the laser engraver on different materials.
5. Maintenance
Regular maintenance ensures the longevity and optimal performance of your ELEGOO PHECDA.
5.1 Cooling Fan Cleaning
Keeping the cooling fans clean is essential for proper heat dissipation and preventing overheating of the laser module.
Video 3: Tutorial on cleaning the cooling fans of the ELEGOO PHECDA laser engraver.
Cleaning Steps (20W laser):
- Remove the shading plate in front of the X-axis.
- Loosen the two hand-twist screws that fix the laser assembly, and slide forward to take out the laser assembly.
- Take out the cable from the cable clamp, and then remove the cable port.
- Use a 2.0mm hex wrench to loosen the four fixing screws of the fan cover.
- Remove the cooling fan assembly.
- Use a brush to clean the dust on the cooling fan blades.
- Align the screw holes, and place the cooling fan assembly in the installation position.
- Use a 2.0mm hex wrench to tighten the four fixing screws of the fan cover.
- Clean the right cooling fan in the same way.
- After cleaning the cooling fans on both sides, insert the laser cable into the port, and snap the cable into the cable clamp.
- Slide the laser assembly into the laser base.
- Tighten the two hand-twist screws that secure the laser assembly.
- Install the shading plate in front of the X-axis.
5.2 Timing Belt Adjustment
Proper tension of the timing belts is crucial for accurate and consistent engraving and cutting results.
Video 4: Instructions for adjusting the timing belt on the ELEGOO PHECDA.
Adjustment Steps (X-axis timing belt):
- Remove the shading plate in front of the X-axis.
- Check if the X-axis belt is too loose.
- Use a 2.0mm hex wrench to loosen the two fixing screws on the drive wheel assembly behind the X-axis. (Loosen but do not remove the screws).
- Press the X-axis left synchronous wheel assembly to the left, so that the X-axis belt is in a tight state, while using a 2.0mm hex wrench to tighten the fixing screws of the drive wheel assembly.
- Press the X-axis belt to ensure it is not too loose or too tight, and the laser head can slide normally.
- Install the shading plate in front of the X-axis.
Adjustment Steps (Y-axis timing belt):
- Check if the Y-axis belt is too loose.
- Use a 2.0mm hex wrench to loosen the two fixing screws on the left drive wheel assembly of the Y-axis. (Loosen but do not remove the screws).
- Press the Y-axis drive wheel assembly to the right, so that the Y-axis belt is in a tight state, while using a 2.0mm hex wrench to tighten the fixing screws of the drive wheel assembly.
- Press the Y-axis belt to ensure it is not too loose or too tight, and can slide normally.
- Adjust the timing belt on the other side of the Y-axis in the same way.
5.3 X-axis Timing Belt Replacement
If the X-axis timing belt is damaged or worn, it may need to be replaced.
Video 5: Detailed steps for replacing the X-axis timing belt on the ELEGOO PHECDA.
Removal Steps:
- Remove the shading plate in front of the X-axis.
- Use a 2.0mm hex wrench to loosen the two fixing screws on the drive wheel assembly behind the X-axis. (Loosen but do not remove the screws).
- Remove the front end of the timing belt on the left side of the X-axis. (Press the front end of the belt down to remove it easily).
- Pull out the timing belt from the left drive wheel assembly.
- Remove the front end of the timing belt on the right side of the X-axis, and take out the complete timing belt.
Installation Steps:
- Take out the new X-axis timing belt, fold the front end, and put it on the timing wheel of the X-axis motor.
- Hang the front end of the X-axis timing belt upwards into the belt fixing groove on the right side.
- Pass the X-axis timing belt from the middle of the bottom of the laser head base (between the two rows of wheels).
- Hang the front end of the X-axis timing belt upwards into the belt fixing groove on the left.
- Press the X-axis left synchronous wheel assembly to the left, so that the X-axis belt is in a tight state, while using a 2.0mm hex wrench to tighten the fixing screws of the drive wheel assembly.
- Press the X-axis belt to ensure it is not too loose or too tight, and the laser head can slide normally.
- Install the shading plate in front of the X-axis.
6. Troubleshooting
This section provides solutions for common issues you might encounter with your ELEGOO PHECDA.
6.1 Touch Screen Replacement
If your touch screen is unresponsive or damaged, follow these steps for replacement.
Video 6: Step-by-step guide to replacing the touch screen on the ELEGOO PHECDA.
Replacement Steps:
- Lay the machine along its side and remove the cable from the touch screen port.
- Tear off the tape around the touch screen. (Do not discard the torn tape, you can continue to use it later).
- Press outward around the touch screen and take out the touch screen.
- Install the new touch screen from the outside of the machine, paying attention to the installation direction of the touch screen: the direction of the touch screen port, towards the direction of the right cable port.
- In addition, the blank double-sided tape area on both sides of the touch screen corresponds to the groove position of the touch screen.
- Tear off the protective film on the surface of the double-sided tape.
- Align the touch screen groove, place the touch screen to the installation position, and press around the touch screen to ensure that the double-sided tape fully fits the machine.
- Lay the machine sideways, and stick tape around the inside of the touch screen to fix the edge of the screen (you can use the tape torn from the old screen).
- Insert the cable into the touch screen port.
- Connect the machine's power cord and turn on the power.
- Check that the touch screen function is normal and you can use the machine normally.
6.2 Motherboard Replacement
If you experience issues with the machine's core functions, a motherboard replacement might be necessary.
Video 7: Instructions for replacing the motherboard on the ELEGOO PHECDA.
Replacement Steps:
- Lay down the machine on its side and remove all cables on the motherboard.
- Use a 2.0mm hex wrench to loosen the four screws that fix the motherboard, and remove the motherboard.
- Take out the new motherboard, align it with the screw holes, and place the motherboard in the installation position.
- Use a 2.0mm hex wrench to tighten the four screws that fix the motherboard.
- Insert the corresponding ports in sequence according to the labels on the cable.
6.3 Wifi Antenna Replacement
If you experience connectivity issues, replacing the Wi-Fi antenna might resolve the problem.
Video 8: How to replace the Wifi Antenna on the ELEGOO PHECDA.
Replacement Steps:
- Use an 8mm open-end wrench to loosen the fixing screw of the Wifi antenna and remove the Wifi antenna.
- Use an 8mm open-end wrench to loosen the fixing screws of the Wifi antenna base, and take out the Wi-Fi antenna base.
- Remove the Wi-Fi antenna cable on the motherboard.
- Take out the new Wi-Fi antenna and connect the cable to the motherboard.
- Insert the Wi-Fi antenna base into the mounting hole.
- Use screws to fix the Wifi antenna base, and use an 8mm open-end wrench to tighten the screws slightly.
- Install the Wifi antenna, and use an 8mm open-end wrench to tighten the screws slightly.
7. Specifications
| Feature | Detail |
|---|---|
| Product Dimensions | 26.49 x 25.98 x 7.48 inches |
| Item Model Number | PHECDA |
| Item Weight | 34.5 pounds |
| Manufacturer | ELEGOO |
| Date First Available | August 30, 2023 |
8. Warranty and Support
ELEGOO is committed to providing quality products and excellent customer support. For any technical assistance, troubleshooting, or warranty inquiries, please contact ELEGOO customer service.
ELEGOO has a dedicated team of electrical engineers for support and provides various instruction tutorials in text and video format. Feel free to reach out for further assistance.
You can also refer to the official User Manual (PDF) for additional information.


