TecTake 6x3m Garden Gazebo (B0CDH9CWQJ)
tectake® Garden Gazebo - 6x3m Water- & UV-Protected Pavilion Instruction Manual
Brand: TecTake | Model: 6x3m Garden Gazebo (B0CDH9CWQJ)
1. Introduction
Thank you for choosing the tectake® 6x3m Garden Gazebo. This pavilion is designed to provide versatile outdoor shelter, offering protection from sun and light rain. Its robust steel frame and water-resistant tarpaulin make it an ideal solution for garden parties, BBQs, or as a temporary event shelter. This manual provides essential information for safe assembly, operation, and maintenance of your gazebo.
2. Safety Instructions
- Always assemble the gazebo on a flat, stable surface.
- Ensure all frame connections are securely fastened before use.
- Securely anchor the gazebo using all provided guy ropes and pegs, especially in windy conditions. Failure to do so may result in damage to the gazebo or injury.
- Do not use the gazebo during strong winds, heavy rain, or snow. Disassemble and store the gazebo in adverse weather conditions.
- Keep open flames and heat sources away from the gazebo fabric.
- Regularly check for wear and tear on the frame and fabric. Replace damaged parts immediately.
- Keep children and pets away from the assembly area.
3. Package Contents
Before beginning assembly, verify that all components are present and undamaged. Refer to the image below for a visual representation of the main components.

Figure 3.1: All components included in the tectake 6x3m Garden Gazebo package.
- Steel Frame Components (various poles and connectors)
- Roof Tarpaulin (Water- & UV-Protected)
- 5 Detachable Side Panels with Windows
- Guy Ropes (6 pieces)
- Ground Pegs (12 pieces)
4. Setup and Assembly
The tectake gazebo features a practical plug-in frame system for straightforward assembly. It is recommended that at least two people assemble the gazebo.
- Assemble the Frame: Connect the steel poles using the plug-in system to form the base and roof frame. Ensure all connections click into place securely.
- Attach the Roof Tarpaulin: Carefully drape the roof tarpaulin over the assembled roof frame. Secure it to the frame using the integrated fasteners (e.g., Velcro straps). Ensure the tarpaulin is taut to prevent water pooling.
- Install Side Panels: Attach the five detachable side panels to the frame using the robust fasteners (e.g., Velcro). The large windows on the panels allow for light and visibility.
- Anchor the Gazebo: Firmly anchor each leg of the gazebo to the ground using the provided ground pegs. Additionally, attach and secure the six guy ropes to the frame and peg them into the ground at an angle to provide maximum stability.

Figure 4.1: Detail of the quick and easy plug-in frame assembly system.
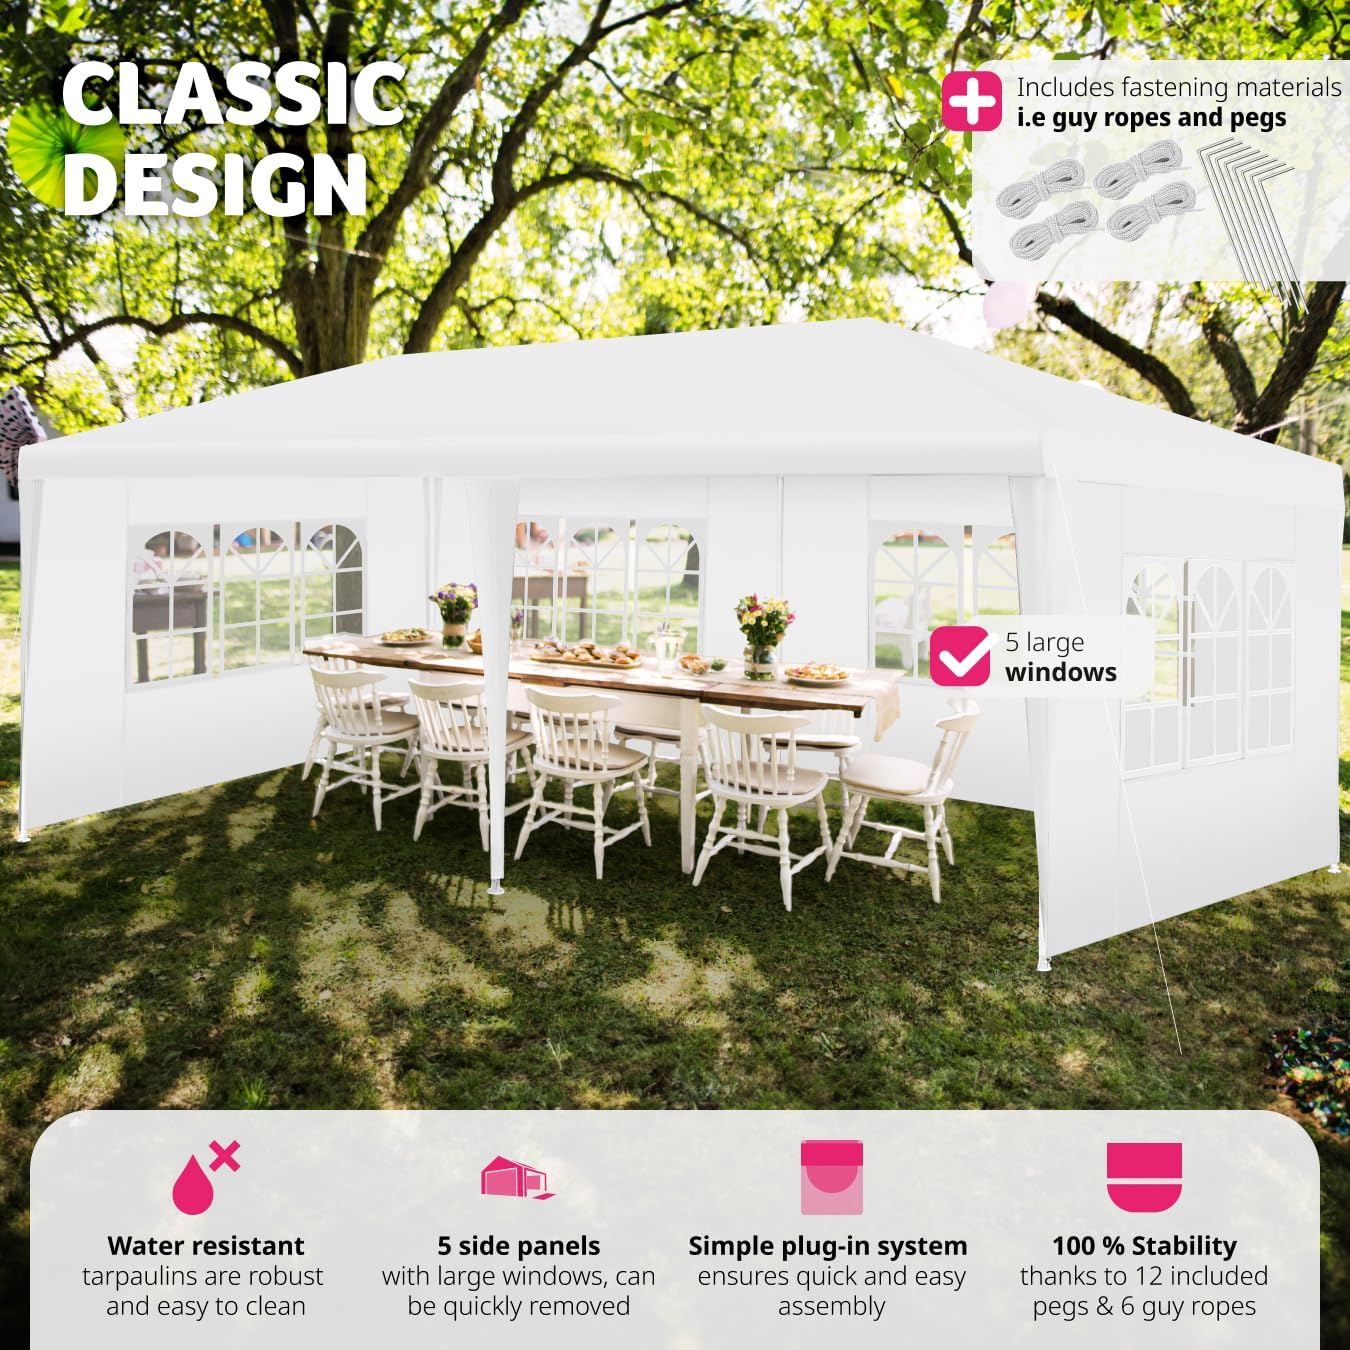
Figure 4.2: The gazebo fully assembled with side panels providing enclosed space.

Figure 4.3: Proper anchoring of the gazebo leg with a ground peg for stability.

Figure 4.4: Guy ropes provide additional stability and should always be used.
5. Operating Instructions
Your tectake gazebo is designed for flexible use:
- Side Panel Configuration: The five side panels can be easily attached or removed as needed. This allows you to customize the gazebo for ventilation, privacy, or protection from elements.
- Weather Protection: The waterproof tarpaulin and UV-protected material offer shelter from sun and light rain. However, it is not designed for extreme weather conditions.
- Event Use: Ideal for garden parties, family gatherings, or temporary market stalls.

Figure 5.1: The gazebo provides a comfortable space for outdoor events.
6. Maintenance
- Cleaning: The tarpaulin and side panels are easy to clean. Use a damp cloth and mild soap to wipe down surfaces. Do not use harsh chemicals or abrasive cleaners.
- Drying: Ensure the tarpaulin and side panels are completely dry before folding and storing to prevent mildew.
- Storage: When not in use, disassemble the gazebo and store all components in a dry, cool place, away from direct sunlight and extreme temperatures.
- Inspection: Periodically inspect the steel frame for rust or damage. Check the fabric for tears or weak spots. Address any issues promptly to prolong the life of your gazebo.
7. Troubleshooting
| Problem | Possible Cause | Solution |
|---|---|---|
| Gazebo feels unstable or wobbly. | Insufficient anchoring; loose frame connections; strong winds. | Ensure all ground pegs are fully inserted and guy ropes are taut. Check all frame connections for tightness. Disassemble in strong winds. |
| Water pooling on the roof. | Tarpaulin not taut enough; improper assembly of roof frame. | Re-adjust the tarpaulin to ensure it is stretched tightly across the frame. Verify roof frame poles are correctly connected and fully extended. |
| Side panels do not fit correctly. | Incorrect panel orientation; frame not fully assembled. | Ensure panels are oriented correctly. Verify the main frame is fully and correctly assembled to its intended dimensions. |
| Difficulty with assembly. | Parts not aligning; attempting assembly alone. | Ensure correct parts are being connected (refer to diagrams). Assembly is easier with two or more people. Do not force connections. |
8. Specifications
| Feature | Detail |
|---|---|
| Product Dimensions (L x W x H) | 600 x 300 x 250 cm (6L x 3W x 2.5H metres) |
| Item Weight | 12 Kilograms |
| Material (Frame) | Alloy Steel (Powder-coated) |
| Material (Tarpaulin/Panels) | Water-resistant, UV-protected fabric |
| Colour | White |
| Side Panels | 5 detachable panels with windows |
| Assembly System | Practical plug-in frame |
| Anchoring | Includes 6 guy ropes and 12 ground pegs |
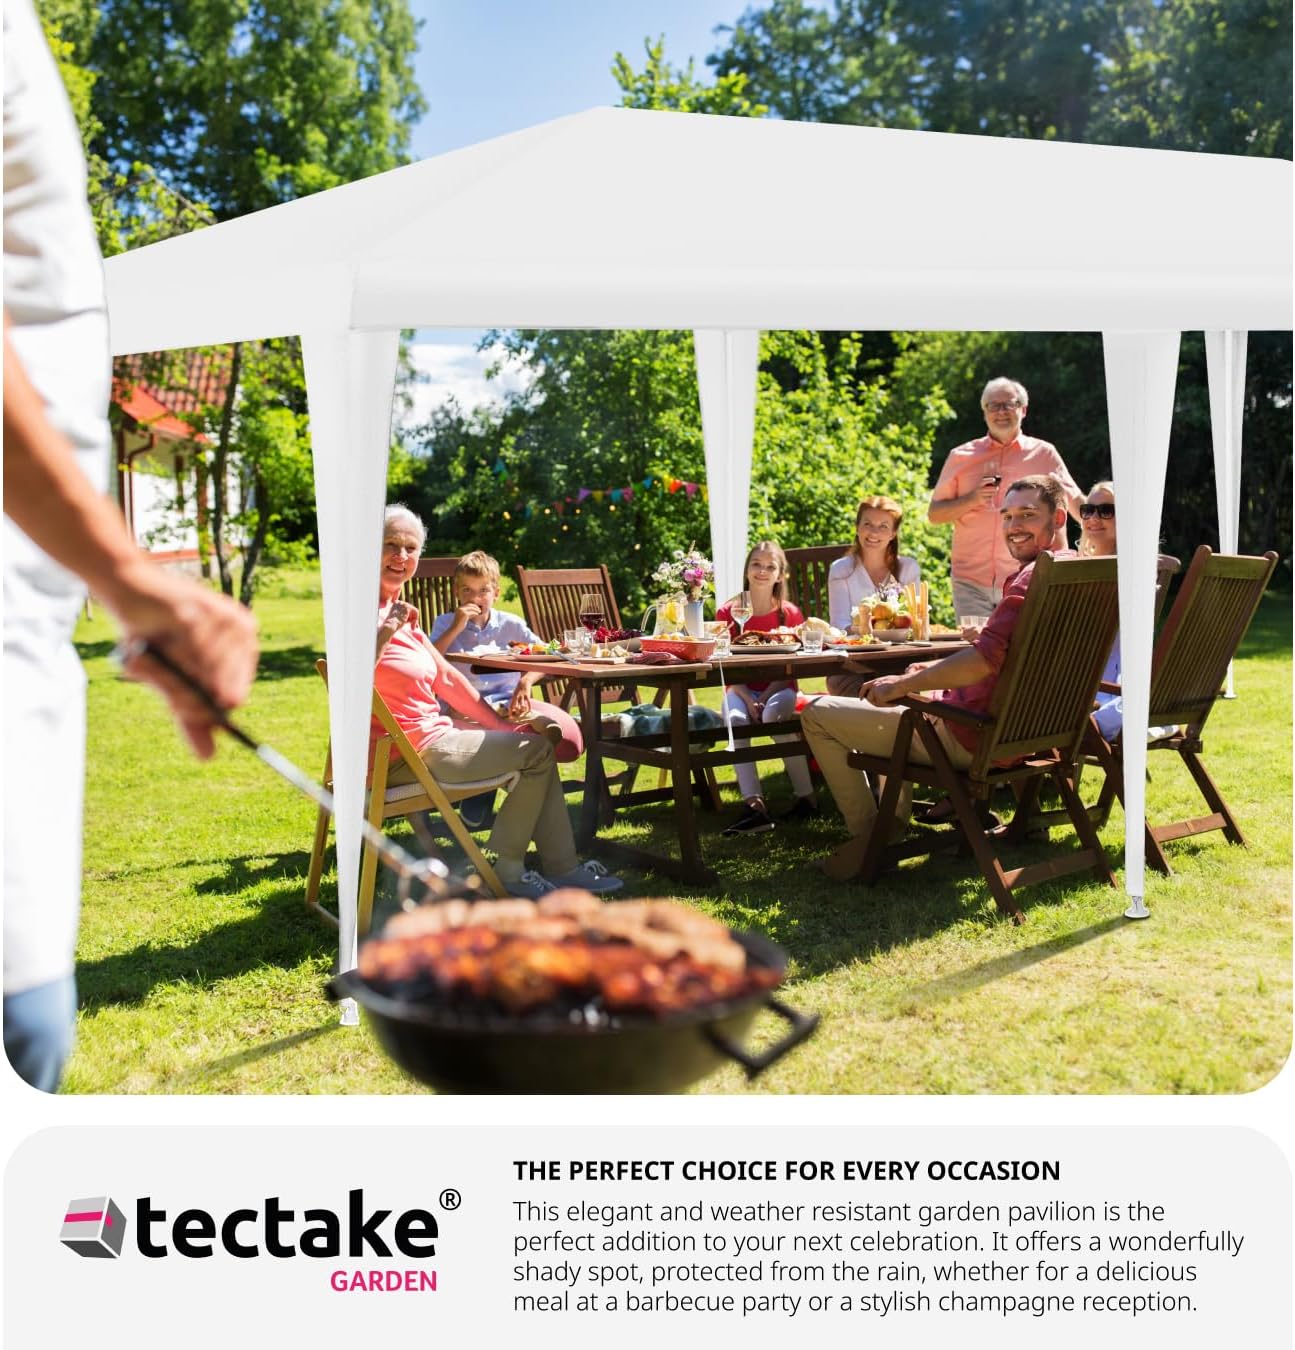
Figure 8.1: Key dimensions of the tectake 6x3m Garden Gazebo.
9. Warranty and Support
Your tectake gazebo is manufactured to high-quality standards. For any issues, missing parts, or concerns regarding your product, please contact the seller or manufacturer directly. Keep your purchase receipt as proof of purchase for any warranty claims. The product typically comes with a standard return policy, allowing for refunds or replacements within 30 days of purchase, subject to seller terms.
For further assistance, please refer to the contact information provided by your retailer or the official TecTake website.
Related Documents - 6x3m Garden Gazebo (B0CDH9CWQJ)
 |
Assembly Instructions for TecTake Gazebo (Models 403265, 403266, 403267) Comprehensive assembly and safety instructions for TecTake gazebo models 403265, 403266, and 403267. Includes parts list, step-by-step assembly guide, and maintenance tips. |
 |
Tectake Polycarbonate Sheets Instruction Manual - Model N251117086-V2 Comprehensive instruction manual for Tectake polycarbonate sheets (models 405928, 405929, 406250, 406251). Includes assembly warnings, production features, specifications, cleaning, storage, and contact information. |
 |
Double Side Awning Instruction Manual Assembly and operation instructions for Tectake double side awnings (Models 406597-406605). Includes parts list, installation steps for masonry and wood, and contact information. |
 |
Navodila za Sestavo Rastlinjaka GREEN HOUSE: Varnost, Namestitev in Vzdrževanje Celovita navodila za sestavo in uporabo rastlinjaka GREEN HOUSE. Vključuje pomembna varnostna opozorila, seznam delov, korake sestavljanja, navodila za obtežitev in vzdrževanje za zagotovitev dolgotrajne uporabe. |
 |
SHOWTEC Lighting Equipment Catalog This document presents a comprehensive catalog of SHOWTEC lighting products, detailing a wide array of stage, entertainment, and architectural lighting solutions designed for professional and enthusiast use. |
Ask a question about this manual
Ask about setup, troubleshooting, compatibility, parts, safety, or missing instructions. Manuals+ will review the question and use this page’s manual context to help answer it.