Introduction
Welcome to the user manual for your Topski 8010Z Vibrating Alarm Clock. This device is designed to provide reliable wake-up assistance, especially for heavy sleepers, individuals with hearing impairment, and seniors. It features a powerful bed shaker, a loud alarm, a large LED display, and a customizable night light. Please read this manual carefully to ensure proper setup, operation, and maintenance of your alarm clock.
Product Overview
Components
- Alarm Clock Unit
- Bed Shaker (wired)
- Power Adapter
Key Features
- Powerful Bed Shaker: Provides strong vibration for effective wake-up.
- Loud Alarm: Up to 100dB adjustable alarm volume.
- Large LED Display: 7-inch display with 2.36-inch tall numbers for easy readability.
- Dimmable Display: Adjustable brightness for the time display.
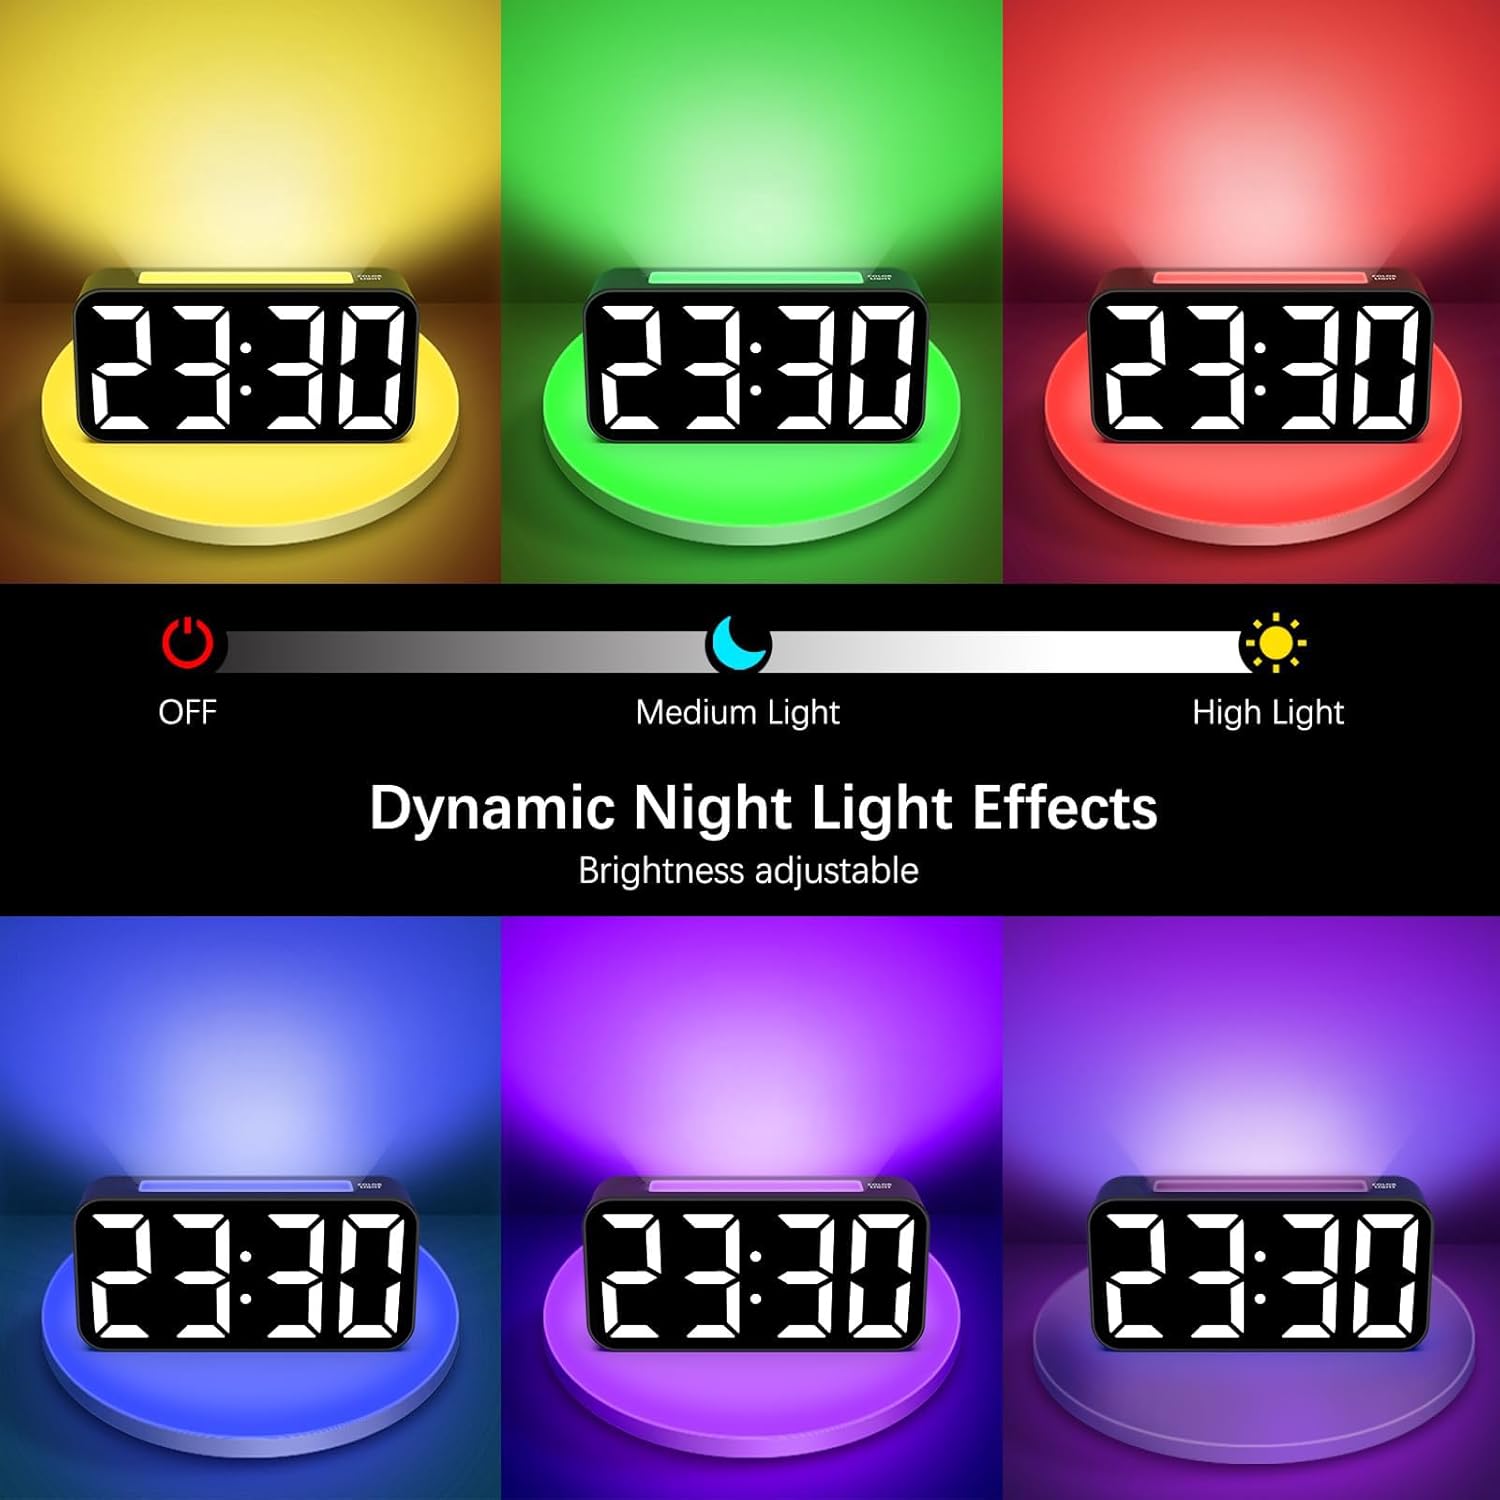
- Dynamic Night Light: Cycle 7-color night light with adjustable brightness.
- Dual Alarms: Set two independent alarms.
- Snooze Function: 9-minute snooze duration.
- Multiple Wake-up Modes: Choose from Ring + Vibration, Vibration Only, or Ring Only.
- 12/24H Format: Switch between 12-hour and 24-hour time display.
- USB Charging Port: Convenient port for charging other devices.
- Battery Backup: Maintains time and alarm settings during power outages (2 AAA batteries not included).
Setup
- Power Connection: Connect the provided power adapter to the DC IN port on the back of the alarm clock and plug it into a standard wall outlet. The display will light up.
- Battery Backup Installation: Open the battery compartment on the bottom of the clock. Insert 2 AAA batteries (not included), ensuring correct polarity (+/-). These batteries will preserve your time and alarm settings in case of a power interruption.
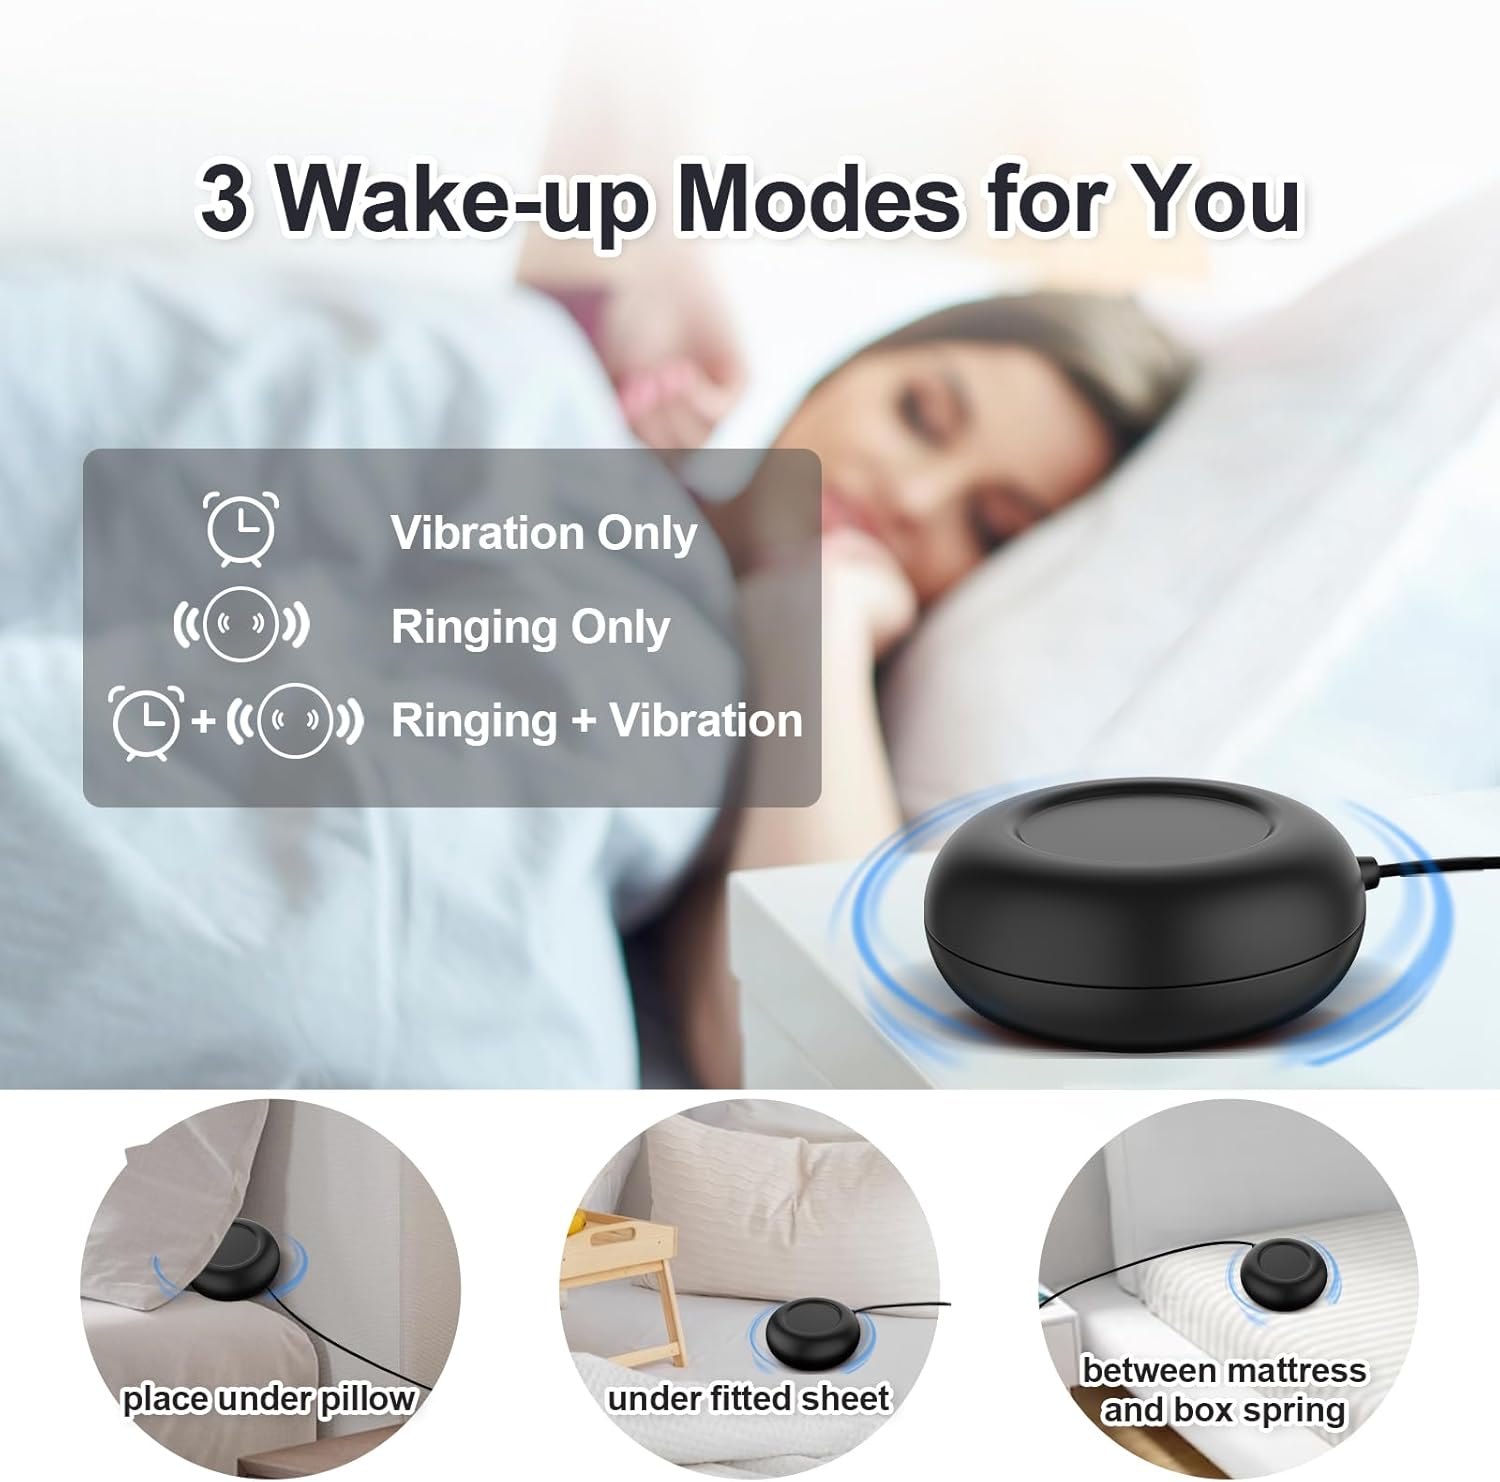
- Connect Bed Shaker: Plug the bed shaker cable into the designated shaker port on the back of the alarm clock. Place the bed shaker under your pillow, under a fitted sheet, or between your mattress and box spring for optimal vibration.

Operating Instructions
1. Time Setting
- Press and hold the 'TIME SET' button (location may vary, typically on the back or top).
- Use the '+' or '-' buttons to adjust the hour. Press 'TIME SET' again to confirm.
- Use the '+' or '-' buttons to adjust the minute. Press 'TIME SET' again to confirm and exit time setting mode.
2. 12/24 Hour Format
- In normal time display mode, press the '12/24H' button (or 'TIME SET' briefly after setting time) to toggle between 12-hour (with AM/PM indicator) and 24-hour formats.

3. Alarm Setting (Alarm 1 & Alarm 2)
- Press and hold the 'ALARM 1' button to set the first alarm. The hour digits will flash.
- Use the '+' or '-' buttons to adjust the hour. Press 'ALARM 1' again to confirm.
- Use the '+' or '-' buttons to adjust the minute. Press 'ALARM 1' again to confirm.
- Repeat the process for 'ALARM 2' using the 'ALARM 2' button.
- To activate/deactivate an alarm, briefly press the 'ALARM 1' or 'ALARM 2' button. An alarm icon will appear/disappear on the display.

4. Alarm Modes
You can choose from three wake-up modes:
- Ring and Vibration: Both the audible alarm and bed shaker activate.
- Vibration Only: Only the bed shaker activates.
- Ring Only: Only the audible alarm activates.
To select the mode, after setting the alarm time, press the 'ALARM MODE' button (or the 'ALARM 1'/'ALARM 2' button repeatedly) until the desired icon appears on the display (e.g., bell icon for ring, vibration icon for shaker, or both).
5. Snooze Function
- When the alarm sounds, press the large 'SNOOZE' button on top of the clock. The alarm will pause for 9 minutes and then sound again.
- To cancel the snooze and turn off the alarm for the day, press any other button (e.g., 'ALARM 1' or 'ALARM 2' button).

6. Display Brightness
- In normal time display mode, press the 'DIMMER' button (or a dedicated brightness button) to cycle through different brightness levels for the LED time display. You can also turn it off completely.
7. Night Light
- Press the 'LIGHT' button (or 'RGB' button) to turn on the night light.
- Press the 'LIGHT' button repeatedly to cycle through the 7 available colors.
- To adjust the night light brightness, press and hold the 'LIGHT' button and use the '+' or '-' buttons, or cycle through brightness levels with short presses.
- Press and hold the 'LIGHT' button again to turn off the night light.

8. Alarm Volume Adjustment
- During alarm setting or when the alarm is sounding, use the 'VOL' button or '+' / '-' buttons to adjust the audible alarm volume. The volume ranges from 85dB to 100dB.

9. USB Charging Port
- The USB port on the side of the clock can be used to charge compatible electronic devices (e.g., smartphones, tablets). Connect your device's charging cable to this port.
Maintenance
- Cleaning: Wipe the clock surface with a soft, dry cloth. Do not use abrasive cleaners or solvents.
- Battery Replacement: Replace the AAA backup batteries annually or if the clock loses time during a power outage.
- Storage: If storing the clock for an extended period, remove the backup batteries to prevent leakage.
Troubleshooting
| Problem | Possible Cause | Solution |
|---|---|---|
| Clock display is blank. | No power or power outage. | Ensure power adapter is securely plugged in. Check wall outlet. If power outage, check backup batteries. |
| Alarm does not sound/vibrate. | Alarm not activated or incorrect mode. | Verify alarm icon is displayed. Check alarm mode settings (Ring Only, Vibration Only, or Both). Ensure shaker is connected. |
| Time/alarm settings lost after power outage. | Backup batteries are dead or not installed. | Install 2 new AAA batteries or replace existing ones. |
| Buttons are unresponsive. | Temporary software glitch. | Unplug the power adapter, remove backup batteries, wait 1 minute, then reconnect power. |
Specifications
- Model Number: 8010Z
- Brand: Topski
- Colour: Black
- Product Dimensions: 16.69 x 3.81 x 8.1 cm
- Item Weight: 349 g
- Material: Plastic
- Display Type: Digital LED
- Special Features: Adjustable Brightness, Adjustable Volume, Large Display, Loud Alarm, Snooze, Vibrating Alarm, Night Light, USB Charging Port, Battery Backup

Warranty and Support
For warranty information or technical support, please refer to the product packaging or contact Topski customer service directly. Contact details are typically available on the manufacturer's website or included in the product documentation.