Introduction
Thank you for purchasing the Gochanmi Master8 8-Channel Audio Mixer. This manual provides detailed instructions for the proper setup, operation, and maintenance of your device. Please read this manual thoroughly before use to ensure optimal performance and to prevent damage.
Setup
1. Unpacking
Carefully remove all components from the packaging. Verify that all items listed in the packing contents are present and undamaged. Retain the packaging for future transport or storage.
2. Power Connection
Connect the provided power adapter to the mixer's power input on the rear panel. Plug the adapter into a suitable electrical outlet (110-220V, 50/60Hz). Ensure the power switch is in the 'OFF' position before connecting.

Image: Rear panel of the Gochanmi Master8 mixer. This image displays the power input, power switch, and various audio input/output ports on the back of the unit.
3. Input Connections
The Master8 mixer features 8 microphone inputs (XLR dual-purpose interfaces) and 8 mono line inputs. Connect your microphones, instruments, or other audio sources to the appropriate input channels.
- Microphone Inputs: Use XLR cables for microphones.
- Line Inputs: Use 6.35mm (1/4-inch) mono cables for line-level devices.
4. Output Connections
The mixer provides multiple output options for connecting to amplifiers, speakers, headphones, and recording devices.
- Auxiliary Outputs: 2 sets for sending signals to external effects processors or monitor systems.
- Group Outputs: 2 groups for sub-mixing and routing.
- Stereo Monitor Output: 1 set for main monitoring.
- Headphone Monitor Output: 1 set for personal monitoring.
- Subwoofer Output: 1 set for connecting a subwoofer.

Image: Connection demonstration for the Gochanmi Master8 mixer. This diagram illustrates how to connect various devices such as wireless microphones, guitars, amplifiers, speakers, computers, mobile phones, and headphones to the mixer.
Operating Instructions
1. Powering On/Off
After all connections are made, switch the power button on the rear panel to the 'ON' position. To power off, switch the button to 'OFF'.
2. Channel Gain Adjustment
Each input channel has a gain control knob. Adjust this knob to set the input level for each microphone or line source. The dual-row level lights provide visual feedback for signal levels.
3. Equalization (EQ)
Each mono input channel is equipped with a 4-segment equalizer (stereo channels have 3-segment EQ). Use the high, mid, and low frequency knobs to shape the tone of each channel.

Image: EQ controls and high gain preamplifier section. This image highlights the knobs for adjusting high, mid, and low frequencies, along with the gain control for individual channels. It also shows the ultra-low noise discrete microphone preamplifier compatible with 6.35mm and XLR connectors.
4. +48V Phantom Power
Each microphone input interface has an independent +48V phantom power supply. Press the dedicated +48V button for the respective channel to activate it when using condenser microphones.
5. Independent Mute Function
Each channel features an independent mute button. Press this button to silence a channel as needed.
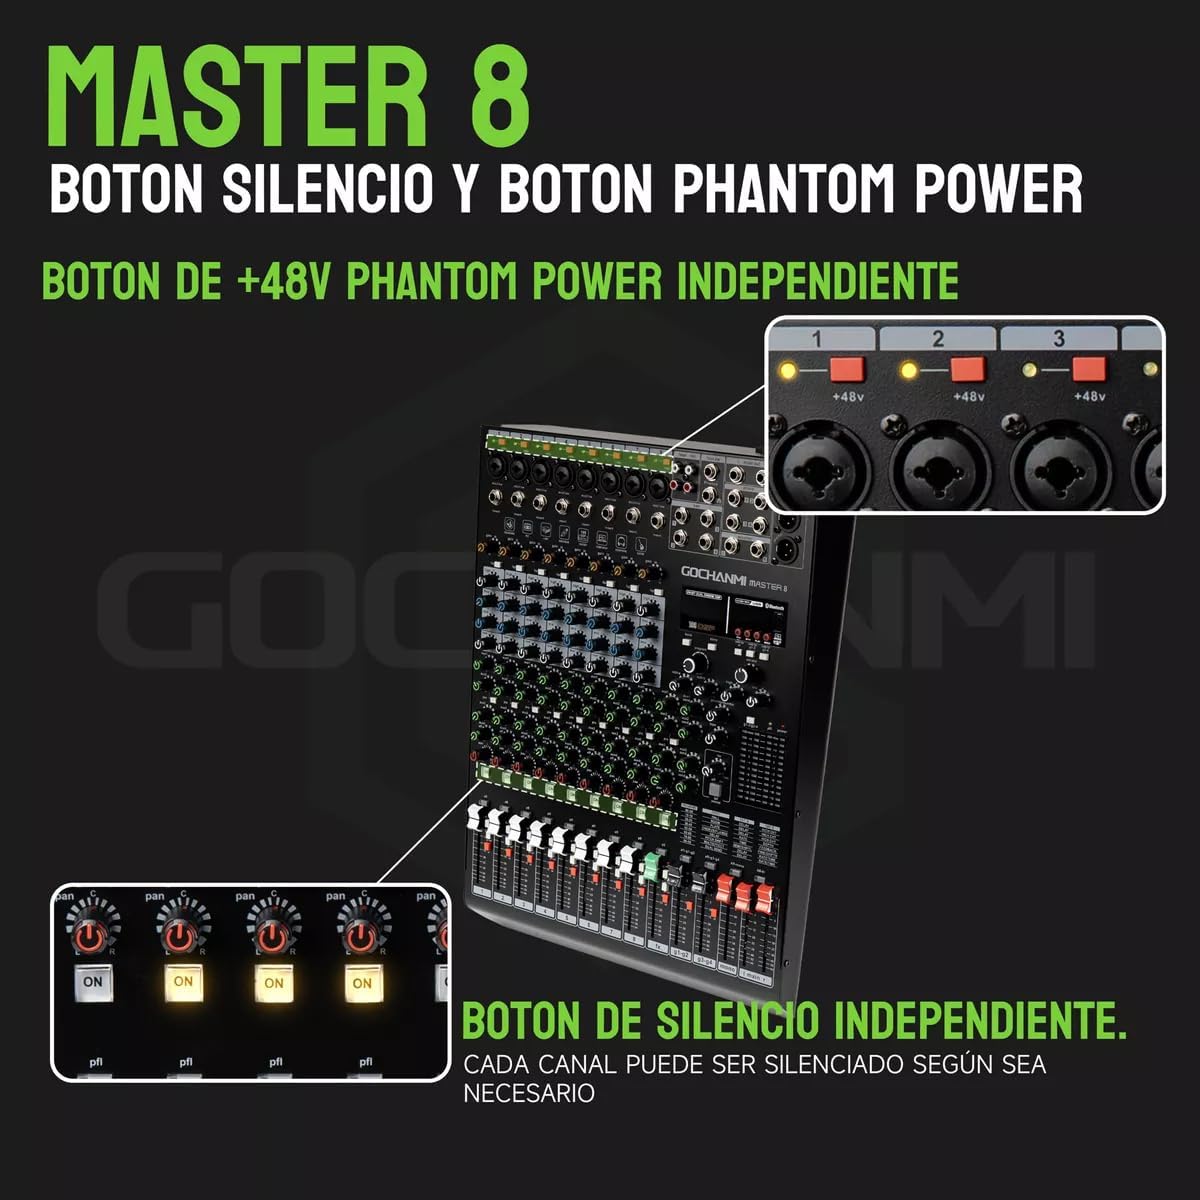
Image: Independent +48V Phantom Power and Mute buttons. This image shows the individual buttons for activating +48V phantom power and muting each channel on the mixer.
6. DSP Effects
The mixer includes a built-in 199-bit DSP effects device. Use the dedicated controls to select and adjust various effects such as reverb, delay, chorus, and more.

Image: DSP effects adjustment. This image displays the digital screen and rotary encoder used to select and modify the 199 built-in DSP effects, including a table of reverb programs.
7. Bluetooth Connectivity
To connect a Bluetooth device:
- After powering on, the display will show 'NO'. Press the 'MODE' button to switch to Bluetooth mode.
- The display will change from 'NO' to 'BLUE', indicating Bluetooth mode is active.
- Search for the mixer on your mobile phone's Bluetooth settings and connect to 'MASTER' to use.

Image: How to connect Bluetooth. This image provides a step-by-step visual guide for pairing a mobile device via Bluetooth with the mixer.
8. USB Functionality
The Master8 mixer offers versatile USB connectivity:
- Connect to a Computer as a Sound Card: Use a dual-head USB cable to connect to a computer for simultaneous power supply and data transfer.
- USB Recording/Playback: Play music from a USB disk or record audio directly to a USB disk.
- External Hard Drive Connection: Play stored music or record audio to an external hard drive.

Image: Multifunctional USB connection. This diagram shows how the mixer can connect to a computer as a sound card, to a mobile phone via Bluetooth, and to an external USB drive for playback or recording.
Maintenance
1. Cleaning
Wipe the mixer's surface with a soft, dry cloth. Do not use liquid cleaners or solvents, as they may damage the finish or internal components.
2. Storage
When not in use for extended periods, store the mixer in a cool, dry place, away from direct sunlight and extreme temperatures. It is recommended to use the original packaging for storage.
Troubleshooting
- No Power: Ensure the power adapter is securely connected to both the mixer and a working electrical outlet. Check the power switch position.
- No Sound Output: Verify all input and output cables are correctly connected. Check channel gain levels, master volume, and individual channel faders. Ensure any connected amplifiers or speakers are powered on and functioning.
- Distorted Sound: Reduce input gain levels to prevent clipping. Check cable integrity. Ensure connected devices are sending appropriate signal levels.
- Bluetooth Connection Issues: Ensure the mixer is in Bluetooth mode ('BLUE' displayed). Check that your mobile device's Bluetooth is enabled and within range. Try restarting both devices.
- DSP Effects Not Working: Ensure the DSP effects are enabled and the effect parameters are adjusted correctly.
Specifications
| Microphone Input | 8 channels (8 dual-purpose XLR interfaces) |
| Line Input | 8 channels mono single-plug |
| Output Channels | 2 Aux outputs, 2 Group outputs, 1 Stereo monitor output, 1 Headphone monitor output, 1 Subwoofer output |
| Effects Device | 199-bit DSP effects device |
| Phantom Power | Independent +48V for each microphone input |
| Frequency Response | 20Hz-20kHz, ±3dB |
| Distortion | <0.003% (A-weighted) |
| Microphone Balanced Input Noise | -119dB (A-weighted) |
| Common Mode Rejection Ratio | 60dB |
| Single Channel Input Gain (MIC) | 0 to 48dB |
| Single Channel Input Gain (LINE) | -33 to +15dB |
| Stereo Channel Input Gain (LINE) | -8 to +6dB |
| Main Mix Crosstalk | -87dBu (A-weighted) |
| Channel Crosstalk | -85dBu (A-weighted) |
| Maximum Output Level | +20dBu |
| MIC Input High-Pass Filter | 75 Hz, 18 dB/oct. |
| Single Channel Equalization (High) | ±15dB@12KHz |
| Single Channel Equalization (Mid) | ±12dB@2.5KHz |
| Single Channel Equalization (Low) | ±15dB@80Hz |
| Power Supply | Built-in switching power adapter 110-220V, 30W |
| Power Consumption | <=23W |
| Connectivity Technology | Bluetooth, USB |
| UPC | 791360188711 |
Warranty and Support
This product comes with a 30-day / 1-month seller warranty from the date of purchase. Please retain your proof of purchase for warranty claims.
For technical support or warranty inquiries, please contact your retailer or the manufacturer directly. Refer to your purchase documentation for specific contact information.