1. Introduction
This manual provides detailed instructions for the setup, operation, and maintenance of your LOFICOPER Digital Alarm Clock. Please read this manual thoroughly before using the product to ensure proper function and longevity.
The LOFICOPER Digital Alarm Clock features a large 6.5-inch LED display, adjustable brightness, dual alarm settings with snooze, a USB charging port, and a time memory function. It is designed for versatile placement on a desktop or wall.
2. Package Contents
Upon unboxing, please verify that all items listed below are present and in good condition:
- LOFICOPER Digital Alarm Clock (Model DS-002)
- USB Power Cable (1 meter)
- Detachable Stand
- User Manual

3. Product Overview
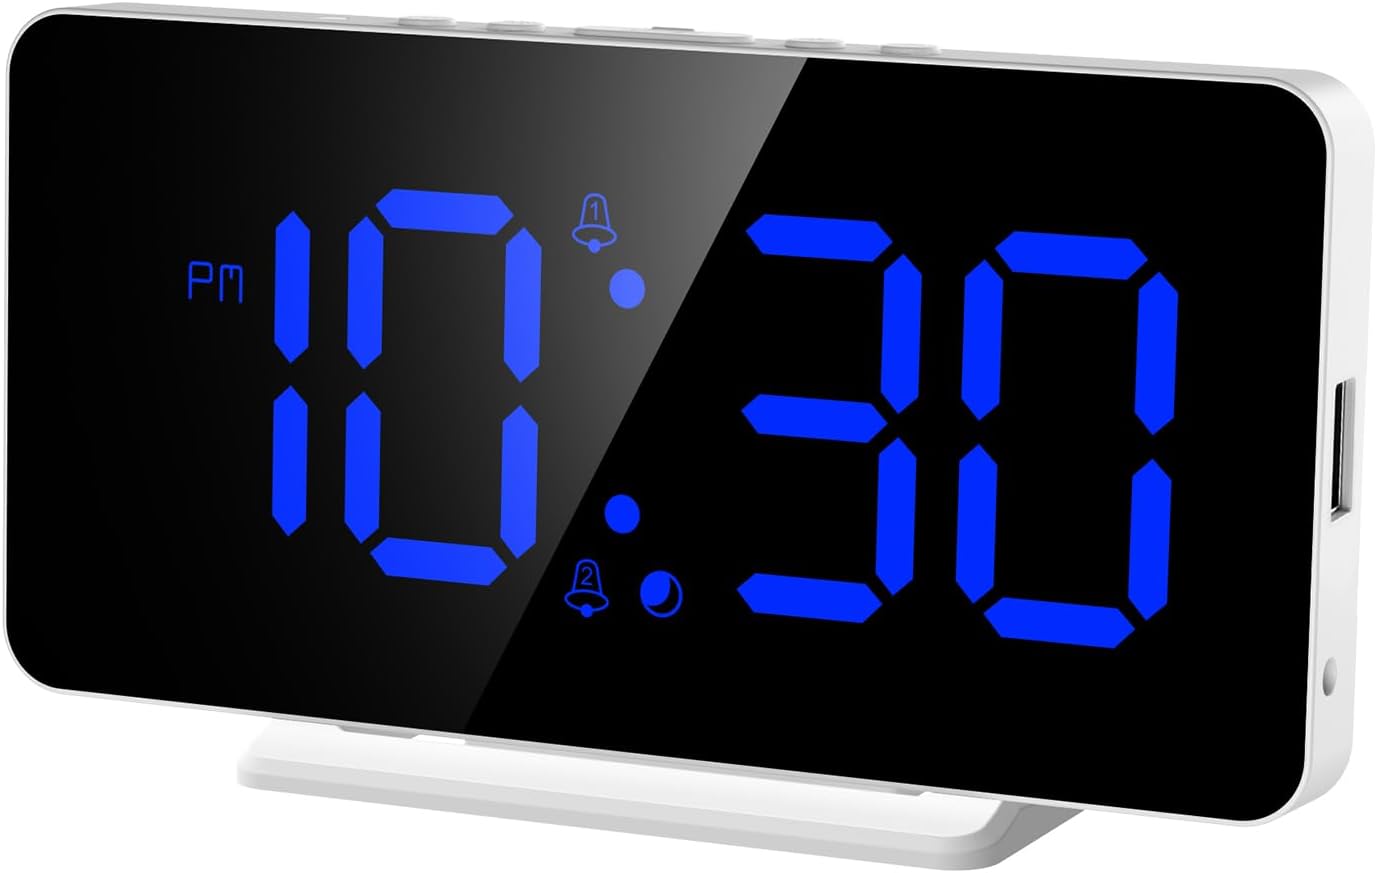
3.1 Front Display
The front of the alarm clock features a large 6.5-inch LED display that shows the time, date, and temperature. Indicators for PM, alarm 1, and alarm 2 are also present.

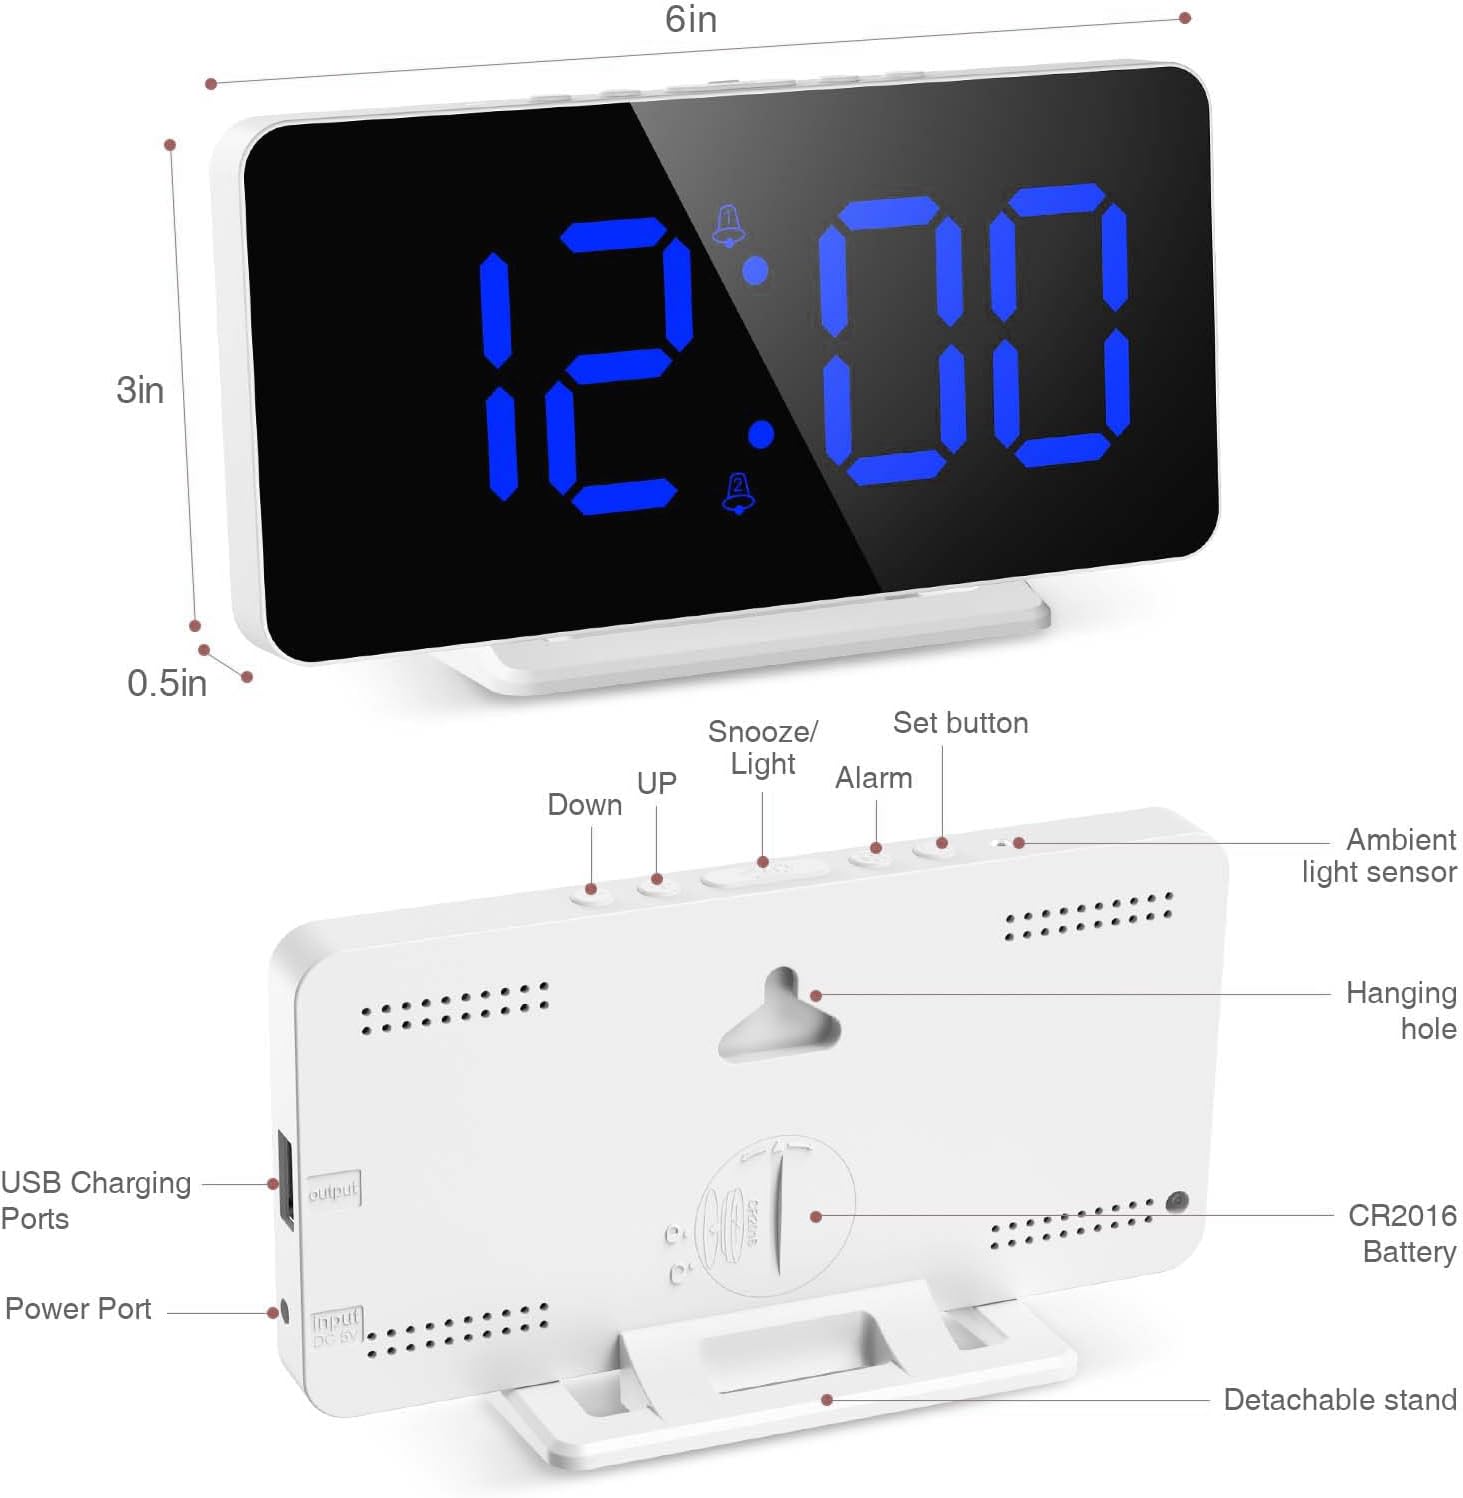
3.2 Buttons and Ports
Familiarize yourself with the buttons and ports located on the top and back of the device:

- Ambient Light Sensor: Detects ambient light for automatic brightness adjustment.
- Set Button: Used to enter and confirm settings (time, date, alarm).
- Alarm Button: Used to set and activate/deactivate alarms.
- Snooze/Light Button: Activates snooze during an alarm; adjusts brightness manually.
- UP Button: Increases values during setting; navigates menus.
- Down Button: Decreases values during setting; navigates menus.
- USB Charging Ports (Output): For charging external electronic devices.
- Power Port (Input): Connects to the USB power cable for main power.
- CR2016 Battery Compartment: Houses the memory battery (pre-installed).
- Hanging Hole: For wall mounting.
4. Setup
4.1 Powering On
- Connect the provided USB power cable to the Power Port on the back of the alarm clock.
- Plug the other end of the USB cable into a standard USB power adapter (not included) or a powered USB port.
- The display will light up, indicating the clock is powered on.
4.2 Memory Battery
The clock comes with a pre-installed CR2016 button cell battery. This battery provides a time memory function, ensuring that your time and alarm settings are retained even if the main power is disconnected. No need to reset the time when power is restored.
4.3 Placement
The LOFICOPER Digital Alarm Clock offers two placement options:
- Desktop: Attach the detachable stand to the bottom of the clock and place it on any flat surface.
- Wall-Mount: Use the hanging hole on the back of the clock to mount it on a wall using a suitable screw (not included).

5. Operating Instructions
5.1 Setting Time (12/24 Hour Format)
- Press and hold the Set button for approximately 3 seconds to enter time setting mode. The hour digits will flash.
- Use the UP or Down buttons to adjust the hour.
- Press the Set button again to confirm the hour and move to minute setting. The minute digits will flash.
- Use the UP or Down buttons to adjust the minutes.
- Press the Set button again to confirm the minutes and move to 12/24 hour format selection.
- Use the UP or Down buttons to select either 12-hour or 24-hour format. In 12-hour format, a 'PM' indicator will appear for afternoon hours.
- Press the Set button one last time to exit time setting mode.
5.2 Setting Date
- From normal time display, press the Set button once to cycle through display modes until the date (Year-Month-Day) is shown.
- Press and hold the Set button for approximately 3 seconds. The year digits will flash.
- Use the UP or Down buttons to adjust the year.
- Press the Set button to confirm the year and move to month setting.
- Adjust the month using UP or Down buttons.
- Press the Set button to confirm the month and move to day setting.
- Adjust the day using UP or Down buttons.
- Press the Set button to exit date setting.
5.3 Setting Alarms (Alarm 1 & Alarm 2)
The clock supports two independent alarms.
- Press the Alarm button once to select Alarm 1 (indicated by a bell icon with '1'). Press again for Alarm 2 (bell icon with '2').
- While the desired alarm is displayed, press and hold the Alarm button for approximately 3 seconds. The hour digits will flash.
- Use the UP or Down buttons to set the desired alarm hour.
- Press the Alarm button to confirm the hour and move to minute setting. The minute digits will flash.
- Use the UP or Down buttons to set the desired alarm minutes.
- Press the Alarm button to confirm the minutes and exit alarm setting mode.
- To activate or deactivate an alarm, press the Alarm button repeatedly until the corresponding bell icon (1 or 2) appears or disappears from the display.
5.4 Snooze Function

- When an alarm sounds, press the Snooze/Light button to activate the snooze function. The alarm will pause and sound again after the set snooze duration.
- The snooze duration can be adjusted from 5 to 60 minutes. To set the snooze duration, while in normal time display, press and hold the Snooze/Light button for 3 seconds. The default snooze time (e.g., '05') will flash. Use the UP or Down buttons to adjust the duration. Press Snooze/Light again to confirm.
- To turn off the alarm completely, press any other button (Set, Alarm, UP, Down) during the alarm or snooze period.
5.5 Adjusting Brightness
The clock offers 3 levels of brightness and an automatic light-sensing mode.

- Manual Adjustment: In normal time display, press the Snooze/Light button repeatedly to cycle through the 3 brightness levels (Bright, Medium, Low).
- Automatic Light-Sensing Mode: The clock can automatically adjust its brightness based on the ambient light. To activate this mode, continue pressing the Snooze/Light button until the display indicates 'AUTO' or a specific icon for automatic mode appears. The ambient light sensor is located on the top of the clock.
5.6 Display Modes (Time, Date, Temperature)
The clock can display time, date, and temperature. There are 3 display modes and two LED display time options.
- Press the Set button briefly to cycle through the display modes: Time only, Time and Date, Time and Temperature.
- The clock also offers two LED display time options, which can be configured in the settings menu (refer to the full manual for advanced display options).
5.7 USB Charging Port Usage
The alarm clock features a built-in USB output port on its side, allowing you to charge other electronic devices.

- Connect your device's charging cable to the USB output port on the alarm clock.
- Ensure the alarm clock is powered on via its main USB input.
- The clock will provide power to charge your connected device.
6. Maintenance
- Cleaning: Use a soft, dry cloth to clean the display and casing. Avoid abrasive cleaners or solvents.
- Power: Always use the provided USB cable for power. Ensure the power source meets the clock's requirements.
- Battery Replacement: The CR2016 memory battery typically lasts for several years. If time settings are frequently lost after power disconnection, the battery may need replacement. To replace, open the battery compartment on the back of the clock and insert a new CR2016 battery, observing polarity.
- Environment: Keep the clock away from extreme temperatures, direct sunlight, and high humidity.
7. Troubleshooting
| Problem | Possible Cause | Solution |
|---|---|---|
| Clock display is off. | No power supply. | Ensure the USB power cable is securely connected to both the clock and a working power source. |
| Alarm does not sound. | Alarm is not activated or set incorrectly. | Verify that the alarm time is set correctly and the alarm icon (bell 1 or 2) is visible on the display. |
| Time settings are lost after power outage. | CR2016 memory battery is depleted. | Replace the CR2016 button cell battery in the battery compartment. |
| Display is too bright/dim. | Brightness setting is not optimal. | Press the Snooze/Light button to manually adjust brightness or activate automatic light-sensing mode. |
| USB charging port not working. | Clock is not powered or device cable is faulty. | Ensure the alarm clock is receiving main power. Try a different USB cable for your device. |
8. Specifications
| Feature | Detail |
|---|---|
| Model | DS-002 |
| Display Type | Digital LED |
| Display Size | 6.5 inches |
| Brightness Levels | 3 manual levels + Automatic light-sensing |
| Alarms | 2 independent alarms |
| Snooze Duration | Adjustable (5-60 minutes) |
| Power Input | USB (DC 5V) |
| Memory Battery | CR2016 (pre-installed) |
| USB Output Port | Yes, for charging devices |
| Dimensions | 15.24 x 3.81 x 7.62 cm (6 x 1.5 x 3 inches) |
| Weight | 190 g |
| Color | Blue (LED display) |
9. Warranty and Support
LOFICOPER products are designed for reliability and performance. For specific warranty details, please refer to the warranty card included with your purchase or contact LOFICOPER customer support.
If you encounter any issues or have questions regarding your LOFICOPER Digital Alarm Clock, please contact our customer support team through the following channels:
- Email: support@loficoper.com (Example email, replace if actual is known)
- Website: Visit the LOFICOPER Store on Amazon for FAQs and additional product information.
Please have your model number (DS-002) and purchase date ready when contacting support.