1. Introduction
This manual provides detailed instructions for the safe and proper installation and use of your Stellar Mounts Ultra Slim Flat TV Wall Mount. Designed for LCD, Curved, OLED, and Plasma flat-panel TVs ranging from 37" to 102" with a maximum weight capacity of 165 lbs (75 kg), this mount offers a low 1.4-inch profile for a sleek appearance. Please read all instructions carefully before beginning installation.
2. Safety Information
- Weight Capacity: Do not exceed the maximum weight capacity of 165 lbs (75 kg).
- TV Size: Ensure your TV size is within the recommended range of 37" to 102".
- Wall Type: This mount is designed for installation on solid concrete walls or wood studs. Do not install on drywall alone.
- Professional Installation: If you are unsure about the installation process, consult a qualified professional.
- Hardware: Use only the provided hardware. Ensure all screws are securely tightened.
- Children: Keep children away from the installation area.
3. Package Contents
Verify that all components are present before beginning installation:
- Wall Mount Bracket
- Mounting Hardware Kit (various screws, anchors, washers)
- Bubble Level
- Instruction Manual (this document)
4. Product Specifications
| Specification | Detail |
|---|---|
| Brand | Stellar Mounts |
| Model Number | Flat Mount for QN65S90CDFXZA |
| Mounting Type | Wall Mount |
| Movement Type | Fixed |
| Material | Alloy Steel |
| Color | Black |
| Compatible Devices | Monitor, Television |
| TV Size Compatibility | 37" – 102" |
| Max VESA Compatibility | 800x400 mm |
| Weight Capacity | 165 lbs (75 kg) |
| Profile from Wall | 1.4 inches (35.56 mm) |
The mount is designed for versatility, supporting a wide range of TV sizes and VESA patterns.

Image: Illustrates the mount's compatibility with various TV sizes (37"-102") and VESA patterns (Min: 200x200mm, Max: 800x400mm), and its 165 lbs max load capacity.
5. Installation Guide
Follow these three easy steps for secure installation:
Step 1: Attach Wall Plate to Wall
- Determine the desired mounting location on your wall. Use a stud finder to locate wood studs if applicable, or ensure you are mounting on a solid concrete surface.
- Position the wall plate against the wall at the desired height and use the included bubble level to ensure it is perfectly horizontal.
- Mark the drilling points through the holes on the wall plate.
- Drill pilot holes at the marked locations. For wood studs, use a smaller drill bit. For concrete, use a masonry drill bit and insert wall anchors.
- Secure the wall plate to the wall using the appropriate screws and washers from the hardware kit. Ensure it is firmly attached.
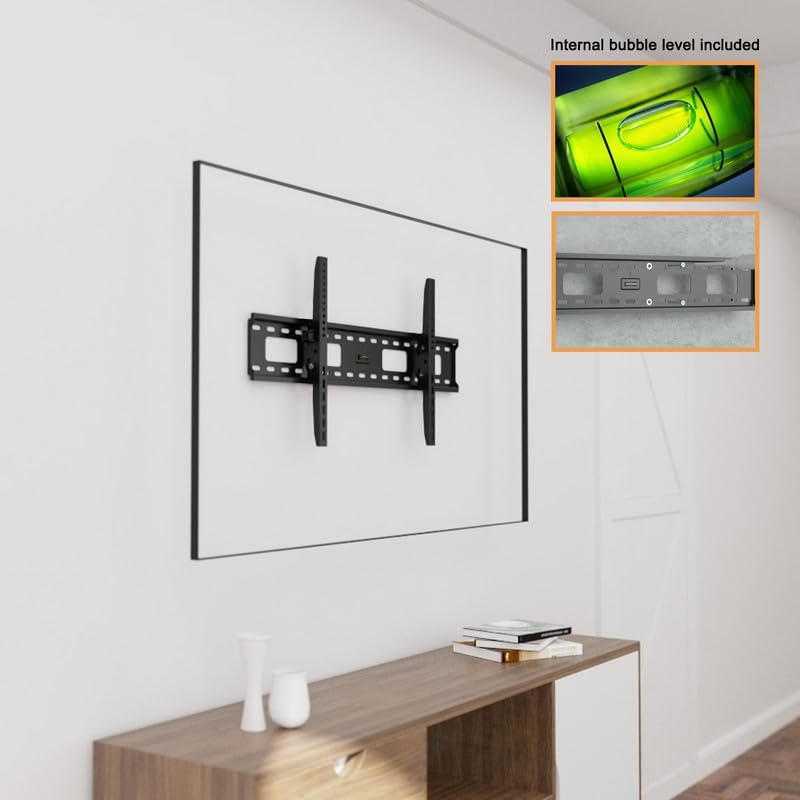
Image: Shows the wall plate with an integrated bubble level, aiding in precise horizontal alignment during installation.
Step 2: Attach Brackets to TV
- Carefully place your TV face down on a soft, clean surface to prevent screen damage.
- Identify the VESA mounting holes on the back of your TV.
- Attach the two vertical TV brackets to the back of your TV using the appropriate screws and spacers from the hardware kit. Ensure the brackets are centered and securely fastened.
- Tighten the screws firmly, but do not overtighten.
Step 3: Attach TV to Wall Plate
- With assistance, carefully lift the TV and align the vertical brackets on the TV with the wall plate.
- Hook the TV brackets onto the top edge of the wall plate.
- Gently lower the TV until the brackets engage securely with the wall plate.
- Locate the safety screws at the bottom of the TV brackets. Tighten these screws to anchor the TV rails to the wall bracket, preventing accidental shifting or movement.
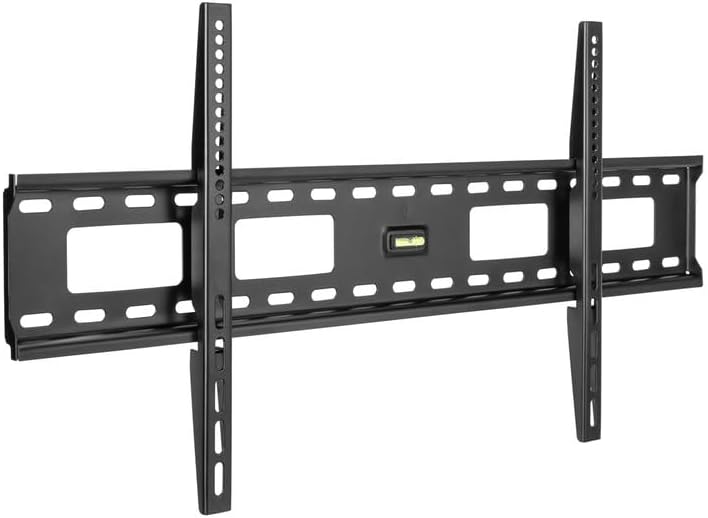
Image: Displays the main components of the Stellar Mounts Ultra Slim Flat TV Wall Mount, including the wall plate and TV brackets.
For a visual guide, please refer to the official installation video:
Video: Official installation guide for Stellar Mounts Heavy Duty Flat Mount. This video demonstrates the step-by-step process of mounting the TV bracket to the wall and attaching the TV.
Once installed, your TV will sit approximately 1.4 inches from the wall, providing an ultra-slim and flush appearance.

Image: Illustrates the ultra-slim design, showing the TV mounted with a minimal 20mm (approximately 0.8 inches) gap from the wall, contributing to a seamless aesthetic.
6. Usage and Adjustments
The sliding bracket design allows for horizontal adjustment of your TV even after installation. This feature helps achieve perfect screen placement and centering on your wall.
Note: This is a fixed flat wall mount. The tilt knob feature, which allows for vertical angle adjustments, is not available on this specific flat model.
7. Maintenance
To ensure the longevity and appearance of your TV wall mount:
- Regularly check all mounting screws and bolts to ensure they remain tight.
- Clean the mount with a soft, dry cloth. Avoid abrasive cleaners or solvents that could damage the finish.
- Do not hang objects from the mount or apply excessive force to the mounted TV.
8. Troubleshooting
If you encounter any issues during or after installation, consider the following:
- TV not level: Recheck the wall plate's level using the bubble level. Minor adjustments can sometimes be made by slightly loosening and re-tightening screws.
- Mount feels unstable: Ensure all screws are fully tightened into the wall studs or anchors. Verify that the wall type is suitable for the mount.
- Difficulty attaching TV to wall plate: Ensure the TV brackets are correctly aligned with the wall plate. Check for any obstructions.
9. Warranty Information
Stellar Mounts products are designed for durability and reliability. For specific warranty terms and conditions, please refer to the product packaging or contact Stellar Mounts customer support. Keep your purchase receipt as proof of purchase.
10. Customer Support
For further assistance, technical support, or inquiries regarding your Stellar Mounts product, please contact our customer service team. Refer to the contact information provided on the product packaging or the official Stellar Mounts website.