1. Important Safety Instructions
Please read all instructions carefully before using this appliance. Keep this manual for future reference.
- Do not use the vacuum cleaner outdoors or on wet surfaces.
- Do not allow children to operate the vacuum cleaner. Close supervision is necessary when used near children.
- Do not pick up flammable or combustible liquids, such as gasoline, or use in areas where they may be present.
- Do not pick up anything that is burning or smoking, such as cigarettes, matches, or hot ashes.
- Do not use without the dust cup and filter in place.
- Turn off the appliance before connecting or disconnecting the battery pack, attachments, or performing any maintenance.
- Use only as described in this manual. Use only manufacturer's recommended attachments.
- If the appliance is not working as it should, has been dropped, damaged, left outdoors, or dropped into water, return it to a service center.
2. Package Contents
Verify that all items are included in your package:
- HiKiNS Cordless Vacuum Cleaner Main Unit
- Extension Wand
- Floor Brush Head with LED Light
- Crevice Tool
- 2-in-1 Brush Tool
- Wall Mount Bracket
- Power Adapter/Charger
- Washable HEPA Filter (2 included, one pre-installed)
- User Manual

Image: All components of the HiKiNS Cordless Stick Vacuum Cleaner, including the main unit, various attachments, and charging cable.
3. Product Overview
The HiKiNS Cordless Stick Vacuum Cleaner is designed for versatile cleaning across various surfaces. It features a powerful motor, multi-layered filtration, and a user-friendly LED display.
3.1 Key Features
- 12Kpa Strong Suction: Efficiently picks up pet hair, crumbs, and debris.
- 160W Powerful Motor: Provides robust cleaning performance.
- Rechargeable Battery: Offers up to 45 minutes of runtime on a single charge.
- LED Display: Shows battery status and suction mode.
- Multi-Layered Filtration: Includes washable HEPA filter for improved air quality.
- Flexible Floor Brush: Features LED lights and 180°/90° rotation for easy maneuverability.

Image: The vacuum cleaner head effectively picking up various types of debris from a floor surface, highlighting its 12000Pa suction power.

Image: An illustration showing the internal components of the vacuum's filtration system, detailing the washable HEPA filter, multi-cyclone separation, stainless steel filter, and the 0.8L dust bin.
4. Setup and Assembly
4.1 Charging the Battery
Before first use, fully charge the vacuum cleaner. The battery can be charged while attached to the main unit or separately.
- Connect the power adapter to the charging port on the main unit or directly to the battery if removable.
- Plug the adapter into a wall outlet.
- The LED display will indicate charging status. A full charge typically takes 4-5 hours.

Image: A close-up of the vacuum's main unit, displaying battery charge level and indicating a charging time of approximately 4-5 hours for up to 40 minutes of runtime.
4.2 Assembling the Vacuum
The vacuum can be assembled in various configurations for different cleaning needs.
- Handheld Configuration: Attach desired cleaning tool (crevice tool or 2-in-1 brush) directly to the main unit.
- Stick Vacuum Configuration:
- Insert the extension wand into the main unit until it clicks securely into place.
- Attach the floor brush head to the other end of the extension wand until it clicks.
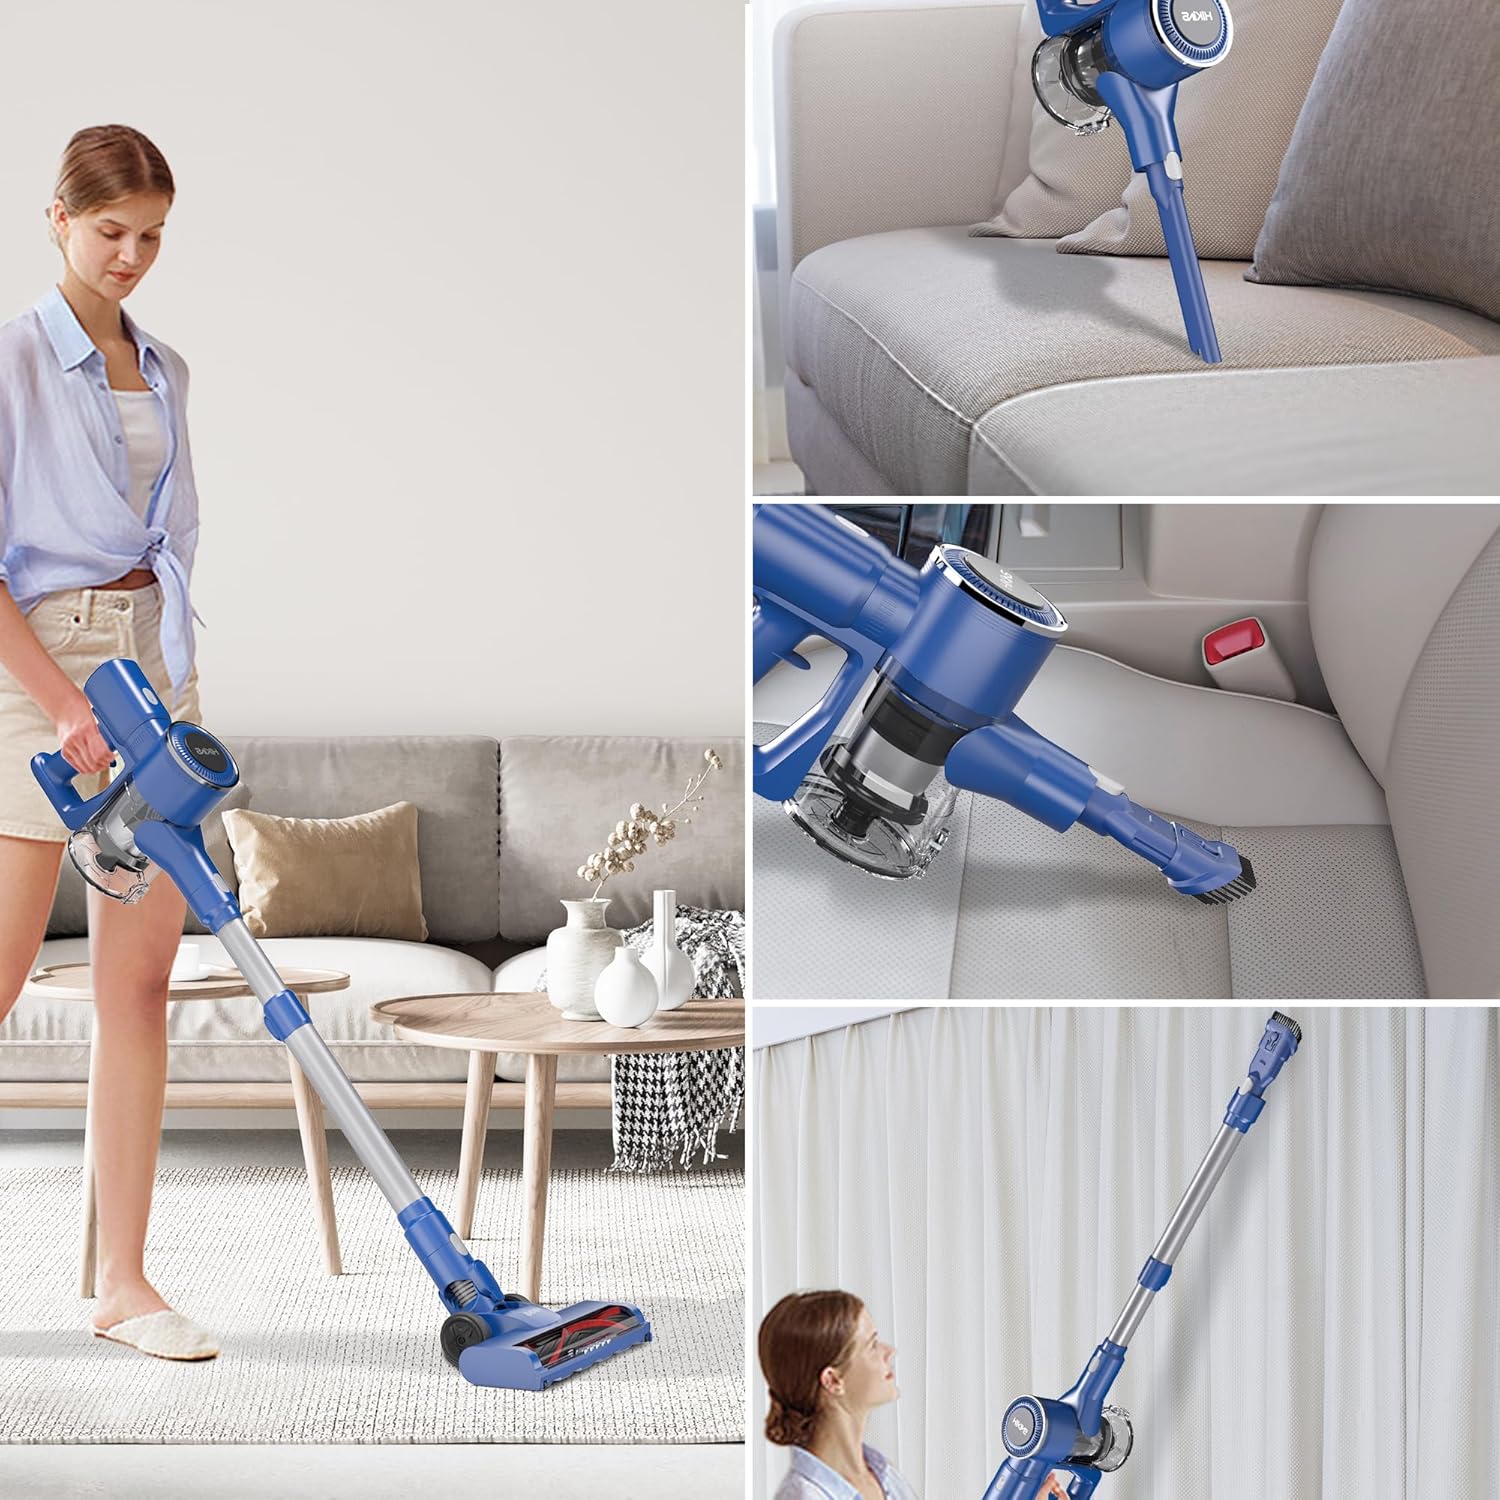
Image: A collage showing the vacuum in different configurations: as a stick vacuum for floors, a handheld vacuum for upholstery, and with an extended wand for high-reach areas like curtains.
5. Operating Instructions
5.1 Powering On/Off and Suction Modes
The vacuum features a smart touchscreen display for easy control.
- Press the ON/OFF button on the handle to power on the vacuum.
- The LED display will show the current battery level and suction mode.
- Press the 'MAX' button on the display to switch between standard and MAX suction modes.
- Press the ON/OFF button again to turn off the vacuum.

Image: A detailed view of the vacuum's smart touchscreen display, indicating the digital power display and the ON/OFF button for operation.
5.2 Using the Floor Brush Head
The flexible floor brush head is ideal for both hard floors and carpets.
- The integrated LED lights illuminate dust and debris in dark areas.
- The brush head can rotate 180 degrees horizontally and 90 degrees vertically for easy navigation around furniture and into tight spaces.

Image: The flexible floor brush head with its integrated LED light, illustrating its ability to rotate 180 degrees horizontally and 90 degrees vertically for enhanced maneuverability.
6. Maintenance
Regular maintenance ensures optimal performance and extends the life of your vacuum cleaner.
6.1 Emptying the Dust Bin
Empty the 0.8L dust bin regularly to maintain suction power.
- Ensure the vacuum is turned off.
- Press the dust bin release button (usually located near the dust bin).
- Carefully remove the dust bin from the main unit.
- Position the dust bin over a trash receptacle and press the bottom release button to open the flap and empty contents.
- Reattach the dust bin to the main unit until it clicks securely.

Image: A hand demonstrating the one-click release mechanism to empty the 0.8L large capacity dust bin into a waste container.
6.2 Cleaning the Filters
The washable HEPA filter should be cleaned regularly (e.g., monthly) and replaced every 3-6 months depending on usage.
- Remove the dust bin as described above.
- Twist and pull out the HEPA filter assembly from the dust bin.
- Tap the filter gently to remove loose dust.
- Rinse the filter under running water until the water runs clear. Do not use detergent.
- Allow the filter to air dry completely for at least 24 hours before re-installing. Ensure it is completely dry to prevent damage to the motor.
- Re-install the dry filter and dust bin.
6.3 Cleaning the Brush Head
Periodically check the floor brush head for tangled hair or debris.
- Turn off and unplug the vacuum.
- Detach the floor brush head from the extension wand.
- Use scissors or a brush to remove any tangled hair or fibers from the brush roll.
- Wipe the brush head with a damp cloth if necessary.
7. Troubleshooting
If you encounter any issues, refer to the following common problems and solutions:
| Problem | Possible Cause | Solution |
|---|---|---|
| Vacuum does not turn on | Battery is not charged or not properly installed. | Ensure battery is fully charged and correctly inserted. |
| Low suction power | Dust bin is full, filter is clogged, or an attachment is blocked. | Empty dust bin, clean/replace filter, check for blockages in attachments/hose. |
| Brush roll not spinning | Hair or debris tangled in brush roll, or brush head is not properly attached. | Clean brush roll, ensure brush head is securely attached. |
| Battery not charging | Power adapter not connected properly or faulty. | Check power adapter connection to vacuum and wall outlet. Try a different outlet. |
8. Specifications
| Feature | Detail |
|---|---|
| Brand | HiKiNS |
| Model Name | Cordless Vacuum Cleaner |
| Item Model Number | 749085052220 |
| Special Feature | Lightweight, Portable |
| Filter Type | Cartridge (Washable HEPA) |
| Included Components | Brush, Crevice Tool, Extension Wand, Floor Brush Head |
| Is Cordless? | Yes |
| Wattage | 160 watts |
| Recommended Uses | Carpet, Hardwood |
| Form Factor | Handheld, Stick |
| Color | Blue |
| Battery Description | Lithium-Ion |
| Noise Level | 70 Decibels |
| Battery Life | Up to 45 minutes |
| Dust Bin Capacity | 0.8 Liters |
| Item Weight | 6 pounds |
| Package Dimensions | 17.24 x 10.87 x 7.72 inches |
9. Warranty and Support
This HiKiNS product comes with a standard manufacturer's warranty. For specific warranty details, please refer to the warranty card included in your package or contact HiKiNS customer support.
If you require technical assistance, have questions about product operation, or need to order replacement parts, please contact HiKiNS customer support through the following channels:
- Website: Visit the official HiKiNS website for FAQs and support contact information.
- Email: Refer to your product packaging or warranty card for customer service email address.
- Phone: Refer to your product packaging or warranty card for customer service phone number.
Please have your model number (749085052220) and purchase date ready when contacting support.