1. Introduction
This manual provides detailed instructions for the installation, operation, and maintenance of your WENMENGDE 10-inch Automatic Rotation Android Car Radio. Please read this manual thoroughly before using the product to ensure proper functionality and to prevent damage.

Figure 1.1: WENMENGDE 10-inch Automatic Rotation Android Car Radio. This image shows the main unit with its 10-inch display, featuring a user interface with various application icons. A rear-view camera module and a microphone are also visible, indicating included accessories.
2. Safety Information
- Professional Installation Recommended: Due to the complexity of car electrical systems, professional installation is highly recommended. Incorrect wiring can cause damage to the unit or the vehicle.
- Power Supply: Ensure the unit is connected to a 12V DC power supply with negative grounding.
- Avoid Distractions: Do not operate the unit or watch videos while driving. Always prioritize road safety.
- Temperature: Avoid exposing the unit to extreme temperatures or direct sunlight for prolonged periods.
- Cleaning: Use a soft, dry cloth for cleaning. Do not use abrasive cleaners or solvents.
- Water Exposure: This unit is not waterproof. Avoid exposure to water or excessive moisture.
3. Package Contents
Verify that all items listed below are included in your package:
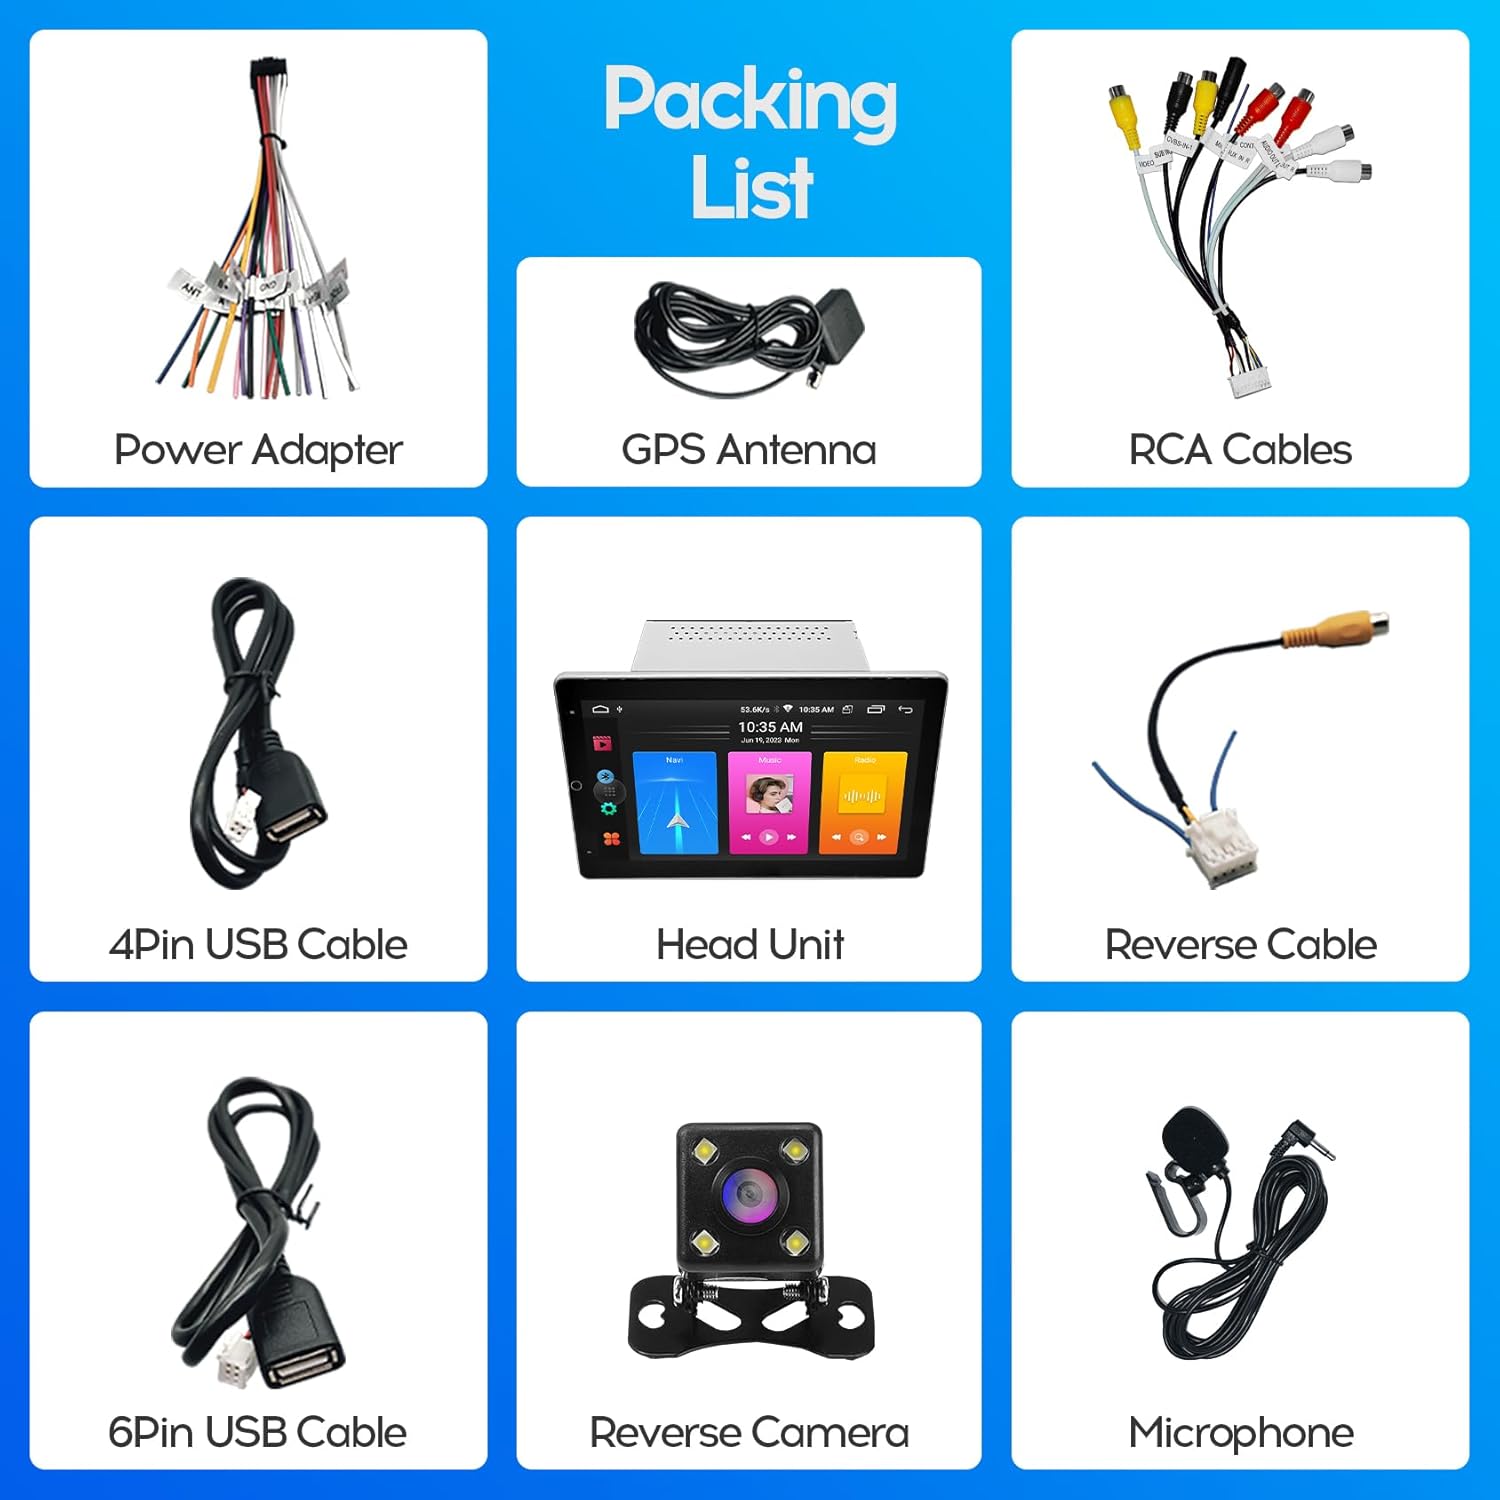
Figure 3.1: Included Accessories. This image displays the complete packing list, including the head unit, power adapter, GPS antenna, RCA cables, 4-pin USB cable, 6-pin USB cable, reverse cable, reverse camera, and microphone.
- WENMENGDE 10-inch Head Unit
- Power Adapter Cable
- GPS Antenna
- RCA Cables
- 4-Pin USB Cable
- 6-Pin USB Cable
- Reverse Cable
- Reverse Camera (Waterproof Night Vision)
- External Microphone
4. Installation Guide
This unit is designed for most general-purpose double DIN (2DIN) car center consoles. Ensure your vehicle has the appropriate installation space (178*100MM) before proceeding.
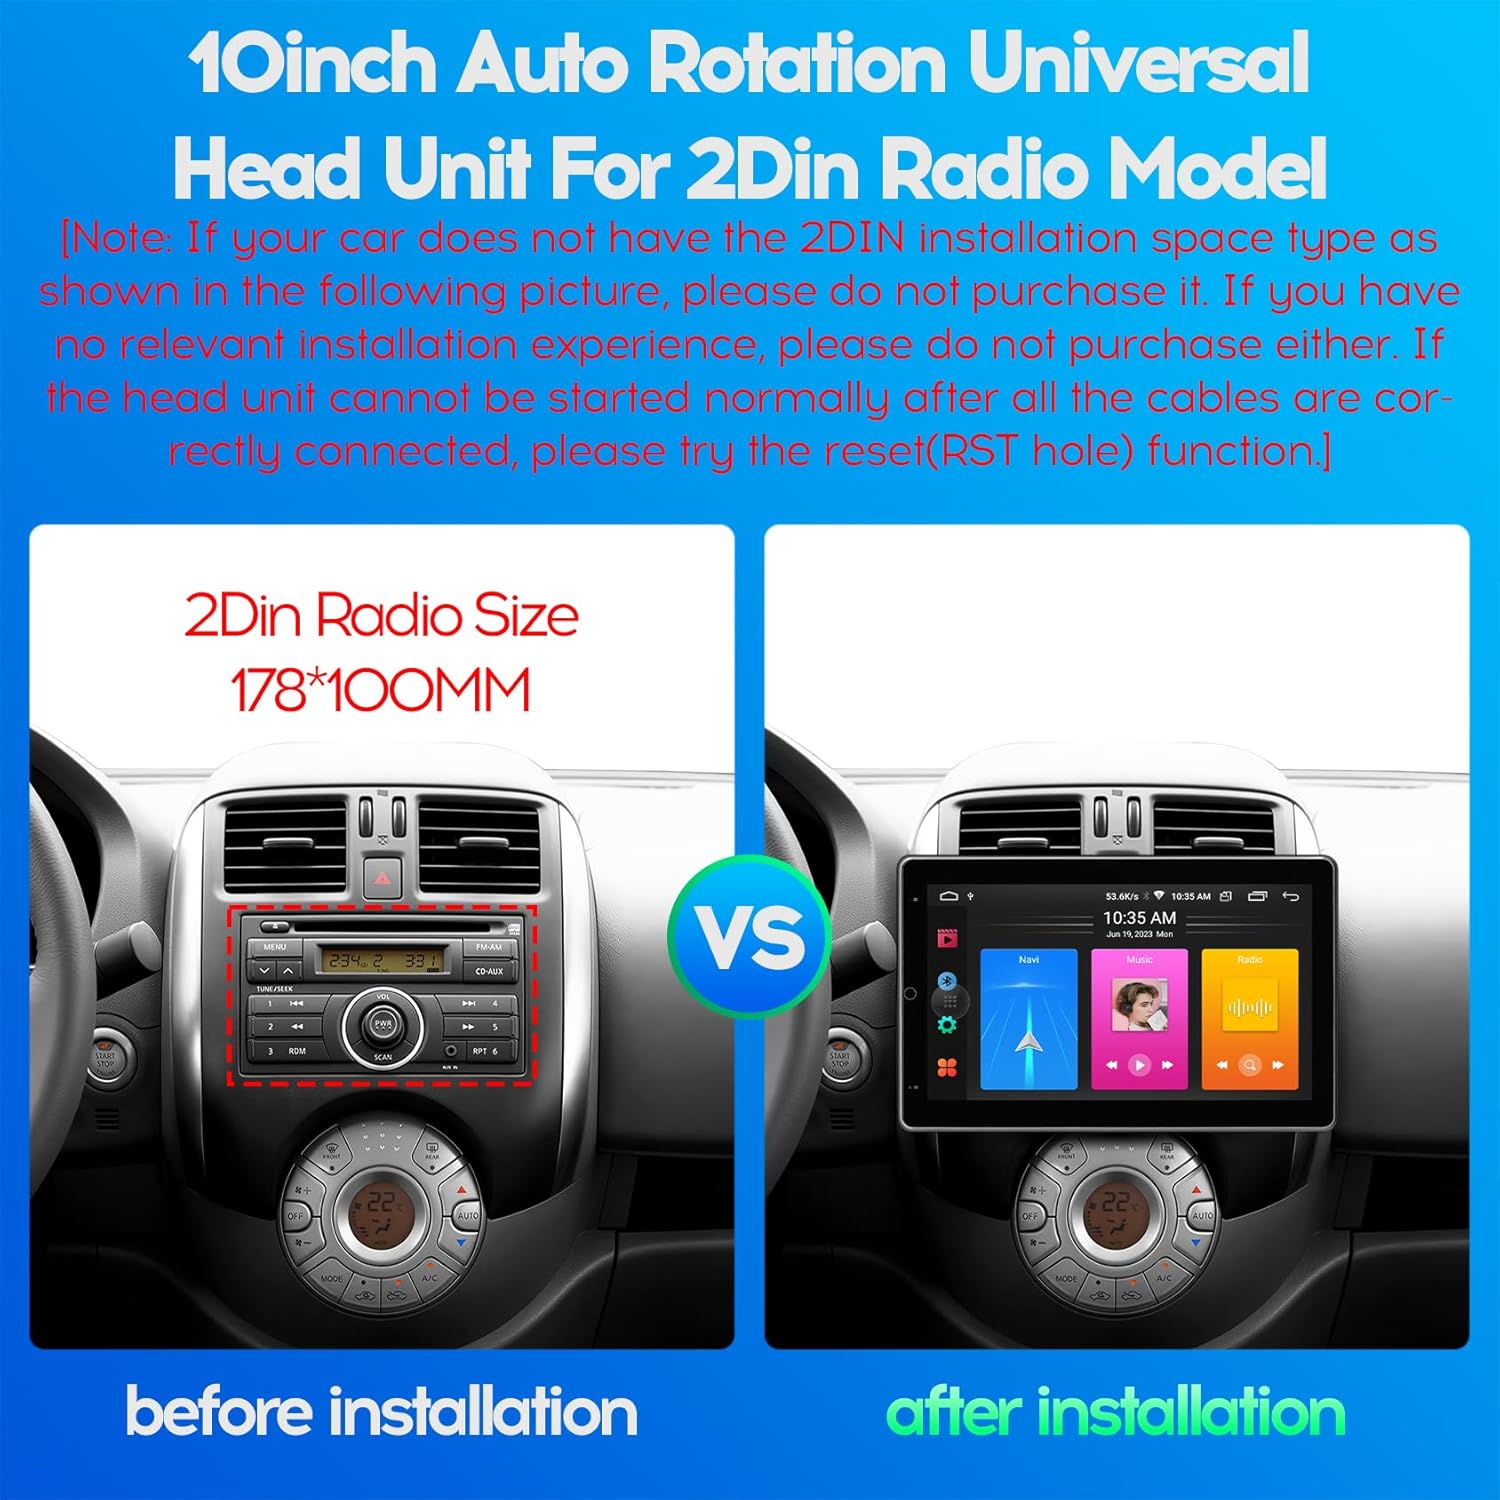
Figure 4.1: 2DIN Radio Size Comparison. This image illustrates the standard 2DIN radio slot dimensions (178x100mm) and how the WENMENGDE 10-inch unit fits into a compatible vehicle dashboard, showing a "before" and "after" installation view.
4.1. Wiring Diagram
Refer to the following diagram for proper wiring connections. Incorrect wiring can lead to malfunction or damage.

Figure 4.2: Head Unit Port Functions and Wiring. This diagram details the various ports on the back of the head unit, including the power adapter, USB cables, RCA cables, reverse video cable, GPS antenna, and WiFi/BT antenna. A close-up of the main power harness shows pin assignments for power, speakers, steering wheel control (SWC), reverse, and antenna.
- Power Connection:
- Yellow (B+): Connect to constant 12V power.
- Red (ACC): Connect to switched 12V power (ignition).
- Black (GND): Connect to vehicle chassis ground.
- Speaker Connections: Connect the speaker wires (FL+, FL-, FR+, FR-, RL+, RL-, RR+, RR-) to your vehicle's corresponding speaker outputs. Ensure correct polarity.
- Steering Wheel Control (SWC): Connect KEY1 and KEY2 wires to your vehicle's steering wheel control wires. Manual learning may be required in the unit's settings.
- Reverse Camera: Connect the reverse camera video input to the unit's "Reverse Video" port and the reverse trigger wire to the vehicle's reverse light signal.
- GPS Antenna: Connect the GPS antenna and place it in a location with a clear view of the sky.
- USB Cables: Connect the provided USB cables for external devices or wired CarPlay/Android Auto.
- Radio Antenna: Connect your vehicle's radio antenna to the unit's radio port.
4.2. Physical Installation
- Carefully remove your existing car radio or blank panel from the dashboard.
- Connect all necessary wiring harnesses to the WENMENGDE head unit according to the wiring diagram.
- Mount the head unit into the 2DIN slot in your dashboard. Ensure it is securely fastened.
- Test all functions (power, audio, radio, camera, etc.) before fully reassembling your dashboard.
- Reassemble the dashboard trim.
Note: If the head unit cannot be started normally after all cables are correctly connected, please try the reset (RST hole) function.
5. Initial Setup
- Power On: Turn on your vehicle's ignition. The unit should power on automatically.
- Language and Time: Navigate to Settings to set your preferred language, time zone, and date.
- Wi-Fi Connection: Go to Settings > Network & Internet > Wi-Fi to connect to an available Wi-Fi network (e.g., your mobile hotspot) for online features and app downloads.
- Steering Wheel Control Learning: If your vehicle has steering wheel controls, go to Settings > Car Settings > Steering Wheel Learning (or similar) to program the buttons.
6. Operating Instructions
6.1. Automatic Screen Rotation
The unit features a 90° automatic rotation function, allowing the display to switch between horizontal and vertical orientations. This adjustment occurs automatically based on the unit's physical orientation.
6.2. CarPlay and Android Auto
The unit supports both Apple CarPlay and Android Auto, offering wireless and wired connectivity.
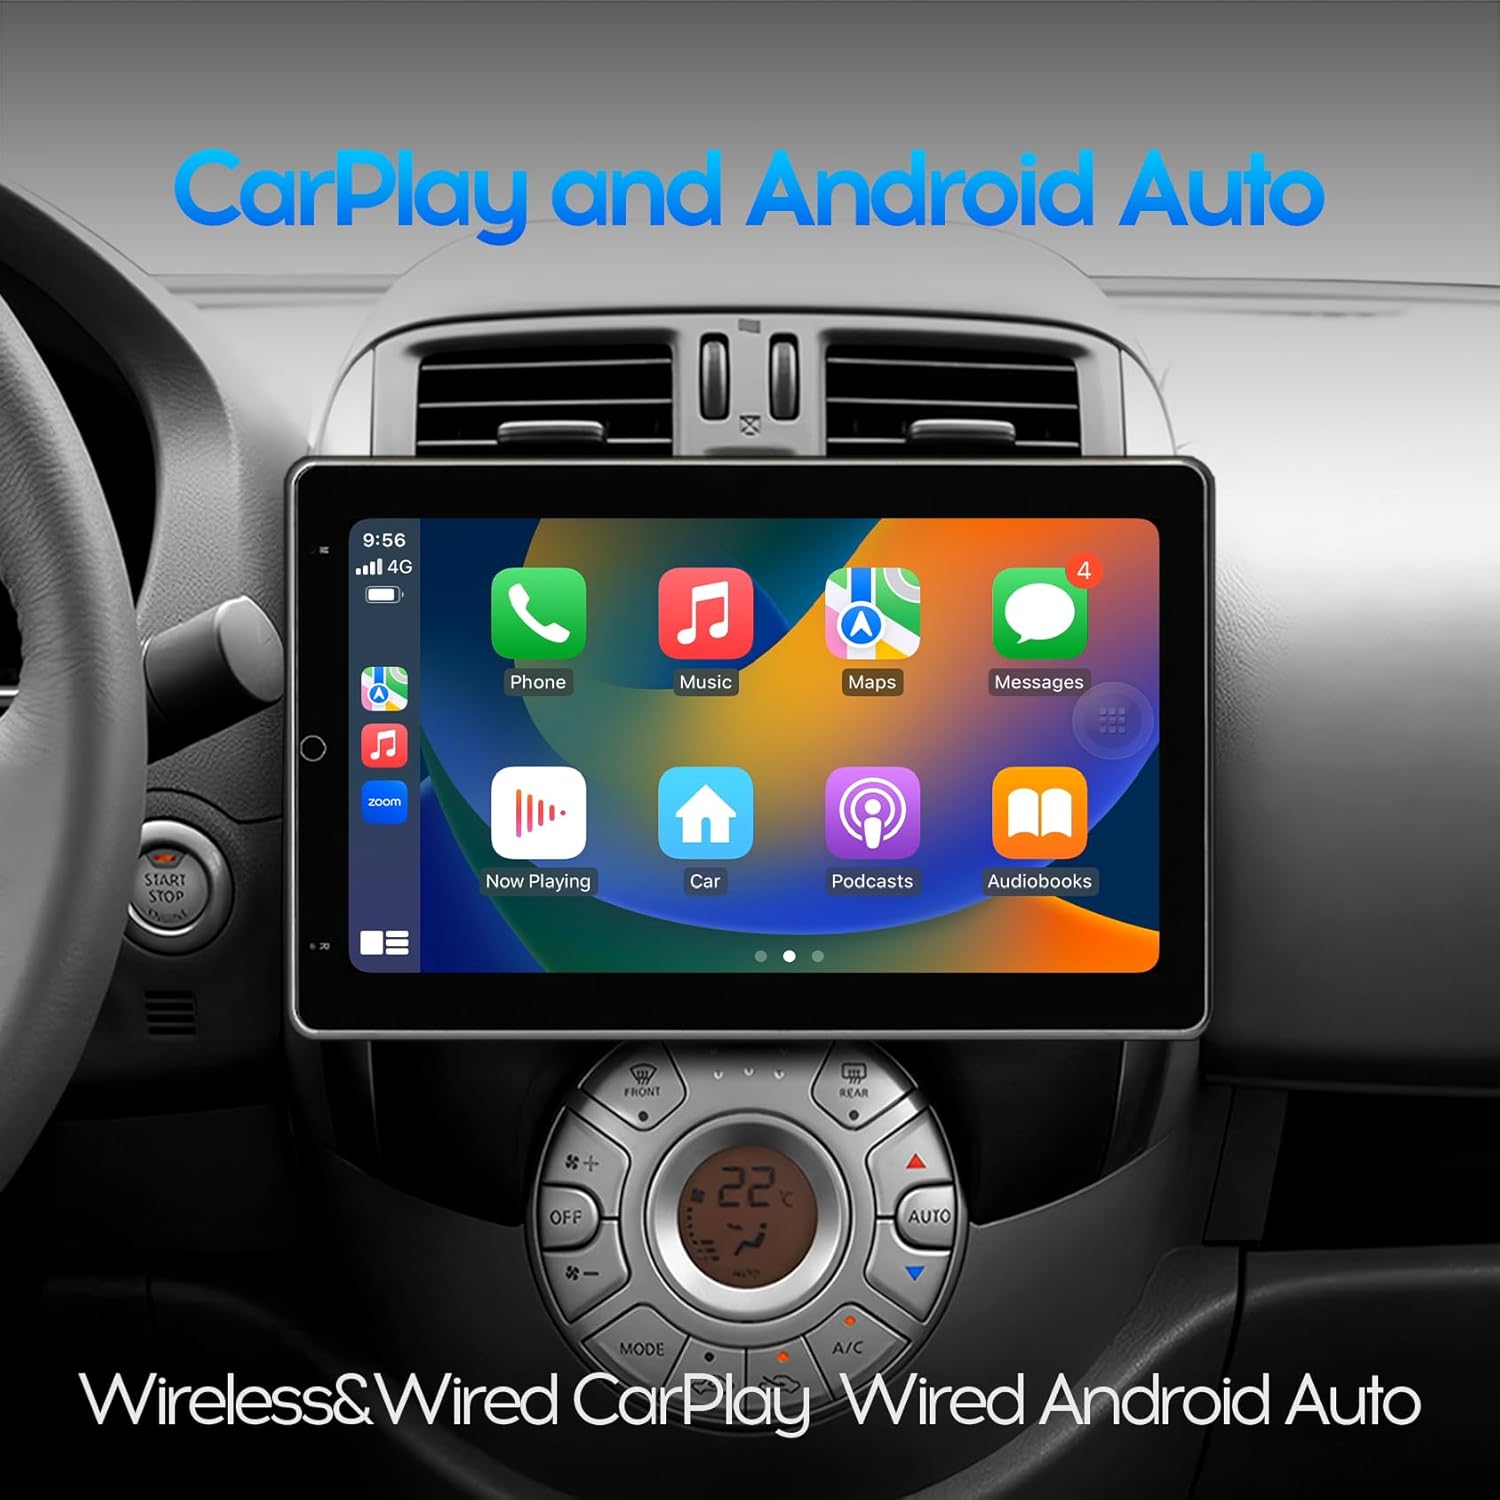
Figure 6.1: CarPlay Interface. This image shows the unit displaying the Apple CarPlay interface, featuring common applications like Phone, Music, Maps, and Messages, integrated into the car's dashboard.
- Wireless Connection:
- Enable Bluetooth on your mobile phone.
- Pair your phone with the car radio via Bluetooth.
- Open the pre-installed application named "Zlink" on the car radio.
- Wait for the automatic connection to CarPlay or Android Auto.
- Wired Connection:
- Connect your mobile phone to the car radio using a USB cable.
- The unit should automatically launch CarPlay or Android Auto.
6.3. GPS Navigation
The unit includes a built-in GPS module and comes with offline maps pre-installed via the "Maps" application. With a Wi-Fi connection, online maps and real-time traffic information are also available.

Figure 6.2: GPS Navigation. This image shows the unit displaying a navigation map with route details and estimated travel time, along with icons for various navigation applications.
To use GPS navigation:
- Tap the "Maps" icon on the home screen.
- Enter your destination.
- Follow the on-screen directions and voice prompts.
6.4. Bluetooth Functionality
The built-in Bluetooth 4.0 module supports hands-free calling, phone book synchronization, and music streaming (A2DP).
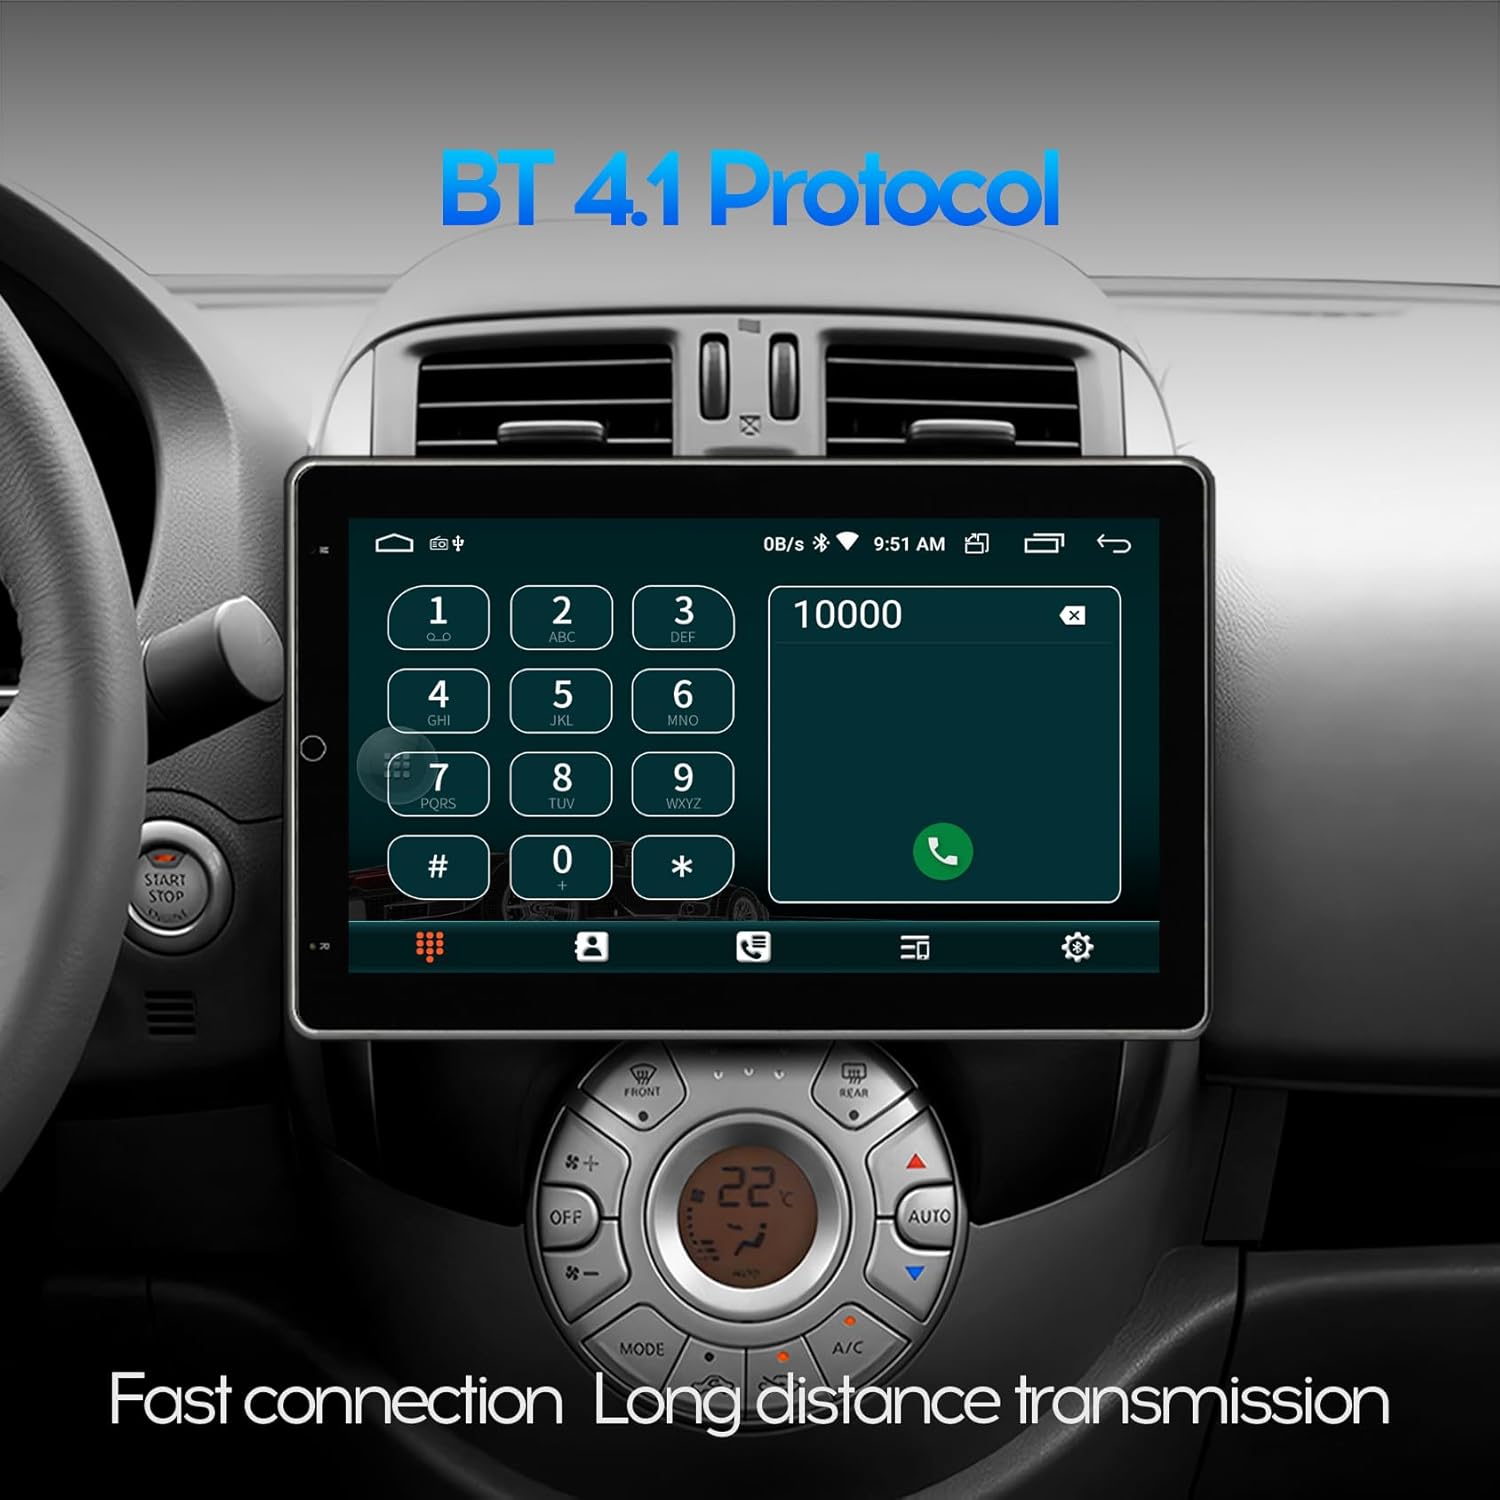
Figure 6.3: Bluetooth Dialer. This image displays the Bluetooth phone dialer interface on the unit, allowing users to make calls directly from the touchscreen.
- Pairing:
- Go to the Bluetooth application on the unit.
- Enable Bluetooth on your mobile phone and search for available devices.
- Select the unit's Bluetooth name (e.g., "WENMENGDE Car Radio") and pair.
- Enter the PIN if prompted (usually "0000" or "1234").
- Hands-free Calling: Once paired, you can make and receive calls directly from the unit's screen.
- Music Streaming: Play audio from your phone through the car speakers via Bluetooth.
6.5. Rear View Camera Function
The unit supports a rear view camera input. When the vehicle is shifted into reverse gear, the car stereo will automatically display the rear view image, providing assistance for parking and maneuvering.

Figure 6.4: Reverse Rear View. This image shows the unit displaying the feed from a rear-view camera, complete with dynamic parking guidelines, assisting with safe reversing.
6.6. Split Screen Mode
The split screen feature allows you to run two applications simultaneously on the display, such as navigation and music playback.
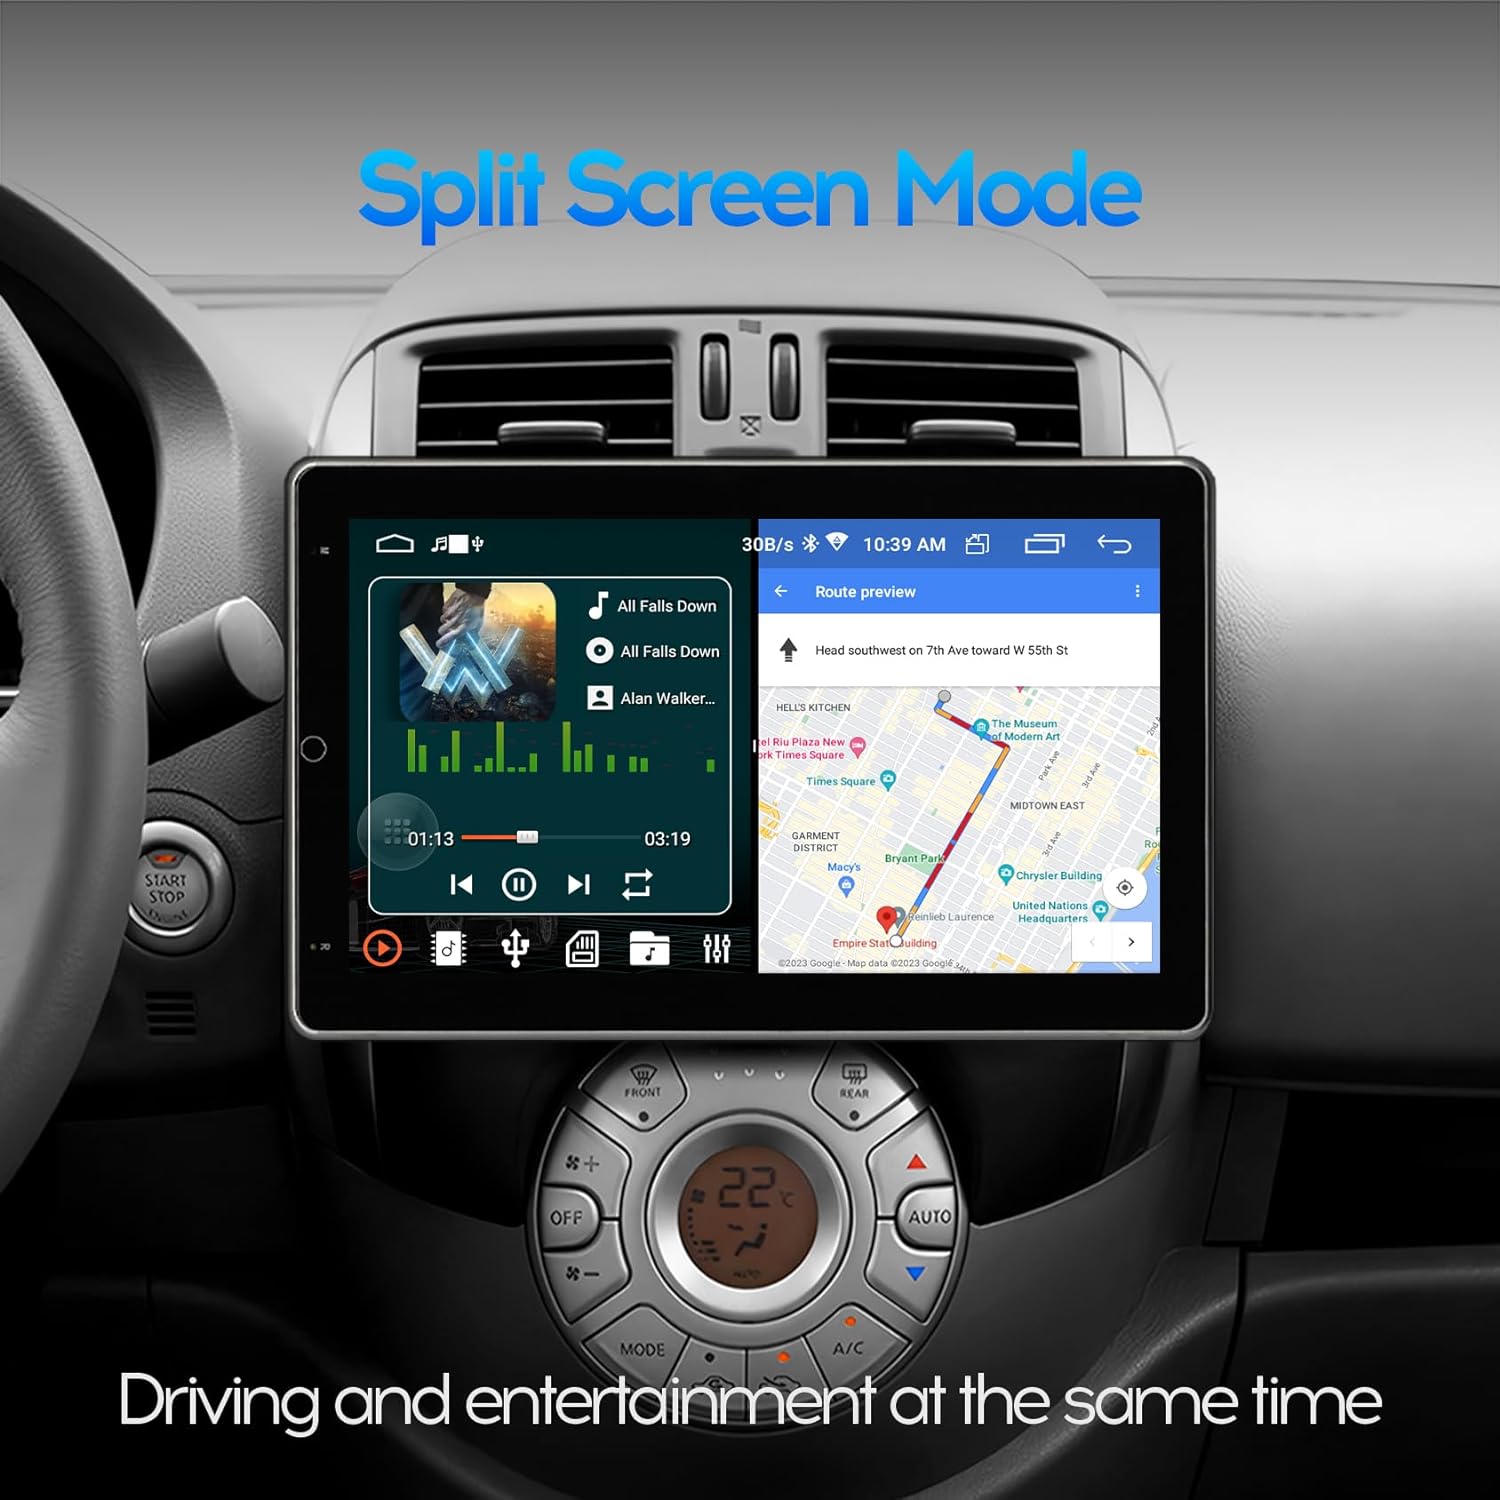
Figure 6.5: Split Screen Mode. This image demonstrates the unit's split-screen capability, showing a navigation application on one side and a music player on the other, allowing for simultaneous use.
To activate split screen:
- Open the first application you wish to use.
- Press and hold the recent apps button (usually a square icon) or swipe up from the bottom and hold, then drag the first app to one side of the screen.
- Select the second application from the recent apps list or app drawer to fill the other half of the screen.
6.7. Wi-Fi and App Installation
Connect the unit to a 2.4GHz Wi-Fi network (e.g., your mobile hotspot) to access online features and download applications from the Google Play Store.

Figure 6.6: Wi-Fi Network and App Downloads. This image shows the unit connected to a Wi-Fi network and displaying the Google Play Store interface, allowing users to download various applications like YouTube, TikTok, and Spotify.
To download apps:
- Ensure the unit is connected to Wi-Fi.
- Open the "Play Store" application.
- Search for and install desired applications.
7. Maintenance
7.1. Cleaning the Screen
Use a soft, lint-free cloth to gently wipe the screen. For stubborn smudges, slightly dampen the cloth with water. Avoid using harsh chemicals, alcohol, or abrasive materials, as these can damage the screen coating.
7.2. Software Updates (FOTA)
The unit supports Firmware Over-The-Air (FOTA) updates for system and CAN versions. Regularly check for updates to ensure optimal performance and access to new features.

Figure 7.1: FOTA Upgrade Interface. This image shows the unit's wireless update screen, indicating that the device's software is currently up to date, with options to check for new updates.
To check for updates:
- Ensure the unit is connected to Wi-Fi.
- Navigate to Settings > About device > System update (or similar path).
- Follow the on-screen prompts to download and install any available updates.
8. Troubleshooting
| Problem | Possible Cause | Solution |
|---|---|---|
| Unit does not power on. | Incorrect wiring (B+, ACC, GND), blown fuse, loose connection. | Check all power connections. Verify fuse. Press the RST (Reset) button. |
| No sound. | Speaker wires incorrectly connected, volume too low, mute activated. | Check speaker wiring polarity. Increase volume. Disable mute. |
| CarPlay/Android Auto not connecting. | Bluetooth not paired (wireless), faulty USB cable (wired), "Zlink" app not open. | Ensure Bluetooth is paired. Try a different USB cable. Open "Zlink" app. Restart phone and unit. |
| GPS signal weak or inaccurate. | GPS antenna improperly placed, antenna faulty. | Relocate GPS antenna to a position with clear sky view. Check antenna connection. |
| Rear view camera not displaying. | Camera wiring incorrect, reverse trigger wire not connected. | Check camera video input and reverse trigger wire connection. |
| Touch screen unresponsive. | Software glitch, temporary freeze. | Press the RST (Reset) button. Restart the unit. |
If problems persist after attempting these solutions, please contact customer support.
9. Specifications

Figure 9.1: Product Dimensions. This image provides detailed measurements for the front, side, and back of the 10-inch head unit, including screen size (25.6cm / 10 inches diagonal) and chassis dimensions.

Figure 9.2: IPS Screen Technology. This image visually compares a non-IPS screen with the unit's 2.5D IPS screen, highlighting the superior visual experience and wider viewing angles of the IPS display.

Figure 9.3: Processor Architecture. This diagram illustrates the AC8227L SOC with its dual CPU architecture, including a Quad Core Cortex-A7 1.1GHz CPU, Quad Core ARM Mali 450 GPU, and a 400MHz ARM9 Coprocessor, indicating the unit's processing capabilities.
- Model: 10-inch Automatic Rotation Android Car Radio
- Screen Size: 10 inches (25.6 cm)
- Display Type: IPS Full Touch Screen, 2.5D Tempered Glass
- Resolution: 1024*600
- Operating System: Android
- Processor: AC8227L SOC (Quad Core Cortex-A7 1.1GHz CPU, Quad Core ARM Mali 450 GPU, 400MHz ARM9 Coprocessor)
- Memory/Storage: 2GB RAM + 32GB ROM
- Connectivity: Bluetooth 4.0, Wi-Fi (2.4GHz), USB
- Special Features: Automatic Rotation, CarPlay (Wireless/Wired), Android Auto (Wireless/Wired), GPS Navigation, Split Screen, PIP, Rear View Camera Support, DVR Function Support, FOTA Upgrade
- Power Supply: 12V DC (Negative Ground)
- Item Weight: 5.49 pounds (2.5 kg)
- Package Dimensions: 11.5 x 10.9 x 8.7 inches
10. Customer Support
For technical assistance, warranty inquiries, or any questions regarding your WENMENGDE car radio, please contact our professional support team. We aim to reply within 24 hours.
Refer to your purchase documentation or the seller's contact information for specific support channels.


