Introduction
This manual provides essential instructions for the installation, operation, and maintenance of your weelye JR-1816RXS-12V 2.4G Bluetooth Remote Control and Receiver Kit. This kit is designed for specific children's electric ride-on cars and includes a remote control and a JR1816RXS-12V control box with a built-in slow start function, eliminating the need for additional slow starter installation.
Important: Please ensure the purchased part has the same appearance and specifications as your original component for proper compatibility and function.

Image: weelye JR-1816RXS-12V Receiver Control Box. This image shows the black control box with connection ports and product labeling indicating "JR-1816RXS-12V Remote Control Car Motor Controller" with supply voltage DC 12V, load current Max 15A, and frequency 2.405GHz-2.485GHz.
Safety Warnings
- WARNING! Not for children under 3 years due to small parts. Choking hazard.
- Load two AAA (1.5V) batteries into the remote controller according to the polarity diagram.
- Non-rechargeable batteries are not to be recharged.
- Different types of batteries or new and used batteries are not to be mixed.
- Batteries are to be inserted with the correct polarity (+/-).
- Exhausted batteries are to be removed from the toy promptly.
- The supply terminals are not to be short-circuited.
- The packaging must be retained as it contains important information.
Setup Instructions
1. Battery Installation (Remote Controller)
- Locate the battery compartment on the back of the remote controller.
- Open the battery compartment cover.
- Insert two AAA (1.5V) batteries, ensuring correct polarity (+/-).
- Close the battery compartment cover securely.
2. Pairing the Remote Control with the Vehicle
The remote control and receiver need to be paired for the first use. This product has a memory function, so re-pairing is not necessary after battery replacement unless the connection is lost.
- Ensure the remote controller has fresh batteries installed.
- Turn OFF the power switch on the children's electric ride-on vehicle.
- On the remote controller, simultaneously hold down the ▲ (Forward) and ▼ (Back) keys for approximately 3-5 seconds to initiate the matching code process. The first LED indicator on the remote will flicker.
- While the LED is flickering, turn ON the power switch on the vehicle.
- The red indicator light on the remote control should stop flashing and remain solid, indicating that the code matching is successful.
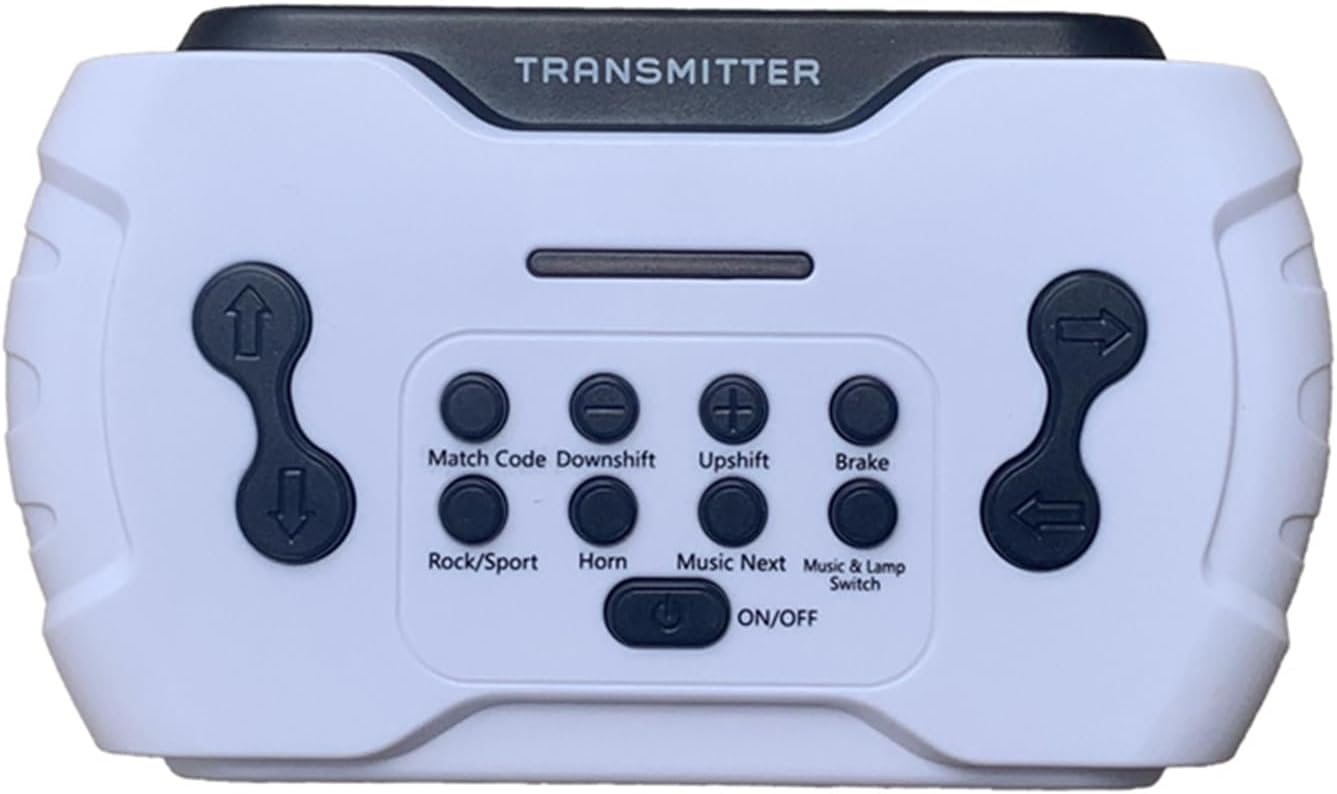
Image: weelye 2.4G Bluetooth Remote Control. This image displays the white remote control labeled "TRANSMITTER" with various buttons including Match Code, Downshift, Upshift, Brake, Rock/Sport, Horn, Music Next, Music & Lamp Switch, and an ON/OFF button.
Operating Instructions
Familiarize yourself with the remote control buttons and their functions:
| Button/Key | Function |
|---|---|
| ON/OFF | Press to turn on the remote. Hold down for 3 seconds to shut down. |
| Match Code | Used for pairing the remote with the vehicle (see Setup Instructions). |
| ▲ (Forward) | Controls the vehicle to move forward. |
| ▼ (Back) | Controls the vehicle to move backward. |
| ◀ (Left) | Controls the vehicle to turn left. |
| ▶ (Right) | Controls the vehicle to turn right. |
| Upshift | Increases the vehicle's speed. The remote supports a total of six speeds. |
| Downshift | Decreases the vehicle's speed. |
| Brake (P) | Press to engage brake mode; all LEDs on the remote will flicker. Press again to exit brake mode. |
| Rock/Sport Switch | Switches the car's driving mode to "Rock" mode; LEDs will cycle flicker. |
| Music & Lamp Switch | Turns the car body's music and lamp power supply ON or OFF. |
| Music Next | Plays the next music track. |
| Horn | Activates the car body's horn sound. |
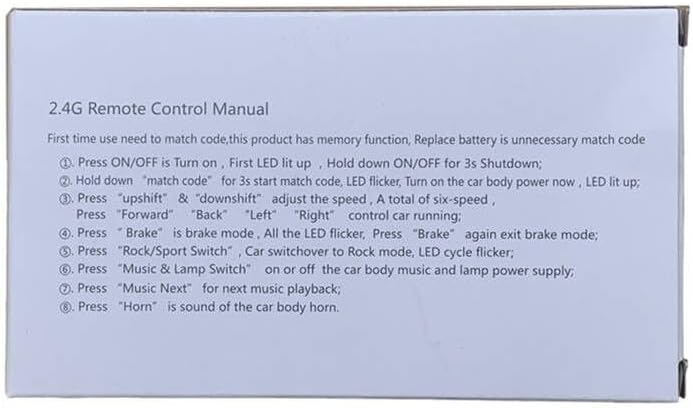
Image: Quick guide from the product packaging showing 2.4G Remote Control Manual instructions for first-time use, matching code, speed adjustment, directional control, brake, Rock/Sport mode, music/lamp switch, next music, and horn functions.
Maintenance
Proper battery care is crucial for the longevity and safe operation of your remote control:
- Always remove exhausted batteries from the remote controller promptly to prevent leakage and damage.
- If the remote control will not be used for an extended period, remove the batteries.
- Clean the remote control and receiver with a soft, dry cloth. Do not use liquids or harsh chemicals.
Troubleshooting
If you encounter issues with your remote control or receiver kit, consider the following:
- Remote Not Responding:
- Check if the remote control batteries are correctly installed and not depleted. Replace if necessary.
- Ensure the vehicle's power is ON.
- Attempt to re-pair the remote control with the vehicle following the "Pairing the Remote Control with the Vehicle" instructions.
- Vehicle Not Moving/Incorrect Function:
- Verify all wiring connections to the JR-1816RXS-12V control box are secure and correctly inserted.
- Confirm that the control box itself is receiving power from the vehicle's battery.
- Ensure the remote is successfully paired (solid red indicator light).
- Interference:
- The 2.4G frequency range is generally robust, but try operating in an area free from other strong wireless signals if you experience intermittent control.
If problems persist, contact the seller or manufacturer for further assistance.
Specifications
| Feature | Detail |
|---|---|
| Model Number | JR-1816RXS-12V |
| Control Box Type | JR1816RXS-12V 7+4P socket, 12V Control Box |
| Remote Control Type | 2.4G Bluetooth Remote Control (White) |
| Supply Voltage (Control Box) | DC 12V |
| Load Current (Control Box) | Max 15A |
| Frequency | 2.405GHz-2.485GHz |
| Remote Battery Type | 2 x AAA (1.5V) batteries (not included) |
| Item Weight | 6.4 ounces (approx.) |
| Item Dimensions | 3.8 x 3.3 x 2.6 inches (approx.) |
| Material Type | Plastic |
| Special Features | Slow start function integrated into control box. |
Warranty and Support
For specific warranty information regarding your weelye JR-1816RXS-12V Remote Control and Receiver Kit, please refer to the documentation provided at the time of purchase or contact your retailer directly.
For technical support or further inquiries, please reach out to the manufacturer or the seller through their official contact channels. Keep your purchase receipt or order details handy for faster service.