1. Introduction
This manual provides essential instructions for the safe operation, maintenance, and troubleshooting of your XIEBro HR101 Robot Vacuum and Mop Combo. Please read this manual thoroughly before using the product and retain it for future reference.
The XIEBro HR101 is a versatile 3-in-1 robotic cleaner designed for vacuuming, mopping, and sweeping. It features 1600Pa maximum suction, app control, remote control, and voice assistant compatibility (Alexa/Google Assistant). It is suitable for various floor types, including hard floors, low-pile carpets, and for picking up pet hair.
2. Package Contents
Verify that all components are present in the package:
- XIEBro HR101 Robot Vacuum and Mop Combo
- Charging Dock
- Power Adapter
- Remote Control
- Side Brushes (2 pairs)
- Mop Cloths (2)
- Water Tank
- Dust Box
- Cleaning Tool
- User Manual (this document)

Image: The XIEBro HR101 Robot Vacuum and Mop Combo, showing the main unit, remote control, and a smartphone displaying the control app. The mopping module is also visible separately.
3. Product Overview
3.1 Robot Components
- Main Unit: Houses the motor, dustbin, water tank, and navigation sensors.
- Side Brushes: Sweep debris into the main brush path.
- Main Brush: Agitates and lifts dirt from floors.
- Dust Box: Collects dry debris. Capacity: 250mL.
- Water Tank: Holds water for mopping. Capacity: 200mL, with 2 adjustable water flow levels.
- Mop Cloth: Attaches to the water tank for wet cleaning.
- Charging Contacts: Located on the robot and charging dock for automatic recharging.
- Power Button/Indicator: On the top of the robot.

Image: An exploded view of the XIEBro HR101 robot vacuum's underside, highlighting the main brush, side brushes, and the integrated mopping system with its electric water tank.
3.2 Charging Dock
The charging dock provides power to recharge the robot's battery. Ensure it is placed against a wall with sufficient clear space around it (at least 0.5 meters on both sides and 1.5 meters in front).
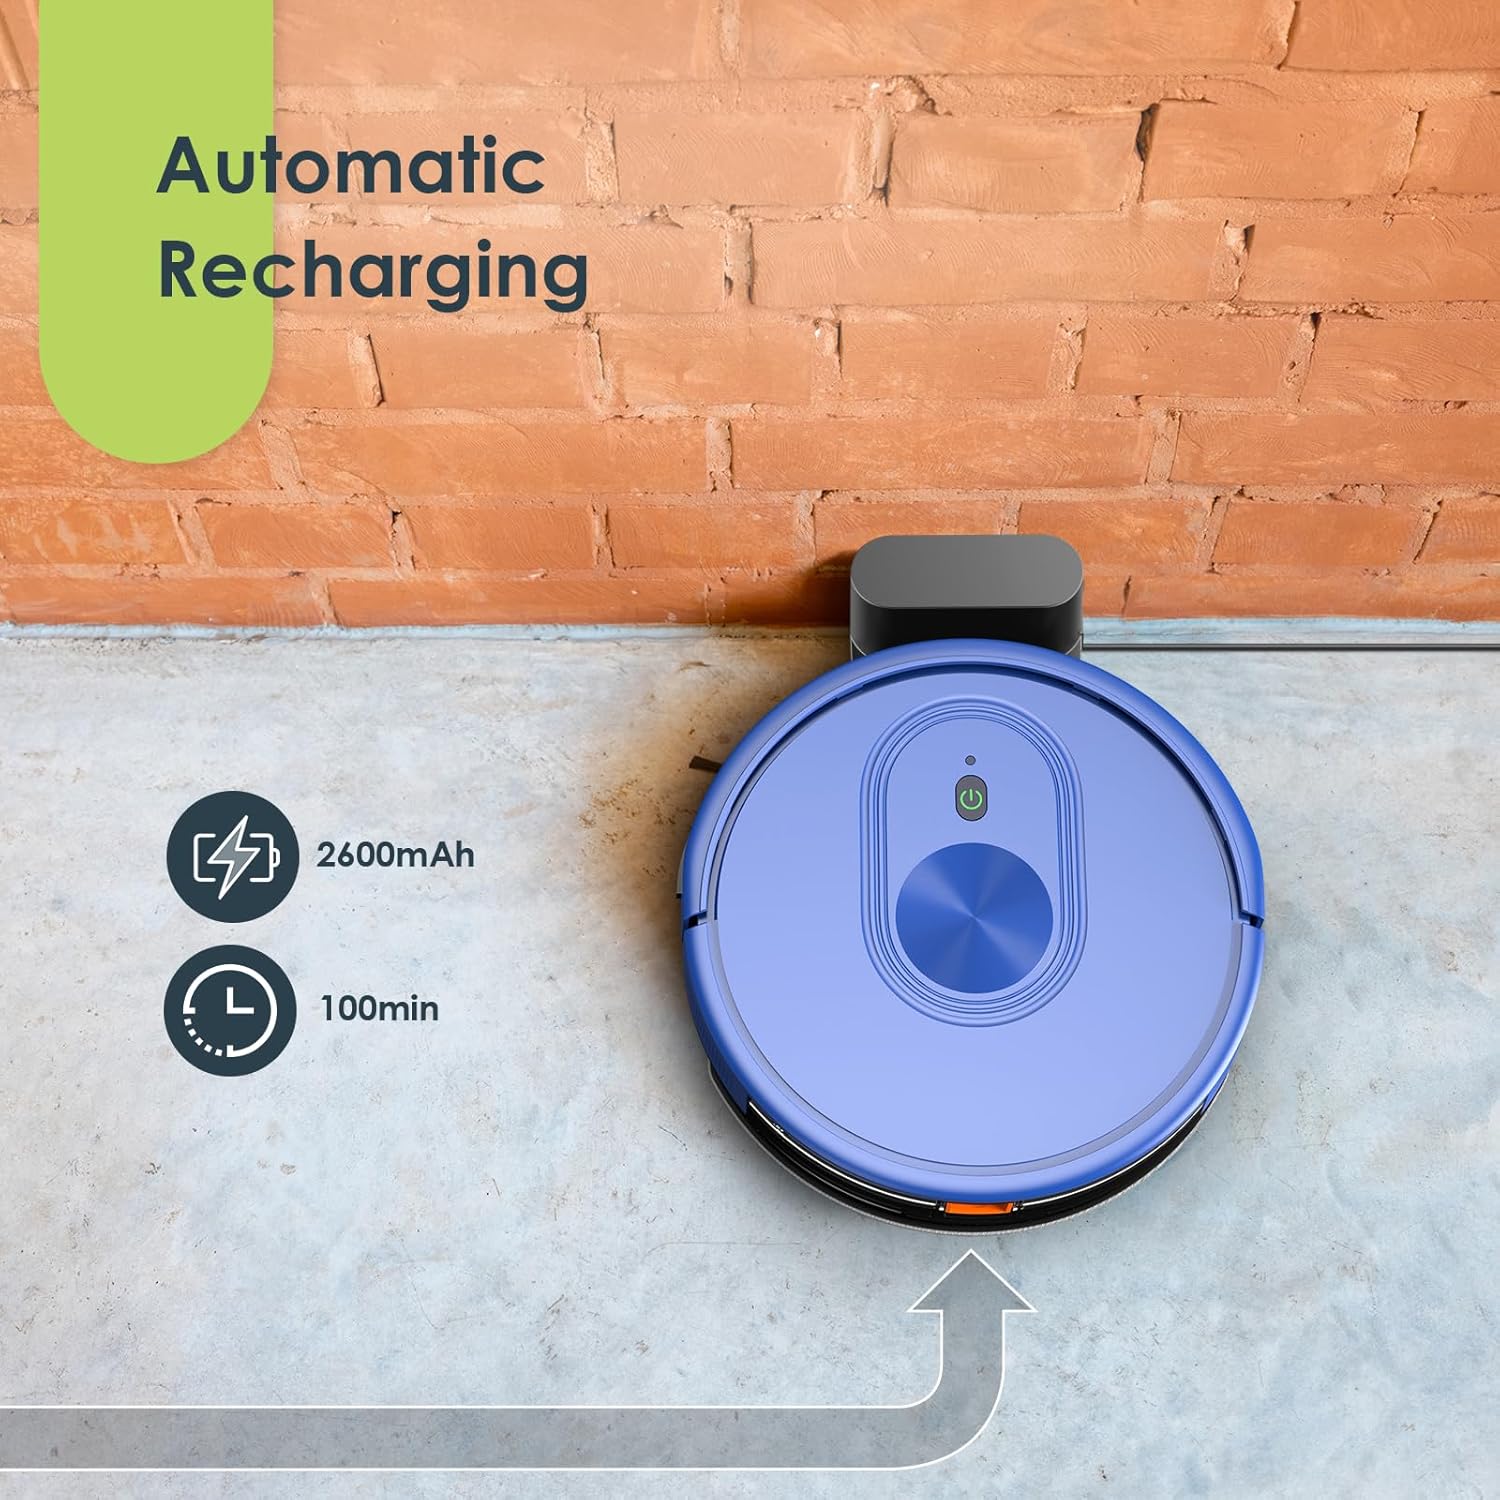
Image: The XIEBro HR101 robot vacuum automatically docking with its charging station. Text indicates a 2600mAh battery and 100 minutes of runtime.
4. Setup
4.1 Preparing the Robot
- Remove all protective films and stickers from the robot and charging dock.
- Attach the side brushes by pressing them onto the posts until they click into place.
- Ensure the dust box and water tank are correctly installed.
4.2 Positioning the Charging Dock
- Place the charging dock on a hard, level surface against a wall.
- Connect the power adapter to the charging dock and plug it into a wall outlet.
- Ensure there are no obstacles within 0.5 meters (1.6 feet) to the left and right, and 1.5 meters (4.9 feet) in front of the charging dock.
- Keep the charging dock plugged in at all times to ensure the robot can recharge.
4.3 Initial Charge
Place the robot onto the charging dock, ensuring the charging contacts align. The robot will begin charging automatically. For first-time use, fully charge the robot for at least 6 hours.
4.4 App Connection (Optional)
- Download the "Tuya Smart" or compatible app from your smartphone's app store.
- Register an account and log in.
- Follow the in-app instructions to add your XIEBro HR101 robot. Ensure your Wi-Fi network is 2.4GHz.
- Once connected, you can control the robot, set schedules, and monitor its status via the app.

Image: A woman relaxing on a sofa while her XIEBro HR101 robot vacuum cleans the floor. A smartphone displays the control app, and a remote control is also shown, illustrating multiple control options including voice commands via Alexa or Google Assistant.
5. Operating the Robot
5.1 Cleaning Modes
- Auto Clean: The robot automatically cleans the entire area. Press the power button on the robot or the "Auto" button on the remote/app.
- Spot Clean: The robot cleans a specific area more intensely. Place the robot near the desired spot and select "Spot Clean" on the remote/app.
- Edge Clean: The robot cleans along walls and furniture edges. Select "Edge Clean" on the remote/app.
- Manual Control: Use the directional buttons on the remote or app to guide the robot manually.
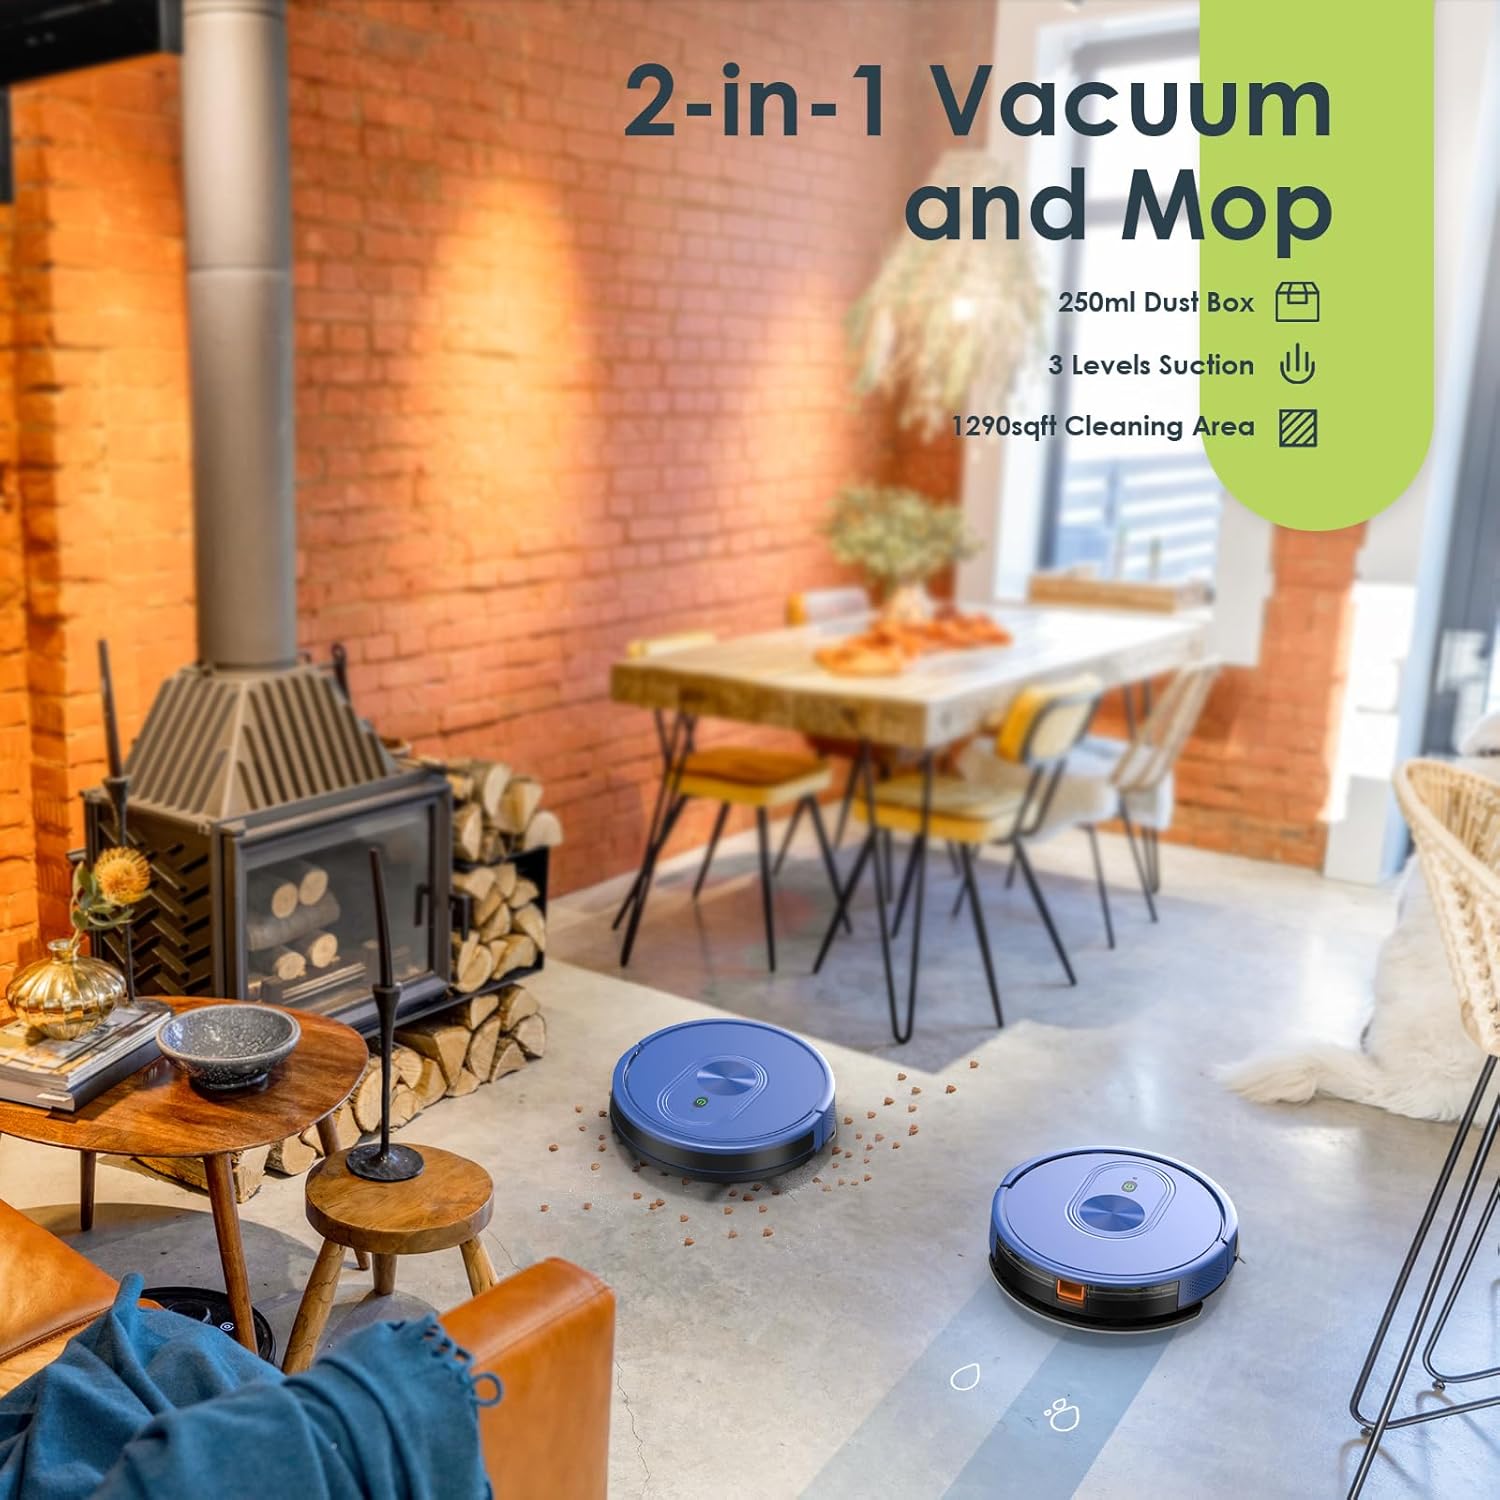
Image: Two XIEBro HR101 robot vacuums operating simultaneously in a dining room, demonstrating their ability to clean a large area. The image highlights the 2-in-1 vacuum and mop function, 250ml dust box, 3 levels of suction, and 1290 sq ft cleaning area.
5.2 Vacuuming Function
The robot is equipped with 1600Pa maximum suction power for effective removal of dust, debris, and pet hair from hard floors and low-pile carpets. Ensure the dust box is empty before starting a cleaning cycle for optimal performance.
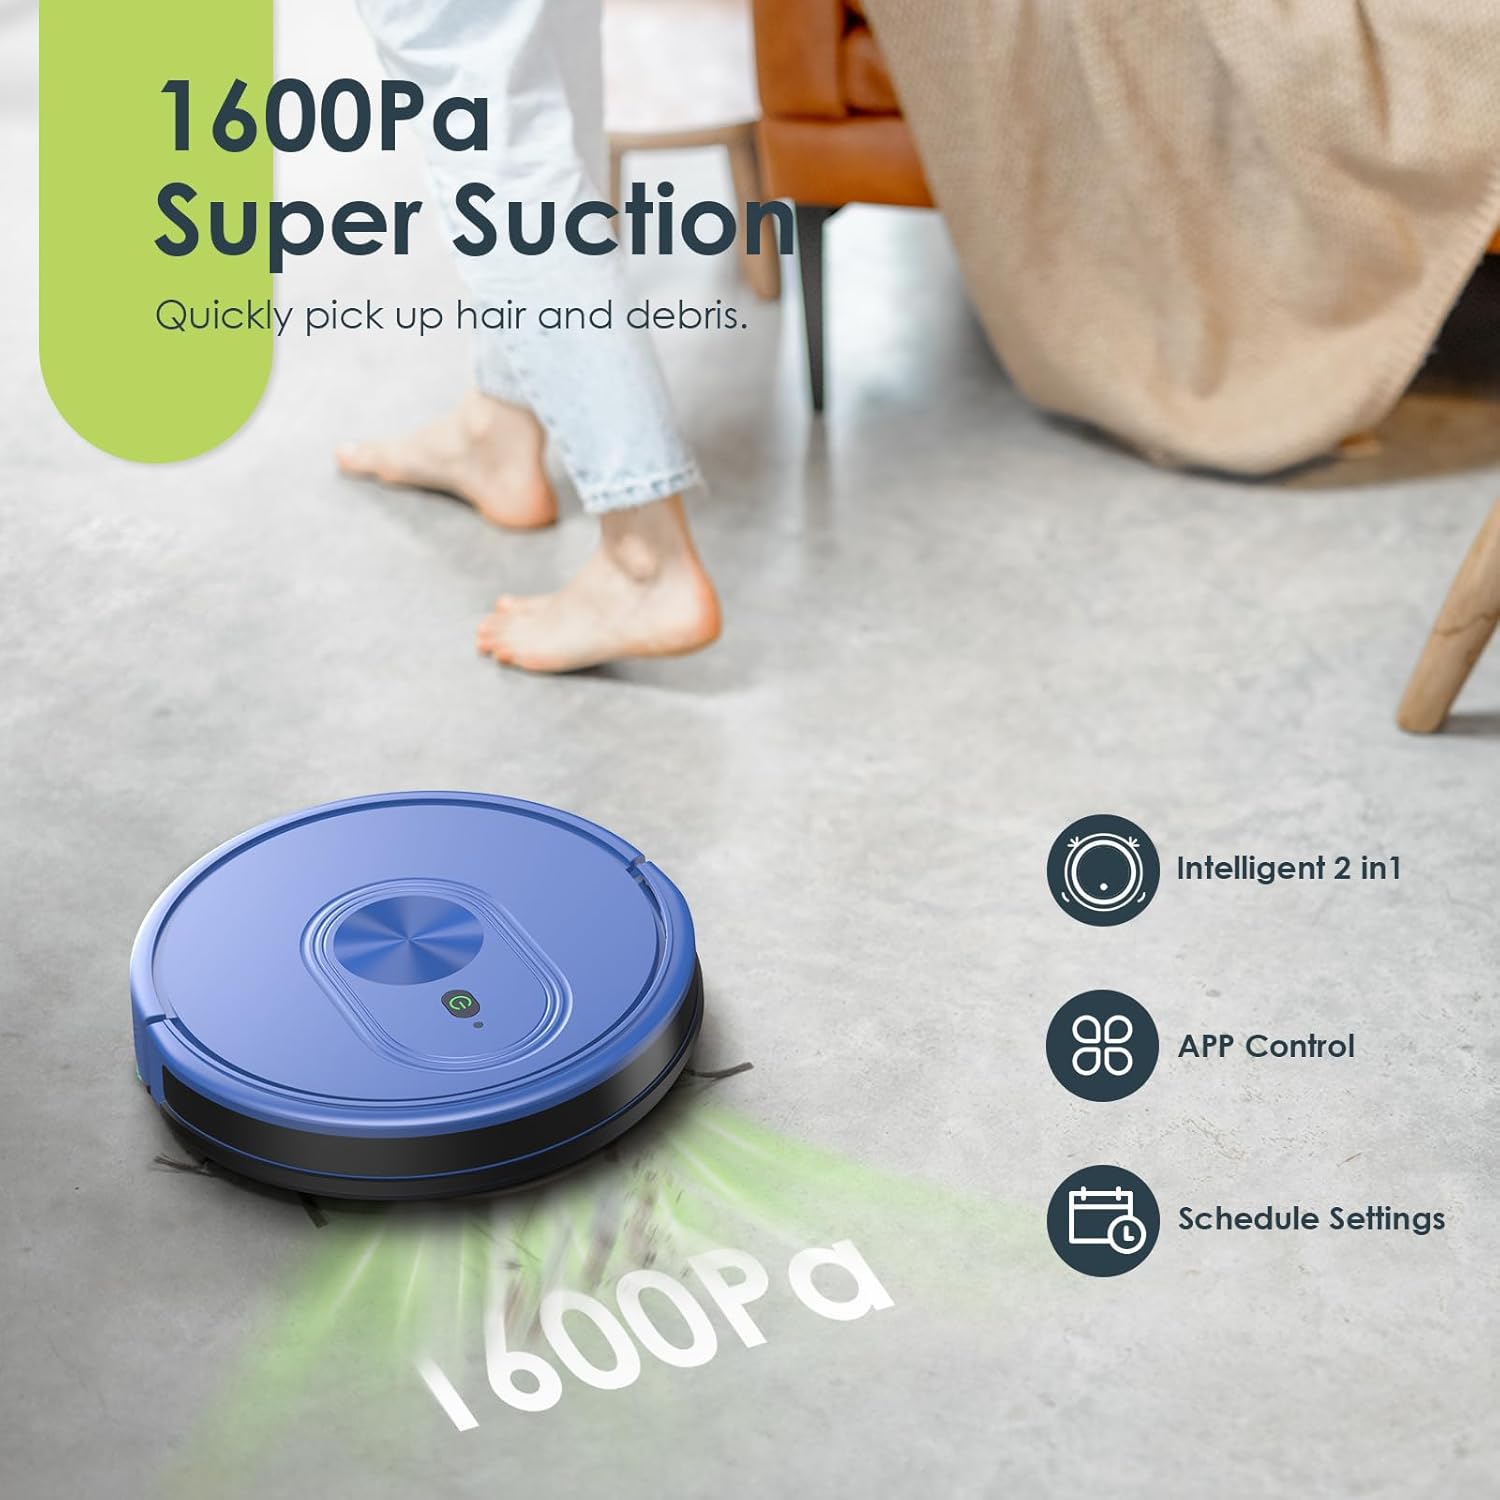
Image: The XIEBro HR101 robot vacuum cleaning a hard floor, with a visual representation of its 1600Pa suction power. Icons indicate intelligent 2-in-1 functionality, app control, and schedule settings.
5.3 Mopping Function
- Fill the water tank with clean water. Do not use cleaning solutions that may clog the nozzle or damage the robot.
- Attach a clean mop cloth to the water tank.
- Insert the filled water tank with the mop cloth into the robot.
- Select a cleaning mode. The robot will automatically dispense water and mop the floor.
- Adjust water flow levels via the app if available.
Note: Remove the water tank and mop cloth when cleaning carpets to prevent wetting. The mopping function is ideal for hard floors.
5.4 Scheduling
Use the mobile app to set cleaning schedules. The robot will automatically start cleaning at the programmed times and return to the charging dock when finished or when the battery is low.
5.5 Voice Control
The XIEBro HR101 is compatible with Amazon Alexa and Google Assistant. Link your robot to your voice assistant account through the respective app to enable voice commands (e.g., "Alexa, turn on the robot").
6. Maintenance
Regular maintenance ensures optimal performance and extends the lifespan of your robot vacuum.
6.1 Emptying the Dust Box
- Press the dust box release button and pull out the dust box.
- Open the dust box lid and empty its contents into a trash bin.
- Clean the filter by tapping it gently or using the cleaning tool. The primary filter is washable, but the filter cotton is not.
- Rinse the dust box with water if necessary, ensuring it is completely dry before reinstallation.
6.2 Cleaning the Main Brush
- Remove the main brush cover and lift out the main brush.
- Use the cleaning tool to remove hair and debris tangled around the brush.
- Reinstall the main brush and cover.
6.3 Cleaning Side Brushes
- Gently pull the side brushes off their posts.
- Remove any tangled hair or debris.
- If brushes are worn or damaged, replace them with new ones.
- Press them back onto the posts until they click.
6.4 Cleaning Sensors and Charging Contacts
- Wipe the cliff sensors (located on the bottom of the robot) and charging contacts (on the robot and dock) with a clean, dry cloth.
- Keep these areas free of dust and debris to ensure proper operation and charging.
6.5 Cleaning the Mop Cloth and Water Tank
- After each mopping session, remove the mop cloth and wash it thoroughly. Air dry completely before next use.
- Empty any remaining water from the water tank and rinse it. Allow it to air dry.
7. Troubleshooting
| Problem | Possible Cause | Solution |
|---|---|---|
| Robot does not turn on. | Low battery; Power switch off. | Charge the robot; Ensure the main power switch is on. |
| Robot does not charge. | Charging contacts dirty; Charging dock not powered. | Clean charging contacts on robot and dock; Ensure power adapter is plugged in. |
| Suction power is weak. | Dust box full; Filter clogged; Main brush tangled. | Empty dust box; Clean/replace filter; Clean main brush. |
| Robot gets stuck frequently. | Obstacles on floor; Robot stuck on high thresholds. | Clear cables, toys, and other obstacles; Use virtual barriers if available or block off problematic areas. |
| Mopping function not working. | Water tank empty; Mop cloth dirty; Water outlet clogged. | Fill water tank; Clean mop cloth; Clean water tank outlet. |
| Cannot connect to Wi-Fi/App. | Incorrect Wi-Fi password; Router too far; 5GHz Wi-Fi network. | Verify password; Move robot closer to router; Ensure 2.4GHz Wi-Fi is used. |
8. Specifications
| Feature | Detail |
|---|---|
| Model Name | HR101 Robot Vacuum and Mop Combo |
| Brand | XIEBro |
| Maximum Suction | 1600Pa |
| Dust Box Capacity | 250mL |
| Water Tank Capacity | 200mL (2 adjustable levels) |
| Battery Capacity | 2600mAh |
| Usage Time | Up to 100 minutes |
| Control Methods | Remote Control, App Control (Tuya Smart), Voice Control (Alexa, Google Assistant) |
| Wi-Fi Compatibility | 2.4GHz only |
| Product Dimensions | 12.04 x 12.04 x 2.89 inches |
| Item Weight | 0.176 ounces (Note: This weight appears to be a data entry error and is unusually low for a robot vacuum.) |
| Filter Type | Cloth (Washable primary filter, non-washable filter cotton) |
9. Warranty and Support
For warranty information and technical support, please refer to the official XIEBro website or contact their customer service directly. Details are typically provided on the product packaging or a separate warranty card.
You may also find support resources and frequently asked questions on the XIEBro Store on Amazon.
