
Retevis RA79
Retevis RA79 Dual Band Ham Radio User Manual
Model: RA79
1. Introduction
Thank you for choosing the Retevis RA79 Dual Band Ham Radio. This manual provides essential information for the safe and efficient operation of your device. The RA79 is a versatile two-way radio designed for various applications, including amateur radio, outdoor activities, and professional use. It features multi-band reception, a durable 1400mAh battery, and multiple programming options.

Figure 1.1: Retevis RA79 Dual Band Ham Radio
This image shows two black Retevis RA79 walkie-talkies from the front, highlighting their compact design, antenna, and LCD screen displaying frequency information.
2. Package Contents
Please check the contents of your package carefully. If any items are missing or damaged, contact your retailer immediately.
- 2 x Retevis RA79 Walkie-talkie
- 2 x Belt Clip
- 2 x Hand Strap
- 2 x Antenna
- 2 x 1400mAh Lithium-ion Battery
- 2 x USB Desktop Charger
- 1 x Multi-language User Manual (this document)
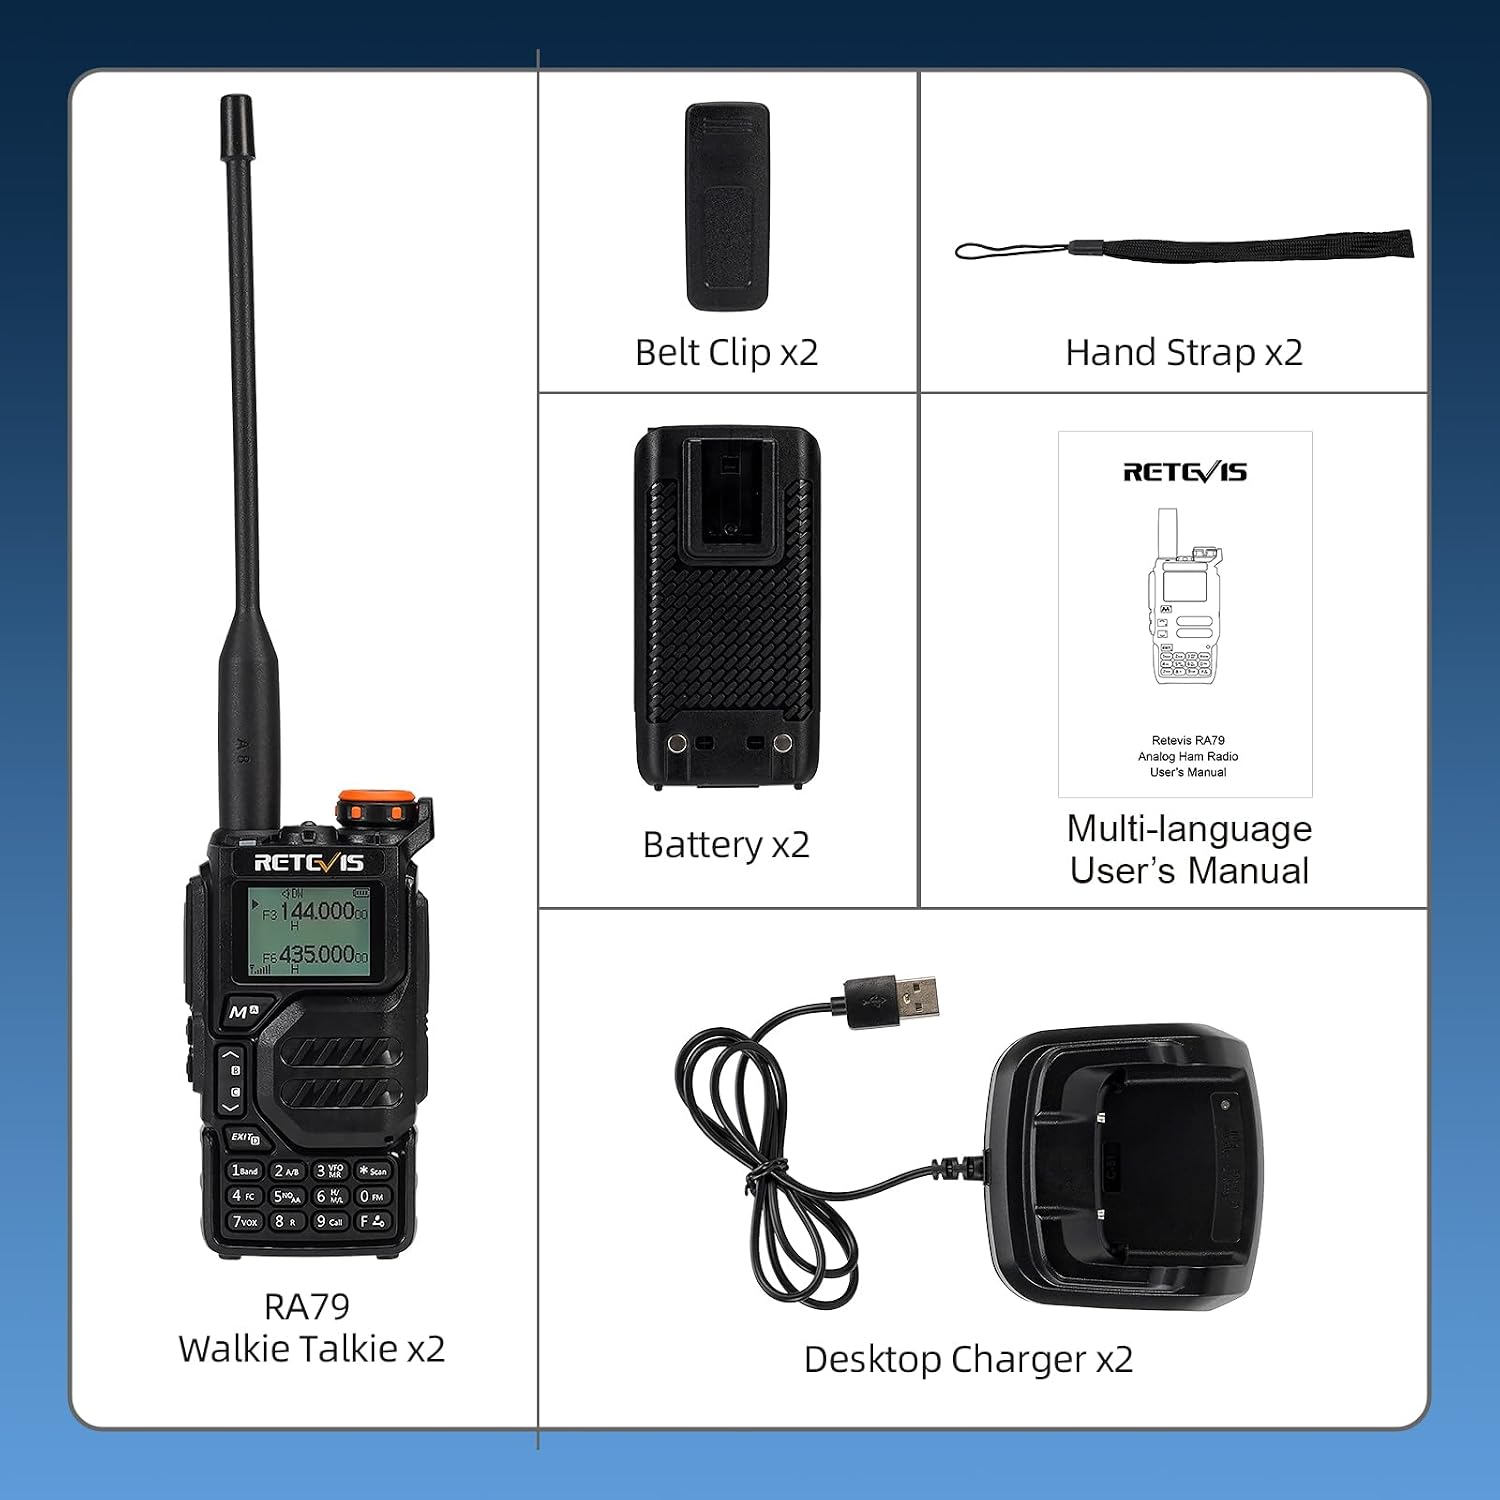
Figure 2.1: Included Accessories
This image displays all components included in the Retevis RA79 package: two RA79 walkie-talkies, two belt clips, two hand straps, two antennas, two batteries, two desktop chargers with USB cables, and a multi-language user manual.
3. Product Overview
3.1. Components and Controls
Familiarize yourself with the various parts of your Retevis RA79 radio.
- Antenna: For transmitting and receiving signals.
- Power/Volume Knob: Rotate to turn the radio on/off and adjust volume.
- LCD Display: Shows frequency, channel, battery status, and other indicators.
- PTT (Push-to-Talk) Button: Press and hold to transmit, release to receive.
- Side Keys (PF1/PF2): Programmable function keys. PF2 is used for wireless pairing (PTT + PF2).
- Keypad: For entering frequencies, channel numbers, and accessing menu functions.
- Battery Pack: Rechargeable 1400mAh Lithium-ion battery.
- Speaker/Microphone: For audio output and input.
- Accessory Jack: For connecting external audio accessories (e.g., headset).

Figure 3.1: RA79 LCD Display and Keypad
This image provides a detailed view of the Retevis RA79's LCD screen, illustrating the VFO (Variable Frequency Oscillator) function which allows direct frequency editing without a computer. The keypad and side buttons are also visible.

Figure 3.2: Dual Band Dual Standby Display
This image highlights the RA79's ability to display and monitor two frequencies simultaneously, demonstrating its dual band and dual standby functionality.
4. Setup
4.1. Battery Installation and Charging
- Align the battery pack with the grooves on the back of the radio and slide it upwards until it clicks into place.
- To charge, place the radio (with battery installed) into the desktop charger. Ensure the charging contacts align.
- Connect the USB cable from the desktop charger to a compatible USB power source (adapter, power bank, PC, or vehicle charger).
- The charging indicator light on the desktop charger will show the charging status. A full charge typically takes several hours.

Figure 4.1: USB Type-C Charging Options
This image demonstrates the versatility of the Retevis RA79's USB Type-C charging, showing it can be charged via a wall adapter, power bank, computer, or in a vehicle.

Figure 4.2: 1400mAh Rechargeable Battery
This graphic highlights the 1400mAh rechargeable battery, indicating its capacity for extended use throughout the day.
4.2. Attaching Antenna and Accessories
- Screw the antenna clockwise into the connector on top of the radio until it is finger-tight. Do not overtighten.
- Attach the belt clip to the back of the radio using the provided screws.
- Thread the hand strap through the designated loop on the radio for secure carrying.
5. Operating Instructions
5.1. Power On/Off and Volume Adjustment
Rotate the Power/Volume knob clockwise to turn the radio on. Continue rotating to increase the volume. Rotate counter-clockwise to decrease volume and turn off the radio.
5.2. Frequency and Channel Selection
The RA79 supports VFO (Variable Frequency Oscillator) mode for direct frequency input and Channel mode for pre-programmed channels.
- VFO Mode: Use the keypad to directly enter the desired frequency (e.g., 145.000 MHz).
- Channel Mode: Use the UP/DOWN arrow keys or keypad to select a pre-programmed channel.
5.3. Transmitting and Receiving
To transmit, press and hold the PTT button. Speak clearly into the microphone. Release the PTT button to return to receive mode.
5.4. Wireless Frequency Pairing
The RA79 supports wireless pairing with other RA79 radios to quickly match frequencies and CTCSS/DCS tones.
- On the master radio, press and hold the PTT + PF2 keys simultaneously to enter pairing mode.
- On the slave radio(s), ensure they are in a state ready to receive frequency information.
- Follow the on-screen prompts to complete the pairing process.

Figure 5.1: Wireless Frequency Pairing
This image illustrates the wireless frequency pairing feature, showing two RA79 radios establishing a connection to share frequency and CTCSS/DCS settings.
5.5. Special Functions
- AM Aviation Reception: The RA79 can receive signals from the aviation band, allowing users to listen to aircraft and tower communications.
- FM Radio Function: Enjoy broadcast FM radio stations within the tuning range.
- Emergency Alarm: Activate the emergency alarm function to alert others in critical situations.
- VFO/CPS/Chirp Editing: The RA79 offers flexible programming options. VFO allows direct frequency input on the radio. CPS (Customer Programming Software) and Chirp are computer-based software for advanced programming.

Figure 5.2: AM Aviation Receiving
This image depicts two RA79 radios with an aircraft in the background, highlighting their ability to receive AM aviation band signals for monitoring air traffic communications.

Figure 5.3: FM Radio Function
This image shows the RA79 displaying an FM radio frequency, indicating its capability to receive broadcast FM radio, suitable for leisure during outdoor activities.

Figure 5.4: Emergency Alarm
This image illustrates the emergency alarm feature of the RA79, designed to enhance safety by providing a means to alert others during emergencies.
6. Maintenance
- Cleaning: Wipe the radio with a soft, damp cloth. Do not use harsh chemicals or abrasive cleaners.
- Battery Care: Fully charge the battery before first use. Avoid overcharging or completely draining the battery for optimal lifespan. Store batteries in a cool, dry place.
- Storage: When not in use for extended periods, remove the battery and store the radio in a dry, dust-free environment.
- Water Resistance: The RA79 is water-resistant. Avoid submerging the radio in water or exposing it to heavy rain for prolonged periods. Ensure all port covers are securely closed.
7. Troubleshooting
| Problem | Possible Cause | Solution |
|---|---|---|
| Radio does not power on. | Battery is low or not installed correctly. | Charge the battery. Ensure the battery is securely installed. |
| Cannot transmit or receive. | Incorrect frequency/channel, antenna loose, or out of range. | Verify frequency/channel settings. Check antenna connection. Move closer to other radios. |
| Poor audio quality. | Low volume, interference, or damaged speaker/microphone. | Adjust volume. Move away from sources of interference. Contact support if hardware issue suspected. |
| Battery drains quickly. | Frequent transmission, old battery, or extreme temperatures. | Reduce transmission time. Replace old battery. Operate within recommended temperature range. |
8. Specifications
| Feature | Detail |
|---|---|
| Model | RA79 |
| Brand | Retevis |
| Color | Black |
| Frequency Range | 144-146 MHz (VHF), 430-440 MHz (UHF) |
| Number of Channels | 200 |
| Max Range | Up to 5 Kilometers (environment dependent) |
| Battery Type | 1400mAh Lithium-ion |
| Voltage | 7.4 Volts DC |
| Special Features | Dual Band, AM Aviation Reception, FM Radio, VFO/CPS/Chirp Programming, Wireless Pairing, Emergency Alarm |
| Water Resistance | Water-resistant |
| Dimensions (H x W x D) | 115 x 65 x 28 mm (excluding antenna) |
9. Warranty and Support
Retevis offers a comprehensive warranty for your RA79 radio:
- Radio Body: 2-year warranty.
- Accessories (Battery, Charger, Antenna, etc.): 1-year warranty.
- Returns: 30-day no-reason return policy.
For warranty claims, technical support, or maintenance services beyond the warranty period, please contact Retevis customer service through Amazon. We aim to respond to all inquiries within 12 hours.
For more information and resources, visit the official Retevis store on Amazon: Retevis Amazon Store
Related documentsRA79


Ask a question about this manual
Ask about setup, troubleshooting, compatibility, parts, safety, or missing instructions. Manuals+ will review the question and use this page’s manual context to help answer it.