1. Introduction
This manual provides detailed instructions for the installation, operation, and maintenance of your Tiandy TC-C32XN 2MP Fixed IP Dome Turret Camera. Please read this manual thoroughly before using the product to ensure correct usage and optimal performance. Keep this manual for future reference.
2. Safety Information
- Ensure the power supply matches the camera's requirements to prevent damage.
- Do not expose the camera to extreme temperatures, humidity, or corrosive environments.
- Avoid pointing the camera directly at strong light sources for extended periods, as this may damage the image sensor.
- Handle the camera with care. Do not drop or subject it to strong vibrations.
- All installation and service should be performed by qualified personnel.
- Disconnect power before cleaning or performing maintenance.
3. Package Contents
Verify that all items are present in your package:
- Tiandy TC-C32XN 2MP Fixed IP Dome Turret Camera
- Adapter
- Mounting Screws and Wall Plugs
- Quick Start Guide (if included)
4. Product Overview
The Tiandy TC-C32XN is a 2MP Fixed IP Dome Turret Camera designed for reliable surveillance. It features Smart IR for clear night vision up to 30 meters, a built-in microphone, and an SD card slot for local storage.

Figure 4.1: Front view of the Tiandy TC-C32XN camera, showing the lens and IR illuminators.
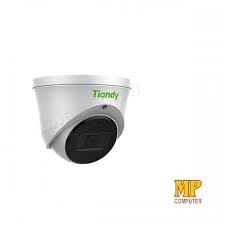
Figure 4.2: Side view of the Tiandy TC-C32XN camera, highlighting its dome turret form factor.
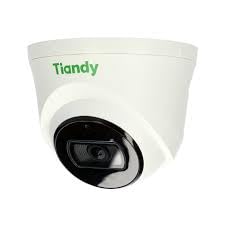
Figure 4.3: Angled view of the Tiandy TC-C32XN camera, showcasing its compact design.
5. Setup and Installation
5.1 Mounting
- Select a Location: Choose a suitable outdoor or indoor location (IP67 rated for outdoor use) that provides the desired viewing angle and is within reach of power and network connections. The camera is designed for protruding mounting.
- Drill Holes: Use the provided mounting template (if applicable) to mark and drill holes for the mounting screws.
- Secure the Camera: Attach the camera base securely to the mounting surface using the provided screws and wall plugs.
5.2 Wiring
- Power Connection: Connect the provided adapter to the camera's power input and then to a power outlet. The camera operates on corded electric power.
- Network Connection: Connect an Ethernet cable from your network router or PoE switch to the camera's Ethernet port. This camera supports Ethernet connectivity for data transmission.
5.3 Initial Configuration
- Power On: Once wired, power on the camera.
- Network Discovery: Use the Tiandy client software or a network scanner tool to discover the camera's IP address on your local network.
- Access Camera: Open a web browser and enter the camera's IP address to access its web interface. Log in using the default credentials (refer to the quick start guide for default username/password).
- Change Default Password: For security, immediately change the default password upon first login.
- NVR Integration: If using with an NVR, add the camera to your NVR system following the NVR's instructions. This camera is compatible with all brand NVRs.
- Mobile App Setup: Download the official Tiandy mobile application (available for Android and iOS) and follow the in-app instructions to add your camera for remote viewing and control.
6. Operating Instructions
6.1 Live View and Recording
Access the camera's live view through the web interface, NVR, or mobile app. Configure recording schedules and methods (continuous, motion-triggered) via the camera's settings.
6.2 Smart IR and Night Vision
The camera features Smart IR technology, which automatically adjusts the intensity of its infrared LEDs to prevent overexposure of objects close to the camera, ensuring clear images in low-light conditions up to 30 meters. It also supports 'Night Color' low light technology for enhanced visibility.
6.3 Motion Detection and Alerts
Configure motion detection zones and sensitivity in the camera settings. The camera supports 'Motion Only' alert types. When motion is detected, the camera can trigger recordings, send notifications to your mobile device, or activate other configured actions. It also supports advanced features like tripwire and perimeter intrusion detection.
6.4 Audio Functionality
The built-in microphone allows for audio monitoring of the surveillance area. Audio settings can be adjusted in the camera's web interface or NVR.
6.5 SD Card Storage
Insert a compatible SD card into the camera's SD card slot for local storage of recordings. Ensure the card is formatted correctly via the camera's settings. The camera supports SD flash memory type.
6.6 Reset Button
A reset button is included for restoring the camera to its factory default settings. Consult the quick start guide for the exact location and procedure for your model.
7. Maintenance
- Cleaning: Gently wipe the camera lens and body with a soft, dry cloth. Do not use harsh chemicals or abrasive cleaners.
- Firmware Updates: Regularly check the Tiandy official website for firmware updates. Keeping your camera's firmware up-to-date ensures optimal performance and security.
- Cable Inspection: Periodically inspect all cables for signs of wear or damage, especially for outdoor installations.
8. Troubleshooting
- No Power: Ensure the power adapter is securely connected and the power outlet is functional.
- No Video: Check network cable connections. Verify the camera's IP address and network settings. Ensure the camera is properly added to your NVR or viewing software.
- Poor Image Quality: Clean the camera lens. Adjust focus if applicable. Check lighting conditions and camera placement.
- Network Connection Issues: Verify router and network cable functionality. Restart the camera and network devices.
- Cannot Access Web Interface: Ensure your computer is on the same network segment as the camera. Verify the camera's IP address. Try resetting the camera to factory defaults if necessary (this will erase all settings).
9. Specifications
| Feature | Specification |
|---|---|
| Model | TC-C32XN |
| Effective Still Resolution | 2 MP (1920x1080) |
| Frame Rate | 30 frames per second |
| Photo Sensor Technology | CMOS (1/2.8") |
| Night Vision Range | 30 Metres (Smart IR) |
| Low Light Technology | Night Color |
| Optical Zoom | 3 x |
| Built-in Microphone | Yes |
| SD Card Slot | Yes (Flash Memory Type: SD) |
| Alert Type | Motion Only (supports tripwire and perimeter) |
| Connectivity Technology | Wireless (IR), Ethernet |
| Power Source | Corded Electric |
| International Protection Rating | IP67 |
| Form Factor | Dome Turret |
| Mounting Type | Protruding |
| Operating System Compatibility | Android, iOS |
| Product Dimensions (L x W x H) | 50 x 50 x 70 Millimeters |
| Item Weight | 20 Grams |
| Included Components | Adapter |
| Color | White |
10. Warranty and Support
For warranty information and technical support, please refer to the warranty card included with your product or visit the official Tiandy website. Contact the seller or manufacturer directly for assistance with product issues or inquiries.