1. Product Overview
The GOLOZA LA-C337 is a versatile digital alarm clock featuring a 180° rotatable projection, a large curved LED display, and a convenient USB charging port. It is designed for clear time display and easy operation.

Image 1.1: The GOLOZA Digital Projection Alarm Clock, showcasing its curved display and compact design, placed on a nightstand.
2. Package Contents
Please check the package for the following items:
- GOLOZA Digital Projection Alarm Clock (LA-C337)
- Micro USB Cable
- Power Adapter
- User Manual
3. Product Features
- Curved LED Display: Large, clear digital time display with adjustable brightness.
- 180° Projection: Projects time onto a wall or ceiling with adjustable brightness and rotation.
- Dual Alarms: Set two independent alarms with progressive volume.
- Snooze Function: Allows for extra sleep time after the alarm sounds.
- USB Charging Port: Conveniently charge your mobile devices.
- Memory Battery: Built-in button battery maintains time settings during power outages.
Image 3.1: A close-up view of the GOLOZA Digital Projection Alarm Clock's clear, blue LED display, showing the time.
4. Initial Setup
4.1 Power Connection
- Connect the Micro USB cable to the power input port on the back of the alarm clock.
- Plug the other end of the USB cable into the provided power adapter.
- Insert the power adapter into a standard electrical outlet. The clock display will light up.
Note: The built-in button battery serves as a backup for time and alarm settings during a power interruption. It does not power the main display or projection.
4.2 Setting Time and Date
Specific button names are not provided, but typically these clocks have 'TIME SET', 'MODE', or similar buttons. Refer to the physical unit for exact button labels.
- Press and hold the Time Set button (or similar) to enter time setting mode. The hour digits will flash.
- Use the +/- or Up/Down buttons to adjust the hour.
- Press the Time Set button again to confirm the hour and move to minute setting. The minute digits will flash.
- Use the +/- or Up/Down buttons to adjust the minutes.
- Press the Time Set button again to confirm minutes and exit time setting mode.
- Follow similar steps to set the date if your model supports it (usually by pressing the Time Set button multiple times to cycle through year, month, day).
5. Operating Instructions
5.1 Setting Alarms
The clock supports two independent alarms (Alarm 1 and Alarm 2).
- Press and hold the Alarm 1 button (or similar) to enter Alarm 1 setting mode. The alarm hour digits will flash.
- Use the +/- or Up/Down buttons to adjust the alarm hour.
- Press the Alarm 1 button again to confirm the hour and move to minute setting. The alarm minute digits will flash.
- Use the +/- or Up/Down buttons to adjust the alarm minutes.
- Press the Alarm 1 button again to confirm minutes and select the alarm sound (e.g., Beep, Chord, Bird Song).
- Press the Alarm 1 button one more time to activate/deactivate Alarm 1 and exit setting mode. An alarm icon will appear on the display when active.
- Repeat the process for Alarm 2 using the corresponding button.
5.2 Adjusting Display Brightness
The main LED display typically has multiple brightness levels.
- Press the Brightness button (or a dedicated dimmer button) repeatedly to cycle through the available brightness levels (e.g., High, Medium, Low, Off).
5.3 Using Projection Feature
The projection feature allows you to view the time on a wall or ceiling.
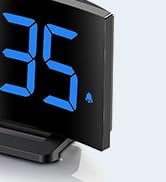
Image 5.1: The GOLOZA Digital Projection Alarm Clock actively projecting the time onto a surface, demonstrating its projection capability.
- Activating/Deactivating Projection: Press the Projector button (or similar) to turn the projection on or off.
- Adjusting Projection Brightness: While the projector is on, press the Projector Brightness button (or the same Projector button repeatedly) to cycle through brightness levels (e.g., High, Medium, Low).
- Rotating Projection: The projector lens can be physically rotated 180° to adjust the projection angle. Some models may also have a button to flip the projected image.
5.4 USB Charging Port Usage
The integrated USB port allows you to charge external devices.
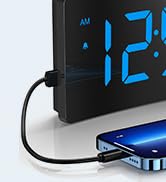
Image 5.2: The GOLOZA Digital Projection Alarm Clock with a smartphone connected to its USB charging port, illustrating its charging capability.
- Connect your device's USB charging cable to the USB output port on the alarm clock.
- Ensure the alarm clock is powered on.
- The clock's USB port provides power to charge your device.
5.5 Snooze Function
When an alarm sounds, press the Snooze button (often a large button on top) to temporarily silence the alarm. The alarm will sound again after a preset interval (e.g., 9 minutes).
5.6 Alarm Volume Adjustment
The alarm volume is progressive, meaning it starts soft and gradually increases. Some models may offer adjustable volume levels.
- If available, press the Volume button (or a dedicated switch) to adjust the alarm volume to your preferred level.
6. Maintenance
- Cleaning: Wipe the clock with a soft, dry cloth. Do not use abrasive cleaners or solvents.
- Placement: Place the clock on a stable, flat surface away from direct sunlight, heat sources, and moisture.
- Battery: The internal button battery is for memory backup. If the clock consistently loses settings after a power outage, the battery may need replacement by a qualified technician.
7. Troubleshooting
| Problem | Possible Cause | Solution |
|---|---|---|
| Clock display is off. | No power connection. | Ensure the power adapter is securely plugged into the clock and a working electrical outlet. |
| Projection is dim or unclear. | Incorrect brightness setting; dirty lens; too much ambient light. | Adjust projection brightness. Clean the projector lens with a soft cloth. Reduce ambient light in the room. |
| Alarm does not sound. | Alarm is not activated; alarm volume is too low. | Ensure the alarm icon is visible on the display. Check and adjust alarm volume. |
| Time settings are lost after power outage. | Internal backup battery is depleted or faulty. | The internal button battery may need replacement. Contact customer support. |
| USB charging not working. | Clock not powered; faulty USB cable; device not compatible. | Ensure the clock is powered. Try a different USB cable. Check device compatibility. |
8. Specifications
| Feature | Detail |
|---|---|
| Model Number | LA-C337 |
| Dimensions (L x W x H) | 17.7 x 3.81 x 7.8 cm |
| Weight | 310 grams |
| Brand | GOLOZA |
| Color | Blue |
| Style | Modern/Elegant/Minimalist |
| Special Features | Integrated Design, Built-in Button Battery (for memory), USB Charging Port, Super Clear Projection, Progressive Volume, Curved Display |
| Power Source | Electrical (USB Powered) |
| Shape | Rectangular, Curved Screen |
| Batteries Included | No (Internal button battery for memory backup is pre-installed but not user-replaceable) |
| UPC/GTIN | 647697054284 |
9. Warranty and Support
GOLOZA is committed to providing quality products and customer satisfaction.
- Return Policy: 6 Months Return period.
- Warranty: 24 Months Warranty from the date of purchase.
- Support: Lifetime Support is provided for this product.
For any questions, technical assistance, or warranty claims, please contact GOLOZA customer service through your purchase platform or the official GOLOZA website.