1. Introduction
The NEEWER QR 2.4G Wireless Flash Receiver is designed to integrate seamlessly with the NEEWER 2.4G Q system, enabling wireless triggering of various flash units when paired with NEEWER QPRO-C, QPRO-N, or QPRO-S flash triggers (sold separately). This receiver supports manual flash triggering and offers versatile connectivity options for a sophisticated lighting setup.
It features a standard hot shoe mount, a 1/4" thread for mounting on light stands, and includes sync cables for compatibility with a wide range of monolights and strobes. The 2.4GHz wireless system provides stable, long-range control over multiple flash units with grouped control capabilities.

Image 1.1: The NEEWER QR 2.4G Wireless Flash Receiver, showcasing its compact design and included accessories.
2. Product Overview
Familiarize yourself with the components and controls of your NEEWER QR Wireless Flash Receiver:

Image 2.1: Detailed diagram of the receiver's components and controls.
- Status Indicator: Provides visual feedback on the device's status.
- TEST Button: Used for manually triggering a test flash.
- Flash Hot Shoe Mount: For attaching a speedlite or on-camera flash unit.
- Increase Button (+): Short press to increase value incrementally; long press for rapid increase.
- Decrease Button (-): Short press to decrease value incrementally; long press for rapid decrease.
- LCD Display: High-definition screen for displaying channel, group, and ID information.
- Mode Switching Button (M): For cycling through different modes or settings.
- Cold Shoe Locking Knob: Secures the receiver to a camera's hot shoe or light stand.
- Cold Shoe Mount: For attaching the receiver to a camera or light stand.
- Power Switch (OFF/ON): To turn the receiver on or off.
- Battery Compartment (Back): Houses two AA batteries.
- Type C USB Firmware Upgrade Port: For future firmware updates.
- 2.5mm Sync Port: For connecting to flash units or for camera shutter release.
3. Setup
3.1 Battery Installation
The QR receiver is powered by two AA batteries (not included).
- Locate the battery compartment on the back of the receiver.
- Open the battery compartment cover.
- Insert two AA batteries, ensuring correct polarity (+/-).
- Close the battery compartment cover securely.

Image 3.1: The receiver's LCD display and battery compartment.
3.2 Mounting the Receiver
The receiver offers flexible mounting options:
- On-Camera Hot Shoe: Attach the receiver to your camera's hot shoe mount. Secure it by tightening the cold shoe locking knob. This allows the receiver to act as a wireless shutter release (shutter release cable not included).
- On a Light Stand: Use the 1/4" thread on the bottom of the receiver to mount it onto a light stand or other compatible photography accessory for flexible lighting positioning.

Image 3.2: The receiver connected to a speedlite flash via its hot shoe mount.
3.3 Connecting to Flash Units / Monolights
To wirelessly trigger your flash units, connect them to the QR receiver using the appropriate method:
- Speedlites/On-Camera Flashes: Attach your speedlite directly to the QR receiver's top hot shoe mount. Compatible with various models including Godox V1, V860III, SK400II, NEEWER NW700, NW620, NW635II, NW600, TT560, etc.
- Studio Strobes/Monolights: For monolights that do not have the NEEWER 2.4G Q system built-in, use the included 2.5mm/3.5mm/6.5mm sync cables and adapter to connect them to the receiver's 2.5mm Sync Port. This enables wireless control when paired with a QPRO trigger. Compatible with NEEWER VISION 4, S101-300W Pro, S101-400W Pro, ML300, Yongnuo, Godox AD200Pro, AD400Pro, etc.

Image 3.3: Connecting the receiver to a studio strobe using sync cables.
4. Operating Instructions
4.1 Powering On/Off
Slide the Power Switch (OFF/ON) located on the side of the receiver to turn the device on or off.
4.2 Wireless Flash Triggering with QPRO Trigger
Once the receiver is set up and connected to your flash unit, pair it with a NEEWER QPRO trigger (not included) to enable wireless control. The QPRO trigger will allow you to control the flash unit remotely.

Image 4.1: The NEEWER Wireless Q System in action, showing the receiver paired with a QPRO trigger and various compatible flashes.
4.3 Grouped Control
The 2.4GHz wireless system supports grouped flash synchronization, allowing for more versatile lighting control. You can assign the receiver to one of 5 groups (A, B, C, D, E), 32 channels, and 99 IDs (01-99) for precise control within a range of 328ft/100m.
- Use the Increase (+) and Decrease (-) buttons to adjust channel, group, and ID settings on the LCD display.
- Press the Mode Switching (M) button to cycle through different settings on the display.

Image 4.2: An example of a studio setup utilizing group flash control for multiple lighting units.
4.4 LCD Display and TEST Button
The clear LCD display provides real-time information on the receiver's settings. The physical buttons allow for intuitive operation.
- The TEST Button can be used to manually fire the connected flash unit for testing purposes.
4.5 Wireless Shutter Release Control
By attaching the QR receiver to your camera's hot shoe mount and connecting it via a camera shutter cable (not included) to the 2.5mm Sync Port, you can use the QPRO trigger (not included) as a wireless shutter release for your camera.
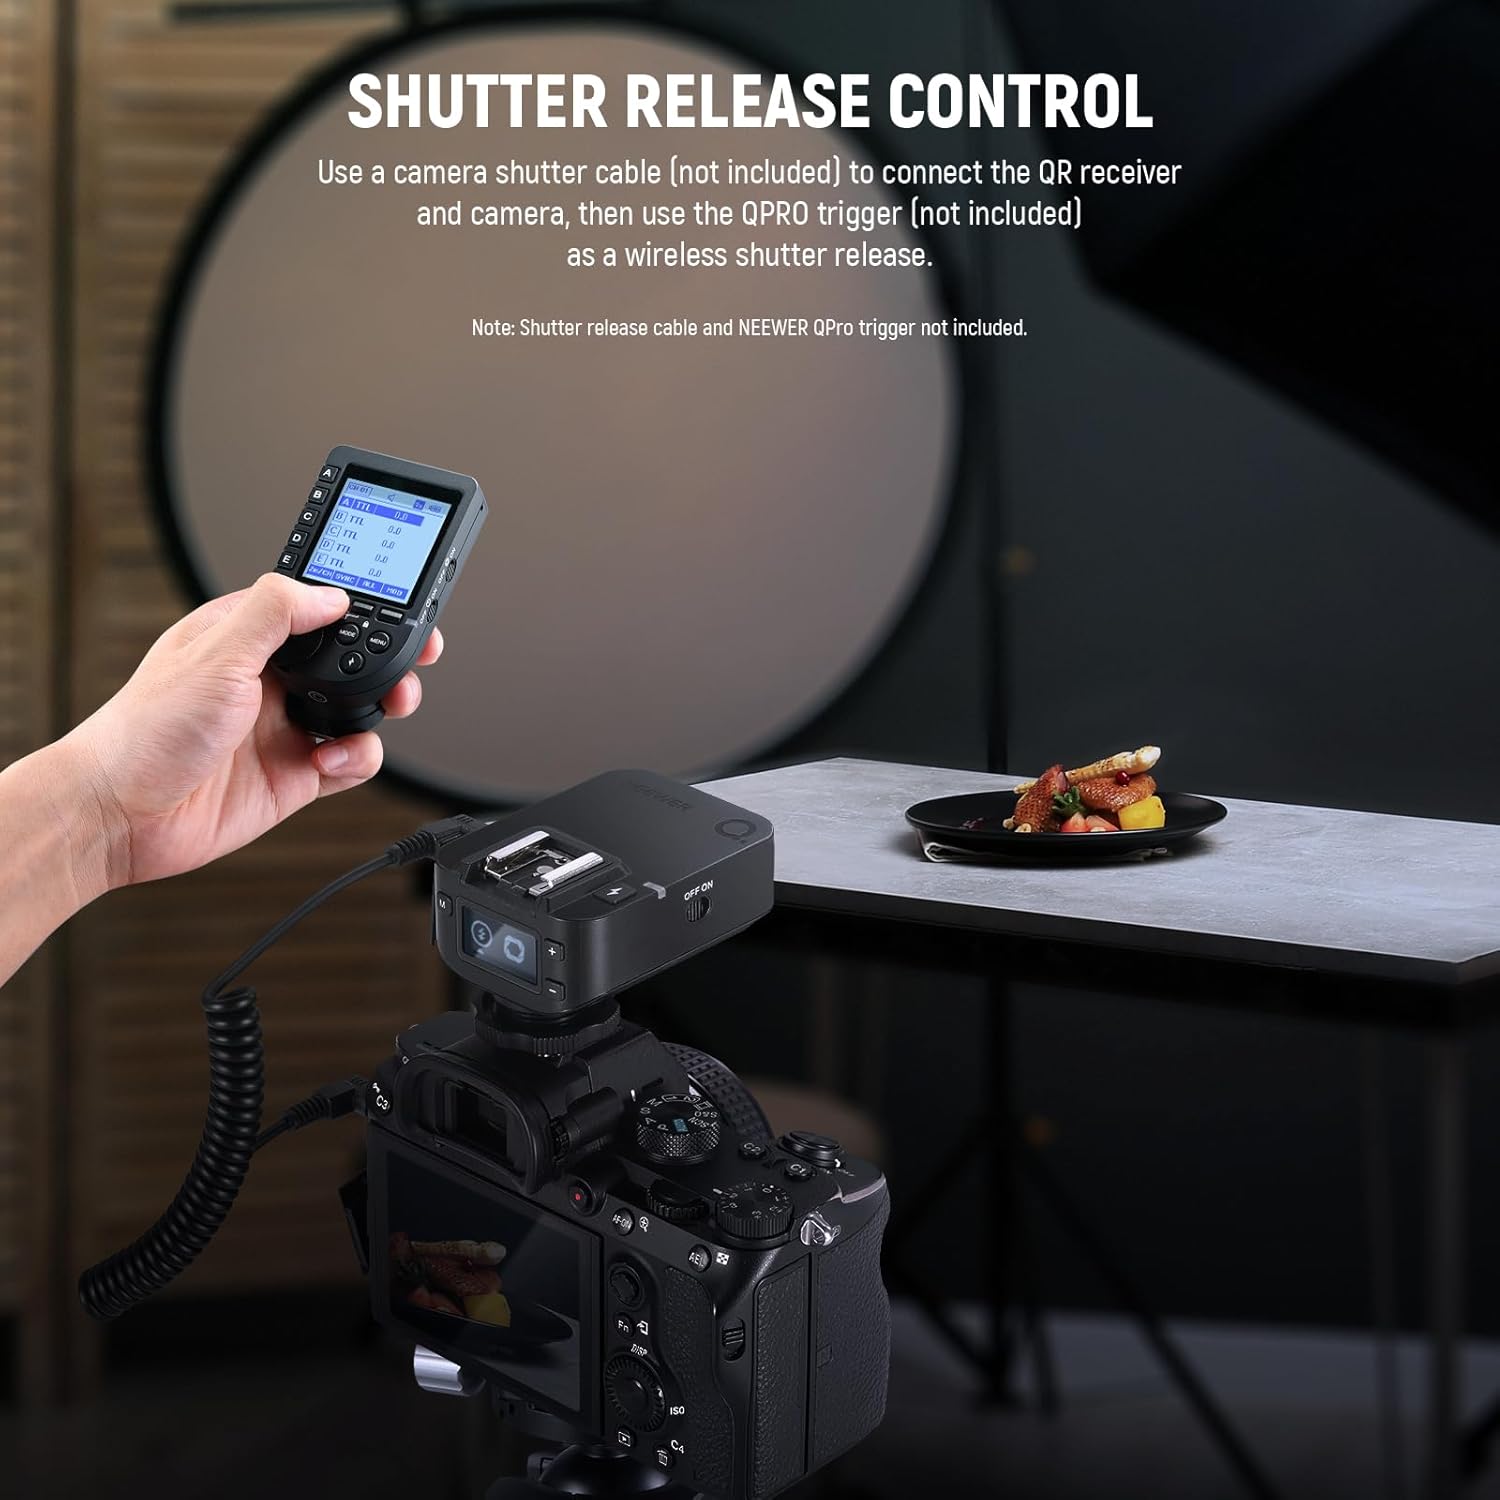
Image 4.3: The receiver configured for wireless camera shutter release.
5. Maintenance
5.1 Battery Replacement
When the battery indicator on the LCD display shows low power, replace the two AA batteries promptly to ensure continuous operation.
5.2 Firmware Upgrades
The receiver supports firmware upgrades via its USB Type C port (cable not included). Check the official NEEWER website for the latest firmware versions and instructions to ensure optimal performance and compatibility.
5.3 Cleaning
To clean the receiver, use a soft, dry cloth. Avoid using harsh chemicals or abrasive materials that could damage the surface or internal components. Keep the hot shoe contacts and sync port free of dust and debris.
6. Troubleshooting
- Receiver not powering on: Ensure batteries are correctly inserted and fully charged. Check the power switch position.
- Flash not triggering wirelessly:
- Verify that the receiver is paired with a compatible NEEWER QPRO trigger.
- Check that the channel, group, and ID settings on both the receiver and the QPRO trigger match.
- Ensure the flash unit is properly mounted on the hot shoe or connected via sync cable.
- Confirm the flash unit is powered on and in the correct mode (e.g., manual mode).
- Check the distance between the trigger and receiver; ensure it's within the 100m range and free from significant obstructions.
- Shutter release not working:
- Ensure the receiver is securely mounted on the camera's hot shoe.
- Verify that the correct shutter release cable (not included) is properly connected between the camera and the receiver's 2.5mm Sync Port.
- Confirm the QPRO trigger is functioning correctly.
7. Specifications
| Feature | Detail |
|---|---|
| Product Model | QR |
| Wireless Mode | 2.4G Frequency |
| Modulation Mode | MSK |
| Channels | 32 |
| Wireless IDs | 01-99 |
| Groups | A, B, C, D, E (5 Groups) |
| Power Supply | 2xAA Batteries (Not Included) |
| Transmission Range | >100m |
| Product Type | Universal Single Contact Receiver |
| Wireless Shutter Output Interface | Camera shutter can be controlled through the 2.5mm Sync port |
| Synchronous Flash Output Interface | Flash can be triggered through the 2.5mm Sync port |
| Firmware Update | Firmware can be updated via the Type C USB port on the device |

Image 7.1: Visual representation of the NEEWER QR receiver's technical specifications.
8. What's in the Box
The package includes the following items:
- 1 x QR Receiver
- 1 x User Manual
- 1 x 3.5mm to 6.5mm Adapter
- 1 x 2.5mm to 2.5mm SYNC Cable
- 1 x 2.5mm to 3.5mm SYNC Cable
Note: NEEWER QPRO trigger and AA batteries are NOT included.

Image 8.1: All items included in the NEEWER QR Wireless Flash Receiver package.
9. Warranty and Support
For warranty information and technical support, please refer to the official NEEWER website or contact NEEWER customer service directly. Keep your purchase receipt as proof of purchase for any warranty claims.