1. Introduction
Thank you for choosing the BIUBLE Car Jump Starter. This device is a versatile emergency tool designed to provide reliable assistance for your vehicle and electronic devices. It combines a powerful 2000A peak current jump starter, a 150PSI portable air compressor, a 5W LED flashlight, and a high-capacity power bank. Please read this manual thoroughly before use to ensure safe and optimal operation.
2. Important Safety Information
Failure to follow these safety instructions may result in electric shock, fire, or serious injury. Keep this manual for future reference.
- Always wear eye protection when jump starting a battery.
- Do not short circuit the smart clamps by touching the red and black clamps together.
- Do not expose the device to extreme temperatures (above 60°C / 140°F) or direct sunlight for extended periods.
- Do not immerse the device in water or expose it to rain.
- Keep out of reach of children.
- Ensure proper polarity connection: red clamp to positive (+), black clamp to negative (-). Incorrect connection can damage the device and vehicle.
- If the vehicle does not start after three attempts, discontinue use and check for other vehicle issues.
- Disconnect the smart clamps from the vehicle battery within 30 seconds after the vehicle starts.
- Do not attempt to jump start a frozen battery.
- Do not use the device if it is damaged or if the cables are frayed.
3. Package Contents
Verify that all items are present in your package:
- 1 × BIUBLE Car Jump Starter Unit
- 1 × Smart Clamp with Jumper Cables
- 1 × Type-C Data Cable (Note: Wall charger is not included)
- 1 × Multi-language Instruction Manual
4. Product Overview
Familiarize yourself with the components of your BIUBLE Car Jump Starter.

Image: This diagram illustrates the various parts of the BIUBLE Car Jump Starter, including the Power Button, Battery Indicator LEDs, Type-C Input, USB Output ports, LED Flashlight, Jump Start Port, and the internal high-capacity battery.
- Power Button: Used to turn the device on/off and cycle through flashlight modes.
- Battery Indicator: LED lights or LCD screen displaying the current charge level of the jump starter.
- Type-C Input: Port for charging the jump starter unit.
- USB Output 1 & 2: Ports for charging external electronic devices.
- LED Flashlight: Integrated light for illumination in dark conditions.
- Jump Start Port: Dedicated port for connecting the smart clamp.
- Solid Case: Durable exterior housing for protection.
- High Capacity Battery: Internal lithium-polymer battery providing power for all functions.
5. Setup and Charging the Jump Starter
Before first use, fully charge your BIUBLE Car Jump Starter.
- Connect the provided Type-C data cable to the Type-C Input port on the jump starter.
- Connect the other end of the Type-C cable to a USB wall charger (not included) or a powered USB port.
- The battery indicator lights will illuminate or the LCD screen will show charging progress.
- Charge until the battery indicator shows a full charge (all LEDs solid or 100% on LCD).
- Disconnect the charging cable once fully charged.
It is recommended to recharge the jump starter every 3-6 months, even if not in use, to maintain optimal battery health.
6. Operating Instructions
6.1. Jump Starting a Vehicle
This device is capable of jump starting 12V vehicles with up to 8.0L gas or diesel engines.
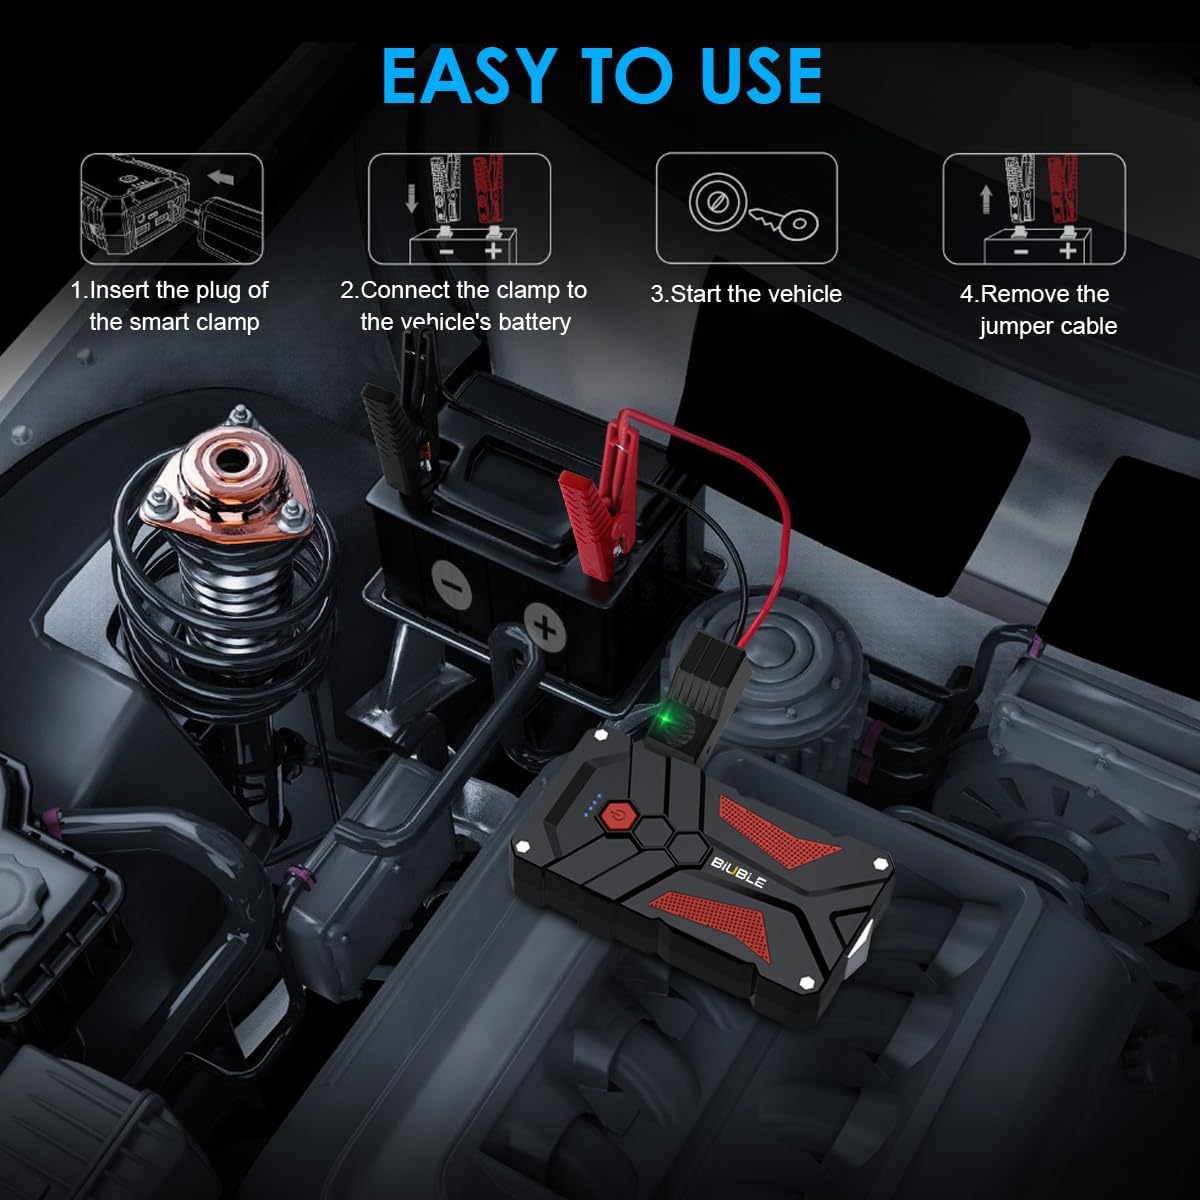
Image: A visual guide demonstrating the four easy steps to jump start a vehicle: inserting the smart clamp, connecting to the battery, starting the vehicle, and removing the cables.
- Ensure the jump starter has at least 50% charge.
- Turn off your vehicle's ignition and all accessories (lights, radio, etc.).
- Insert the blue plug of the smart clamp firmly into the jump start port on the BIUBLE unit. Ensure a secure connection.
- Connect the red (+) clamp to the positive (+) terminal of your vehicle's battery.
- Connect the black (-) clamp to the negative (-) terminal of your vehicle's battery.
- Observe the indicator light on the smart clamp. A solid green light indicates a correct connection and that the battery is ready for jump starting. If the light is red or flashing, check connections or refer to the troubleshooting section.
- Once the smart clamp shows a solid green light, start your vehicle's engine.
- As soon as the engine starts, immediately remove the smart clamp from the vehicle battery terminals. First remove the black (-) clamp, then the red (+) clamp.
- Disconnect the smart clamp from the jump starter unit.

Image: This image highlights the safety features of the smart clamps, including spark-proof technology and reverse polarity protection, along with a manual override button for specific situations.
The smart clamp features Spark Proof and Reverse Polarity Protection for safe operation. In rare cases where the vehicle battery is extremely low and the smart clamp does not show a green light, a Manual Override button may be present on the smart clamp. Consult the smart clamp's specific instructions for safe use of this feature.
6.2. Using the Portable Air Compressor
The integrated 150PSI air compressor can inflate tires and other inflatables.
- Connect the air hose to the tire valve or appropriate inflatable adapter.
- Turn on the jump starter unit.
- Use the controls on the device to set the desired pressure. The LED screen will display the preset pressure.
- Select the preferred unit of measurement (PSI, BAR, KPA, KG/CM²).
- Start the inflation process.
- The air compressor will automatically stop once the preset pressure is reached.
- Disconnect the air hose.
6.3. Using as a Power Bank
The BIUBLE unit can charge your electronic devices via its USB output ports.
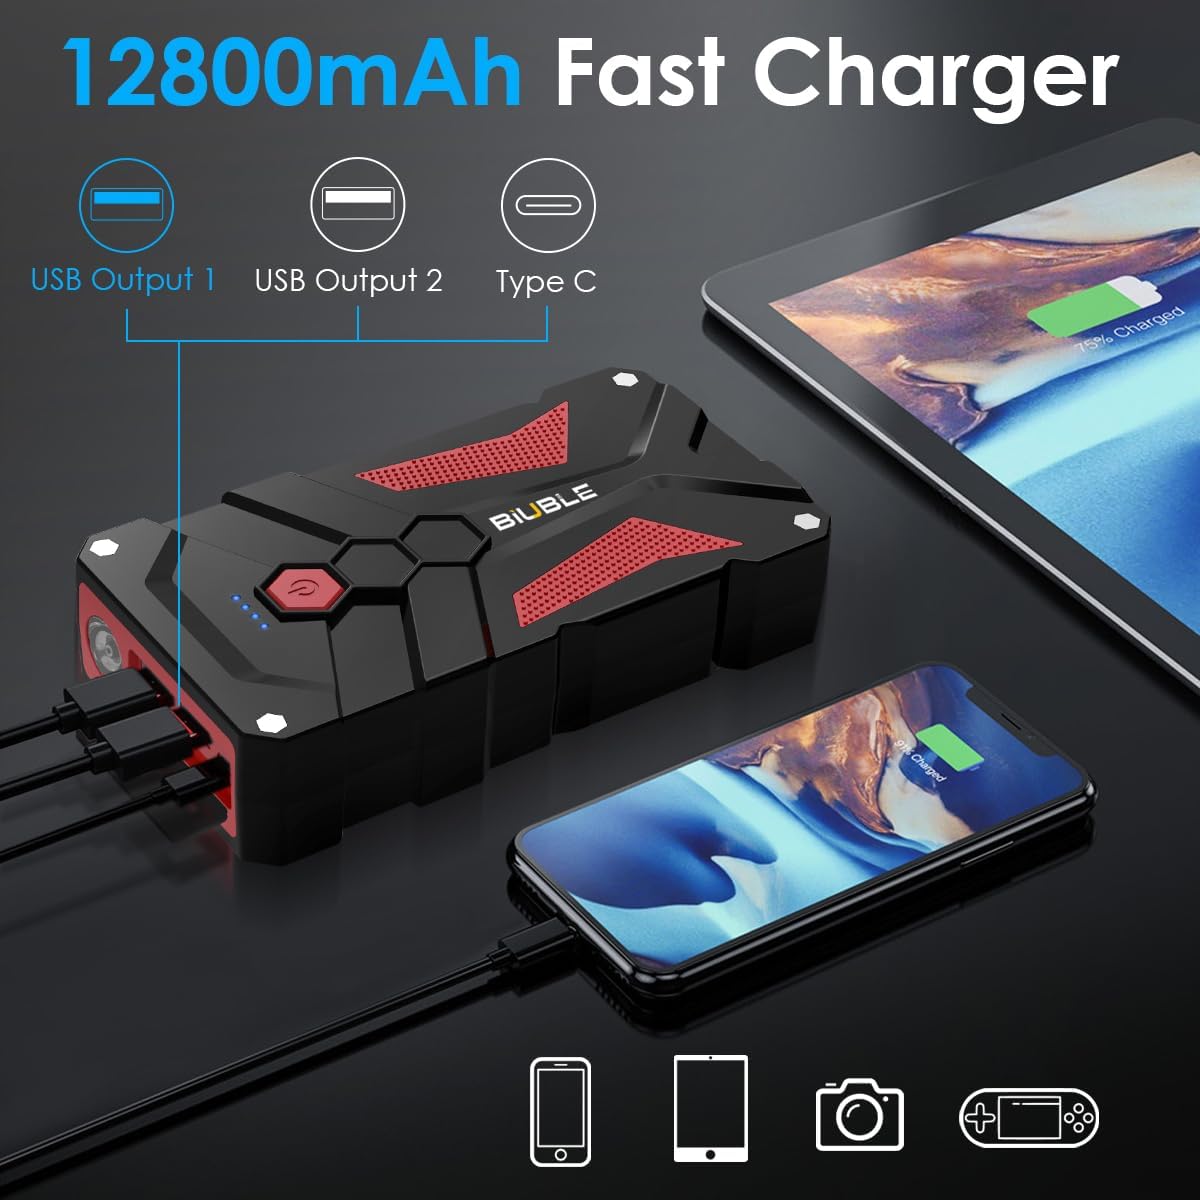
Image: The BIUBLE jump starter is shown actively charging a smartphone and a tablet simultaneously using its 12800mAh fast charger capability and multiple USB output ports.
- Turn on the jump starter unit.
- Connect your electronic device (e.g., smartphone, tablet, camera) to one of the USB Output ports using a compatible USB charging cable.
- The device will begin charging. The LCD screen will display the current power status of the jump starter.
- Disconnect your device once charging is complete.
6.4. Using the LED Flashlight
The integrated 5W LED flashlight provides illumination for various situations.
- Press and hold the Power Button for a few seconds to turn on the flashlight.
- Press the Power Button repeatedly to cycle through different lighting modes (e.g., solid beam, strobe, SOS signal).
- Press and hold the Power Button again to turn off the flashlight.
7. Maintenance
Proper maintenance ensures the longevity and performance of your jump starter.
- Recharging: Recharge the jump starter fully after each use. If not used for an extended period, recharge it every 3-6 months to prevent battery degradation.
- Storage: Store the device in a cool, dry place, away from direct sunlight, moisture, and flammable materials. The ideal storage temperature is between 0°C and 40°C (32°F and 104°F).
- Cleaning: Clean the exterior of the unit with a soft, dry cloth. Do not use harsh chemicals or abrasive cleaners. Ensure all ports are free of dust and debris.
- Battery Terminals: Keep the smart clamp terminals clean and free of corrosion.
8. Troubleshooting
If you encounter issues, refer to the following common problems and solutions:
| Problem | Possible Cause | Solution |
|---|---|---|
| Vehicle does not start | Jump starter battery is low. Incorrect clamp connection. Vehicle battery is severely damaged. Other vehicle issues. | Recharge the jump starter. Ensure red clamp is on positive (+), black on negative (-). Check smart clamp indicator for solid green. Consult a mechanic. Do not attempt to jump start a frozen or visibly damaged battery. If the vehicle does not start after 3 attempts, seek professional assistance. |
| Smart clamp indicator is red/flashing | Reverse polarity connection. Vehicle battery voltage too low. Poor connection. | Disconnect and reconnect clamps with correct polarity. Ensure clamps are securely attached to clean battery terminals. If a manual override button is present on the smart clamp, refer to its specific instructions for use in extremely low battery situations. |
| Air compressor not inflating | Air hose not securely connected. Jump starter battery is low. Incorrect pressure setting. | Ensure the air hose is tightly screwed onto the tire valve. Recharge the jump starter. Verify the desired pressure is set correctly on the LED screen. |
| Electronic device not charging from USB | Jump starter is off. USB cable is faulty. Jump starter battery is low. | Press the power button to turn on the jump starter. Try a different USB cable or a different USB output port. Recharge the jump starter. |
9. Specifications
Technical details of the BIUBLE Car Jump Starter Model JS001.
| Feature | Detail |
|---|---|
| Brand | BIUBLE |
| Model Number | JS001 (also JS0006) |
| Peak Current | 2000A |
| Starting Current | 1000A |
| Vehicle Compatibility | 12V vehicles, up to 8.0L Gas or 8.0L Diesel engines |
| Battery Capacity | 4500mAh - 26800mAh (typical 12800mAh) Lithium-polymer |
| Input | Type-C |
| USB Output | USB Output 1, USB Output 2 |
| Air Compressor Pressure | Up to 150PSI |
| LED Flashlight Power | 5W |
| Product Dimensions (L x W x H) | 17.5 x 9 x 3.5 cm (6.9 x 3.5 x 1.4 inches) |
| Item Weight | 821 g (1.81 lbs) |
| Compliant Specifications | ETL |
10. Warranty and Support
Your BIUBLE Car Jump Starter comes with a comprehensive warranty and dedicated customer support.
- Warranty: This product is covered by a 2-year warranty from the date of purchase. Please retain your proof of purchase for warranty claims.
- Customer Support: If you have any questions, concerns, or require assistance with your BIUBLE Car Jump Starter, please do not hesitate to contact our customer support team. We are committed to providing a prompt response within 24 hours and 5-star service.
For contact information, please refer to the contact details provided in your purchase documentation or on the official BIUBLE website.