1. Introduction
This manual provides comprehensive instructions for the assembly, operation, and maintenance of your vidaXL Garden Gate, Model 153158. Please read these instructions carefully before installation and use to ensure proper function and longevity of the product. Retain this manual for future reference.
2. Safety Information
- Always wear appropriate personal protective equipment (PPE) during assembly, such as gloves and safety glasses.
- Ensure all components are securely fastened before use.
- Do not allow children to play near the gate during installation or operation.
- Verify the stability of the mounting surface before installation.
- Keep keys for the locking system in a safe place, out of reach of children.
3. Package Contents
Before beginning assembly, ensure all parts listed below are present and undamaged.
- 1x Gate Panel (with laser-cut tree design)
- 2x Gate Posts (with flange plates)
- 1x Locking System (pre-installed or separate)
- 3x Keys for Locking System
- Mounting Accessories (bolts, nuts, washers, etc.)
- Instruction Manual
4. Specifications
| Feature | Detail |
|---|---|
| Brand | vidaXL |
| Model Number | 153158 |
| Color | Anthracite |
| Material | Galvanized steel with powder coating |
| Total Size (W x H) | 41.3" x 70.9" (105 cm x 180 cm) |
| Gate Panel Size (W x H) | 33.5" x 68.9" (85 cm x 175 cm) |
| Post Tube Size (W x D) | 4.7" x 3.9" (12 cm x 10 cm) |
| Post Height | 70.9" (180 cm) |
| Item Weight | 59.8 lbs (27.2 kg) |
| Assembly Required | Yes |
Note: All dimensions are approximate and may vary slightly.
5. Setup and Installation
The vidaXL Garden Gate is designed for straightforward assembly. Follow these steps carefully for proper installation.
5.1 Prepare the Installation Area
- Choose a level and stable surface for gate installation.
- Ensure adequate clearance for the gate to swing open and close without obstruction.
- Mark the positions for the gate posts according to the gate's width and desired placement.
5.2 Attach Posts to the Ground
The gate posts come with flange plates for secure ground attachment.
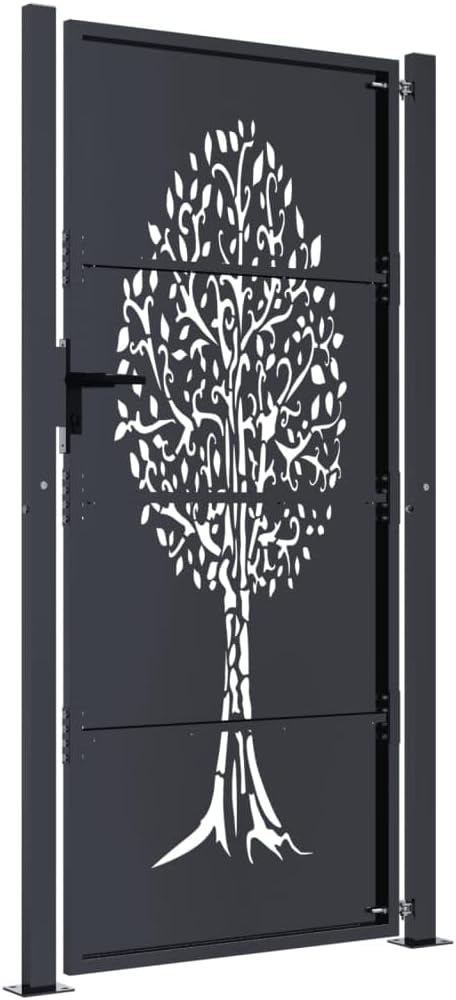
Figure 5.2.1: Illustration of securing the gate post flange plate to the ground using anchor bolts. Ensure the bolts are tightened securely for stability.
- Position the gate posts at the marked locations.
- Drill holes into the ground through the flange plates, if necessary, using appropriate drilling equipment for your surface type (e.g., concrete, wood).
- Secure the posts firmly using the provided mounting accessories (bolts, anchors).
- Ensure both posts are plumb and aligned correctly.
5.3 Attach Gate Panel to Posts
The gate panel attaches to the posts via hinges.

Figure 5.3.1: Fully assembled vidaXL garden gate, illustrating the gate panel hinged to the two support posts. The decorative tree design is visible on the gate panel.
- Carefully lift the gate panel and align its hinges with the corresponding hinge points on one of the secured posts.
- Insert the hinge pins or secure the hinge bolts as per the design.
- Ensure the gate swings freely and closes properly. Adjust post alignment if necessary.
5.4 Install Locking System
The gate includes a lockable system for security.

Figure 5.4.1: Detailed view of the gate's handle and integrated keyhole, part of the locking mechanism. This shows where the key is inserted to secure the gate.
- If the locking system is not pre-installed, attach the handle and lock mechanism to the gate panel as instructed in the supplementary hardware guide (if provided).
- Ensure the latch aligns correctly with the strike plate on the opposite post when the gate is closed.
- Test the locking mechanism with the provided keys to confirm it operates smoothly.
6. Operation
Operating your vidaXL Garden Gate is straightforward.
- Opening the Gate: Turn the handle to disengage the latch, then push or pull the gate open.
- Closing the Gate: Gently push the gate until the latch engages with the strike plate on the post.
- Locking the Gate: Insert one of the provided keys into the keyhole and turn it to engage the locking mechanism. Remove the key and store it safely.
- Unlocking the Gate: Insert the key into the keyhole and turn it to disengage the lock.
7. Maintenance
Regular maintenance will help preserve the appearance and functionality of your garden gate.
- Cleaning: Clean the gate periodically with a soft cloth and mild soap and water. Avoid abrasive cleaners or harsh chemicals that could damage the powder coating.
- Inspection: Regularly inspect all bolts, hinges, and the locking mechanism for tightness and signs of wear. Tighten any loose fasteners.
- Lubrication: Apply a silicone-based lubricant to the hinges and locking mechanism annually, or as needed, to ensure smooth operation and prevent rust.
- Rust Prevention: The galvanized steel with powder coating offers good protection against corrosion. However, if scratches or chips occur, touch up the affected areas with appropriate outdoor metal paint to prevent rust.
8. Troubleshooting
| Problem | Possible Cause | Solution |
|---|---|---|
| Gate does not close properly. | Posts are not aligned; hinges are stiff; ground is uneven. | Check post alignment and adjust if necessary. Lubricate hinges. Ensure the ground beneath the gate is level. |
| Locking mechanism is stiff or difficult to operate. | Lack of lubrication; debris in the lock; misalignment. | Apply lubricant to the lock cylinder and latch. Clean any debris. Check if the gate is properly aligned when closed. |
| Gate squeaks when opening/closing. | Dry hinges. | Lubricate hinges with a suitable lubricant. |
| Rust spots appear. | Damage to powder coating; prolonged exposure to moisture. | Clean the area, gently sand if necessary, and apply outdoor metal paint to touch up. |
9. Warranty and Support
For information regarding warranty coverage or if you require further assistance, please contact vidaXL customer support. Refer to your purchase documentation for specific warranty terms and contact details.
You can visit the official vidaXL store for more product information: vidaXL Store