1. Introduction
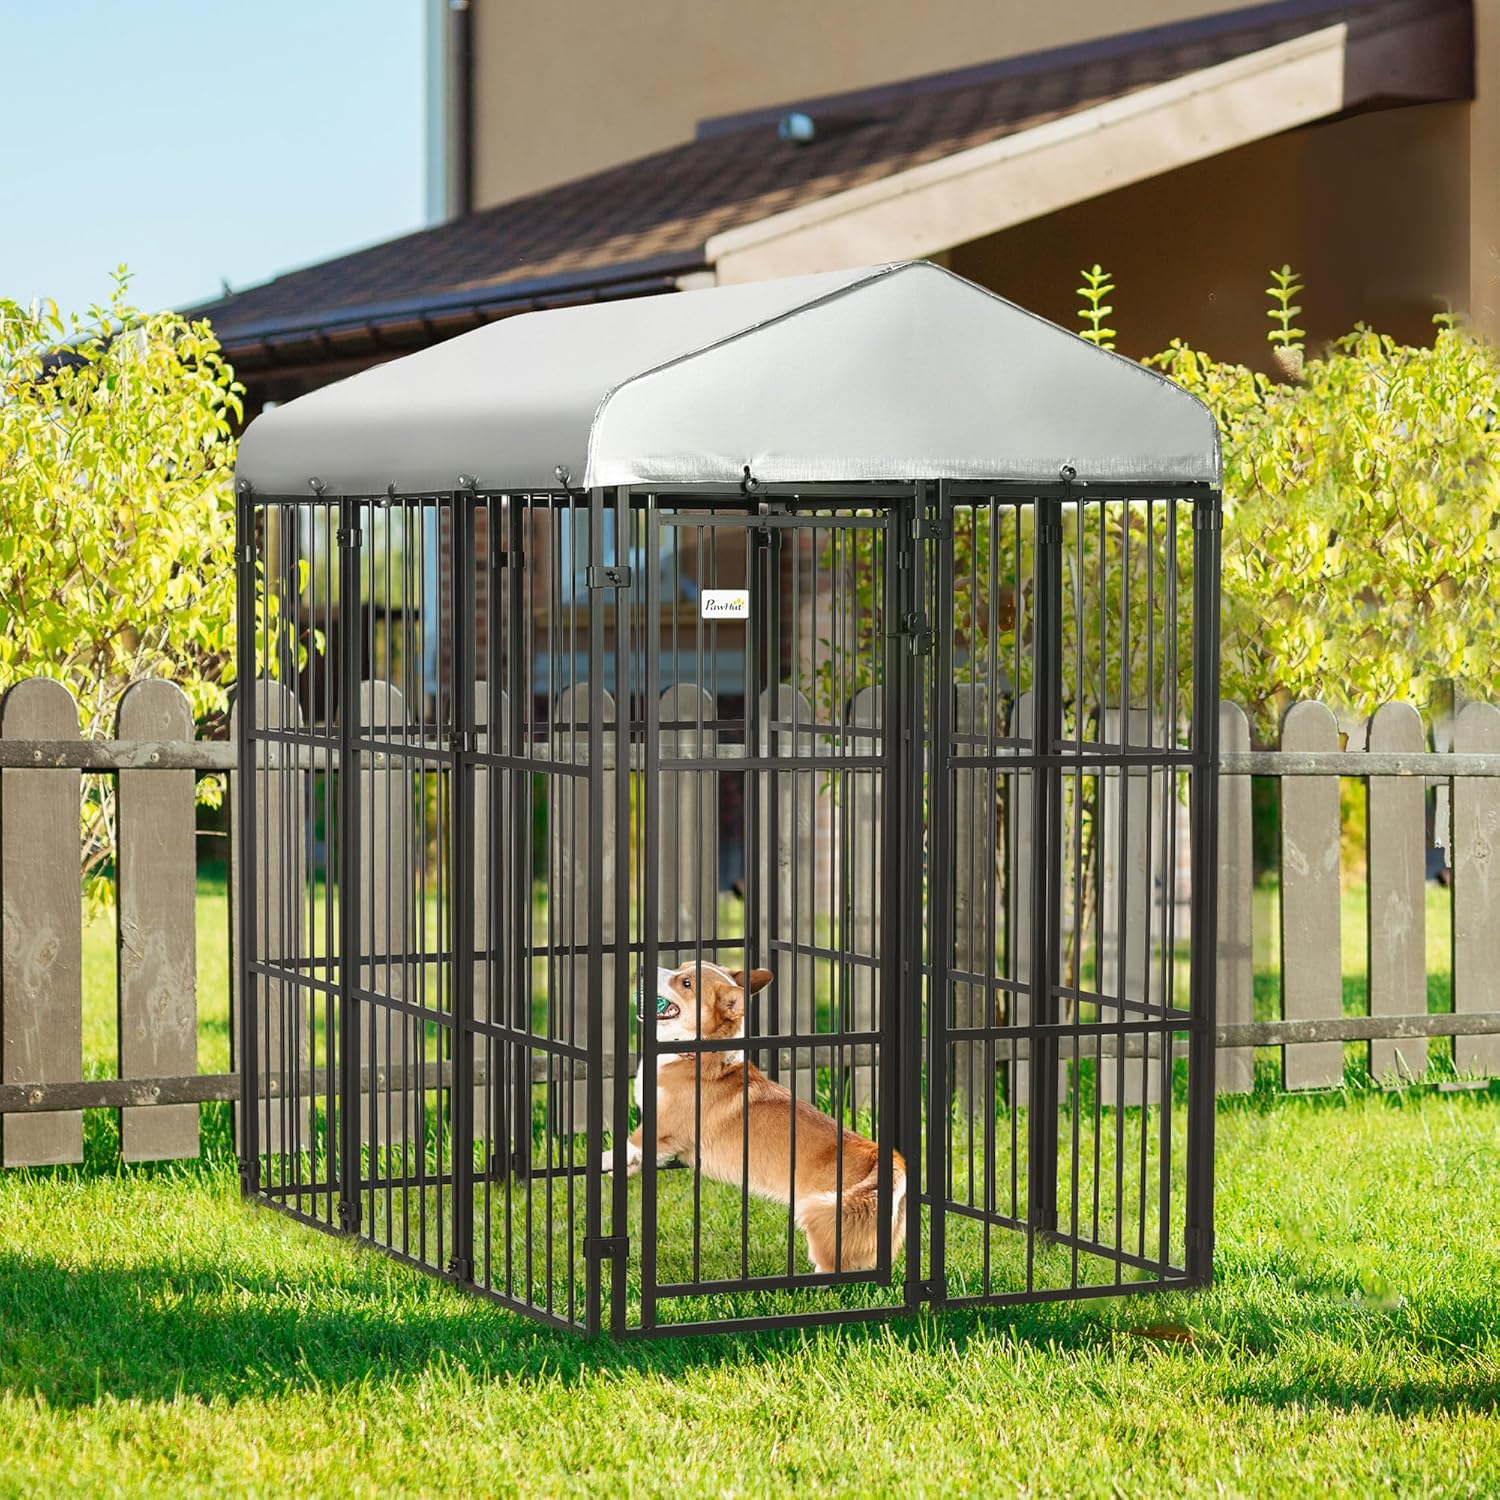
This manual provides detailed instructions for the assembly, operation, and maintenance of your PawHut 6' x 4' Covered Dog Playpen. Designed to offer a secure and comfortable outdoor space for your pets, this playpen features a heavy-duty metal frame and a protective roof. Please read these instructions carefully before assembly and use to ensure proper setup and safe operation.


2. Safety Information
- Always ensure all connections are securely fastened before allowing pets into the playpen.
- Regularly inspect the playpen for any signs of wear, damage, or loose components.
- Do not modify the product in any way, as this may compromise its structural integrity and safety.
- This playpen is designed for outdoor use. Ensure it is placed on a level surface to prevent tipping.
- Supervise pets, especially during initial use, to ensure they adapt safely to the enclosure.
Animal Suitability
This playpen is suitable for medium to large dogs weighing up to 66 lbs, as well as other animals such as chickens and ducks. It is not suitable for cats, extra-small dogs, or other small pets that can pass through the bar gaps (3.25 inches).

3. Package Contents
Before beginning assembly, please ensure all parts are present and undamaged. The package should contain:
- Metal fence panels (various sizes, including door panel)
- Protective PE roof cover
- Galvanized steel pipes and bars
- Spring button clips for roof attachment
- Connection hardware (bolts, nuts, clamps)
- Assembly tools (if provided, otherwise standard tools like wrenches may be needed)
4. Setup and Assembly
Assembly is required for this product. It is recommended to have at least two people for easier and safer installation. Follow these steps:
- Unpack Components: Carefully remove all parts from the packaging and lay them out on a clean, flat surface. Verify all components against the package contents list.
- Assemble Panels: Connect the metal fence panels using the provided connection hardware. Ensure the galvanized steel pipes align correctly and are securely fastened.
- Install Door Panel: Integrate the door panel into the desired position within the enclosure. Ensure the door opens and closes smoothly and the latch mechanism functions correctly.
- Attach Roof Frame: Assemble the roof support frame according to the diagrams. Lift and secure the roof frame onto the top of the assembled panels.
- Secure Roof Cover: Drape the PE roof cover over the roof frame. Use the spring button clips to firmly fasten the cover to the frame, ensuring it is taut and provides adequate shelter.


5. Operating Instructions
Door Operation
The playpen features a single door with a secure locking mechanism for easy access and pet containment. To open, lift the latch and pull the door outwards. To close, push the door shut and ensure the latch is fully engaged to prevent accidental escapes.


Placement
Position the playpen on a flat, stable outdoor surface. The protective roof provides shelter from sun and rain, making it suitable for various weather conditions. Ensure there is adequate space around the playpen for air circulation and easy access.

6. Maintenance
Cleaning
Clean the metal frame and PE roof cover regularly with mild soap and water. Rinse thoroughly and allow to air dry. Avoid using harsh chemicals or abrasive cleaners, which can damage the materials.
Inspection
Periodically check all bolts, nuts, and connections to ensure they remain tight. Inspect the PE roof cover for any tears or damage, and the metal frame for rust or structural compromise. Address any issues promptly to maintain the safety and longevity of the playpen.


7. Troubleshooting
- Playpen feels flimsy or unstable: Ensure all connection points are tightened securely. Verify that the playpen is placed on a completely flat and level surface. Consider anchoring the playpen if used in windy conditions or with highly active animals.
- Rusting observed: While the steel is heavy-duty, prolonged exposure to moisture can lead to rust. Ensure the playpen is cleaned and dried regularly. Applying a rust-inhibiting spray periodically can help extend its lifespan, especially in humid environments.
- Small pets escaping: This playpen has a bar gap of 3.25 inches. It is not designed for very small animals or cats that can fit through these gaps. Ensure the playpen is used only with animals of appropriate size as indicated in the safety section.
- Difficulty with door latch: Check for any obstructions or misalignment. Ensure the door frame is properly installed and not warped. Lubricate moving parts if necessary.
8. Specifications
| Feature | Detail |
|---|---|
| Overall Dimensions | 72" L x 47.75" W x 72" H (6' L x 4' W x 6' H) |
| Door Dimensions | 18" W x 53.25" H |
| Item Weight | 92.4 Pounds |
| Material | Heavy-Duty Steel, PE Cover |
| Color | Black |
| Gap Size Between Bars | 3.25 Inches |
| Recommended Animals | Medium to Large Dogs (up to 66 lbs), Chickens, Ducks |
| Specific Uses | Outdoor |
| Assembly | Required |

9. Warranty Information
This PawHut Covered Dog Playpen is covered by a 1-Year Manufacturer Warranty. This warranty covers defects in materials and workmanship under normal use. Please retain your proof of purchase for any warranty claims. For specific terms and conditions, refer to the warranty documentation included with your product or contact customer support.
10. Customer Support
For further assistance, questions, or to report any issues with your PawHut product, please contact the manufacturer or visit the official PawHut store.
- Manufacturer: Aosom LLC
- Online Store: Visit the PawHut Store on Amazon