Introduction
The EBUYFIRE 120db USB Rechargeable Bike Alarm with Remote Control is designed to provide enhanced security for your bicycle, motorcycle, electric scooter, and other valuable assets. Featuring a loud 120dB alarm, adjustable sensitivity, and a convenient remote control, this device helps deter theft and alerts you to potential tampering. Its USB rechargeable battery ensures long-lasting performance, and the waterproof design allows for reliable outdoor use.

Image: Overview of the EBUYFIRE Anti-Theft Vibration Alarm with Remote, highlighting its 110db loud alarm, IP55 waterproof rating, USB rechargeable feature, 5 levels of sensitivity, and SOS function.
What's in the Box
- USB Rechargeable Alarm x1
- Remote Controller x1
- USB Cable x1
- User Manual x1
- Retail Box x1
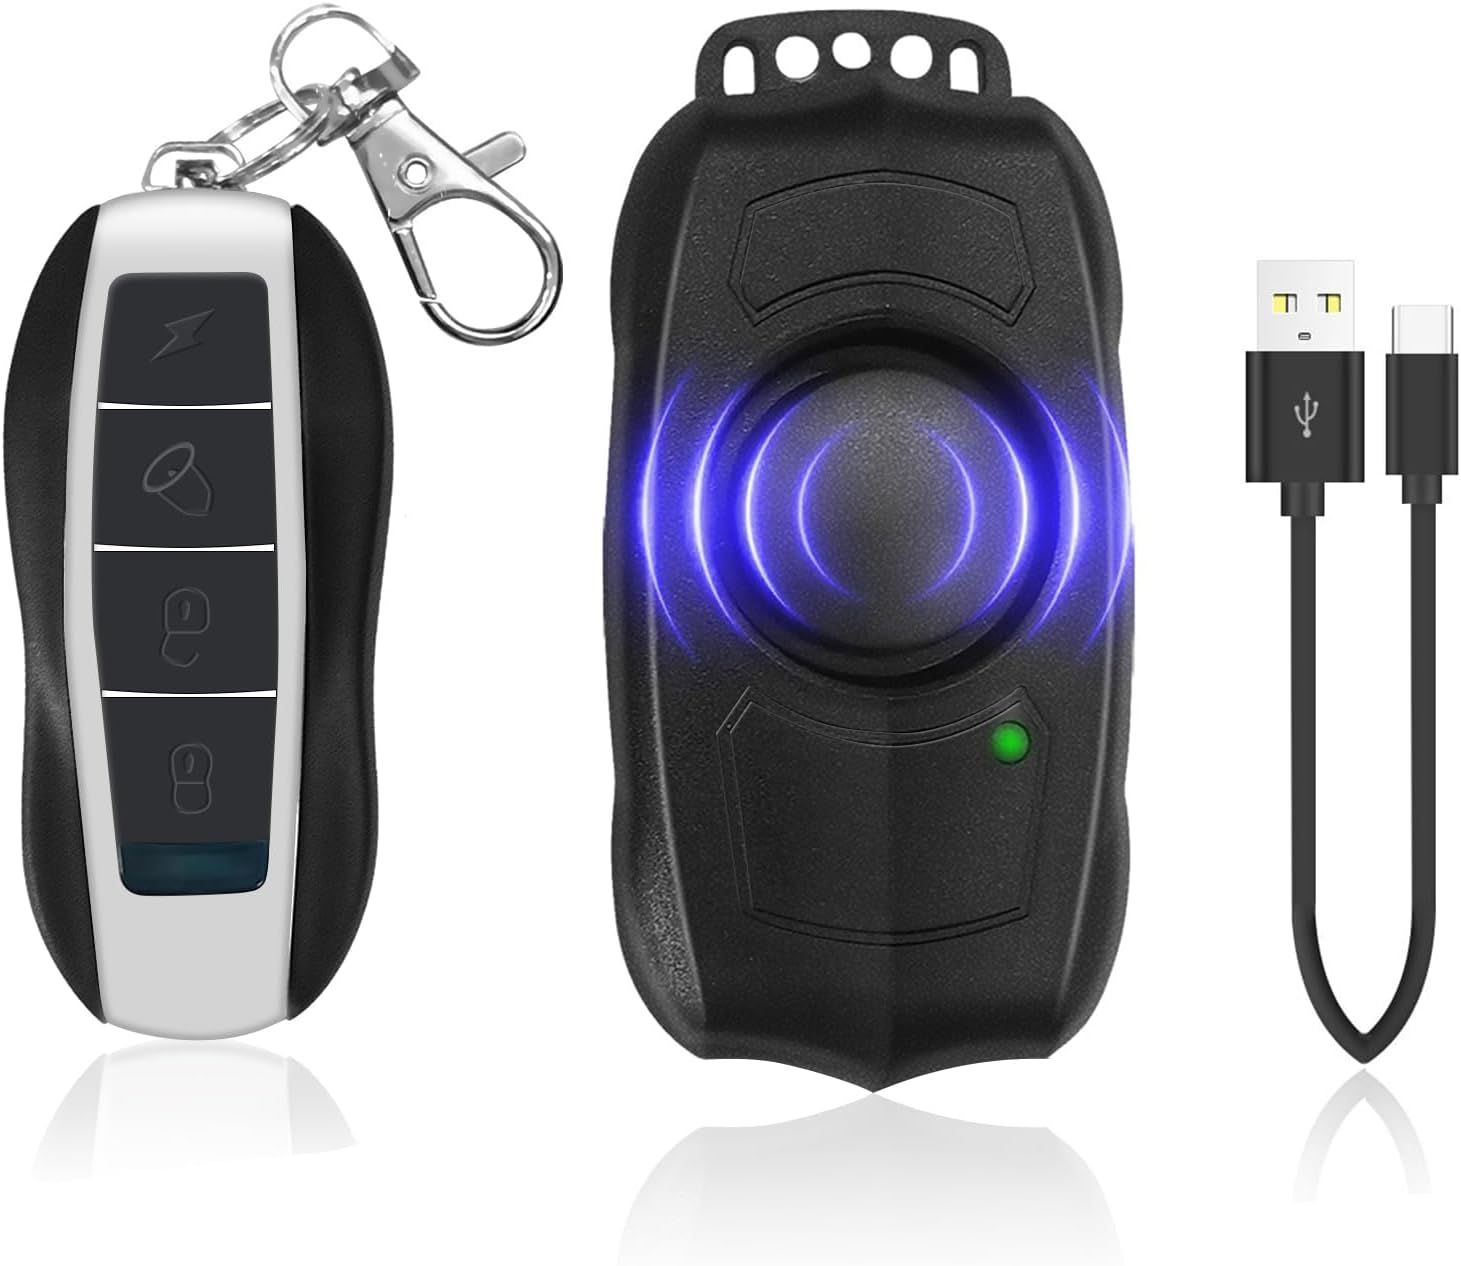
Image: The EBUYFIRE bike alarm unit, its remote control, and a USB charging cable, representing the package contents.
Setup
1. Charging the Alarm
The alarm unit is equipped with a 500mAh polymer lithium battery and is Micro USB rechargeable. Ensure the alarm is fully charged before first use. A full charge typically takes 2-3 hours and provides approximately 30 days of standby time.
- Connect the provided Micro USB cable to the charging port on the alarm unit.
- Connect the other end of the cable to a USB power source (e.g., computer, USB wall adapter).
- The charging indicator light will show a stable red or blue flashing during charging.
- When fully charged, the indicator light will turn off or show a blue flashing.
- If the battery is low, please charge it promptly to avoid the need for re-pairing.

Image: The alarm unit connected to a Micro USB charging cable, with details on charging time, standby time, and indicator light behavior.
2. Installation
The EBUYFIRE bike alarm offers two primary installation methods:
- Strap Installation: Use the provided straps to secure the alarm to a suitable location on your bike frame, seat post, or other desired surface. Ensure it is firmly attached.
- Double-Sided Sticker Installation: For flat surfaces, use the included double-sided adhesive sticker to attach the alarm. Clean the surface thoroughly before applying for optimal adhesion.
No screws or complex wiring are required for installation.

Image: The alarm unit shown in various application contexts, including bicycles, electric skateboards, motorcycles, and wheelchairs, demonstrating its versatility.
3. Remote Control Pairing
The alarm comes pre-paired with one remote. If you need to pair additional remotes or re-pair an existing one, follow these steps:
Pairing the First Remote Control:
- Remove the battery from the bike alarm for 30 seconds.
- Press and hold the sound button on the remote to enter code learning mode. After hearing a 'Bi' sound, press the ARM or DISARM button. You'll hear 'Bi...Bi' twice, indicating successful pairing.
- Assemble and install the battery back into the alarm.
Pairing Additional Remote Controls:
You can pair additional remotes one by one. The bike alarm can be paired with a maximum of 8 remotes. If you pair more than 8, the code of the first remote will be overwritten.
- First, disarm using the old remote's unlock key.
- Long-press the old remote's lock key to enter code learning mode.
- After one 'Bi' sound, press the ARM or DISARM key on the new remote, and you'll hear 'Bi ... Bi' twice. The new remote is now ready to use.
How to Delete Pairing:
- Firstly, ensure that the bike alarm is not in arming mode.
- Secondly, press and hold the unlock button on the learned remote control.
- Thirdly, after hearing the 'Bi' sound, press the switching button.
- Finally, you will hear 'Bi... Bi... Bi' three times. At this point, all the pairing codes in the alarm will be reset.
Video: Demonstrates the installation process of the WSDCAM Bike Alarm, including bracket assembly and mounting on a bicycle.
Video: Instructions on how to pair a remote control with the bike alarm unit.
Operating Instructions
1. Arming and Disarming
- Arm: Press the lock button on the remote control. The alarm will emit a 'Bi' sound, indicating it is armed.
- Disarm: Press the unlock button on the remote control. The alarm will emit a 'Bi' sound, indicating it is disarmed.
- Vehicle Search: Press the lightning bolt button to activate the vehicle search function, making the alarm sound to help locate your vehicle.
- Bell Function: Press the bell button to cycle through 3 different bell sounds (not available in armed mode).

Image: The remote control and the alarm unit, with labels indicating the functions of each button (Alarm Key, Withdrawal key, Key of remote control doorbell, Car-hunting key) and parts of the alarm (Buzzer, Indicator light, USB charge port, Fixed plate).

Image: A person using the remote control to locate their bike in a crowded parking area, demonstrating the vehicle search function with a remote control range of 0-50ft.
Video: Demonstrates the functionality of the wireless remote bike alarm, including arming, disarming, and the loud siren.
2. Adjusting Sensitivity and Volume
The alarm features adjustable sensitivity and volume levels to suit your environment and preferences.
- Sensitivity: The alarm has 5 adjustable sensitivity levels, from gentle touch to strong impact.
- Volume: There are 3 adjustable volume levels for the alarm sound.
Steps to Adjust Sensitivity and Volume:
- Press and hold the Disarm Button until the remote's blue indicator light goes off then glows (the alarm will make sounds during this time, just ignore it).
- Short press the Arm Button to adjust the sensitivity level. It has 7 sensitivity levels, indicated by different musical notes (Do re mi fa sol la si, "Do" sound means the highest sensitivity level).
- Press the Bell Button to select the volume level (It has 3 Volume Levels from high to low).
- Press the Disarm Button to exit setting mode.
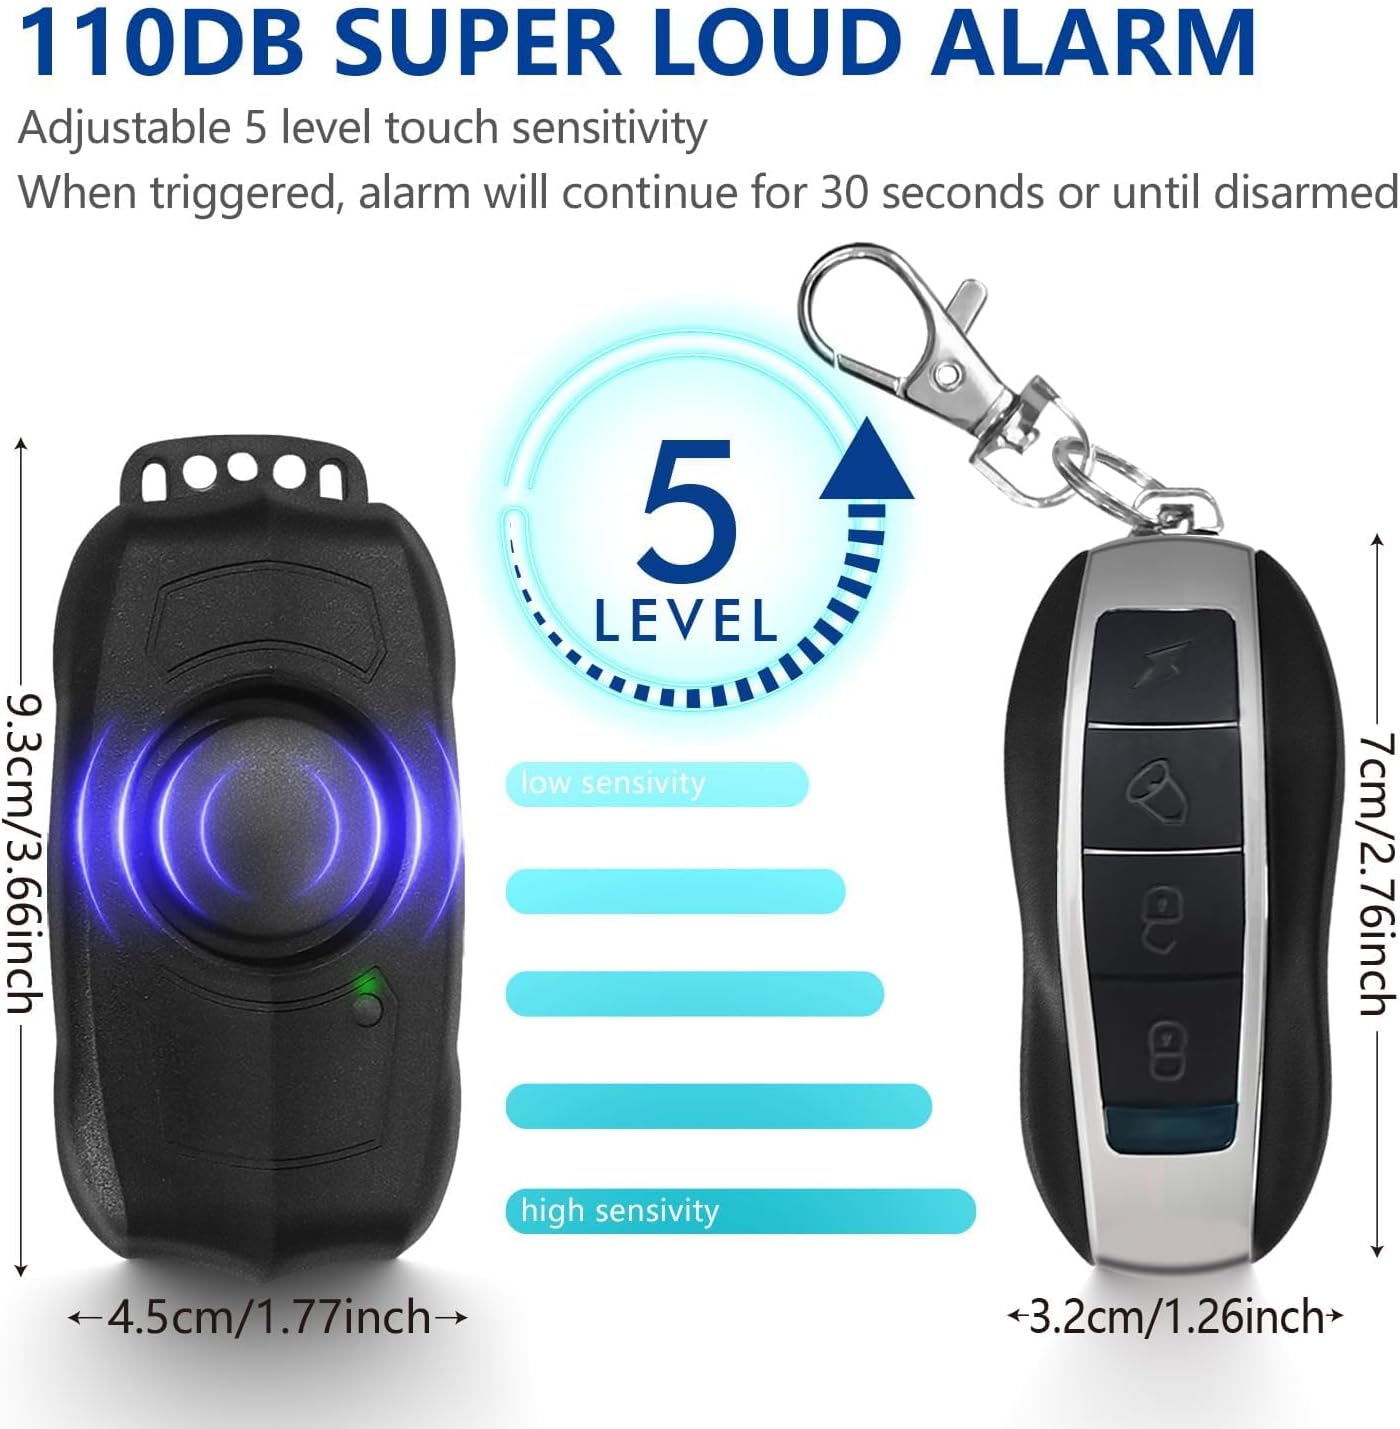
Image: The alarm unit and remote control with their dimensions, illustrating the 5 adjustable sensitivity levels from low to high.
Video: Guide on how to adjust the sensitivity and volume settings of the alarm.
3. SOS Emergency Alarm Function
The alarm includes an SOS emergency alarm function. If the vehicle tilts at a 45-degree angle (indicating a fall or accident), the alarm can sound to alert others for help. This function can be set according to the user manual.

Image: Illustration of the SOS function, where the alarm automatically activates if the bicycle tilts at a 45-degree angle, signaling for help.
Maintenance
1. Battery Charging
Regularly charge the alarm unit using the provided Micro USB cable to ensure optimal performance. Avoid letting the battery completely drain to prevent potential re-pairing issues.
2. Waterproof Design
The alarm features an IP55 waterproof rating, making it suitable for outdoor use in various weather conditions. However, avoid submerging the device in water.
3. General Care
Keep the alarm unit and remote control clean and free from dust and debris. Store in a dry place when not in use for extended periods.
Troubleshooting
- Alarm not responding to remote: Ensure the alarm unit is charged and the remote control battery is functional. Try re-pairing the remote control as per the 'Setup' section.
- Alarm triggers too easily/not easily enough: Adjust the sensitivity level as described in the 'Operating Instructions' section.
- Alarm sound is too loud/quiet: Adjust the volume level as described in the 'Operating Instructions' section.
- Short battery life: Ensure the alarm is fully charged. Battery life can vary based on usage and environmental conditions.
Specifications
| Feature | Detail |
|---|---|
| Item Weight | 4.6 ounces |
| Product Dimensions | 2.41 x 1.63 x 0.65 inches |
| Item Model Number | Rechargeable Alarm with Remote control |
| Batteries | 1 Lithium Polymer battery required (included) |
| Wireless Remote | Yes |
| Maximum Range | 50 Meters (approx. 164 feet) |
| Noise Level | 120 Decibels |
| Waterproof Rating | IP55 (from image) |
Warranty
This product comes with a 1-year warranty from the date of purchase. Please retain your proof of purchase for warranty claims. The warranty covers manufacturing defects under normal use conditions.
Support
For further assistance, technical support, or warranty inquiries, please contact EBUYFIRE customer service through the platform where you purchased the product or visit the official EBUYFIRE store page: