Favoto FT0466-1_EU
Favoto 425L Foldable Car Roof Bag User Manual
Model: FT0466-1_EU
Product Overview
The Favoto 425L Foldable Car Roof Bag is designed to provide additional storage space for your vehicle, whether it's a car or an SUV, with or without roof racks. Constructed from durable and waterproof 500D PVC material, it offers a generous 425-liter capacity, making it ideal for carrying luggage, camping gear, and other items securely on your vehicle's roof. Its foldable design allows for compact storage when not in use.

Figure 1: Favoto 425L Foldable Car Roof Bag and included accessories (anti-slip mat, straps, storage bag, lock).
Package Contents
- 1 x Favoto Car Roof Bag (425L capacity)
- 1 x Anti-slip Mat
- 8 x Reinforced Straps
- 4 x Door Hooks
- 1 x Storage Bag
- 1 x Combination Lock (may vary by package)
Setup and Installation
Proper installation is crucial for the safety and stability of the roof bag. Follow these steps carefully:
1. Prepare Your Vehicle
- Ensure the vehicle's roof is clean and dry.
- If your vehicle has roof rails or crossbars, ensure they are securely fastened.
- The Favoto roof bag is designed for universal fit and can be installed on vehicles with cross bars, basket racks, side rails, or even without a rack.

Figure 2: The roof bag is compatible with various car roof configurations and car types including sedans, hatchbacks, SUVs, wagons, crossovers, and minivans.
2. Place the Anti-slip Mat
- Unfold the anti-slip mat and place it on the center of your vehicle's roof where the roof bag will sit. This mat helps prevent the bag from shifting and protects your vehicle's paintwork.

Figure 3: The anti-slip mat provides a secure base for the roof bag, preventing movement and protecting the vehicle's surface.
3. Position the Roof Bag
- Place the folded roof bag on top of the anti-slip mat.
- Ensure the zipper opening faces the rear of the vehicle. This design prevents the zipper from being forced open by wind resistance during travel.
4. Secure with Straps and Door Hooks (for vehicles without roof racks)
- Open the vehicle's doors.
- Insert the flat end of the door hooks into the door frame weather stripping, ensuring they are firmly seated.
- Thread the reinforced straps through the buckles on the roof bag and then through the door hooks.
- Tighten all 8 straps evenly to secure the bag. Ensure there is no slack and the bag is taut against the roof.
- Close the doors carefully, ensuring the straps are not pinched or damaged.

Figure 4: Step-by-step guide for securing the roof bag using the provided door hooks, ideal for vehicles without existing roof racks.
5. Secure with Straps (for vehicles with roof racks/crossbars)
- Thread the reinforced straps through the buckles on the roof bag and around your vehicle's existing roof rails or crossbars.
- Tighten all 8 straps evenly to secure the bag. Ensure there is no slack and the bag is taut against the roof.
Important: After initial installation, drive a short distance and then re-check the tightness of all straps. Re-tighten if necessary. Periodically check strap tension during long journeys.
Operating Instructions
Loading the Roof Bag
- The roof bag has a capacity of 425 liters. Distribute weight evenly inside the bag to maintain vehicle balance.
- Avoid overloading the bag beyond its maximum recommended weight capacity (refer to specifications).
- Place heavier items at the bottom and center of the bag.
- The bag is designed to accommodate items such as sleeping bags, handbags, tents, and suitcases.

Figure 5: Illustration of the 425L capacity, showing how multiple items like sleeping bags, handbags, tents, and suitcases can be stored.
Waterproof Features
- The roof bag is made from 500D PVC waterproof material with high-frequency voltage technology to ensure water resistance.
- Ensure the zipper is fully closed and the wide zipper flap is pulled down and secured with the magic tapes (velcro) over the zipper. This provides an additional layer of protection against water ingress.
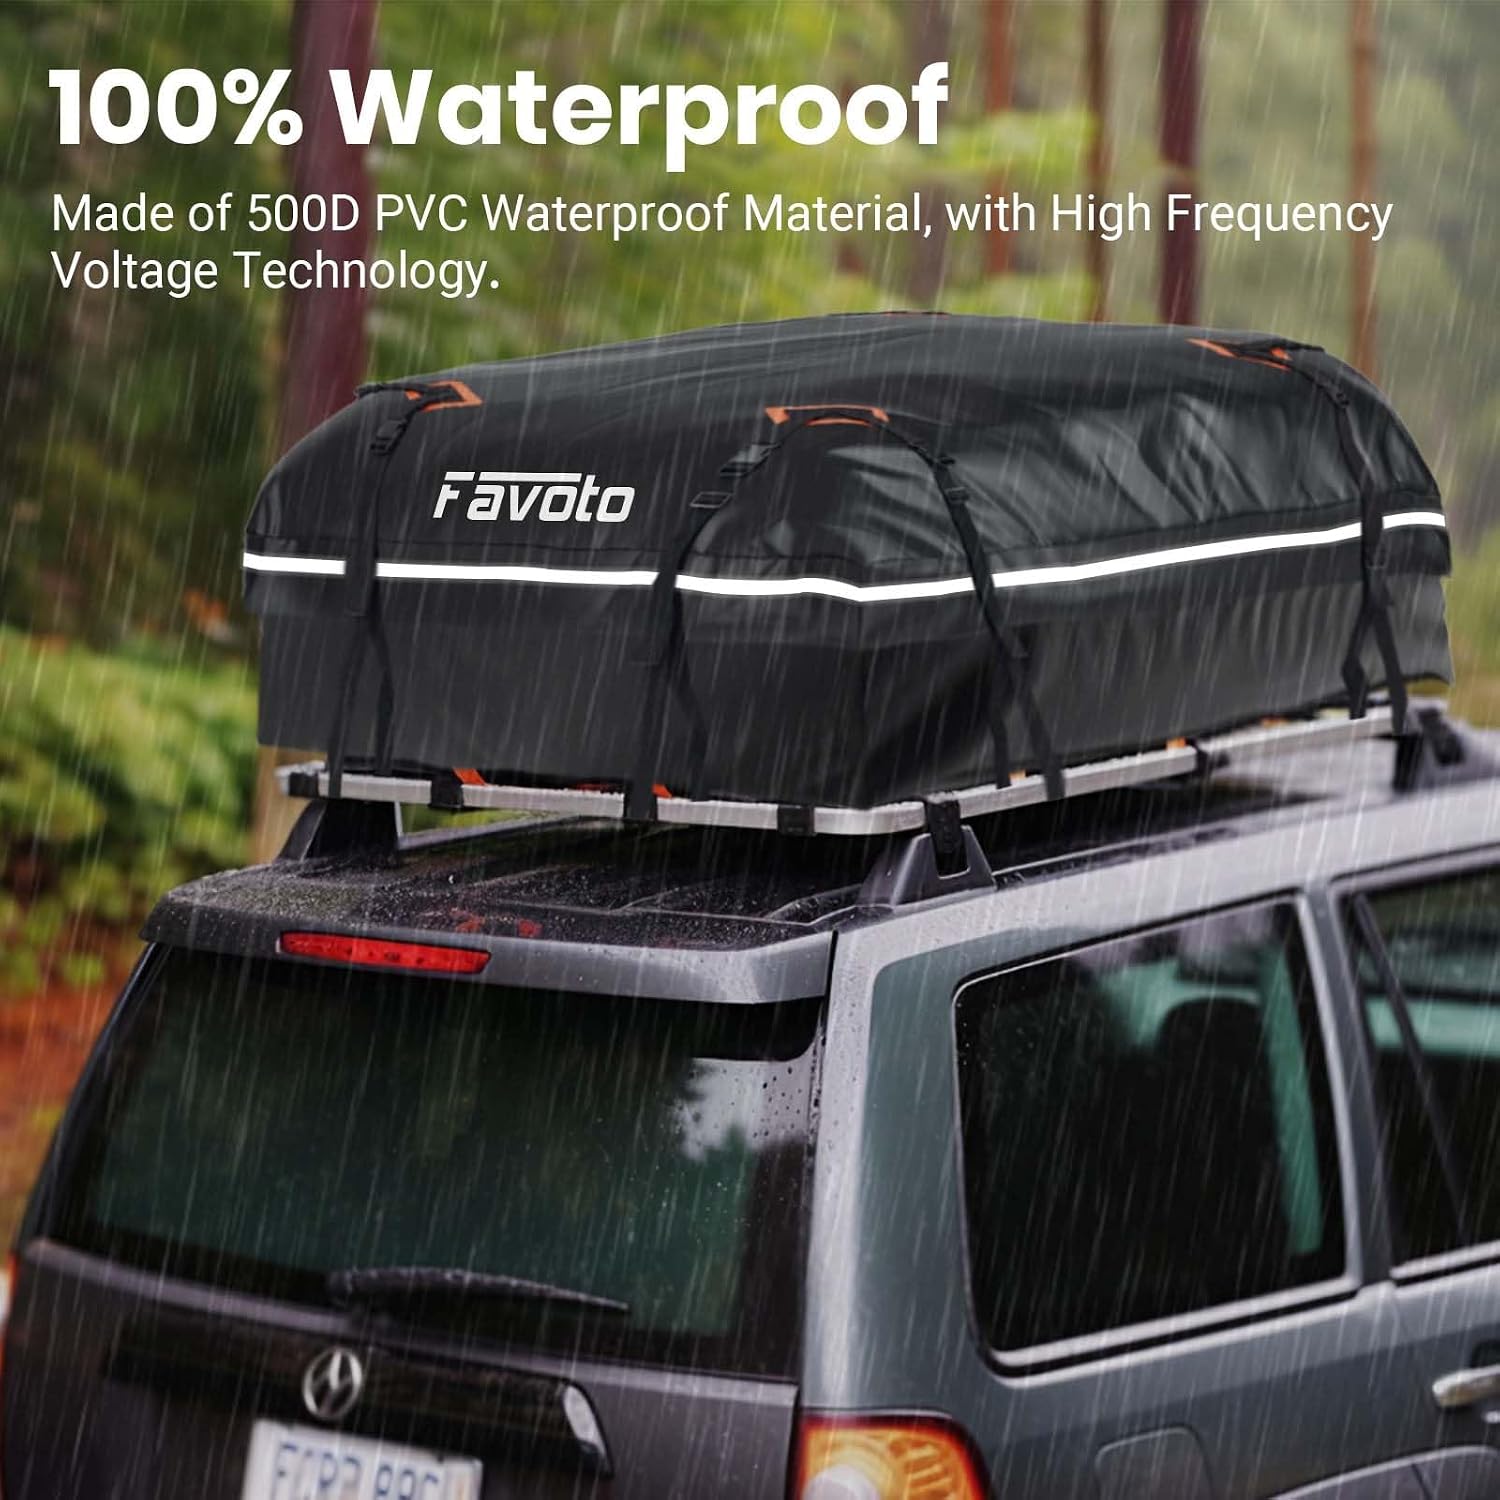
Figure 6: The roof bag is constructed with 500D PVC waterproof material and high-frequency voltage technology for reliable protection against rain.
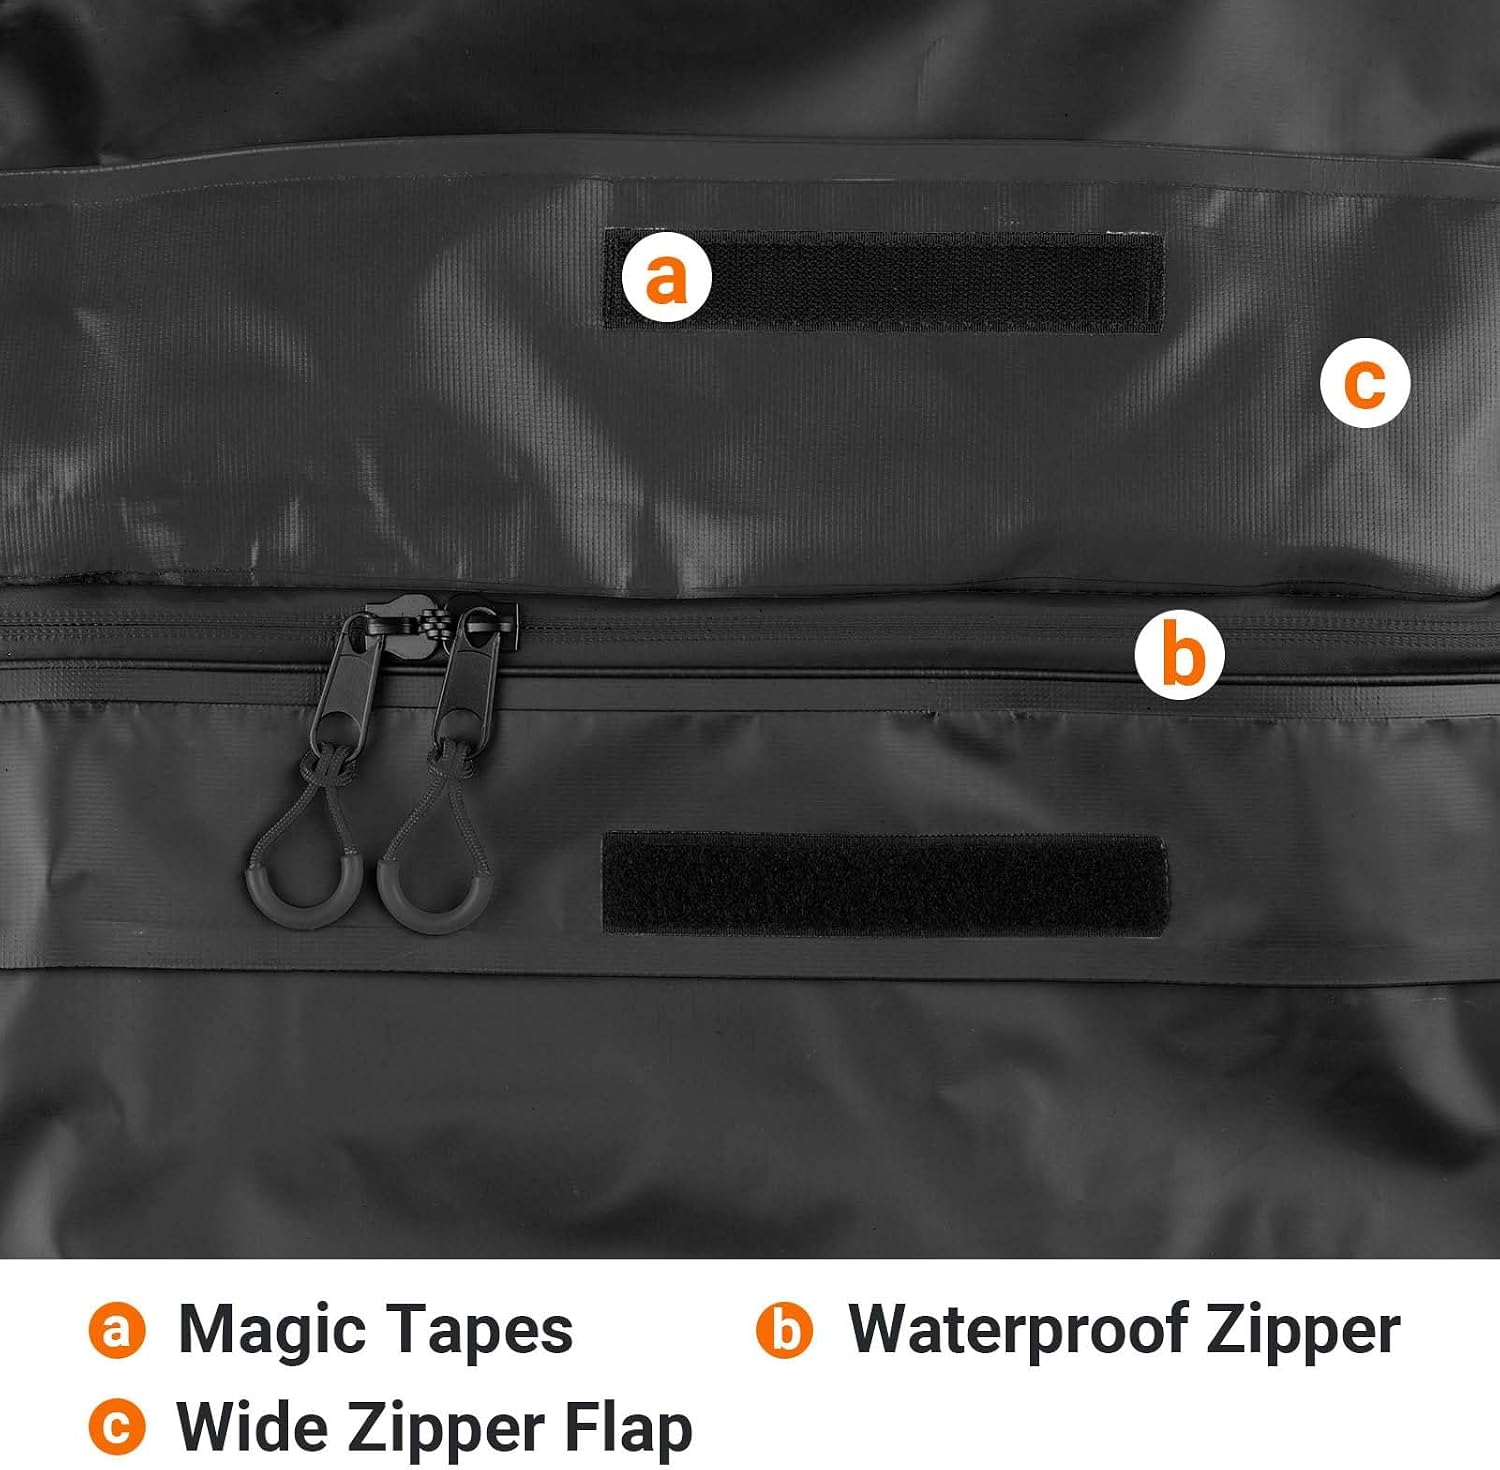
Figure 7: Detail of the waterproof zipper and the protective wide zipper flap with magic tapes (velcro) for enhanced water resistance.
Driving with the Roof Bag
- Drive at appropriate speeds, especially in windy conditions or when cornering.
- Be aware of the increased height of your vehicle when entering low-clearance areas such as garages or drive-thrus.
- Regularly check the security of the straps and the bag during long trips.
Maintenance
- Cleaning: Clean the roof bag with a damp cloth and mild soap. Do not use harsh chemicals or abrasive cleaners. Allow it to air dry completely before storing.
- Storage: When not in use, fold the roof bag neatly and store it in the provided storage bag. Store in a cool, dry place away from direct sunlight to prolong its lifespan.
- Inspection: Before each use, inspect the bag, straps, and zippers for any signs of wear, tear, or damage. Do not use if damaged.
Troubleshooting
| Problem | Possible Cause | Solution |
|---|---|---|
| Bag is shifting or loose | Straps not tightened sufficiently; uneven load distribution; anti-slip mat not used. | Ensure all 8 straps are tightened evenly and securely. Redistribute contents for balanced weight. Always use the anti-slip mat. |
| Water leakage inside bag | Zipper not fully closed; zipper flap not secured; damage to bag material. | Ensure zipper is completely closed and the protective flap is pulled down and secured with velcro. Inspect bag for tears or punctures. |
| Difficulty closing vehicle doors with hooks | Hooks not properly seated in weather stripping; straps too thick. | Ensure hooks are fully inserted into the door frame's weather stripping. Do not force the door; adjust hook position if necessary. |
Specifications
| Feature | Detail |
|---|---|
| Brand | Favoto |
| Model Number | FT0466-1_EU |
| Material | 500D PVC (Polychlorure de vinyle) |
| Capacity | 425 Liters |
| Dimensions (L x W x H) | 109 cm x 86 cm x 43 cm (43 in x 34 in x 17 in) |
| Item Weight | 3.88 Kilograms |
| Water Resistance Level | Waterproof |
| Mounting Type | Roof Mount |
| Closure Type | Zipper |
| Shell Type | Soft |
Warranty and Support
Favoto products are manufactured to high-quality standards. For any questions, concerns, or support needs regarding your Favoto 425L Foldable Car Roof Bag, please refer to the seller's return policy or contact Favoto customer service through the platform where the product was purchased. Keep your purchase receipt for warranty claims.
For more information, visit the official Favoto website or contact their customer support directly.
Ask a question about this manual
Ask about setup, troubleshooting, compatibility, parts, safety, or missing instructions. Manuals+ will review the question and use this page’s manual context to help answer it.