1. Introduction
Thank you for choosing the WALI Single Monitor Arm Desk Mount. This manual provides detailed instructions for the safe and efficient installation, operation, and maintenance of your new monitor arm. Please read this manual thoroughly before installation and keep it for future reference.
This monitor arm is designed to provide an ergonomic viewing experience for monitors without traditional VESA mounting holes, offering flexibility and comfort in your workspace.
2. Safety Information
Please observe the following safety precautions to prevent injury or damage to your equipment:
- Do not exceed the maximum weight capacity of 22 lbs (10 kg).
- Ensure the desk surface is stable and capable of supporting the combined weight of the mount and monitor.
- Verify that the monitor screen thickness is between 1 inch and 2.75 inches for proper fit within the adaptor brackets.
- Keep children and pets away during installation.
- Use all provided hardware. If any parts are missing or damaged, contact WALI customer support.
- Tighten all screws firmly but do not overtighten.
- Periodically check all connections to ensure they remain secure.
3. Package Contents
Carefully unpack the box and ensure all items are present and undamaged. If any items are missing or damaged, please contact WALI customer support.
- Monitor Arm Assembly (Pole, Arm, Adaptor Brackets)
- Desk Clamp (C-clamp)
- Grommet Base Components
- Hardware Kit (screws, washers, Allen wrenches)
- User Manual

Image: Overview of the WALI Single Monitor Arm Desk Mount, showing the pole, arm, and the unique adaptor brackets for monitors without mounting holes.
4. Product Overview & Compatibility
The WALI Single Monitor Arm Desk Mount is designed for versatility and ergonomic adjustment. It supports a wide range of monitors, particularly those lacking standard VESA mounting holes.
Compatibility
- Screen Size: Up to 27 inches
- Weight Capacity: Up to 22 lbs (10 kg)
- Screen Thickness: 1 inch to 2.75 inches
- Mounting Type: Non-mounting hole monitors (utilizes adaptor brackets)

Image: Visual representation of the monitor arm's display compatibility, highlighting the maximum weight capacity of 22 lbs and support for screens up to 27 inches.
Product Dimensions
The arm provides significant reach and height adjustment to suit various desk setups and user preferences.

Image: Diagram illustrating the key dimensions of the monitor arm, including the 16-inch arm length and 16-inch pole height, along with swivel ranges.
5. Setup
Follow these steps to properly install your WALI Single Monitor Arm Desk Mount.
5.1 Choose Your Mounting Option
The monitor arm offers two installation methods: C-clamp for desk edges or Grommet Base for desks with a pre-drilled hole.
- C-Clamp Installation: Secure the C-clamp to the edge of your desk. Ensure the clamp is tightened firmly to prevent movement. The C-clamp supports desk thicknesses from 0.4 to 4 inches.
- Grommet Base Installation: If your desk has a grommet hole (0.4 to 4 inches in diameter), use the grommet base components to secure the pole through the hole.

Image: Visual guide to the two installation methods: C-clamp for desk edges and Grommet Base for through-desk mounting.
5.2 Attach the Monitor to the Adaptor Brackets
This mount is specifically designed for monitors without VESA holes. The adaptor brackets securely grip the monitor's edges.
- Carefully place your monitor face down on a soft, clean surface to prevent scratches.
- Attach the adaptor brackets to the monitor arm's VESA plate.
- Adjust the brackets to securely grip the top and bottom edges of your monitor. Ensure the soft padding on the grips protects the monitor's surface.
- Tighten the screws on the brackets to firmly hold the monitor in place. Do not overtighten.
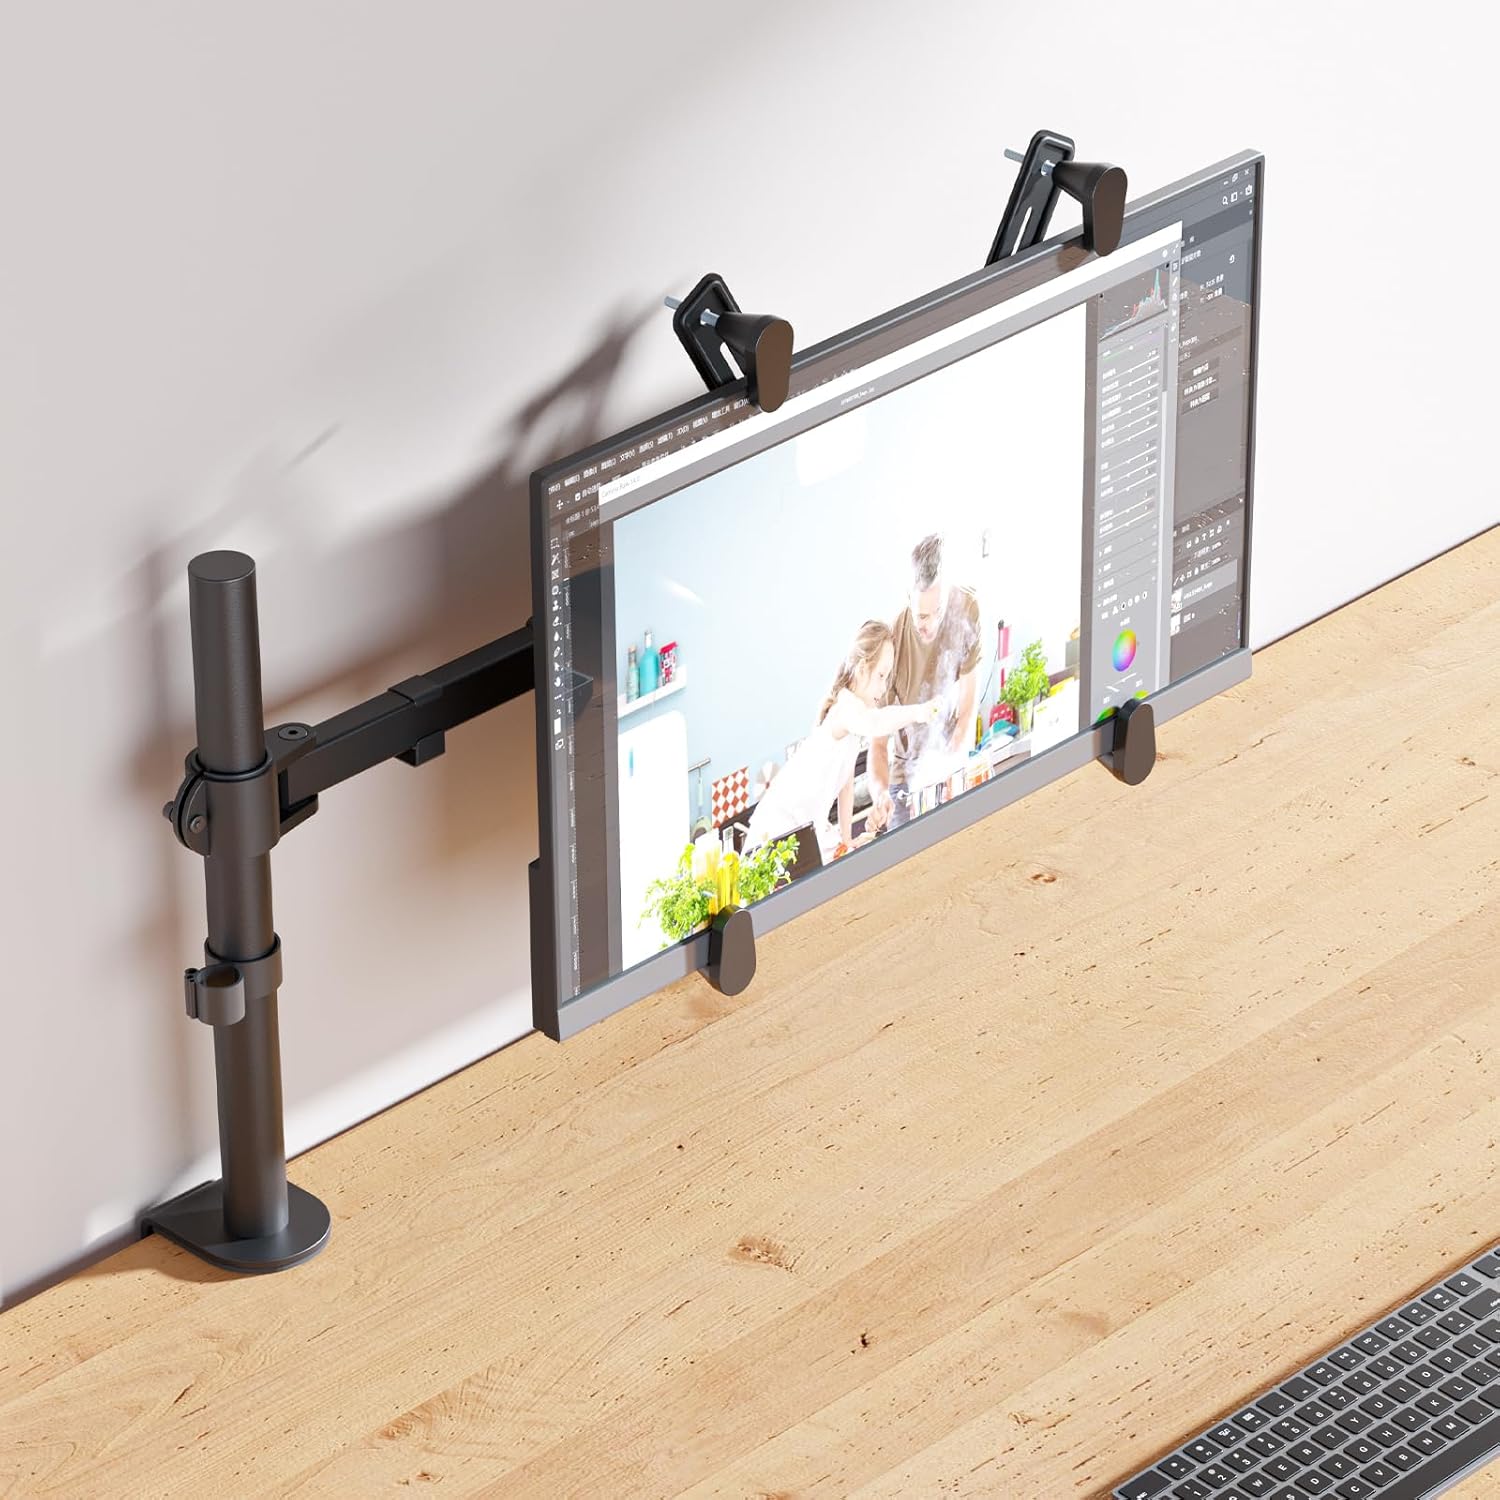
Image: A monitor securely attached to the arm using the non-VESA adaptor brackets, viewed from the side to show the grip mechanism.
5.3 Cable Management
Utilize the integrated cable management clips on the arm to route your monitor cables neatly along the arm and down the pole. This helps maintain a clean and organized workspace.

Image: Illustration of how to route cables along the monitor arm for a tidy setup, demonstrating the cable management clips.
6. Operating and Adjustments
Once installed, the WALI monitor arm allows for dynamic adjustments to achieve your optimal viewing angle and ergonomic position.
- Height Adjustment: Loosen the collar on the pole to slide the arm up or down to your desired height. Re-tighten the collar securely. Bezel height can be adjusted from 10.5 inches to 16.25 inches.
- Tilt Adjustment: The monitor can be tilted +/-90° to reduce glare and improve viewing comfort. Adjust the tilt mechanism behind the monitor.
- Swivel Adjustment: Swivel the monitor +/-90° horizontally to share your screen or change viewing angles.
- Rotation: Rotate the monitor 360° for landscape or portrait orientation.

Image: Demonstrates the monitor's ability to freely tilt up to +/-90 degrees, allowing for flexible viewing angles.

Image: A user seated at a desk, demonstrating the ergonomic benefits and comfortable viewing position achieved with the WALI monitor arm.
7. Maintenance
Regular maintenance ensures the longevity and optimal performance of your monitor arm.
- Cleaning: Wipe the surface of the monitor arm with a soft, damp cloth. Avoid harsh chemicals or abrasive cleaners.
- Tightness Check: Periodically (e.g., every 3-6 months) check all screws and connections to ensure they are still tight and secure. Re-tighten if necessary.
- Lubrication: No lubrication is typically required for the moving parts. If any joints become stiff, contact customer support.
8. Troubleshooting
If you encounter any issues with your WALI monitor arm, refer to the following table for common problems and solutions.
| Problem | Possible Cause | Solution |
|---|---|---|
| Monitor arm is unstable or wobbles. | Desk clamp/grommet base not tightened sufficiently; monitor too heavy. | Ensure the desk clamp or grommet base is securely fastened to the desk. Verify monitor weight is within the 22 lbs limit. |
| Monitor sags or does not hold position. | Tilt/swivel mechanism not tightened; monitor not securely gripped by adaptor brackets. | Tighten the adjustment screws for tilt and swivel. Ensure the adaptor brackets are firmly gripping the monitor edges. |
| Difficulty adjusting arm movement. | Joints are too tight. | Loosen the relevant adjustment screws slightly. Refer to the assembly instructions for specific adjustment points. |
| Monitor edges are scratched by brackets. | Protective padding missing or misaligned. | Ensure the soft padding on the adaptor brackets is correctly positioned and intact. |
If the problem persists after attempting these solutions, please contact WALI customer support for further assistance.
9. Specifications
| Feature | Detail |
|---|---|
| Brand | WALI |
| Model Number | M001U |
| Material | Steel, Plastic |
| Color | Black |
| Item Weight | 8.47 pounds |
| Maximum Compatible Screen Size | 27 Inches |
| Minimum Compatible Screen Size | 17 Inches |
| Weight Capacity | 22 lbs (10 kg) |
| Screen Thickness Compatibility | 1" to 2.75" |
| Mounting Type | Tabletop Mount (C-clamp or Grommet Base) |
| Movement Type | Rotate, Swivel, Tilt |
| Tilt Range | +/-90 Degrees |
| Swivel Range | +/-90 Degrees |
| Rotation | 360 Degrees |
| Bezel Height Adjustment | 10.5" to 16.25" |
| UPC | 811278025967 |
10. Warranty and Support
WALI products are built with quality and durability in mind. Your purchase includes a user manual and access to experienced and friendly US-based customer support, available to assist 7 days a week.
For detailed warranty information or to contact customer support, please refer to the contact information provided with your product packaging or visit the official WALI website.
You can also find the official User Manual (PDF) here.


