Introduction
Thank you for choosing the Natwind 3 Tier Printer Stand. This manual provides essential information for the safe assembly, operation, and maintenance of your new printer stand. Please read these instructions carefully before assembly and retain them for future reference.
Safety Information
- Weight Capacity: Do not exceed the maximum weight capacity of 88 lbs (40 kg) per shelf. Overloading can cause instability and damage.
- Assembly: Ensure all parts are securely fastened before use. Do not use power tools for assembly unless specifically instructed, as this may overtighten screws and damage components.
- Placement: Place the stand on a level, stable surface. Avoid placing it in areas with high humidity or direct sunlight.
- Electrical Safety: The built-in power outlets are for indoor use only. Do not plug in devices that exceed the specified electrical ratings (125V, 12A). Do not use with damaged cords or plugs.
- Children and Pets: Keep small parts and packaging materials away from children and pets during assembly.
Package Contents
Please verify that all components are present before beginning assembly. If any parts are missing or damaged, contact customer support.
- Top Shelf (1)
- Middle Shelf (1)
- Bottom Shelf (1)
- Side Frames (2)
- Power Outlet Panel (1)
- Load-bearing Steel Tubes (2)
- Lockable Casters (4)
- Adjustable Foot Pads (4)
- Assembly Hardware (screws, wrench)
- Instruction Manual (this document)
Setup and Assembly
Follow these steps to assemble your Natwind 3 Tier Printer Stand. It is recommended to have two people for easier assembly.
- Unpack and Identify Parts: Carefully remove all components from the packaging. Lay them out on a clean, soft surface to prevent scratches. Identify each part using the package contents list.
- Attach Side Frames to Bottom Shelf: Secure the two side frames to the bottom shelf using the provided screws. Ensure the frames are oriented correctly.
- Install Casters or Foot Pads: Decide whether you want to use the lockable casters for mobility or the adjustable foot pads for stationary stability. Screw the chosen components into the designated holes on the bottom of the side frames. If using casters, ensure they are locked during assembly for stability.
- Attach Middle Shelf: Position the middle shelf between the side frames. Note the three reserved holes for height adjustment. Choose your desired height and secure the middle shelf using screws. The distance between each hole is approximately 4 inches.
- Install Power Outlet Panel: Attach the power outlet panel to the designated area on one of the side frames, typically between the top and middle shelves. Ensure the panel is facing outwards for easy access.
- Attach Top Shelf: Place the top shelf onto the upper part of the side frames and secure it with screws. Ensure the extra load-bearing steel tubes are correctly positioned under the top shelf for enhanced stability.
- Final Check: Once assembled, gently shake the stand to ensure all connections are secure and stable.

Figure 1: Product Dimensions. The stand measures 19.7" W x 15.8" D x 30.7" H (with casters) or 29.5" H (with foot pads).

Figure 2: Adjustable Middle Shelf and Extra Load-bearing Steel Tubes. The middle shelf can be adjusted to three different heights, and the top shelf is reinforced with additional steel tubes for stability.

Figure 3: Mobility Options. The stand can be equipped with universal lockable wheels for easy movement or stable foot pads for a fixed position.
Video 1: Natwind 3 Tier Printer Stand Overview. This video demonstrates the assembly process, key features like the adjustable shelf and power outlets, and the versatility of the stand in various settings.
Operating Instructions
- Using the Adjustable Shelf: The middle shelf can be repositioned to accommodate items of different heights. To adjust, remove the items from the shelf, unscrew the fasteners, move the shelf to one of the three pre-drilled positions, and re-secure the fasteners.
- Utilizing Built-in Power Outlets: The stand features three AC outlets (125V, 12A) and a 5ft power cord. Plug the stand's power cord into a wall outlet. You can then plug in your printer, computer, shredder, or other compatible devices directly into the stand's outlets.
- Mobility and Stability: If using casters, unlock them to move the stand. Lock the casters once the stand is in its desired position to prevent accidental movement. If using foot pads, the stand will remain stationary.
- Storage Capacity: The three tiers provide ample space for various office equipment and supplies, such as printers, paper, files, and other accessories.

Figure 4: Built-in Power Outlets. The integrated power strip provides convenient access to three AC outlets for your devices.
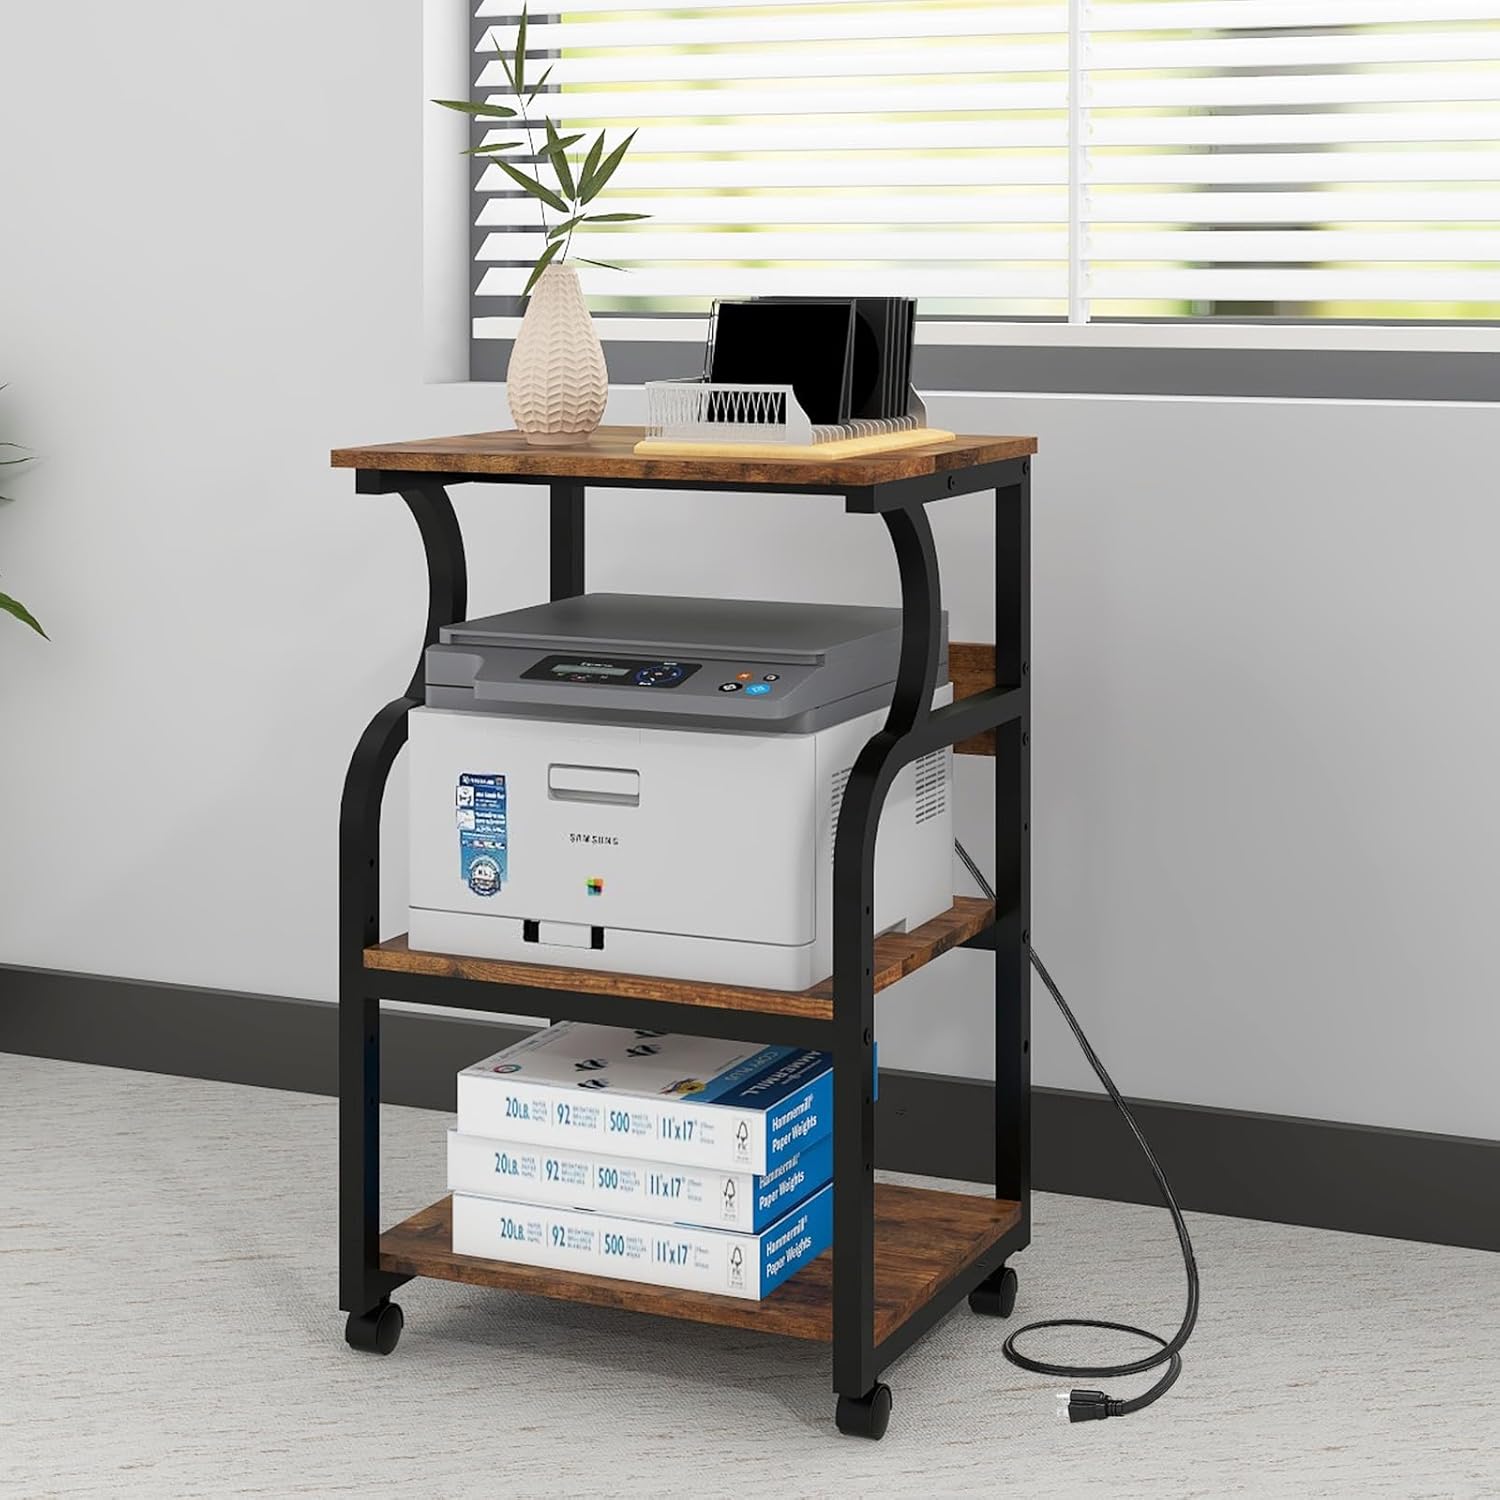
Figure 5: Stand in Use. The printer stand effectively organizes office equipment and provides power access.

Figure 6: Versatile Storage. The stand offers ample space for various items beyond just printers, including office supplies and decorative elements.
Maintenance
- Cleaning: Wipe the surfaces with a soft, damp cloth. Avoid using harsh chemicals or abrasive cleaners, as they may damage the finish.
- Hardware Check: Periodically check all screws and fasteners to ensure they remain tight. Re-tighten if necessary to maintain stability.
- Caster Care: If using casters, keep them free of debris to ensure smooth rolling.
Troubleshooting
- Stand is Wobbly: Ensure all screws are fully tightened. Verify that the stand is placed on a level surface. If using foot pads, adjust them to compensate for uneven floors.
- Power Outlets Not Working: Check if the stand's main power cord is securely plugged into a functional wall outlet. Ensure the devices plugged into the stand's outlets are properly connected and powered on. Do not overload the outlets.
- Difficulty Moving Stand: If using casters, ensure they are unlocked. Check for any obstructions or debris around the wheels.
Specifications
| Feature | Detail |
|---|---|
| Model Number | NATWIND-3T-PS |
| Product Dimensions (with casters) | 19.7 x 15.7 x 30.7 inches (L x W x H) |
| Product Dimensions (with foot pads) | 19.7 x 15.7 x 29.5 inches (L x W x H) |
| Item Weight | 21 pounds |
| Material | Particle Board, Steel Frame |
| Weight Capacity (per shelf) | 88 lbs (40 kg) |
| Power Outlets | 3 AC Outlets (125V, 12A) |
| Power Cord Length | 5 feet |
| Adjustable Shelf Height | 3 positions, 4 inch increments |
Warranty and Support
Natwind stands behind the quality of its products. For specific warranty details, please refer to the warranty card included with your purchase or visit the official Natwind website. If you encounter any issues or have questions regarding your printer stand, please contact Natwind customer support for assistance.
Contact Information: Please refer to your purchase documentation or the manufacturer's website for the most current customer support contact details.