Introduction
Thank you for choosing the Hournor Digital LED Wall Clock. This clock features a large, clear LED display, remote control operation, and displays time, date, day of the week, and temperature. This manual provides comprehensive instructions for setup, operation, and maintenance to ensure optimal performance and longevity of your device.
Product Features
- Large LED Display: 11.5-inch screen with 3.6-inch high-contrast jumbo digits for easy readability. Displays time, date, week, and temperature.
- Adjustable Brightness: Four levels of brightness can be adjusted via remote control. Automatic dimming function available by pressing and holding the SNOOZE key.
- Versatile Mounting: Designed for both wall mounting and desktop placement.
- Remote Control Operation: All settings and operations can be conveniently performed using the included remote control.
- Memory Function: Built-in memory retains time data even if power is disconnected.
- Power Requirement: The clock requires continuous power via a USB cable. An adapter (5V/1A or 5V/2A) is required and not included.
Package Contents
Please check the package for the following items:
- Hournor Digital LED Wall Clock
- Remote Control
- USB Power Cable
- User Manual (this document)
Note: A 5V/1A or 5V/2A power adapter is required and not included in the package. Two CR2032 batteries are required for the clock's memory function and are not included.
Setup
- Insert Memory Batteries (Optional but Recommended): Open the battery compartment on the back of the clock and insert two CR2032 batteries (not included). These batteries maintain time settings during power outages.
- Connect Power: Connect the provided USB power cable to the clock's power input port. Plug the other end into a 5V/1A or 5V/2A USB power adapter (not included) and then into a wall outlet. The clock display will light up.
- Remote Control Batteries: Insert batteries into the remote control if not already present.
- Initial Settings: Upon first power-up, the clock may display default settings. Use the remote control to set the correct time, date, and preferred temperature unit.

Image: The Hournor Digital LED Wall Clock displaying 10:53, October 18th, Thursday, and 78°F. This image illustrates the large LED display and its various informational segments.
Operating Instructions
Using the Remote Control
All clock settings and operations are managed via the remote control. Ensure the remote has working batteries and is pointed towards the clock for optimal response.
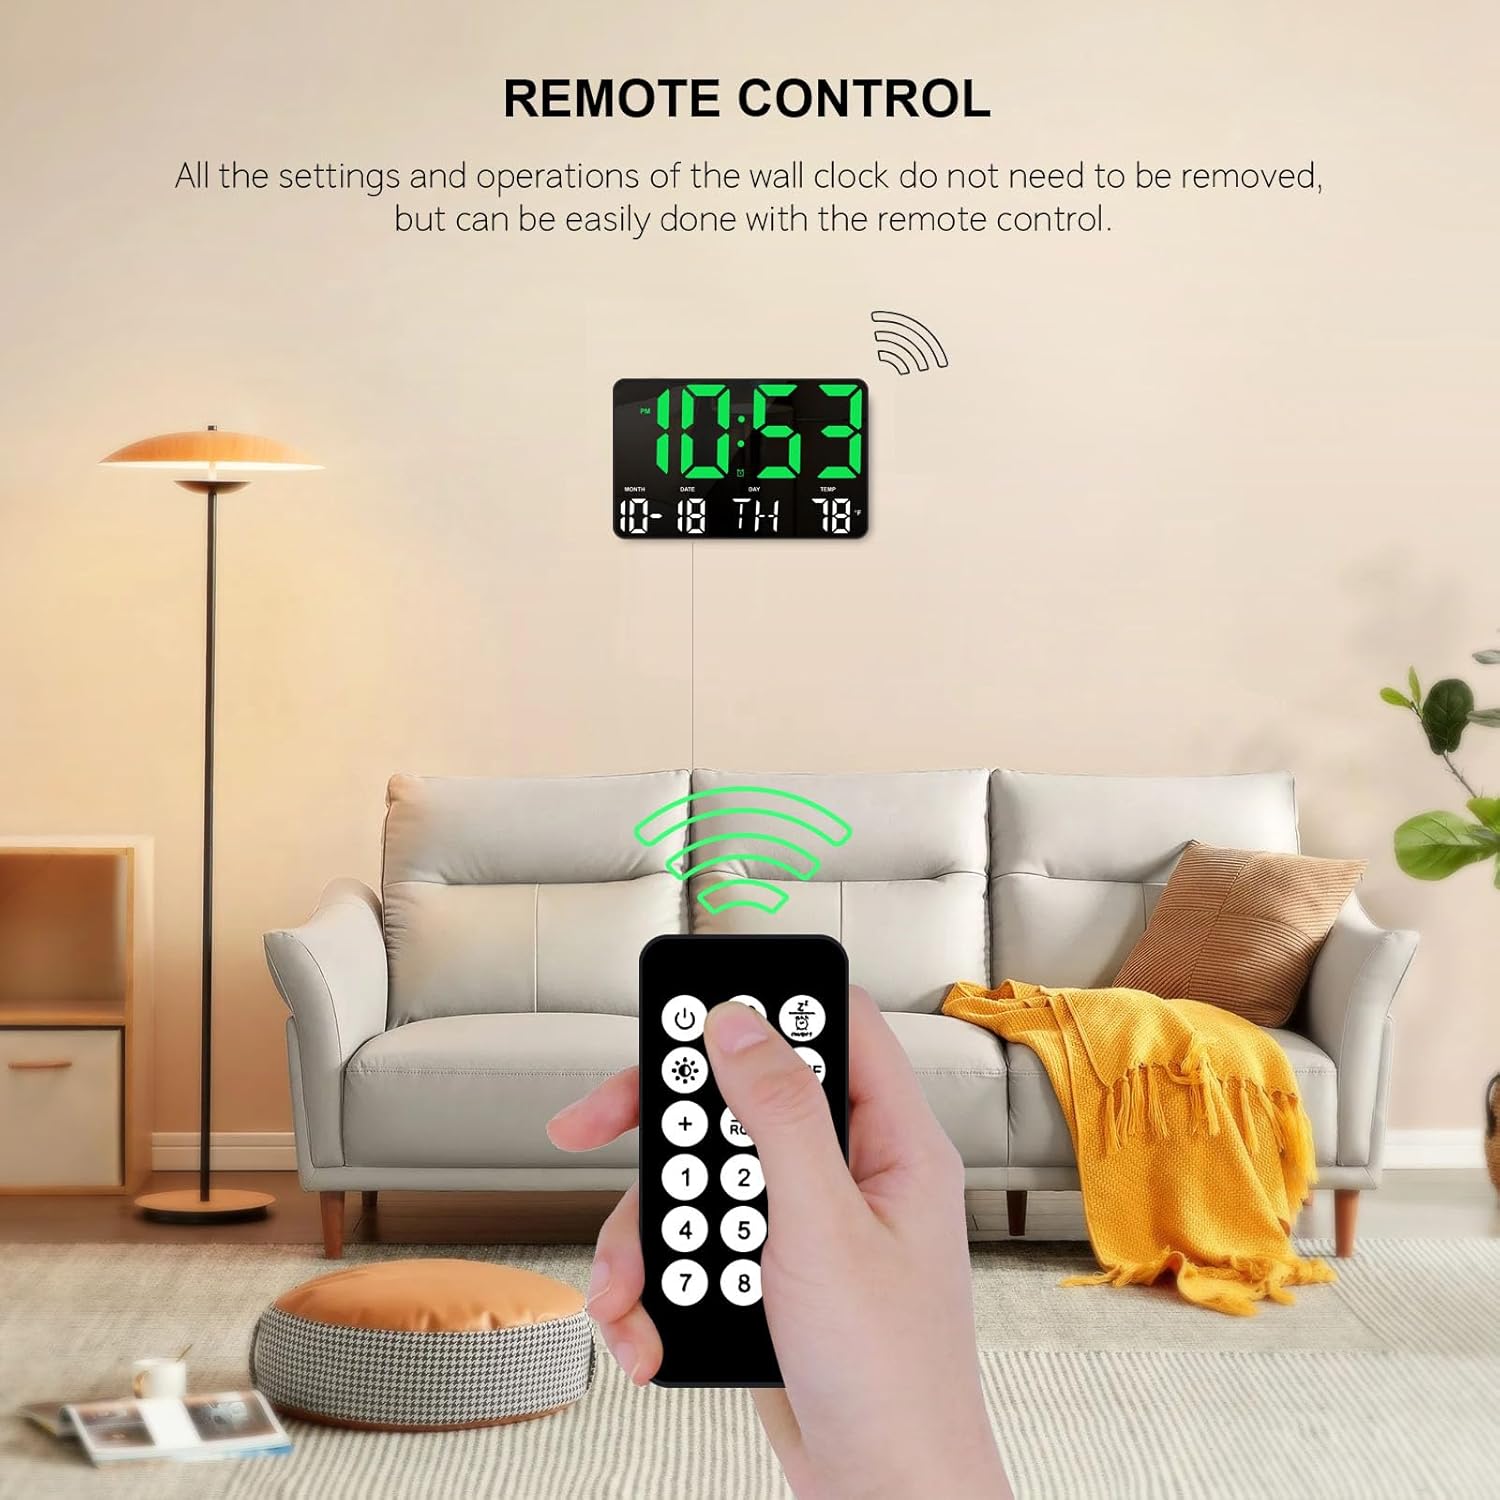
Image: A hand holding the remote control, pointing towards the Hournor Digital LED Wall Clock mounted on a wall. This demonstrates the convenience of remote operation.
Setting Time and Date
- Press the SET button on the remote control. The hour digits will start flashing.
- Use the UP and DOWN arrows to adjust the hour.
- Press SET again to move to the minute digits, then use UP and DOWN to adjust.
- Continue pressing SET to cycle through year, month, and day settings, adjusting each with the UP and DOWN arrows.
- After setting the day, press SET one last time to save all changes and exit the setting mode.
Setting Alarm
- Press the ALARM button on the remote. The alarm hour digits will flash.
- Use the UP and DOWN arrows to set the desired alarm hour.
- Press ALARM again to move to the minute digits, then use UP and DOWN to set the alarm minute.
- Press ALARM one last time to confirm and activate the alarm. An alarm icon will appear on the display.
- To deactivate the alarm, press the ALARM button again. The alarm icon will disappear.
Temperature Unit Selection (°C/°F)
Press the °C/°F button on the remote control to switch between Celsius and Fahrenheit temperature displays.
Brightness Dimmer
The LED display offers four levels of brightness to suit different environments and preferences. You can adjust this manually or enable an automatic dimming feature.
- Manual Adjustment: Use the dedicated brightness buttons on the remote control (often labeled with sun icons or numbers 1-4) to cycle through the four brightness levels.
- Automatic Dimming: Press and hold the SNOOZE button on the remote control to activate the automatic dimming function. The clock will adjust its brightness based on ambient light conditions. Press and hold SNOOZE again to deactivate.

Image: A visual representation of the Hournor Digital LED Wall Clock's display at 100%, 80%, 50%, and 20% brightness levels, demonstrating the adjustable dimmer feature.
Mounting Options
The Hournor Digital LED Wall Clock is designed for flexible placement, allowing it to be either wall-mounted or placed on a desktop.
- Wall Mounting: Use appropriate screws and anchors (not included) to secure the clock to a wall. Ensure the mounting location is stable and near a power outlet.
- Desktop Placement: The clock can be placed on any flat surface such as a desk, shelf, or table. Ensure it is stable and not prone to falling.

Image: The Hournor Digital LED Wall Clock displayed in a bedroom on a nightstand, mounted in a gym, and on a wall in an office/garage setting. This illustrates its versatility for different environments.
Maintenance
- Cleaning: Gently wipe the clock's display and body with a soft, dry cloth. Do not use abrasive cleaners or solvents, as they may damage the surface.
- Battery Replacement (Memory): If the clock consistently loses time settings after a power outage, the internal CR2032 batteries may need replacement. Replace them carefully, observing polarity.
- Remote Control Batteries: Replace the remote control batteries when its range decreases or it becomes unresponsive.
Troubleshooting
| Problem | Possible Cause | Solution |
|---|---|---|
| Clock display is off. | No power supply or faulty connection. | Ensure the USB cable is securely connected to the clock and the power adapter, and the adapter is plugged into a working outlet. Check if the power adapter is 5V/1A or 5V/2A. |
| Time/Date is incorrect after power loss. | Memory batteries (CR2032) are dead or not installed. | Install or replace the two CR2032 batteries in the clock's battery compartment. |
| Remote control is unresponsive. | Remote batteries are dead or incorrectly inserted. Obstruction between remote and clock. | Replace the remote control batteries. Ensure there is a clear line of sight between the remote and the clock. |
| Display is too bright or too dim. | Brightness setting needs adjustment. | Use the brightness buttons on the remote control to adjust to a comfortable level. Alternatively, activate or deactivate the automatic dimming function by pressing and holding the SNOOZE button. |
Specifications
| Brand | Hournor |
| Model Number | clock0717 |
| Color | Green |
| Product Dimensions (L x W x H) | 24.89 x 3.81 x 16 cm (9.8 x 1.5 x 6.3 inches) |
| Item Weight | 531 grams (1.17 lbs) |
| Display Type | Digital LED |
| Special Features | Memory Function, Large LED Display, Remote Control, Automatic Dimmer |
| Power Source | Corded Electric (USB cable, 5V/1A or 5V/2A adapter required) |
| Memory Batteries | 2 x CR2032 (for memory retention, not included) |
Warranty and Support
Hournor provides a 12-month worry-free warranty for this product. If you encounter any questions or issues, please contact us through the buyer-seller message system. Our customer service team is available 24 hours to assist you and ensure your satisfaction.