1. Introduction
This manual provides essential information for the assembly, operation, and maintenance of your Bandai HGAC 1/144 XXXG-01D2 Gundam DEATHSCYTHE Hell model kit. This High Grade After Colony (HGAC) series kit offers a detailed and articulated representation of the iconic mobile suit from the Gundam Wing series. Please read these instructions carefully before beginning assembly to ensure a smooth and enjoyable building experience.
2. Safety Information
- Small Parts: This kit contains small parts that may pose a choking hazard. Keep out of reach of small children.
- Sharp Edges: Some parts may have sharp edges or points. Handle with care during assembly.
- Tools: Use appropriate tools such as plastic nippers and hobby knives carefully. Adult supervision is recommended for younger builders.
- Ventilation: If using paints, glues, or markers, ensure adequate ventilation in your workspace.
3. Package Contents
Verify that all components are present before starting assembly. The package should contain:
- Multiple plastic runners (frames of parts)
- Poly-caps (for joints)
- Foil stickers or decals
- Instruction manual (this document refers to the detailed booklet included in the box)

Image 3.1: Overview of the kit's components, including various runners, accessories like the Beam Scythe and Buster Shield, and interchangeable hands.
4. Setup and Assembly
Assembly of the HGAC 1/144 XXXG-01D2 Gundam DEATHSCYTHE Hell requires careful attention to detail. Refer to the included pictorial instruction booklet for step-by-step guidance.
4.1. Recommended Tools
- Plastic Nippers: For cleanly cutting parts from runners.
- Hobby Knife: For trimming nubs and refining part edges.
- Tweezers: Useful for applying small stickers or decals.
- Cutting Mat: To protect your work surface.
4.2. Assembly Steps Overview
- Part Preparation: Carefully cut each part from its runner using nippers. Trim any excess plastic (nubs) with a hobby knife for a clean finish.
- Sectional Assembly: Assemble the model in sections as indicated in the instruction booklet (e.g., head, torso, arms, legs, weapons).
- Joints: Pay close attention to poly-cap placement for articulated joints. Ensure parts snap together firmly but do not force them.
- Stickers/Decals: Apply foil stickers or decals as directed in the manual to enhance detail. Use tweezers for precision.
- Final Assembly: Connect all assembled sections to form the complete mobile suit.

Image 4.1: Front and rear views of the fully assembled Gundam Deathscythe Hell, showcasing its overall design and backpack.
5. Operating and Features
Once assembled, your Gundam Deathscythe Hell model kit is ready for display and posing. Explore its articulation and unique features.
5.1. Articulation
The HGAC kit features a high degree of articulation in its joints, allowing for dynamic posing. Carefully manipulate the arms, legs, torso, and head to achieve desired stances. Avoid excessive force to prevent damage to the plastic joints.
5.2. Active Cloak
The signature Active Cloak can be posed in both closed (storage) and open (combat) configurations. Gently adjust the cloak panels to switch between modes.

Image 5.1: Gundam Deathscythe Hell with its Active Cloak folded, presenting a more compact profile.

Image 5.2: Gundam Deathscythe Hell in a combat pose with its Active Cloak spread wide, revealing the inner mechanisms.
5.3. Beam Scythe and Buster Shield
The model includes its iconic weaponry: the Beam Scythe and Buster Shield. These can be equipped to the model's hands. The Beam Scythe features clear green effect parts to simulate its energy blade. The Buster Shield can be attached to the forearm or deployed with its own beam effect part.

Image 5.3: Detailed view of the Gundam Deathscythe Hell's upper body, showcasing the Beam Scythe and Buster Shield in hand.

Image 5.4: Gundam Deathscythe Hell posed mid-action, demonstrating the Beam Scythe's extended green blade.

Image 5.5: A full body shot of the Gundam Deathscythe Hell, showcasing its poseability with the Beam Scythe.
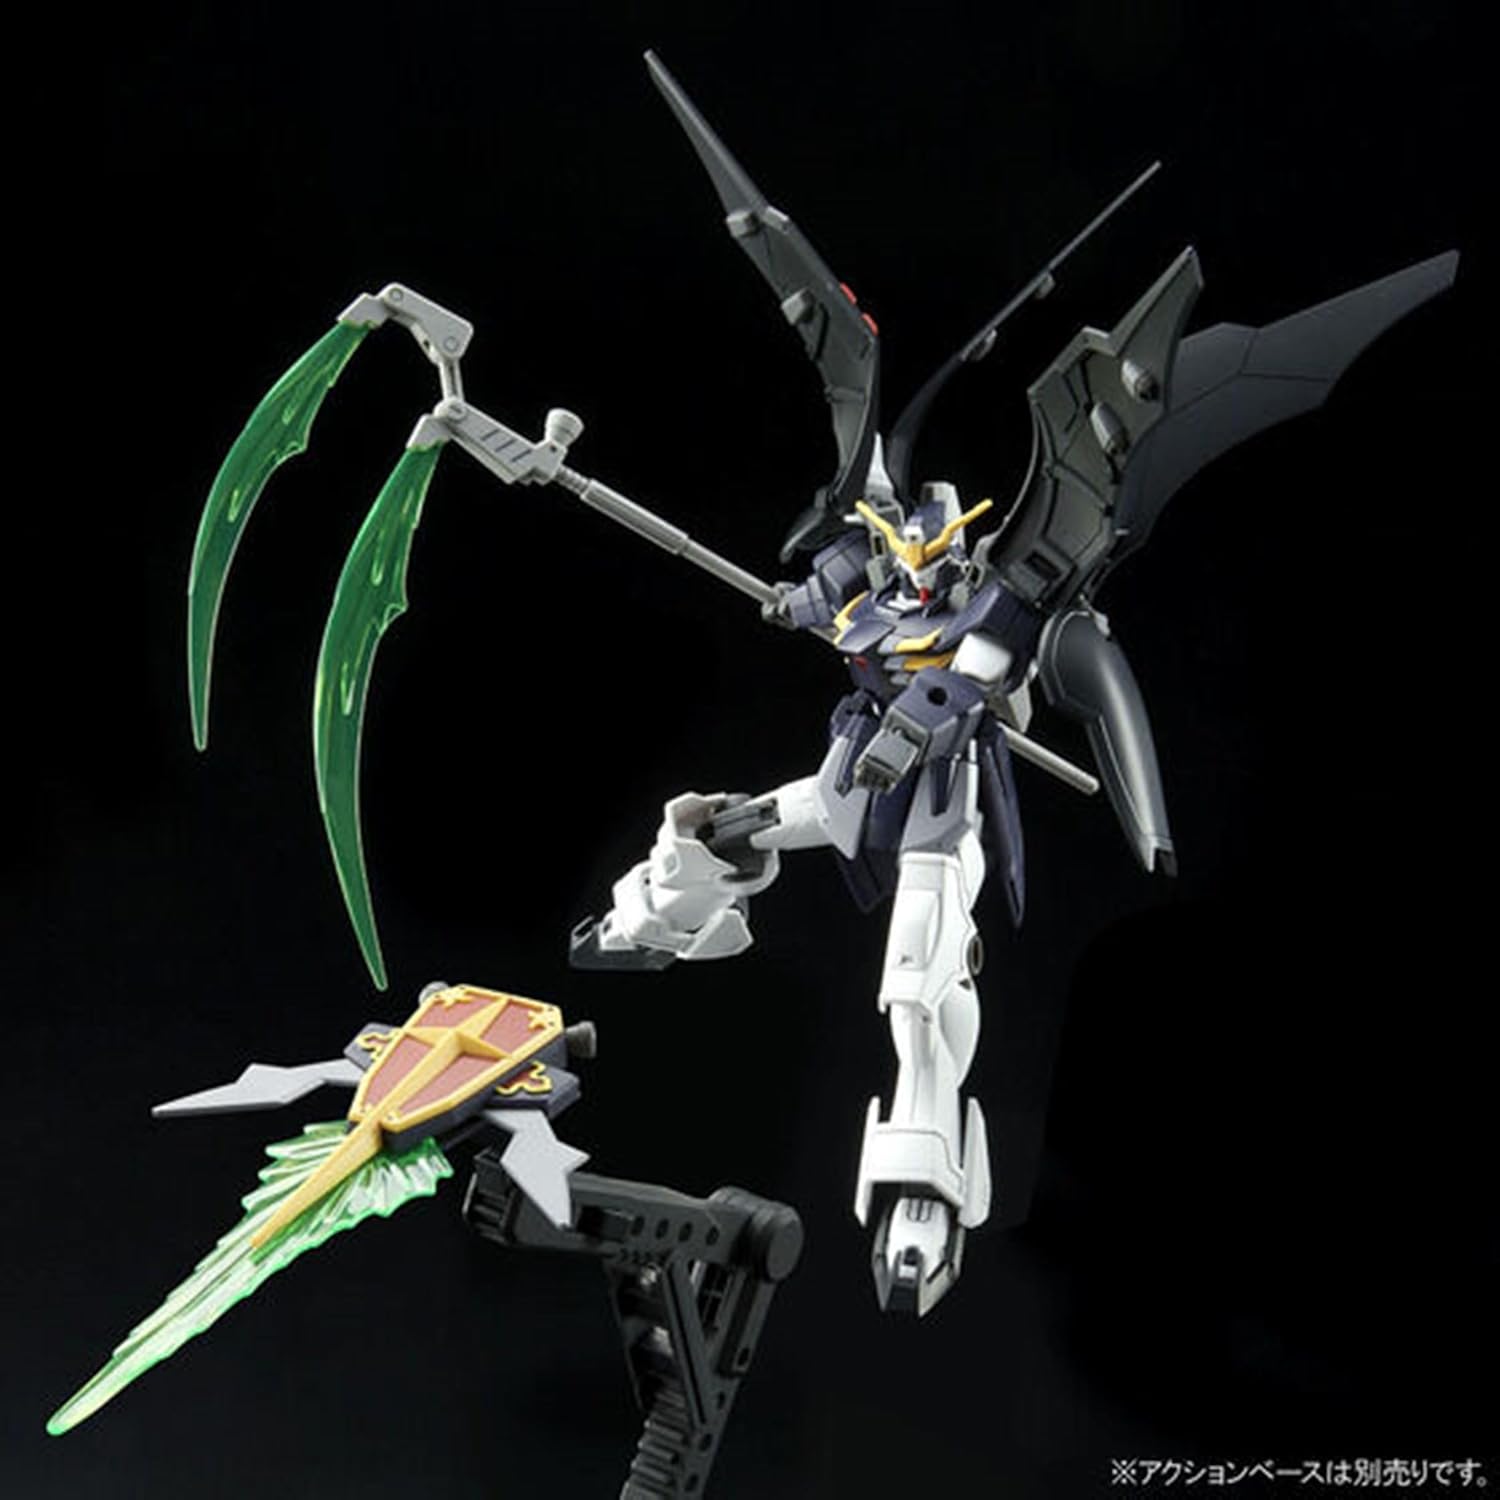
Image 5.6: Gundam Deathscythe Hell demonstrating the versatility of its weaponry, including the deployed Buster Shield.
6. Maintenance
Proper care will preserve the appearance and integrity of your model kit.
- Cleaning: Dust your model regularly with a soft brush or compressed air. Avoid using harsh chemicals or abrasive materials.
- Storage: Store the model away from direct sunlight, extreme temperatures, and high humidity to prevent discoloration or material degradation.
- Handling: Handle the model by its main body parts rather than delicate accessories or thin antennae to avoid breakage.
7. Troubleshooting
Encountering minor issues during or after assembly is common. Here are solutions to frequent problems:
- Loose Joints: If a joint feels too loose, you can apply a thin layer of clear nail polish or a specialized hobby joint-tightening solution to the ball or peg. Allow it to dry completely before reassembling.
- Parts Not Fitting: Double-check the instruction manual to ensure the correct parts are being used and oriented properly. Sometimes, a small amount of plastic flash (excess material) might prevent a snug fit; carefully trim it with a hobby knife.
- Broken Parts: For minor breaks, plastic cement can be used. For more significant damage, contact the manufacturer for potential replacement parts if available.
- Stickers Peeling: Ensure the surface is clean and dry before applying stickers. Press firmly to remove air bubbles. A clear topcoat can help seal them in place.
8. Specifications
| Specification | Detail |
|---|---|
| Brand | BANDAI SPIRITS |
| Model Number | 5063278 (XXXG-01D2) |
| Scale | 1/144 |
| Material | Plastic |
| Product Dimensions (L x W x H) | 11.61 x 7.28 x 3.15 inches (Box) |
| Item Weight | 0.34 Kilograms (12 ounces) |
| Number of Pieces | 1 (referring to the complete kit) |
9. Warranty and Support
For questions regarding missing parts, manufacturing defects, or assembly assistance not covered in this manual, please contact BANDAI SPIRITS customer support. Retain your proof of purchase for any warranty claims. Specific warranty terms may vary by region and retailer.