ENOMAKER [Z2]Ender-3 S1/Pro
ENOMAKER Ender 3 S1 Linear Rail Guide for Z axis Instruction Manual
Model: [Z2]Ender-3 S1/Pro
1. Introduction
This manual provides comprehensive instructions for the installation, operation, and maintenance of your ENOMAKER Ender 3 S1 Linear Rail Guide for Z axis. This linear rail guide is designed to enhance the stability and precision of your 3D printer's Z-axis movement, leading to superior print quality and reduced noise. It minimizes vibrations and wobbling, ensuring smoother and more detailed prints. Crafted from high-carbon chromium steel, it offers excellent wear resistance, smooth motion, uniform force, and increased durability. The concealed design ensures a neat appearance by mounting the guide rail inside the profile.
2. Safety Information
Always ensure your 3D printer is powered off and unplugged from the mains before performing any installation or maintenance. Handle all components with care to avoid injury or damage. Keep small parts away from children. If you are unsure about any step, seek professional assistance.
3. Package Contents
Please verify that all items listed below are present in your package:
- 1 x Z-axis Linear Rail
- 1 x Linear Bearing Block
- 1 x Mounting Bracket (Blue)
- Assorted Screws and Fasteners
- 2 x Wrenches (Spanners)

Figure 3.1: Complete ENOMAKER Ender 3 S1 Z-axis linear rail guide kit, including the rail, linear block, mounting bracket, fasteners, and tools.
4. Setup and Installation
Follow these steps to install the Z-axis linear rail guide on your Creality Ender 3 S1 or S1 Pro 3D printer:
- Prepare the Printer: Power off and unplug your 3D printer. Carefully remove any existing Z-axis components that will be replaced by the linear rail system, such as the original Z-axis wheels and plate.
- Mount the Linear Rail: Attach the linear rail to the Z-axis extrusion of your printer. Ensure proper alignment with the existing screw holes.
- Install the Mounting Bracket: Secure the blue mounting bracket to the linear bearing block. This bracket will hold the hotend assembly.
- Attach Bearing Block to Rail: Slide the linear bearing block onto the linear rail. Ensure it moves smoothly along the rail.
- Connect to Printer: Attach the assembly (bearing block with bracket) to the Z-axis lead screw nut and the hotend carriage. Refer to the installation tips for correct screw tightening order.
- Final Adjustments: Once installed, ensure all screws are tightened securely. As a final step, be sure to remove the rubber stoppers from both ends of the linear rail. These stoppers prevent the sliding block from falling out during shipping and handling.

Figure 4.1: The linear rail guide installed on a 3D printer's Z-axis, demonstrating how it ensures stable and precise vertical movement for improved print quality.

Figure 4.2: Diagram showing key installation tips for the Z-axis linear rail guide, including screw tightening order and the final step of removing the rubber stopper.
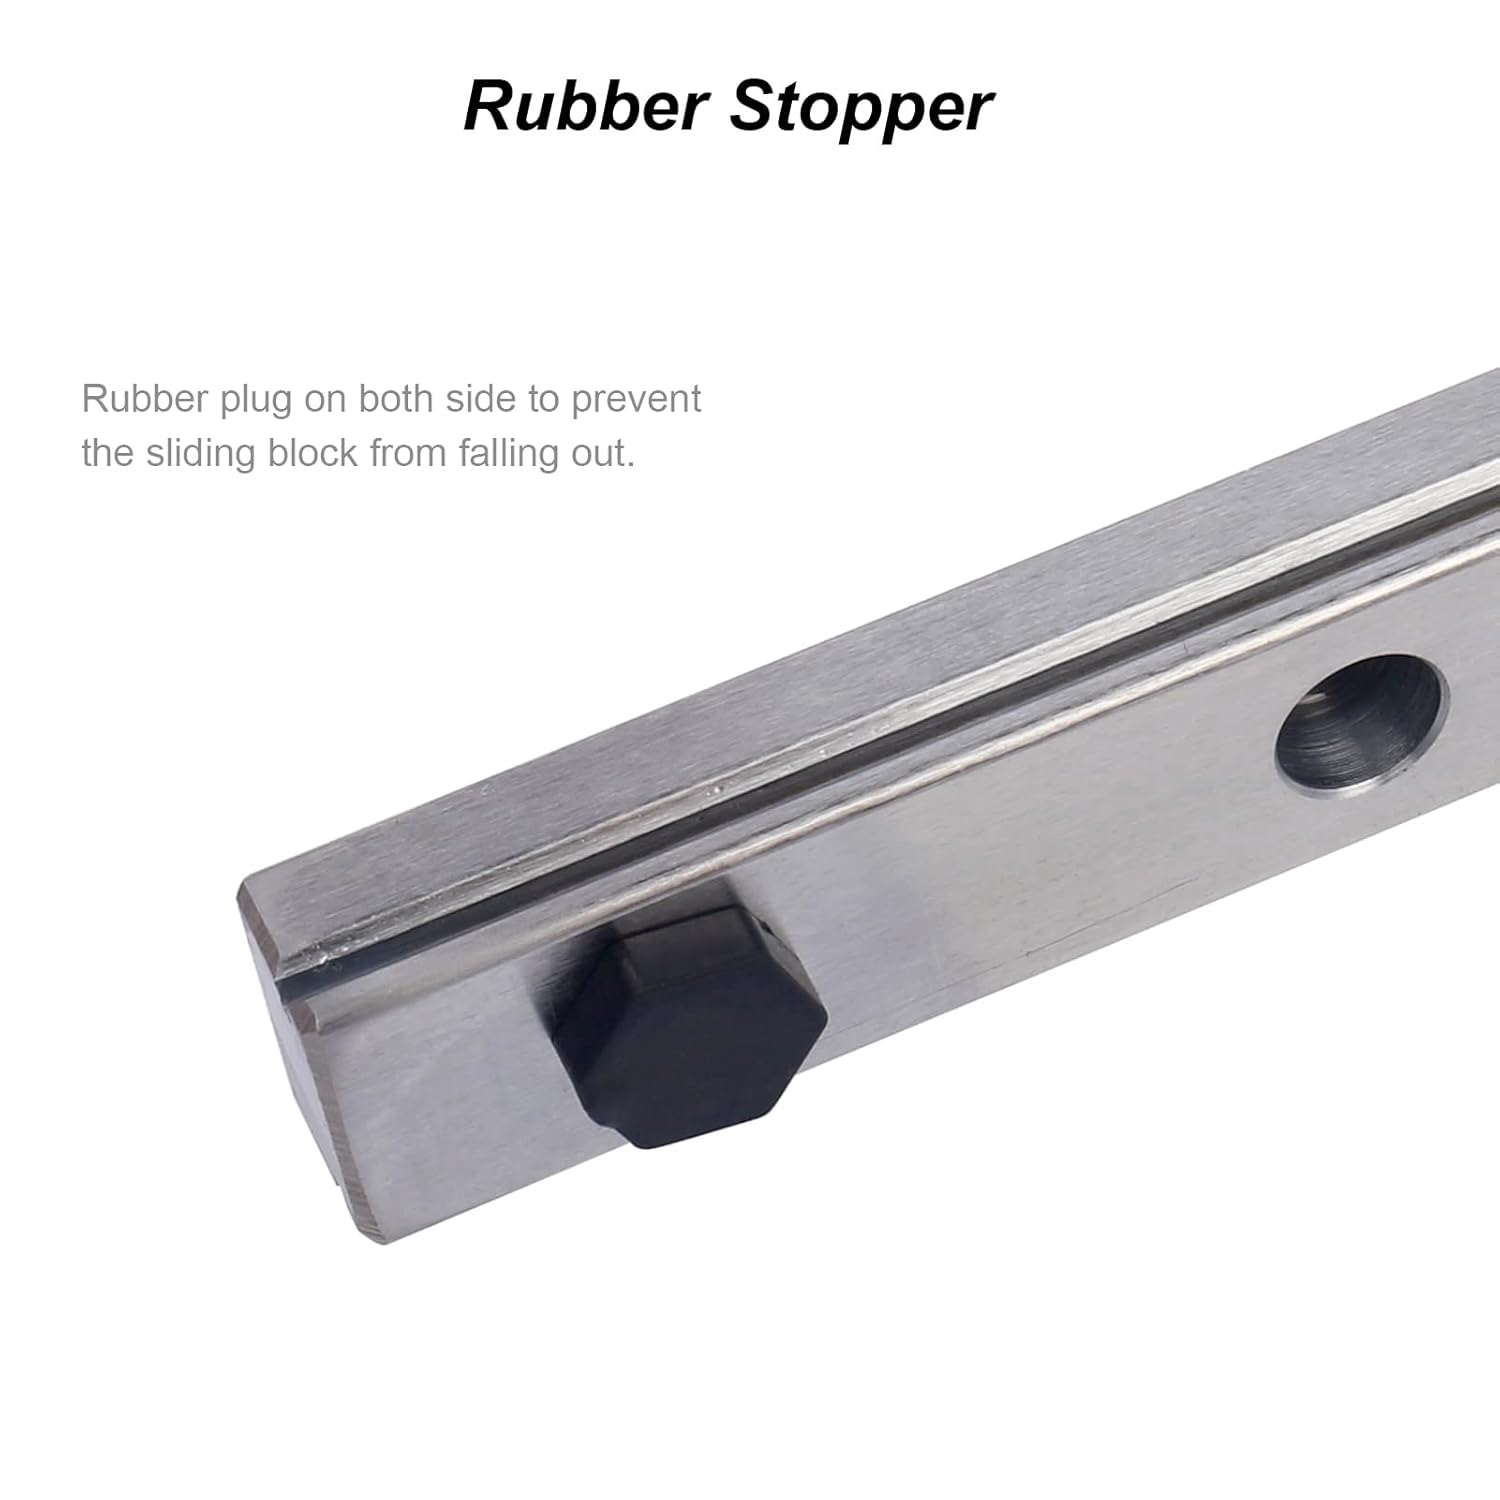
Figure 4.3: Close-up of the rubber stopper on the linear rail, designed to prevent the sliding block from falling out during handling or installation.

Figure 4.4: Illustration of the linear rail's concealed design, showing how the guide rail is mounted discreetly inside the printer's profile for a neat appearance.

Figure 4.5: Full view of a 3D printer with the ENOMAKER Z-axis linear rail guide installed, showcasing its integration with the Ender 3 S1/Pro model.
5. Operating
Once installed, the ENOMAKER Ender 3 S1 Linear Rail Guide operates automatically as an integral part of your 3D printer's Z-axis movement system. It ensures smooth, precise vertical motion, minimizing vibrations and improving print layer accuracy. No specific user interaction is required for its operation beyond the normal use of your 3D printer.

Figure 5.1: Close-up view of the linear rail and bearing block, highlighting its high precision, low noise, high speed, and long life characteristics. A note advises against removing the slider to prevent ball bearings from falling out.
6. Maintenance
Regular maintenance will ensure the longevity and optimal performance of your linear rail guide:
- Cleaning: Periodically inspect the linear rail and bearing block for dust, filament debris, or other contaminants. Use a soft, lint-free cloth to gently wipe away any buildup. Avoid abrasive materials.
- Lubrication: The linear bearing block contains internal ball bearings that require lubrication for smooth operation. Apply a small amount of high-quality lithium grease or a specialized linear rail lubricant to the rail surface every few months, or as needed based on usage. Move the bearing block back and forth along the rail to distribute the lubricant evenly.
- Inspection: Regularly check all mounting screws to ensure they remain tight. Inspect the linear rail and bearing block for any signs of wear or damage.

Figure 6.1: Detailed view of the high-quality linear bearing, emphasizing its durable steel construction for smooth and efficient operation.
7. Troubleshooting
If you encounter issues with your linear rail guide, consider the following:
- Rough Movement or Grinding Noise:
- Check for debris on the rail surface. Clean thoroughly.
- Apply lubricant as described in the Maintenance section.
- Ensure all mounting screws are properly tightened and the rail is not warped or misaligned.
- Reduced Print Quality (Z-wobble):
- Verify that the linear rail and bearing block are securely mounted and free of play.
- Ensure the Z-axis lead screw is straight and properly coupled.
- Check for any external vibrations affecting the printer.
8. Specifications
| Attribute | Detail |
|---|---|
| Manufacturer | ENOMAKER |
| Model | [Z2]Ender-3 S1/Pro |
| Manufacturer Reference | ENO-3S1-RailGuide-Z |
| Parcel Dimensions | 48.26 x 9.52 x 4.44 cm |
| Item Weight | 726 g |
9. Warranty and Support
For warranty information, technical support, or any inquiries regarding your ENOMAKER Ender 3 S1 Linear Rail Guide, please contact ENOMAKER customer service through their official channels or the retailer from whom you purchased the product. Please have your model number and purchase details ready when contacting support.
Ask a question about this manual
Ask about setup, troubleshooting, compatibility, parts, safety, or missing instructions. Manuals+ will review the question and use this page’s manual context to help answer it.