1. Introduction
Thank you for choosing the KOO Kinchika Remote Control Car. This versatile vehicle is designed for dynamic play, featuring a unique shapeshifting capability that allows for over 100 different configurations. Equipped with four powerful motors, LED lights, and programmable functions, the Kinchika offers an engaging experience. This manual provides essential information for safe operation, setup, maintenance, and troubleshooting.
2. Safety Warnings
Please read all safety warnings carefully before use to prevent injury or damage.
- Choking Hazard: Not suitable for children under 36 months due to small parts.
- Suffocation Hazard: Keep packaging materials away from children.
- Epilepsy Warning: This toy produces flashes that may trigger epilepsy in sensitized individuals.
- Battery Safety: Do not mix old and new batteries. Do not mix alkaline, standard (carbon-zinc), or rechargeable (nickel-cadmium) batteries. Dispose of batteries properly.
- Adult Supervision: Always supervise children during operation.
- Environmental Use: Avoid operating in wet conditions or on public roads.
3. Package Contents
Ensure all items are present in the package:
- KOO Kinchika Remote Control Car
- Remote Control Unit
- Rechargeable Battery for Car
- USB Charging Cable
- Instruction Manual (this document)
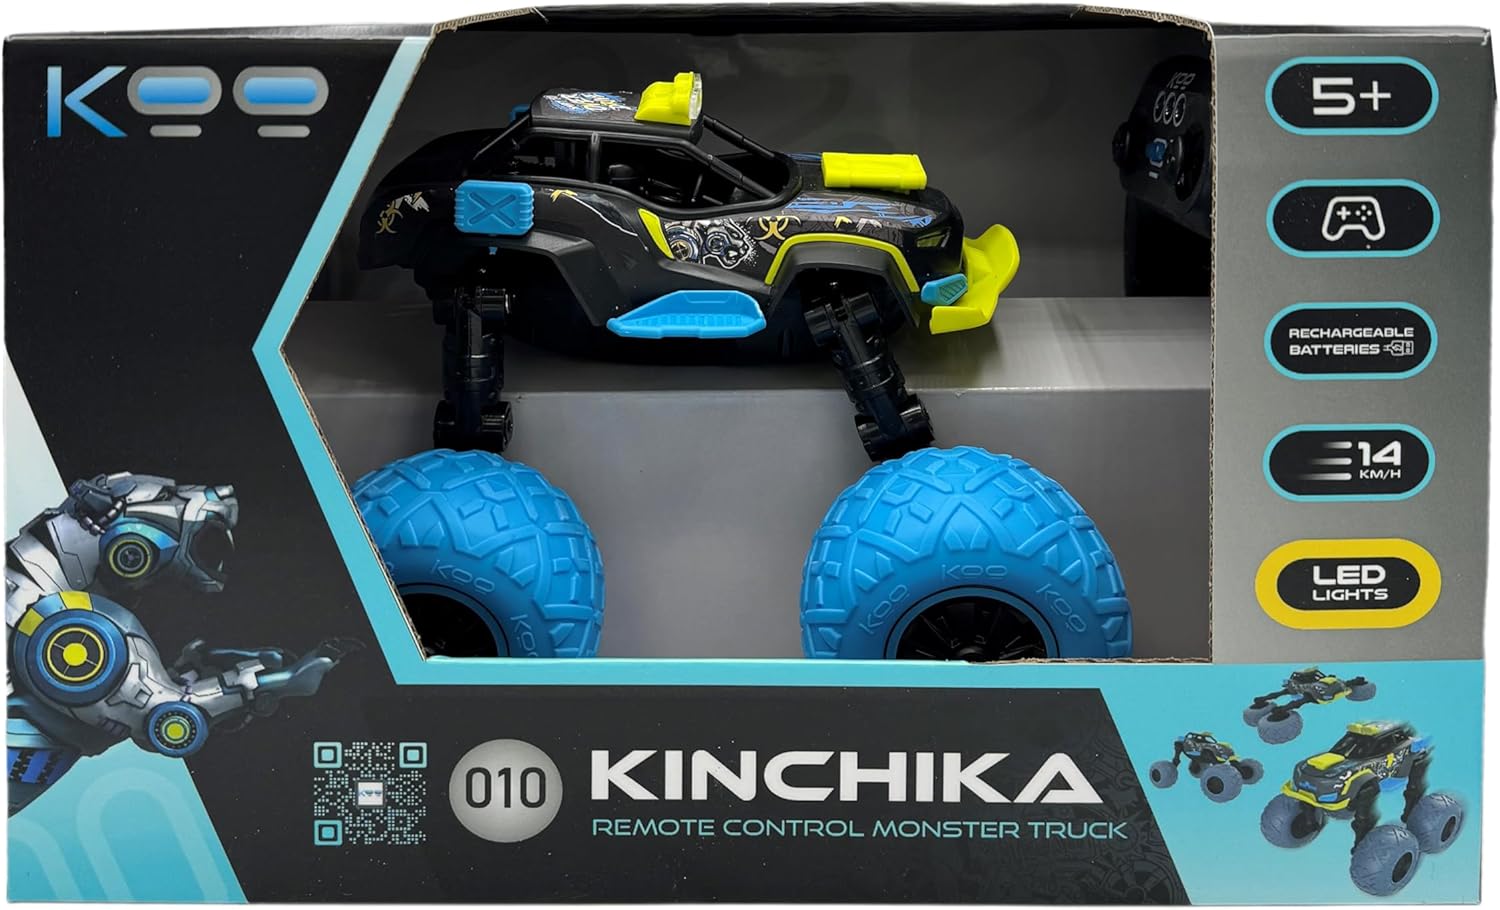
Image: KOO Kinchika product packaging. The box displays the car in its monster truck configuration, the remote control, and key features like "5+", "Rechargeable Batteries", "14 KM/H", and "LED Lights".
4. Setup
4.1 Car Battery Installation and Charging
- Locate the battery compartment on the underside of the KOO Kinchika car.
- Open the battery compartment cover.
- Connect the rechargeable battery to the car's battery connector.
- Place the battery inside the compartment and close the cover securely.
- To charge the car battery, connect the USB charging cable to the car's charging port and to a standard USB power adapter (not included). The charging indicator will show the charging status.
- Allow several hours for a full charge. A full charge typically provides approximately 20 minutes of play time.
Note: All KOO cars are equipped with rechargeable batteries as part of the "E-KOO Friendly" initiative.
4.2 Remote Control Battery Installation
The remote control requires 3 AAA batteries (not included).
- Locate the battery compartment on the back of the remote control.
- Open the battery compartment cover.
- Insert 3 AAA batteries, ensuring correct polarity (+/-).
- Close the battery compartment cover securely.
5. Operating Instructions
5.1 Remote Control Overview

Image: The KOO Kinchika remote control. Labels indicate: "Forward/Backward" (left joystick), "On/Off" (center button), "Left/Right" (right joystick), and "LED Light" (top buttons).
- Left Joystick: Controls Forward and Backward movement.
- Right Joystick: Controls Left and Right steering.
- Center Button: Power On/Off for the remote control.
- Top Buttons: Activates/deactivates the LED lights on the car.
5.2 Powering On and Pairing
- Ensure both the car and remote control have fresh or fully charged batteries.
- Turn on the car using its power switch (usually located near the battery compartment).
- Press the On/Off button on the remote control to power it on.
- The car and remote control should automatically pair. If not, turn both off and on again.
5.3 Driving and Transformation
Use the joysticks on the remote control to maneuver the Kinchika car. The Kinchika features fully articulated arms that allow it to transform into various shapes. Experiment with the car's movement and the remote control to discover different configurations and driving styles.

Image: The KOO Kinchika remote control car in its elevated monster truck configuration, showcasing its large blue wheels and yellow accents.

Image: Another view of the KOO Kinchika car, highlighting its adjustable chassis and wheel design.
5.4 Programmable Functions
The Kinchika car allows you to record sequences of movements and play them back. Refer to the remote control's specific programming buttons (if available, not explicitly detailed in provided data) or experiment with holding certain buttons during movement to initiate recording. Once recorded, a dedicated playback button will execute the sequence.
5.5 LED Lights
Activate the car's LED lights using the designated button(s) on the remote control for enhanced visibility and visual effect, especially in low-light conditions.
6. Maintenance
6.1 Cleaning
To clean the KOO Kinchika car, gently wipe it with a dry or slightly damp cloth. Do not use harsh chemicals or immerse the car in water.
6.2 Battery Care
- Always fully charge the car's rechargeable battery before first use and after each play session.
- Remove batteries from the remote control if it will not be used for an extended period.
- Store batteries in a cool, dry place.
7. Troubleshooting
| Problem | Possible Cause | Solution |
|---|---|---|
| Car does not respond to remote control. |
|
|
| Short play time (approx. 20 minutes). |
|
|
| One wheel or motor not functioning. |
|
|
8. Specifications
| Feature | Detail |
|---|---|
| Model Name | Kinchika |
| Item Model Number | KAB_KOO_0010 |
| Brand | KOO |
| Product Dimensions | 21.3 x 21.4 x 19.2 cm |
| Item Weight | 1.27 Kilograms |
| Manufacturer Recommended Age | 5 years and up |
| Car Batteries | Rechargeable Lithium-Ion (Included) |
| Remote Control Batteries | 3 AAA batteries (Not Included) |
| Material Type | Plastic |
| Remote Control Type | Infrared |
| Educational Objective(s) | Develop creativity, problem-solving, hand-eye coordination and social interaction |
| Special Feature | Flashing Light (LED) |
9. Warranty and Support
For warranty information, technical support, or assistance with your KOO Kinchika Remote Control Car, please contact the retailer or manufacturer directly. Keep your proof of purchase for any warranty claims.
For general inquiries or further assistance, please visit the official KOO website or contact their customer service department.