Introduction
This user manual provides essential information for the safe operation, setup, and maintenance of your Marcree Digital Home Cabinet Safe Box. Please read this manual thoroughly before using the safe to ensure proper functionality and security.
The Marcree Digital Home Cabinet Safe Box is designed to protect your valuables, documents, and other important items with advanced security features, including a digital keypad, dual alarm system, and robust construction.
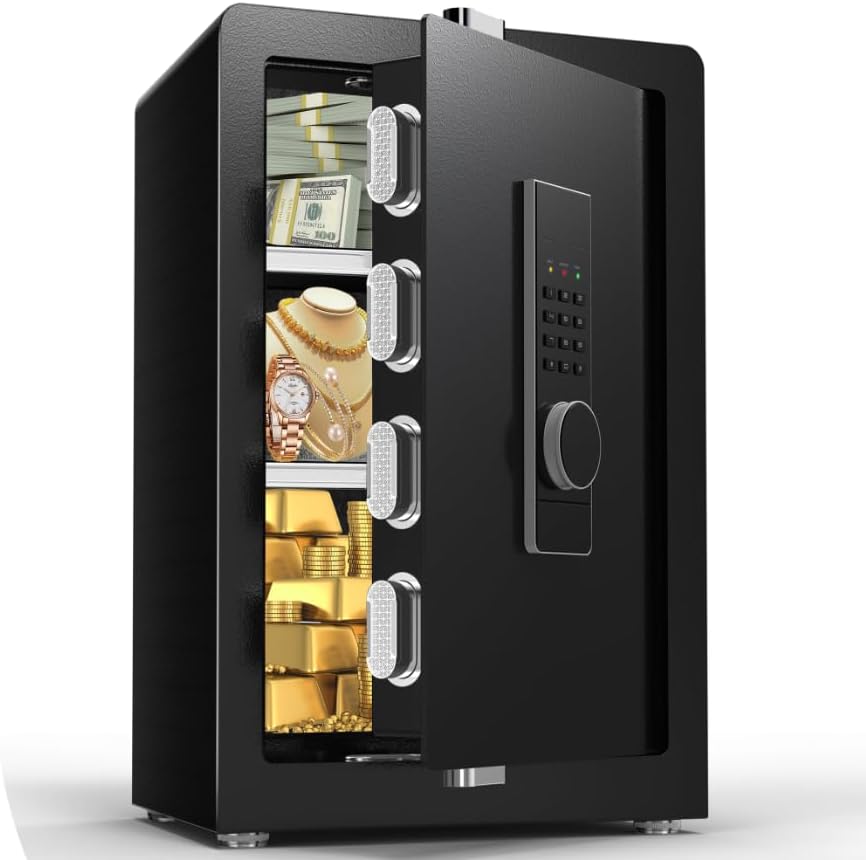
Figure 1: Marcree Digital Home Cabinet Safe Box with interior view.

Figure 2: Anti-drilling and anti-prying construction for enhanced security.
Included Components
Your package should contain the following items:
- Marcree Security Safe (1)
- Emergency Key (2)
- Hidden Compartment Key (2)
- Extended Screws (6)
- Emergency Battery Holder (1)
- Anti-slip Mat (4)
- User's Manual (1)
- Fireproof Waterproof Bag (1)
Setup and Initial Use
1. Initial Opening (Emergency Key)
For the first opening or in case of emergency (e.g., forgotten password, low battery), use the emergency key.
- Locate the emergency keyhole, usually concealed behind a small cover on the keypad panel.
- Insert the emergency key and turn it.
- Simultaneously turn the knob on the keypad to open the safe door.
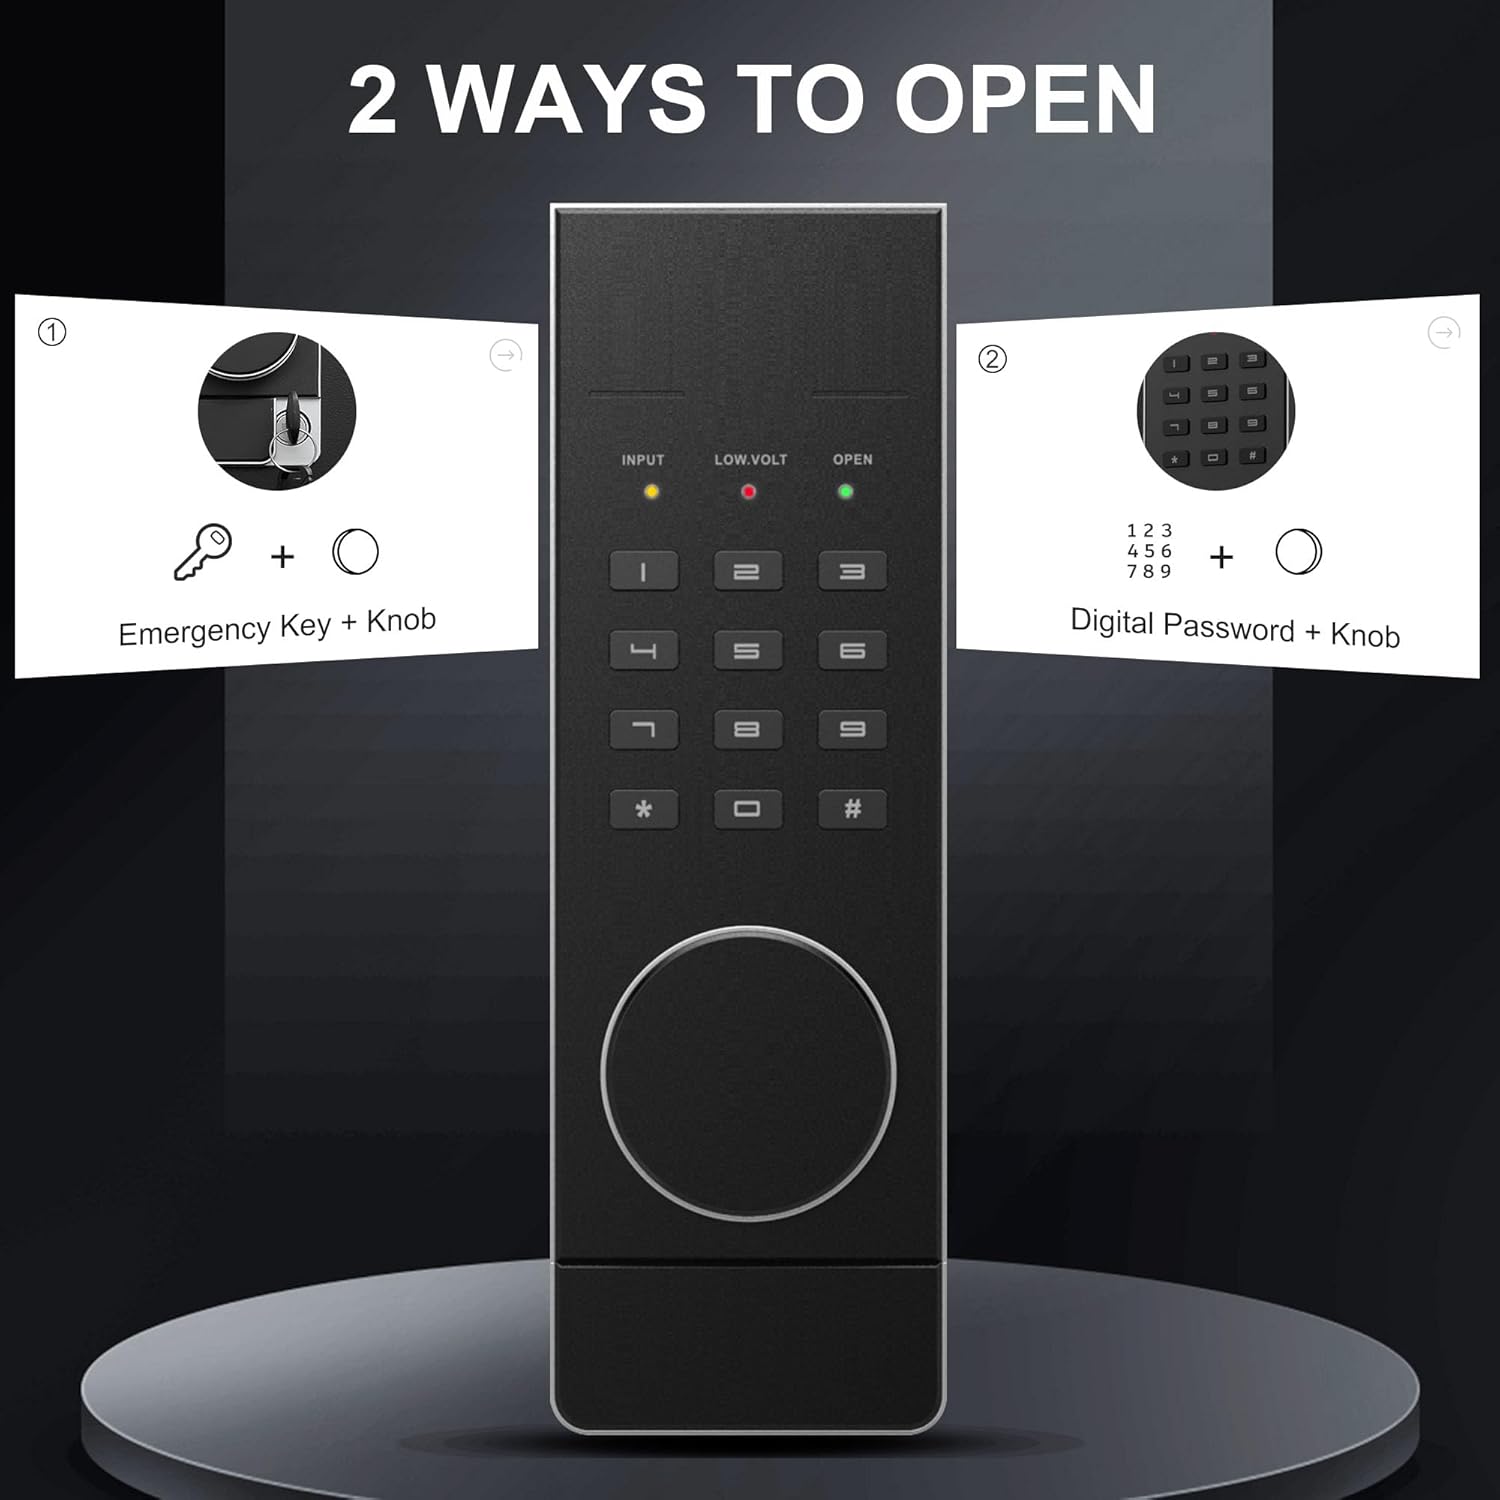
Figure 3: Emergency Key and Digital Keypad for opening.
Video 1: Demonstrates the initial opening of the safe using the emergency key and knob, followed by battery installation and code setting.
2. Battery Installation
The safe requires 4*AA batteries for the digital keypad to function. The battery compartment is located on the inside of the safe door.
- Open the safe door.
- Locate the battery compartment cover on the inside of the door.
- Remove the cover and insert 4*AA batteries, ensuring correct polarity (+/-).
- Replace the battery compartment cover.
3. Setting Your Passcode
It is recommended to set your personal passcode immediately after battery installation.
First Code Setting:
- With the safe door open, press the green "Setting Button" located on the inside edge of the door.
- Enter your desired new code (4-8 digits) on the keypad.
- Press "#" to confirm.
- Re-enter the same new code.
- Press "#" again to confirm. The indicator light will confirm successful setting.
Second Code Setting (if applicable):
Some models support a second user code.
- With the safe door open, press "00" then the green "Setting Button".
- Enter the new code (4-8 digits) on the keypad.
- Press "#" to confirm.
- Re-enter the same new code.
- Press "#" again to confirm.
4. Mounting the Safe
For enhanced security, it is highly recommended to mount the safe to a floor or wall using the provided expansion screws.
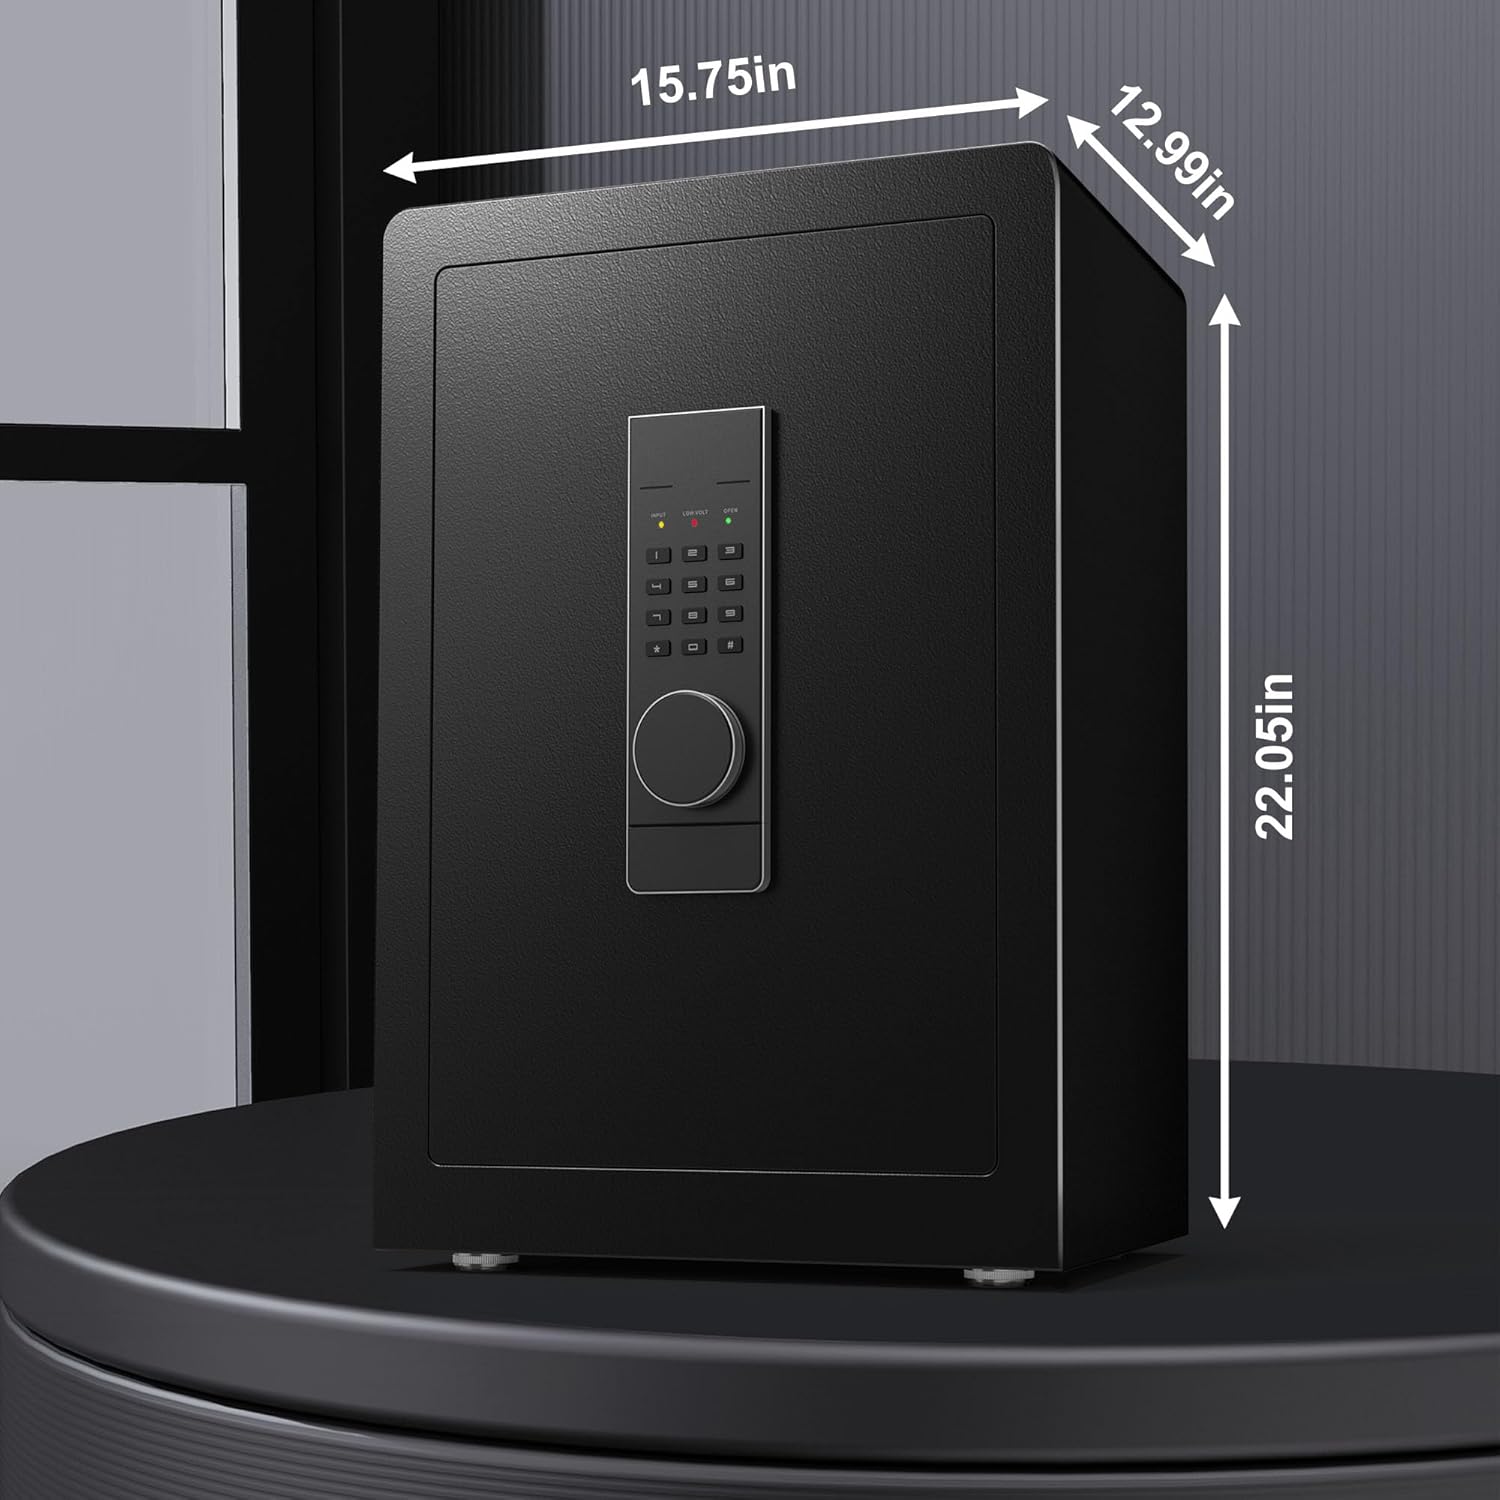
Figure 4: Safe dimensions and potential mounting points.
- Identify a suitable location for mounting, ensuring it is a solid surface.
- Mark the drilling points through the pre-drilled holes on the back or bottom of the safe.
- Drill holes into the wall or floor at the marked positions.
- Align the safe with the drilled holes and secure it using the extended screws.
Operating Your Safe
1. Opening the Safe with Digital Passcode
- Enter your 4-8 digit passcode on the keypad.
- Press "#" to confirm.
- Within 5 seconds, turn the knob clockwise to open the safe door.
2. Dual Security Alarm System
Your safe is equipped with a dual alarm system for enhanced security.
- Incorrect Code Alarm: If the passcode is entered incorrectly three consecutive times, the alarm will sound. To stop the alarm, enter the correct passcode.
- Vibration Alarm: To activate the vibration alarm, press "*" on the keypad. If the safe experiences violent impact or abnormal shaking, the alarm will trigger. To stop the alarm, enter the correct passcode.
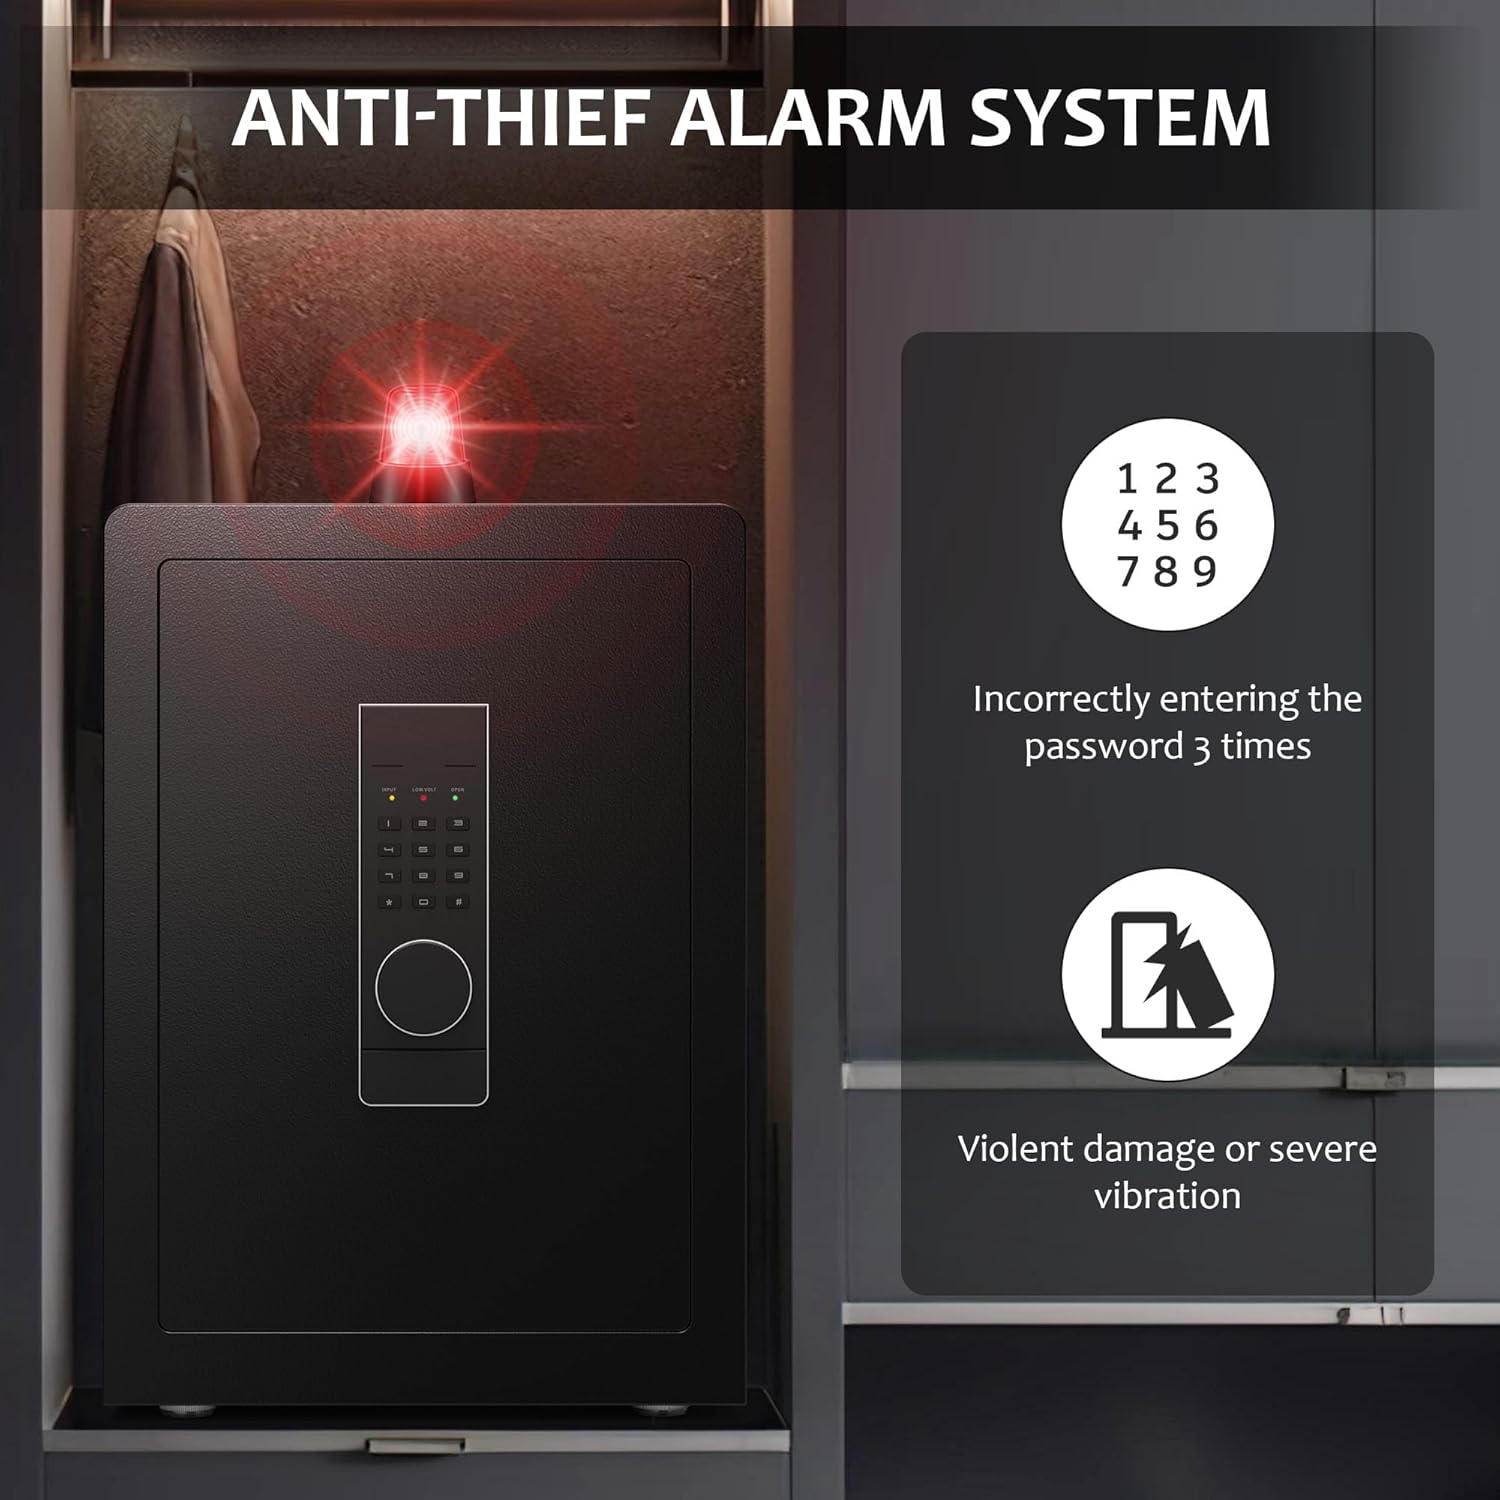
Figure 5: Dual alarm system triggers.
3. Adjustable Shelves
The safe features adjustable shelves to customize the internal storage space according to your needs.
- To remove a shelf, gently lift it from its supports.
- To adjust the height, reposition the shelf supports into the desired slots on the side rails.
- Place the shelf back onto the supports.

Figure 6: Removable and adjustable shelves for versatile interior organization.
4. Private Hidden Compartment
A unique hidden compartment is located at the bottom of the safe, accessible only with a special key.
- Locate the hidden compartment at the base of the safe's interior.
- Use the smaller, distinct hidden compartment key to unlock and access this private area.

Figure 7: Hidden compartment design for isolating private items.
Maintenance
- Battery Replacement: Replace batteries promptly when the low voltage indicator lights up or when the keypad becomes unresponsive. Always use new AA batteries.
- Cleaning: Clean the exterior of the safe with a soft, damp cloth. Avoid abrasive cleaners or solvents that could damage the finish.
- Key Storage: Store emergency keys and hidden compartment keys in a secure location outside the safe, but easily accessible to you.
Troubleshooting
| Problem | Possible Cause | Solution |
|---|---|---|
| Safe does not open with passcode. | Incorrect passcode entered; low batteries; keypad malfunction. | Verify passcode and re-enter. Replace batteries. Use emergency key. |
| Alarm sounds unexpectedly. | Incorrect passcode entered multiple times; vibration alarm activated. | Enter correct passcode to stop the alarm. Ensure vibration alarm is not accidentally activated. |
| Door does not close properly. | Obstruction in the door frame; locking bolts not fully retracted. | Check for any items blocking the door. Ensure the knob is fully turned to retract bolts before closing. |
Specifications
| Feature | Detail |
|---|---|
| Brand | Marcree |
| Model Number | K2-60-Z |
| Product Dimensions | 12.99"D x 15.75"W x 22.05"H |
| Lock Type | Electronic, Key |
| Color | Black |
| Capacity | 3 Cubic Feet |
| Material | Alloy Steel |
| Special Features | Alarm System, Sensor Light, Combination Lock, Anti-Theft, Removable Shelf |
| Mounting Type | Floor Mount, Wall Mount |
| Item Weight | 46.3 Pounds |
| Water Resistance Level | Not Water Resistant |
Warranty and Support
Marcree is committed to providing an exceptional customer experience. Your product comes with a standard warranty as per purchase terms.
If you encounter any problems during use, our professional customer service team is available to provide assistance from operation guidance to troubleshooting.
For support, please refer to the contact information provided at the point of purchase or visit the official Marcree website.