1. Introduction
The GNCGarden Orbit 94148 Buddy II is a digital irrigation programmer designed to automate your garden watering system. This two-port timer allows for precise control over two independent watering zones, ensuring efficient water management for your plants. Please read this manual carefully before use to ensure proper operation and longevity of your device.
2. Safety Information
- For outdoor use with cold water only.
- Do not operate at temperatures exceeding 48°C (120°F).
- Keep from freezing: Store the unit above 0°C (32°F) to prevent damage.
- Do not mix old and new batteries.
- Do not mix alkaline, standard (Carbon-Zinc), or rechargeable (Nickel-Cadmium) batteries.

Image: A close-up view of the back of the GNCGarden Orbit Buddy II, displaying a warning label in multiple languages to 'Keep from freezing' and store above 32°F (0°C). This highlights a critical safety and maintenance instruction.
3. Product Overview
The GNCGarden Orbit 94148 Buddy II features a clear digital display, intuitive control dial, and easy-to-use buttons for programming. It includes two independent outlets for managing separate watering zones.
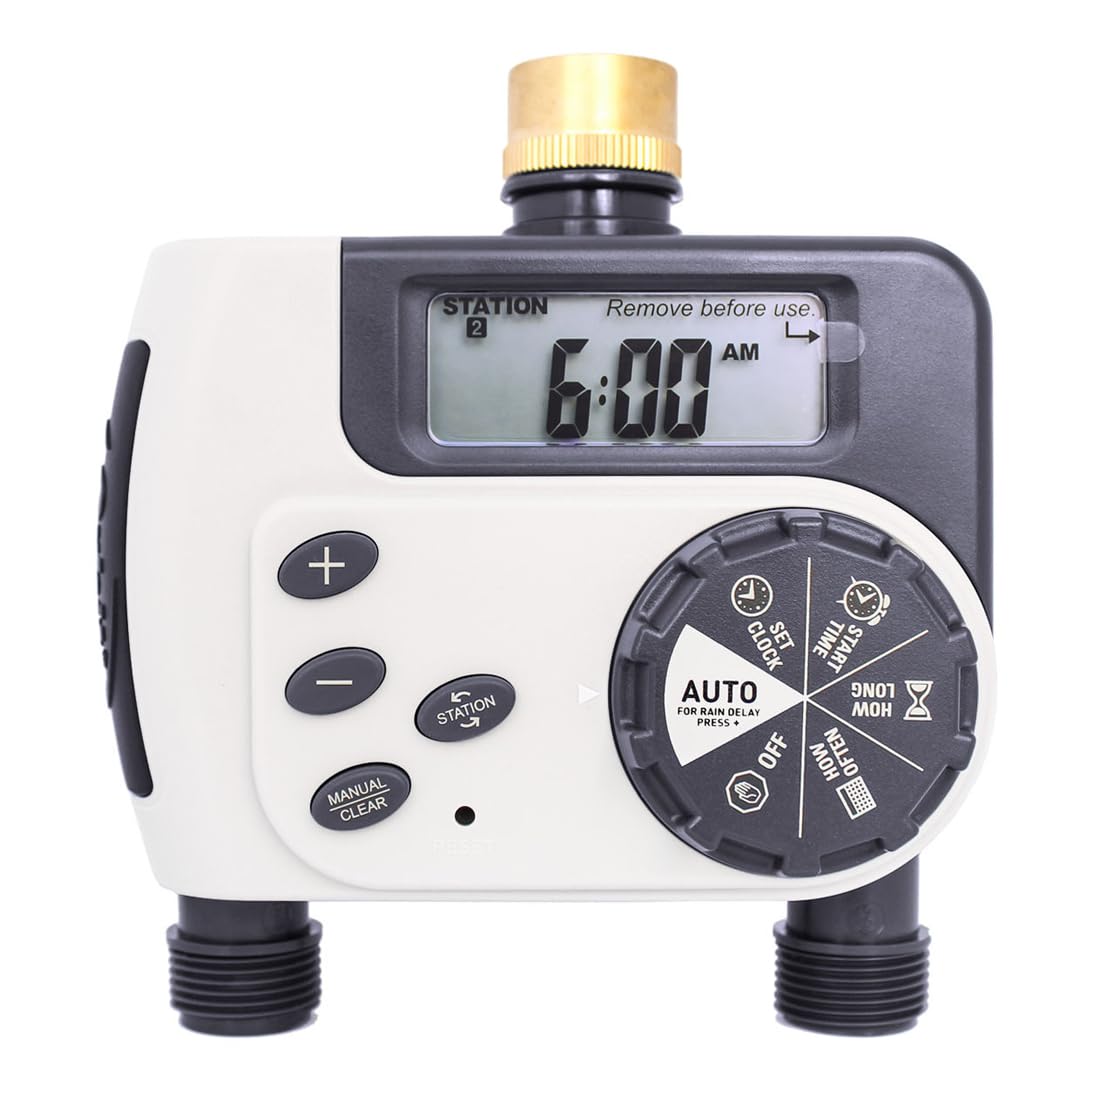
Image: A side view of the GNCGarden Orbit Buddy II digital irrigation programmer. The image clearly shows the digital screen, the main rotary dial with various settings (AUTO, SET CLOCK, START TIME, HOW LONG, HOW OFTEN, OFF), and the control buttons (+, -, MANUAL/CLEAR, ENTER) on the front panel. The brass faucet connector is visible at the top, and the two hose outlets are at the bottom.
4. Setup
4.1 Battery Installation
- Locate the battery compartment on the back of the timer.
- Slide the battery cover off.
- Insert two AA (1.5V) alkaline batteries, ensuring correct polarity (+/-).
- Replace the battery cover securely.
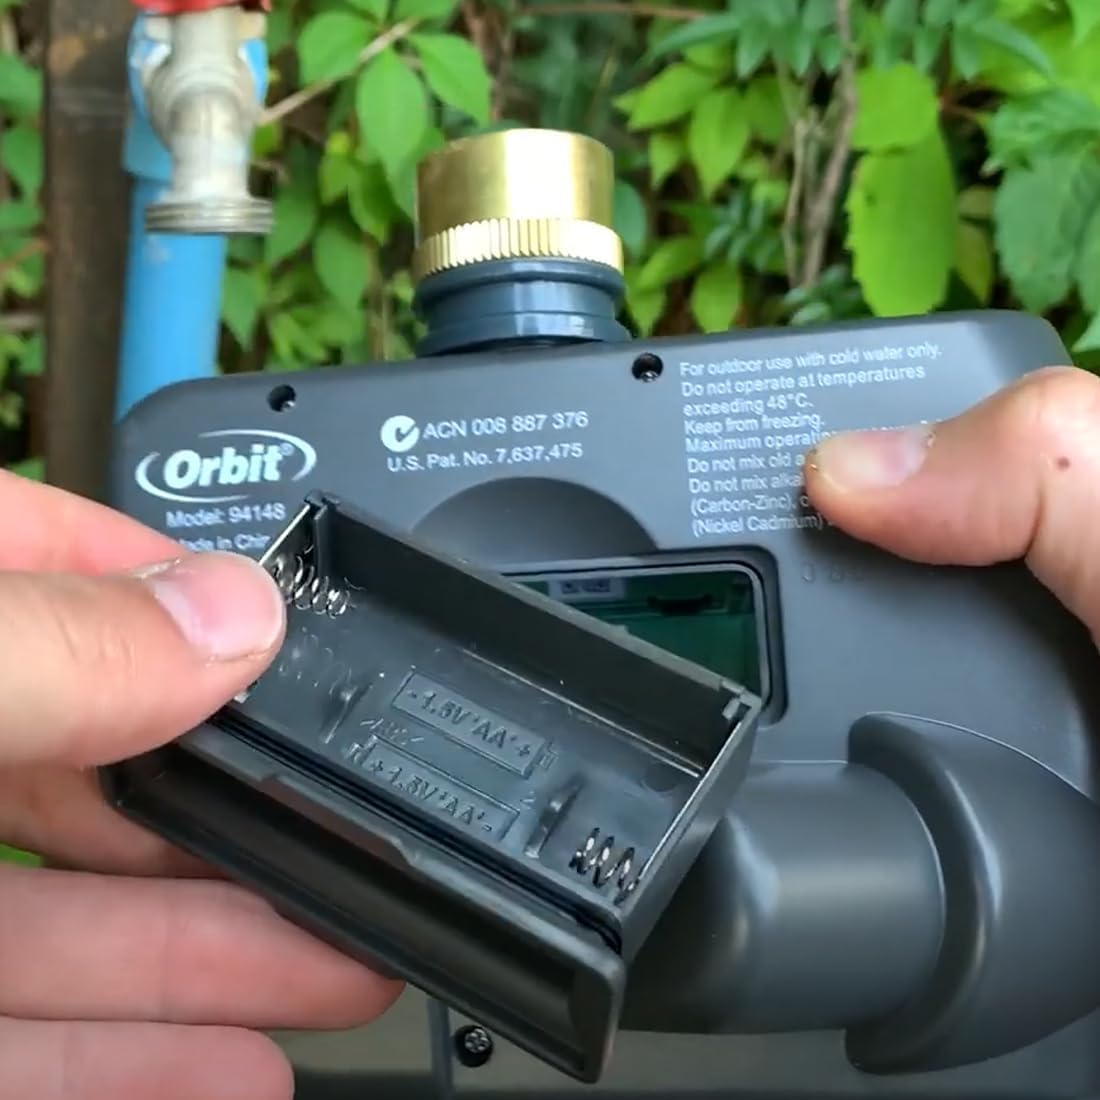
Image: A pair of hands demonstrating the opening of the battery compartment on the back of the GNCGarden Orbit Buddy II irrigation programmer. The compartment is designed for two AA batteries, and the image shows the springs and battery slots.
4.2 Connecting to Faucet
- Ensure the faucet is clean and free of debris.
- Screw the timer onto a standard outdoor garden faucet by hand until snug. Do not overtighten.
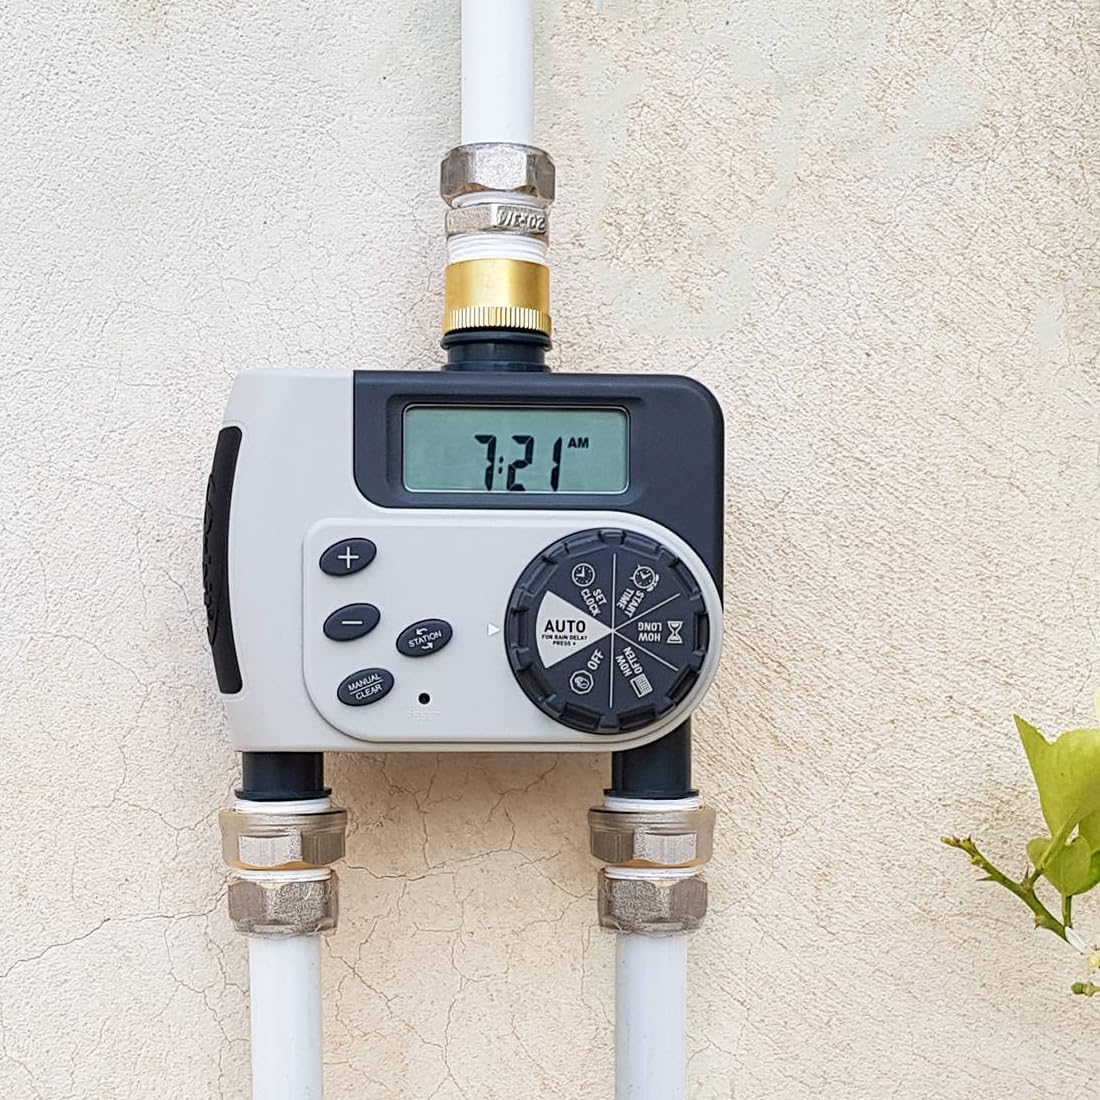
Image: The GNCGarden Orbit Buddy II irrigation programmer is shown securely connected to a standard outdoor garden faucet. The brass connector at the top of the timer is visible, indicating a proper installation.
4.3 Connecting Hoses
- Connect your garden hoses to the two independent outlets at the bottom of the timer.
- Ensure connections are tight to prevent leaks.
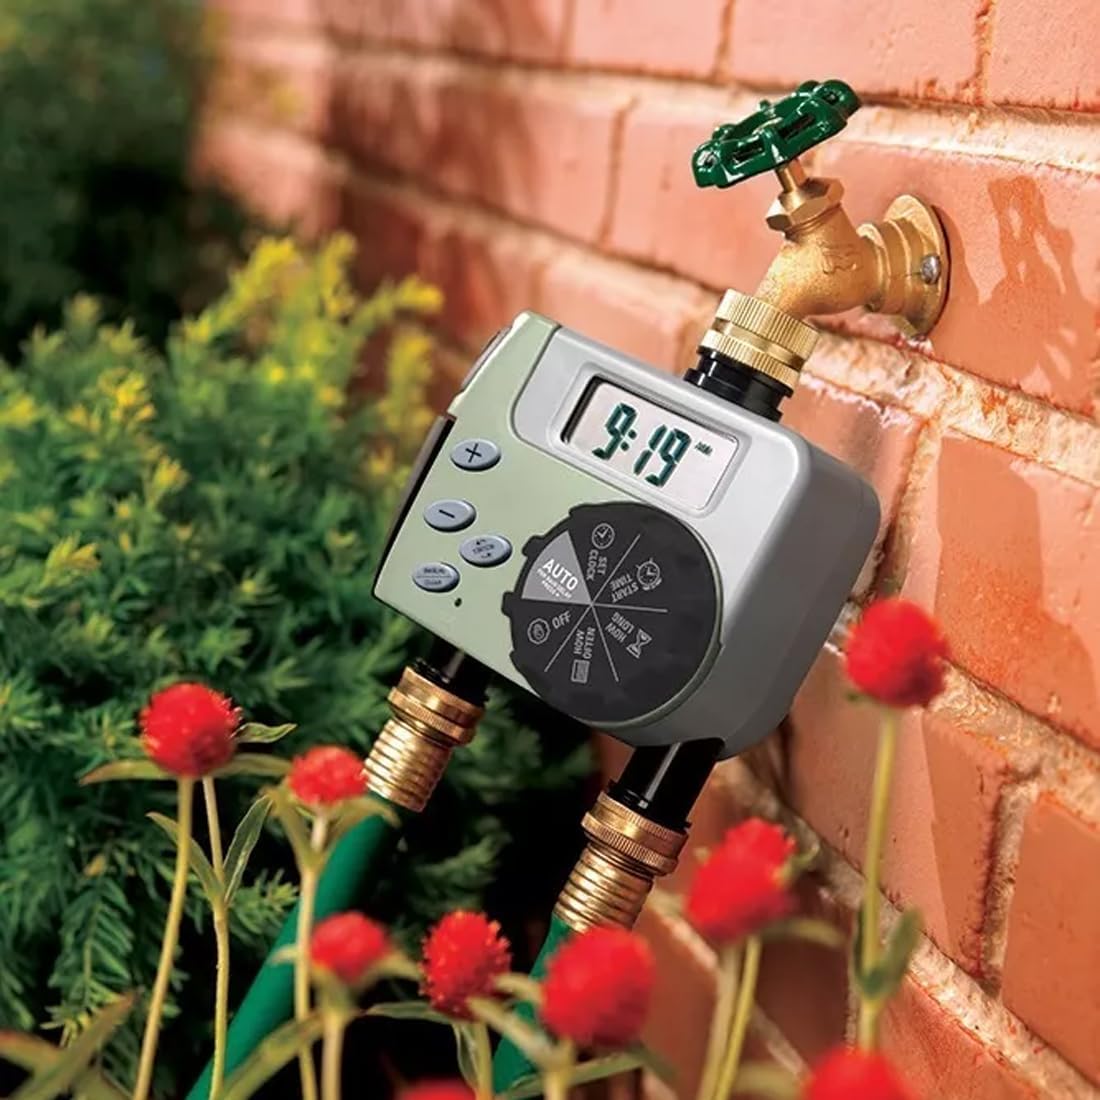
Image: The GNCGarden Orbit Buddy II irrigation programmer is shown installed on a garden faucet, with two separate garden hoses connected to its dual outlets. This demonstrates the setup for controlling two independent watering zones.
5. Operating Instructions and Programming
The control dial allows you to navigate through different programming settings. Use the '+' and '-' buttons to adjust values, and the 'ENTER' button to confirm selections. The 'MANUAL/CLEAR' button allows for manual watering or clearing settings.

Image: A clear front view of the GNCGarden Orbit Buddy II irrigation programmer, highlighting its digital display showing '7:21 AM' and the central rotary dial. The dial positions for programming are visible: SET CLOCK, START TIME, HOW LONG, HOW OFTEN, AUTO, and OFF. The control buttons are also clearly shown.
5.1 Setting the Clock
- Turn the dial to SET CLOCK.
- Use the '+' and '-' buttons to set the current time.
- Press ENTER to confirm.
5.2 Setting Start Time
- Turn the dial to START TIME.
- Use the '+' and '-' buttons to set the desired start time for watering.
- Press ENTER to confirm.
5.3 Setting Watering Duration (HOW LONG)
- Turn the dial to HOW LONG.
- Use the '+' and '-' buttons to set the watering duration from 1 to 240 minutes.
- Press ENTER to confirm.
5.4 Setting Watering Frequency (HOW OFTEN)
- Turn the dial to HOW OFTEN.
- Use the '+' and '-' buttons to select the watering frequency: every 6 hours, every 12 hours, or every 1 to 7 days.
- Press ENTER to confirm.
5.5 Automatic Operation
- After setting the clock, start time, duration, and frequency, turn the dial to AUTO.
- The timer will now operate according to your programmed schedule.
5.6 Manual Watering
- To manually water, press the MANUAL/CLEAR button.
- Use the '+' and '-' buttons to set the desired manual watering duration.
- Press ENTER to start manual watering.
- To stop manual watering, press MANUAL/CLEAR again.
5.7 Turning Off the Timer
- To stop all watering programs, turn the dial to OFF.
6. Maintenance
6.1 Preventing Freezing
During colder months, or when temperatures are expected to drop below 0°C (32°F), disconnect the timer from the faucet and store it indoors to prevent damage from freezing water.
6.2 Cleaning the Filter
The timer includes a filter screen at the inlet to prevent debris from entering the unit. Periodically check and clean this filter to ensure optimal water flow.
- Unscrew the timer from the faucet.
- Remove the filter screen from the inlet.
- Rinse the filter under running water to remove any accumulated debris.
- Reinsert the clean filter and reattach the timer to the faucet.
Image: A detailed close-up of the inlet connection of the GNCGarden Orbit Buddy II, showing the fine mesh filter screen designed to prevent particles from entering the timer. This filter should be regularly cleaned for optimal performance.
7. Troubleshooting
| Problem | Possible Cause | Solution |
|---|---|---|
| Timer does not turn on/display is blank. | Dead or incorrectly installed batteries. | Replace batteries with new AA alkaline batteries, ensuring correct polarity. |
| No water flow. | Faucet is off; clogged filter; low water pressure; incorrect programming. | Ensure faucet is fully open. Clean the inlet filter. Check water pressure (must be between 1.7 and 6.9 bar). Verify programming settings. |
| Timer leaks from connections. | Loose connections; damaged washer. | Tighten all connections by hand. Check and replace rubber washers if damaged. |
| Timer waters at wrong times or not at all. | Incorrect clock or program settings. | Review and adjust the SET CLOCK, START TIME, HOW LONG, and HOW OFTEN settings. Ensure the dial is set to AUTO. |
8. Specifications
- Model: Orbit 94148 Buddy II
- Brand: GNCGarden
- Material: Polycarbonate
- Color: White
- Pressure Range: 1.7 to 6.9 bar (25 to 100 PSI)
- Watering Duration: 1 to 240 minutes
- Watering Frequency: Every 6 hours, 12 hours, or 1 to 7 days
- Power Source: 2 x AA (1.5V) Alkaline Batteries (not included)
- Dimensions (approx.): 20 x 20 x 10 cm
- Item Weight (approx.): 576 grams
9. Warranty and Support
For warranty information or technical support, please refer to the contact details provided at the point of purchase or visit the official GNCGarden website. Keep your purchase receipt as proof of purchase.