DANOPLUS KIB0383
DANOPLUS Digital Rechargeable Dissolved Oxygen Meter (Model KIB0383) User Manual
Model: KIB0383 | Brand: DANOPLUS
1. Introduction
This manual provides detailed instructions for the proper use and maintenance of your DANOPLUS Digital Rechargeable Dissolved Oxygen Meter, Model KIB0383. This device is designed for precise measurement of dissolved oxygen (D.O.) and temperature in various aquatic environments, including fish tanks, hydroponic systems, and water treatment facilities. Please read this manual thoroughly before operating the device to ensure accurate readings and extend product lifespan.
2. Safety Information
- Always handle the meter and probe with care to prevent damage.
- Do not immerse the main meter unit in water. Only the probe is designed for submersion.
- Keep the device away from strong magnetic fields and corrosive substances.
- Use only the provided Type-C cable for charging.
- Store the device in a cool, dry place when not in use.
- Ensure the probe membrane is intact and free from damage before use.
3. Package Contents
Verify that all items listed below are present in your package:
- 1 x DANOPLUS Dissolved Oxygen Meter
- 1 x DO Floating Probe with 3m Cable
- 2 x Spare DO Membrane
- 1 x Electrolyte Solution
- 1 x Type-C Charging Cable
- 1 x English User Manual

Figure 3.1: Contents of the DANOPLUS Dissolved Oxygen Meter package, including the meter, probe, cables, electrolyte, and spare membranes.
4. Product Overview and Components
The DANOPLUS Dissolved Oxygen Meter consists of a main display unit and a connected floating probe. Familiarize yourself with the key components:

Figure 4.1: Diagram illustrating the main components of the DANOPLUS DO Meter, including the charging port, LCD display, control buttons, cable, and probe.
- Charging Port: Located at the top of the meter for Type-C charging.
- LCD Display: Large screen showing D.O. and temperature readings, battery level, and other indicators.
- Power On/Off / HOLD Button: Controls power and freezes the current reading.
- Calibration / Switch Unit / Up Button: Used for calibration, changing measurement units, and navigating settings.
- Backlight / Set / Down Button: Activates backlight, enters settings, and navigates settings.
- Probe: The submersible sensor unit with a 3-meter cable, designed to float for accurate water-level measurements.

Figure 4.2: Detailed view of the LCD display, showing indicators for battery level, calibration status, hold function, D.O. value, atmospheric pressure/salinity/D.O. units, and water temperature with units.
5. Setup
5.1. Initial Charging
The meter features a built-in rechargeable battery. Before first use, fully charge the device.
- Unscrew the battery cover on the head of the meter.
- Connect the provided Type-C charging cable to the charging port.
- Connect the other end of the cable to a suitable USB power source.
- Allow approximately 1.5 hours for a full charge, which provides about 60 hours of continuous usage.

Figure 5.1: Illustration of the USB Type-C charging port and the initial steps for 100% chemical-free air calibration.
5.2. Probe Preparation
Ensure the probe is properly prepared before use.
- Carefully remove the protective cap from the probe tip.
- Inspect the DO membrane for any damage or air bubbles. If damaged, replace with a spare membrane.
- If the membrane is dry, add a few drops of the provided electrolyte solution to the membrane cap and re-attach it to the probe. Allow a few minutes for the membrane to become saturated.

Figure 5.2: Close-up view of the high-accuracy double precious metal D.O. probe tip, showing the membrane area.
6. Calibration
The DANOPLUS DO Meter features a 100% chemical-free air calibration process. Perform calibration regularly for optimal accuracy.
- Step 1: Power on the meter. In normal measurement mode, convert the dissolved oxygen units to percentage (%).
- Step 2: Place the probe in the air, ensuring it is not submerged in any liquid. Wait a few minutes until the reading value stabilizes.
- Step 3: Long press the CAL button to initiate 100% saturation calibration. The "CAL" indicator will flash on the screen.
- Step 4: Wait for a few seconds to 1 minute. The "CAL" indicator will stop flashing, and the reading will stabilize. Short press the Power/HOLD button to complete the calibration.
- Step 5: After successful calibration, the displayed value should be approximately 99.0% ~ 101.0%.

Figure 6.1: The self-floating probe design ensures measurements are taken from the water column, not from the bottom sediment, which is crucial for accurate readings.
7. Operating Instructions
7.1. Power On/Off
- To power on, short press the Power/HOLD button.
- To power off, long press the Power/HOLD button.
7.2. Taking Measurements
- Ensure the meter is powered on and calibrated.
- Submerge the probe into the water sample. The self-floating design will keep the probe at the optimal depth for measurement, preventing interference from sediment.
- Allow a few moments for the readings on the LCD display to stabilize.
- The display will show both dissolved oxygen (D.O.) and temperature readings.
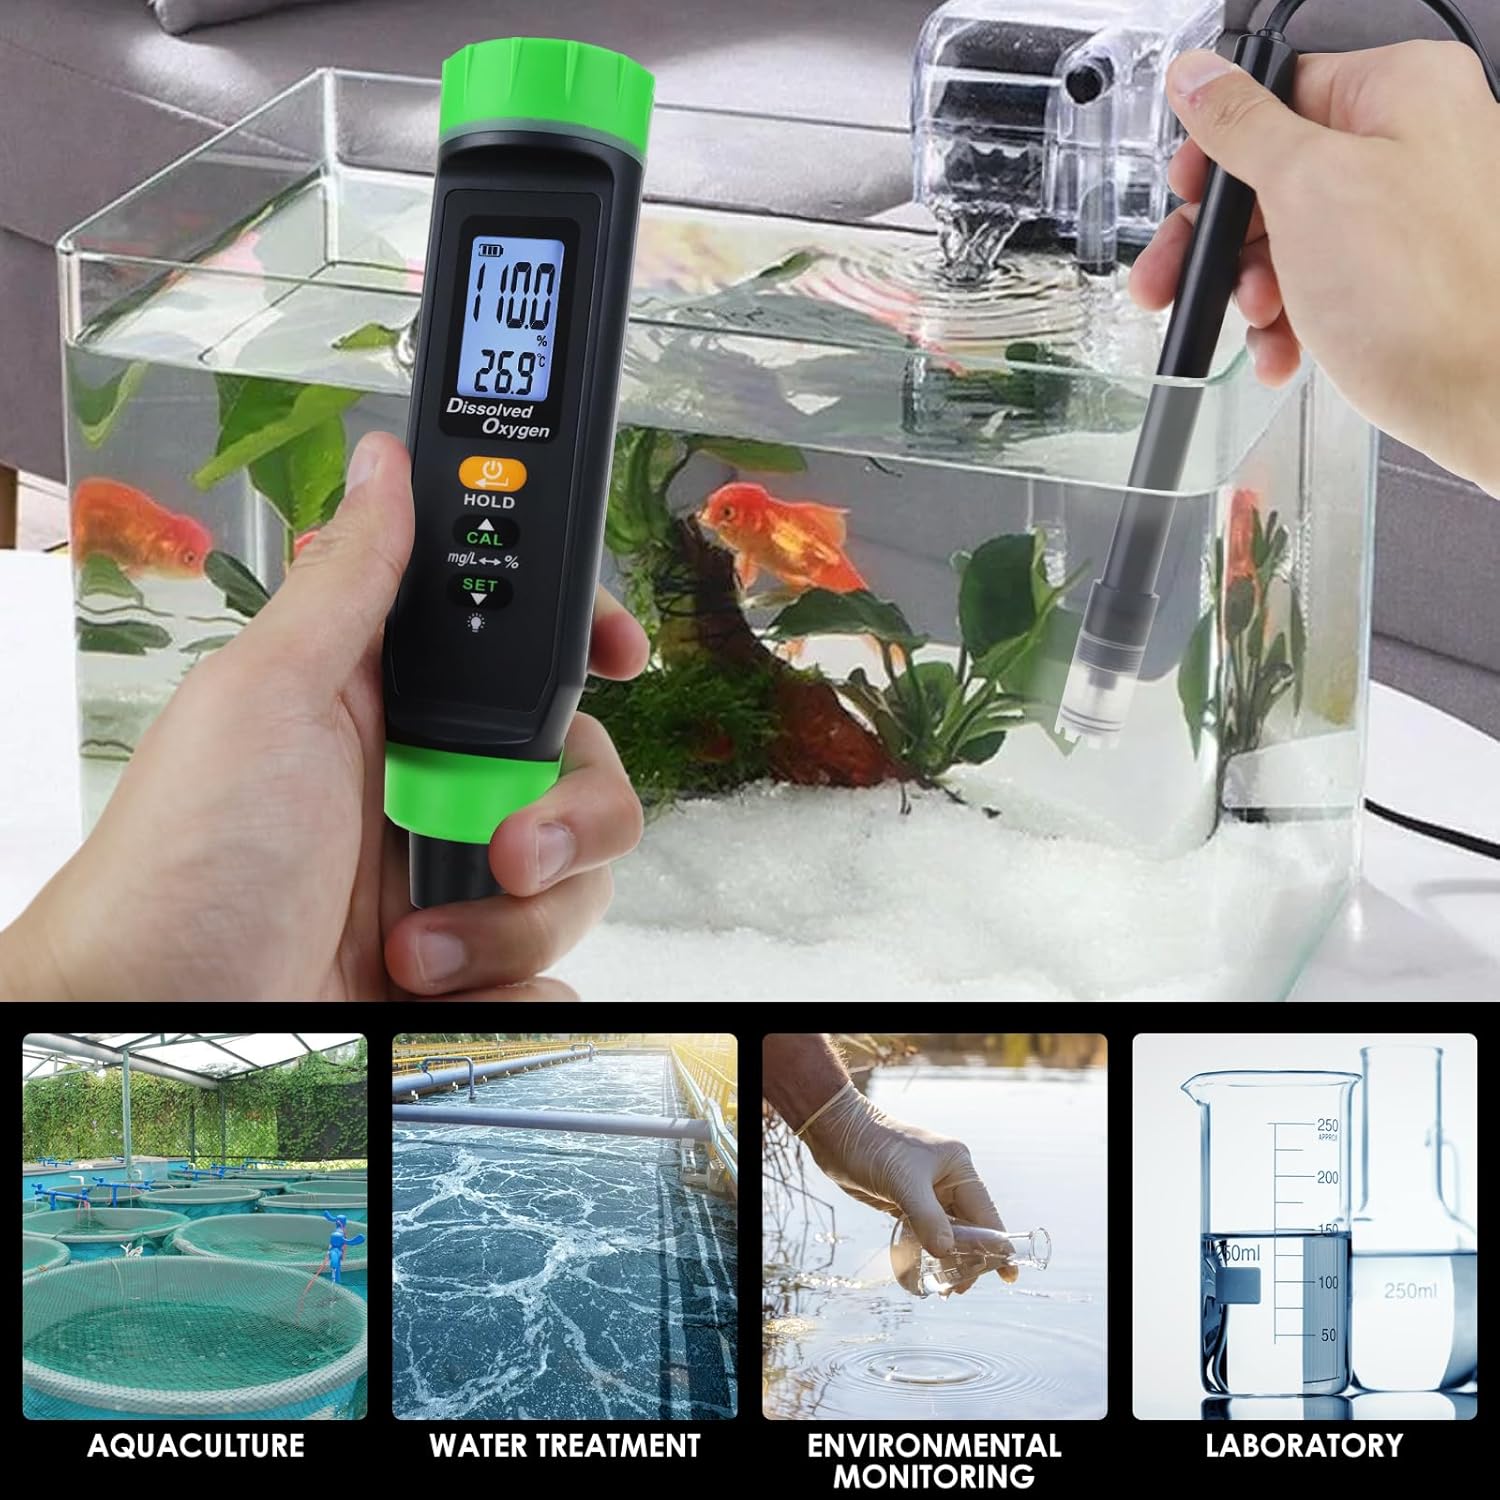
Figure 7.1: The DANOPLUS DO Meter being used to measure dissolved oxygen in a fish tank, demonstrating its application in aquaculture.
7.3. HOLD Function
To freeze the current reading on the display, short press the Power/HOLD button during measurement. Press it again to release the hold and resume live readings.
7.4. Switching Units
- Dissolved Oxygen Units: Short press the CAL button to cycle between % (percentage saturation) and mg/L (milligrams per liter).
- Temperature Units: Short press the SET button to cycle between °C (Celsius) and °F (Fahrenheit).
7.5. Backlight
Short press the SET button to toggle the display backlight on or off for improved visibility in various lighting conditions.
7.6. Triple Compensation Function
The meter incorporates advanced compensation features for enhanced accuracy:
- Automatic Temperature Compensation (ATC): Automatically adjusts D.O. readings based on water temperature.
- Manual Salinity Compensation: Allows for manual input of salinity levels to correct D.O. readings in saline environments. Refer to the full manual for detailed steps on setting salinity.
- Manual Barometric Pressure Compensation: Allows for manual input of barometric pressure to correct D.O. readings, especially important at varying altitudes. Refer to the full manual for detailed steps on setting barometric pressure.

Figure 7.2: Overview of the Triple Compensation Function, highlighting Automatic Temperature Compensation (ATC), Manual Salinity Compensation, and Manual Barometric Pressure Compensation for improved accuracy.
8. Maintenance
8.1. Cleaning the Probe
- After each use, rinse the probe thoroughly with clean water to remove any residue.
- Gently wipe the probe body with a soft, damp cloth. Do not use abrasive cleaners or solvents.
- Ensure the membrane at the probe tip is clean and free from biological growth or debris.
8.2. Replacing the DO Membrane
The DO membrane is a consumable part and may need replacement if damaged or if readings become inconsistent.
- Carefully unscrew the membrane cap from the probe tip.
- Remove the old membrane and discard it.
- Take a new spare DO membrane. Add a few drops of the electrolyte solution into the new membrane cap.
- Carefully screw the new membrane cap onto the probe tip, ensuring no air bubbles are trapped beneath the membrane.
- After replacing the membrane, recalibrate the meter as described in Section 6.
8.3. Storage
- When not in use for extended periods, ensure the probe tip is covered with its protective cap.
- Store the meter and probe in a dry, cool environment, away from direct sunlight and extreme temperatures.
- Periodically charge the battery if storing for a long time to maintain battery health.
9. Troubleshooting
| Problem | Possible Cause | Solution |
|---|---|---|
| Inaccurate or unstable readings |
|
|
| Meter does not power on |
|
|
| Display is dim or unreadable |
|
|
10. Specifications
| Parameter | Value |
|---|---|
| Model Number | KIB0383 |
| Dissolved Oxygen Range | (Specific range not provided, typical is 0-20 mg/L or 0-200%) |
| Temperature Range | (Specific range not provided, typical is 0-50 °C) |
| D.O. Units | % (saturation), mg/L |
| Temperature Units | °C, °F |
| Calibration | 100% Air Saturation |
| Compensation | Automatic Temperature Compensation (ATC), Manual Salinity Compensation, Manual Barometric Pressure Compensation |
| Probe Cable Length | 3 meters |
| Battery Type | Rechargeable (Type-C) |
| Battery Life | Approx. 60 hours (after 1.5 hours charge) |
| Dimensions (Meter) | 17.6 cm (Length) x 3.9 cm (Width) |
| Weight | Approx. 1.1 Pounds (Package Weight) |
| Manufacturer | DANOPLUS |
11. Warranty and Support
For warranty information, technical support, or service inquiries, please refer to the contact information provided with your purchase or visit the official DANOPLUS website. Keep your purchase receipt as proof of purchase for warranty claims.