1. Introduction
Thank you for purchasing the HOLDLAMP 18 LED Par Light. This manual provides essential information for the safe and efficient operation of your new stage lighting fixture. Please read these instructions thoroughly before use and retain them for future reference.
This 200W RGBW 4-in-1 LED Par Light is designed for various applications including stage performances, DJ events, parties, family gatherings, and architectural lighting. It offers multiple control modes and vibrant color mixing capabilities.
2. Safety Instructions
- Electrical Safety: Ensure the power supply voltage matches the specifications (100-240V AC, 50/60Hz). Always connect to a grounded outlet. Disconnect power before cleaning or servicing.
- Ventilation: Do not block ventilation openings. Ensure adequate airflow around the fixture to prevent overheating.
- Placement: This fixture is for indoor use only. Avoid exposure to rain, moisture, or extreme temperatures. Mount securely to prevent accidental falls.
- Eye Protection: Do not stare directly into the LED light source, as it can cause eye damage.
- Handling: Do not operate if the power cord is damaged. Do not attempt to repair the unit yourself; refer all servicing to qualified personnel.
3. Package Contents
Please check the package to ensure all items are present and in good condition:
- 1 x HOLDLAMP 18 LED Par Light
- 2 x Mounting Brackets
- 2 x Screws
- 1 x Power Cable
- 1 x User Manual

Image: Contents of the HOLDLAMP 18 LED Par Light package.
4. Product Overview
The HOLDLAMP 18 LED Par Light features 18 high-quality 10W 4-in-1 RGBW LED beads, offering a wide spectrum of colors and effects. Its robust aluminum alloy casing ensures durability and efficient heat dissipation.

Image: The HOLDLAMP 18 LED Par Light showcasing its RGBW color capabilities and key features.
4.1 Key Features
- RGBW 4-in-1 Color Mixing: Produces a wide range of colors and complex lighting effects.
- High-Quality Construction: Durable aluminum alloy shell with integrated fan for effective heat dissipation and extended lifespan.
- Multiple Control Modes: DMX 512, Automatic, Sound Activation, and Master-Slave.
- Adjustable Brightness: 0-100% linear dimming in all modes.
- Flexible Mounting: Comes with two brackets for wall, truss, or floor placement.
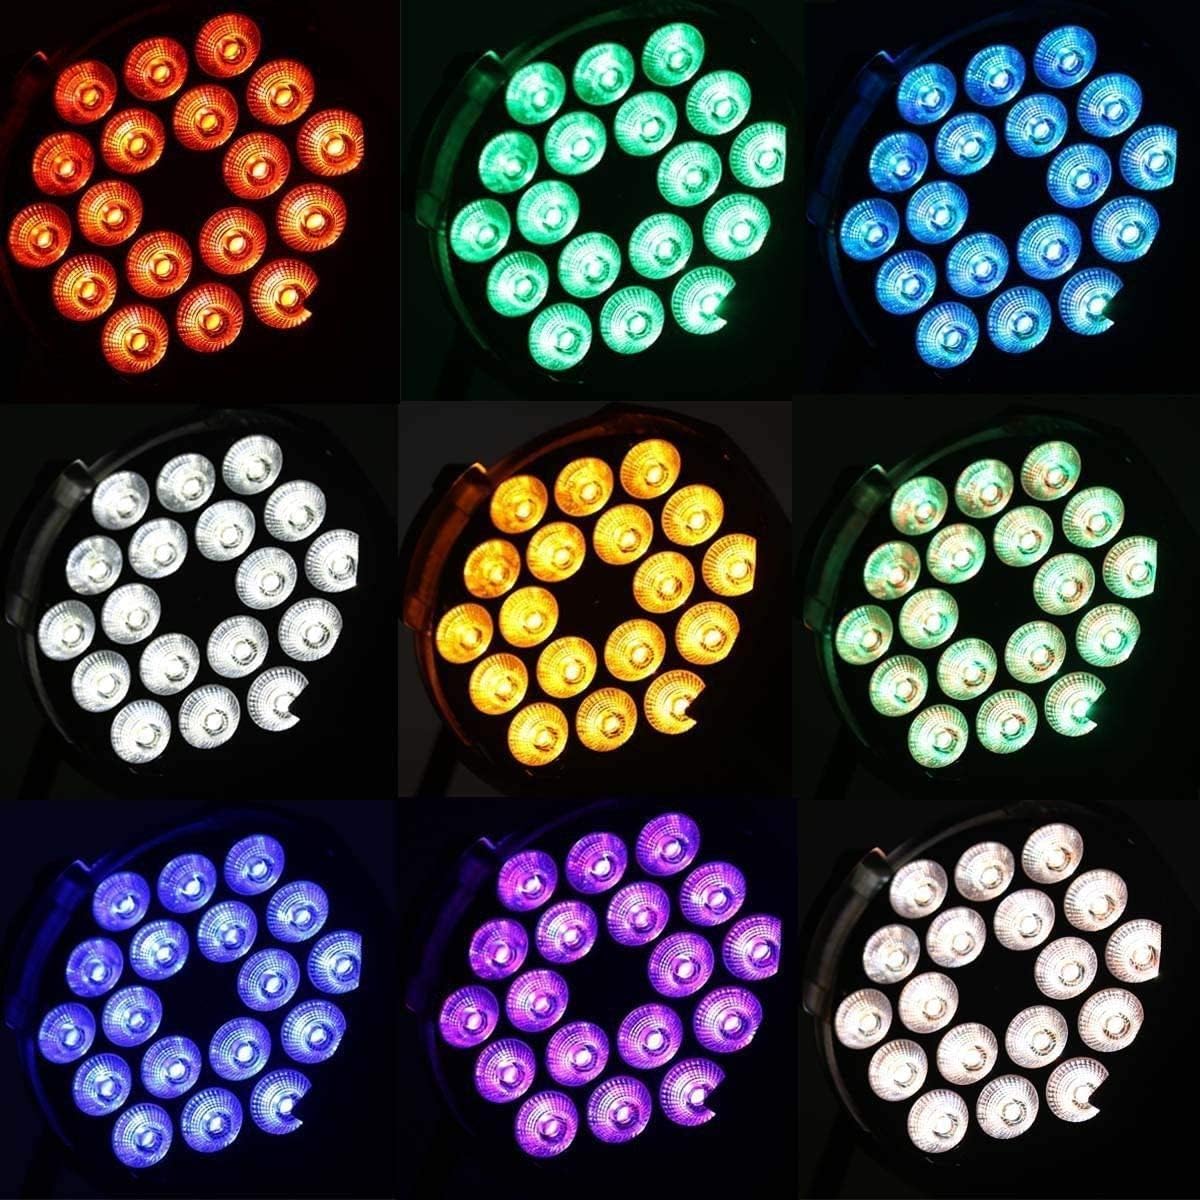
Image: Various color outputs from the LED Par Light.
4.2 Adjustable Bracket
The included brackets allow for flexible positioning. You can adjust the angle of the light up to 360 degrees to direct illumination precisely where needed.

Image: The light fixture with its adjustable bracket, demonstrating 360-degree rotation.
4.3 Control Panel
The rear panel of the fixture houses the control interface, including DMX input/output, power connection, and a digital display with control buttons.

Image: Rear control panel with DMX ports, display, and navigation buttons.
4.4 Dimensions
Understanding the dimensions is crucial for planning installation and placement.

Image: Dimensions of the HOLDLAMP 18 LED Par Light.
5. Setup
5.1 Mounting
- Attach the two provided brackets to the sides of the fixture using the screws.
- Securely mount the fixture to a wall, truss, or place it on a flat surface. Ensure the mounting point can support the weight of the fixture.
- Adjust the angle of the light using the bracket's rotation mechanism.
5.2 Power Connection
- Connect the power cable to the AC IN port on the rear of the fixture.
- Plug the other end of the power cable into a suitable grounded electrical outlet (100-240V AC, 50/60Hz).
5.3 DMX Connection (Optional)
- For DMX control, connect a DMX cable from your DMX controller's output to the DMX IN port on the fixture.
- If linking multiple fixtures, connect a DMX cable from the first fixture's DMX OUT to the next fixture's DMX IN, and so on.
6. Operating Modes
The HOLDLAMP 18 LED Par Light offers several operating modes, selectable via the control panel on the rear of the unit.
6.1 Control Panel Navigation
- MENU: Press to cycle through different operating modes and settings.
- UP/DOWN: Use these buttons to adjust values or select options within a mode.
- ENTER: Confirm your selection or save changes.
6.2 Automatic Mode
In Automatic mode, the fixture cycles through pre-programmed light shows without external input.
- Press the MENU button until 'Auto' or a similar indicator appears on the display.
- Use UP/DOWN to select different automatic programs if available.
- Press ENTER to confirm.
6.3 Sound Activation Mode
In Sound Activation mode, the light reacts to ambient sound or music.
- Press the MENU button until 'Sound' or a similar indicator appears.
- Use UP/DOWN to adjust the sound sensitivity. A higher value means the light will react to quieter sounds.
- Press ENTER to confirm.
6.4 DMX 512 Mode
DMX 512 mode allows for professional control of the fixture using a DMX controller.
- Connect the DMX cables as described in Section 5.3.
- Press the MENU button until 'DMX' or an address setting (e.g., 'A001') appears.
- Use UP/DOWN to set the desired DMX starting address for the fixture. Each fixture in a DMX chain requires a unique address.
- Press ENTER to confirm the DMX address.
The fixture uses 8 DMX channels. Refer to your DMX controller's manual for specific channel assignments and functions (e.g., Red, Green, Blue, White intensity, Strobe, Dimmer, Program selection).
6.5 Master-Slave Mode
This mode allows multiple fixtures to operate in synchronization without a DMX controller. One fixture acts as the 'Master' and controls all 'Slave' fixtures.
- Connect the DMX OUT of the Master fixture to the DMX IN of the first Slave fixture, and so on.
- Set the first fixture (Master) to either Automatic or Sound Activation mode.
- Set all other fixtures (Slaves) to 'Slave' mode (consult the display options using the MENU button).
- The Slave fixtures will now mimic the Master fixture's behavior.
7. Maintenance
7.1 Cleaning
- Always disconnect power before cleaning.
- Use a soft, lint-free cloth to wipe the exterior of the fixture.
- For lenses, use a specialized lens cleaning solution and cloth to avoid scratches.
- Regularly clean the ventilation openings to ensure proper airflow.
7.2 Storage
When not in use, store the fixture in a dry, dust-free environment, preferably in its original packaging or a protective case.
8. Troubleshooting
| Problem | Possible Cause | Solution |
|---|---|---|
| No power / Light does not turn on | Power cable not connected; No power from outlet; Faulty cable/fixture | Check power cable connection; Test outlet with another device; Replace power cable; Contact support if fixture is faulty. |
| No light output in DMX mode | Incorrect DMX address; DMX cable issue; DMX controller not sending signal; Fixture not in DMX mode | Verify DMX address matches controller; Check DMX cable connections; Ensure DMX controller is active; Set fixture to DMX mode. |
| Light not reacting to sound | Sound sensitivity too low; No sound input; Fixture not in Sound Activation mode | Increase sound sensitivity; Ensure music/sound is playing near the fixture; Set fixture to Sound Activation mode. |
| Slave fixtures not synchronizing | Incorrect Master/Slave setup; DMX cable issue between fixtures | Ensure one Master is set to Auto/Sound and others to Slave; Check DMX cable connections between fixtures. |
9. Specifications
| Feature | Specification |
|---|---|
| Power Consumption | 110W |
| Operating Voltage | 100 - 240V AC, 50 / 60Hz |
| Material | Molded Aluminum Shell |
| Lamp Beads | 18 x 10W RGBW 4-in-1 LEDs |
| Lens Angle | 45° (also 25°, 60° mentioned for beam angle) |
| Control Modes | Automatic, Sound Activation, DMX 512, Master-Slave |
| DMX Channels | 8 CH |
| Color Dimming | Red, Green, Blue, White independently dimmable |
| Lifespan | 50,000 hours |
| Operating Temperature | -25°C to +35°C |
| Cooling | Fan Cooling |
| Dimensions (L x W x H) | 22 x 22 x 30 cm (8.7 x 8.7 x 11.8 inches) |
| Weight | 2.25 Kilograms |
| Model Number | JY-01069 |
For detailed product information and energy efficiency data, please refer to the EPREL database: https://eprel.ec.europa.eu/qr/1582638
10. Warranty and Support
HOLDLAMP products are manufactured to high-quality standards. This product comes with a standard manufacturer's warranty against defects in materials and workmanship. Please retain your proof of purchase for warranty claims.
For technical support, troubleshooting assistance, or warranty inquiries, please contact your retailer or the HOLDLAMP customer service department. Contact details can typically be found on the product packaging or the retailer's website.


