1. Product Overview
This manual provides essential information for the installation, operation, and maintenance of the Heurofosh 60366A1 Water Pump Impeller Kit. This kit is designed as a direct replacement for Mercury Marine outboard engines, ensuring optimal cooling system performance.
The kit replaces Mercury part numbers 46-60366A1 and 46-32767A1, and Sierra part number 18-3507.
2. Compatibility
This water pump impeller kit is compatible with the following Mercury Marine outboard engine models:
- 30 HP
- 35 HP
- 40 HP
- 50 HP
- 60 HP
- 65 HP
- 70 HP
Important: Please verify your outboard engine's model, serial number, year, and horsepower before purchasing and installing this kit to ensure proper fitment.
3. Kit Contents
The Heurofosh 60366A1 Water Pump Impeller Kit includes all necessary components for a complete water pump service. Refer to the image below for a visual representation of the kit components.

Figure 3.1: Overview of all components included in the water pump impeller kit.
- 1 x Upper Pump Housing (Part No. 46-77822A1)

Figure 3.2: Upper Pump Housing.
- 1 x Impeller (Part No. 47-89983)

Figure 3.3: Water Pump Impeller with key.
- 2 x Drain Gasket (Part No. 12-20260, 12-19183)
- 1 x Lower Water Pump Base to Face Plate Gasket (Part No. 27-32769, 27-19553)
- 1 x Upper Face Plate to Pump Body Gasket (Part No. 27-32770)
- 1 x Water Pump Base Gasket (Part No. 27-32771, 27-19551)
- 1 x Water Pump Base Gasket (Part No. 27-77417, 27-19552)

Figure 3.4: Various gaskets included in the kit.
- 1 x Rubber Washer (Part No. 12-49221-1)
- 1 x Plate (Part No. 54705)

Figure 3.5: Water Pump Plate.
- 1 x O-Ring (Part No. 25-26855)
- 1 x O-Ring (Part No. 25-45711)
- 1 x O-Ring (Part No. 25-26722)
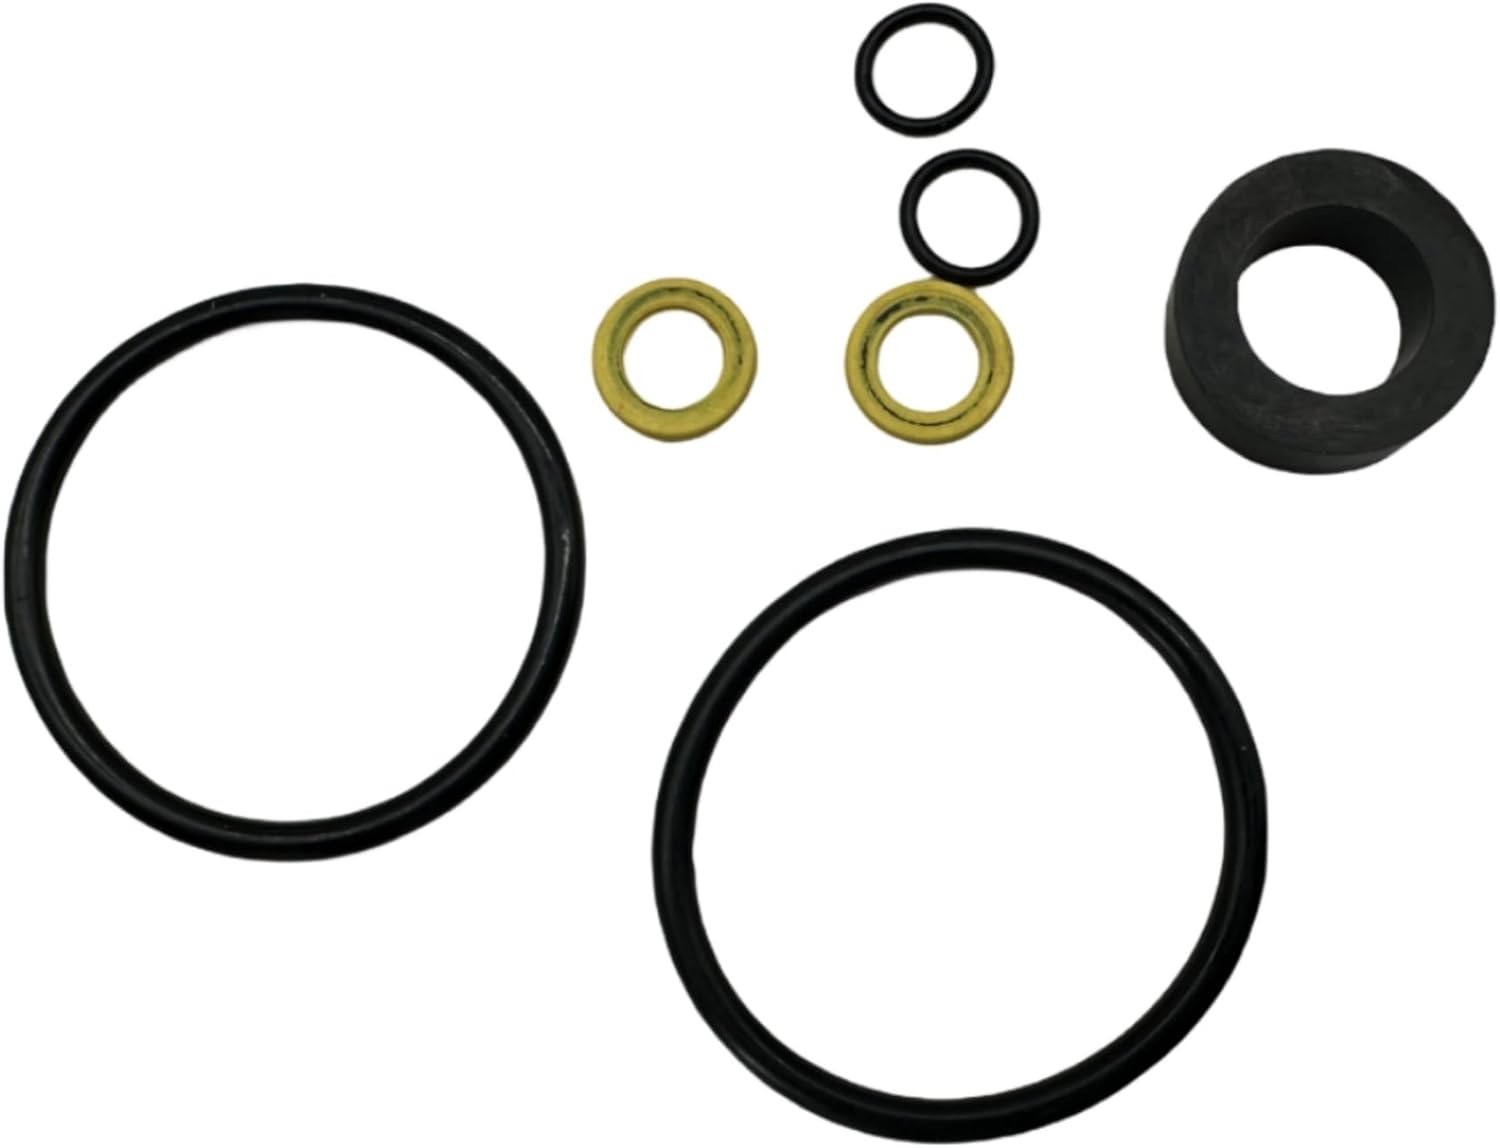
Figure 3.6: Assorted O-rings and rubber washer.
4. Installation (Setup)
Replacing a water pump impeller kit requires mechanical aptitude and specific tools. If you are unsure about any step, it is recommended to consult a qualified marine mechanic.
4.1 Safety Precautions
- Always disconnect the battery before performing any maintenance on your outboard engine.
- Ensure the engine is cool to the touch before beginning work.
- Wear appropriate personal protective equipment (PPE), including gloves and eye protection.
- Work in a well-ventilated area.
4.2 General Installation Steps (Consult your engine's service manual for detailed instructions)
- Prepare the Engine: Place the outboard engine in a vertical position.
- Drain Gearcase Oil: Loosen the drain screw and vent screw on the lower unit to drain the gearcase oil.
- Remove Lower Unit: Disconnect the shift linkage and remove the bolts securing the lower unit to the mid-section. Carefully lower the unit.
- Disassemble Water Pump Housing: Remove the bolts holding the water pump housing in place. Carefully lift off the housing and remove the old impeller, gaskets, and O-rings. Note the orientation of the old impeller blades.
- Clean Surfaces: Thoroughly clean all mating surfaces on the lower unit and water pump housing to ensure a proper seal with the new gaskets. Remove any old gasket material.
- Install New Components:
- Install the new plate and gaskets in their correct positions.
- Lubricate the new impeller with a small amount of clean water or silicone grease.
- Install the impeller into the pump housing, ensuring the blades are bent in the correct direction (usually clockwise when viewed from the top, but confirm with your engine's manual).
- Install the new O-rings and rubber washer as per your engine's specifications.
- Carefully place the upper pump housing over the impeller and secure it with the appropriate bolts. Do not overtighten.
- Reattach Lower Unit: Carefully lift the lower unit back into position, aligning the driveshaft and shift shaft. Secure with the bolts, ensuring proper torque as specified by your engine's manual. Reconnect the shift linkage.
- Refill Gearcase Oil: Refill the gearcase with the recommended type and amount of gearcase oil.
- Test: Before launching, perform a flush with fresh water to ensure the water pump is circulating water correctly. Look for a strong stream of water from the tell-tale (pee hole).
5. Operation
Once the water pump impeller kit is correctly installed, the outboard engine's cooling system should operate efficiently. The water pump circulates water through the engine to prevent overheating.
5.1 Normal Operation Indicators
- Tell-tale Stream: A steady, strong stream of water should exit the tell-tale (also known as the "pee hole") when the engine is running. This indicates proper water circulation.
- Engine Temperature: The engine temperature gauge (if equipped) should remain within the normal operating range.
- No Overheating Alarms: The engine should not trigger any overheating alarms or enter guardian mode.
6. Maintenance
Regular inspection and replacement of the water pump impeller kit are crucial for the longevity and reliable operation of your outboard engine. The impeller is a wear item and should be replaced periodically.
6.1 Recommended Maintenance Schedule
- Annual Inspection: Inspect the water pump impeller and housing annually, or every 100 hours of operation, whichever comes first. Look for cracks, tears, or signs of wear on the impeller blades.
- Impeller Replacement: It is generally recommended to replace the water pump impeller every 2-3 years, or every 200-300 hours of operation, even if it appears to be in good condition. This preventative maintenance helps avoid unexpected failures.
- Post-Grounding Inspection: If the lower unit strikes an object or runs aground, immediately inspect the water pump impeller for damage, as debris can cause premature wear or failure.
6.2 Cleaning and Storage
- Flushing: Always flush your outboard engine with fresh water after each use in saltwater or brackish water to prevent corrosion and mineral buildup in the cooling system.
- Winterization: During winterization, ensure the cooling system is properly drained and, if necessary, treated with antifreeze according to your engine manufacturer's guidelines.
7. Troubleshooting
This section addresses common issues related to the water pump and cooling system.
| Problem | Possible Cause | Solution |
|---|---|---|
| No water or weak stream from tell-tale | Clogged tell-tale, worn impeller, debris in cooling system, air lock. | Clear tell-tale with a wire. Inspect/replace impeller. Flush cooling system. Bleed air from system if applicable. |
| Engine overheating | Worn or damaged impeller, clogged water passages, thermostat malfunction, low engine oil. | Replace impeller. Flush cooling system. Check/replace thermostat. Verify engine oil level. |
| Unusual noise from lower unit | Damaged impeller, foreign object in pump housing, worn bearings. | Inspect impeller and pump housing for damage or debris. Consult a mechanic for bearing issues. |
If troubleshooting steps do not resolve the issue, it is recommended to seek assistance from a certified marine technician.
8. Specifications
| Attribute | Detail |
|---|---|
| Product Name | Water Pump Impeller Kit |
| Brand | Heurofosh |
| Model Number | 46-60366A1 |
| Replaces OEM Part Numbers | Mercury 46-60366A1, 46-32767A1; Sierra 18-3507 |
| Compatible Engine HP | 30, 35, 40, 50, 60, 65, 70 HP Mercury Marine Outboard Engines |
| Item Weight | 6.4 ounces (0.18 Kilograms) |
| Package Dimensions | 6.06 x 4.02 x 2.13 inches |
| Exterior Finish | Polished |
| Vehicle Service Type | Boat |
| Date First Available | July 18, 2023 |
9. Warranty and Support
For specific warranty information regarding your Heurofosh Water Pump Impeller Kit, please refer to the product packaging or contact Heurofosh customer support directly. Keep your proof of purchase for any warranty claims.
For technical assistance or further inquiries, please visit the official Heurofosh website or contact their customer service department.