1. Safety Instructions
Please read and understand all safety instructions before operating the high-pressure cleaner. Failure to follow these instructions may result in electric shock, fire, and/or serious injury.
- Electrical Safety: Always connect the unit to a properly grounded outlet. Do not operate the unit with damaged cords or plugs. Keep all electrical connections dry.
- Water Pressure: The high-pressure jet can be dangerous if misused. Never direct the jet at people, pets, or electrical equipment.
- Personal Protective Equipment (PPE): Always wear appropriate eye protection (safety goggles) and protective footwear when operating the cleaner.
- Children and Bystanders: Keep children and bystanders away from the operating area.
- Water Temperature: Do not use hot water with this unit unless specified.
- Chemicals: Use only detergents recommended for high-pressure cleaners. Follow detergent manufacturer's instructions.
- Maintenance: Disconnect the power supply before performing any maintenance or cleaning.
2. Product Overview
The PARKSIDE® PHD 110 E1 is a compact and powerful high-pressure cleaner designed for various cleaning tasks around the home and garden. It features an Auto Start-Stop System for energy efficiency.
Components
- High-Pressure Cleaner Unit
- High-Pressure Gun
- High-Pressure Hose (3 meters)
- Vario Nozzle
- Water Inlet Connector
- Power Cable
- Detergent Tank (if applicable, based on 6L tank volume)

Figure 2.1: Front view of the PARKSIDE PHD 110 E1 High-Pressure Cleaner. The main unit is green with a red power button, and the black spray gun is attached to the top.
3. Setup
3.1 Assembly
- Attach the high-pressure hose to the outlet on the front of the main unit and to the high-pressure gun. Ensure connections are secure.
- Insert the Vario nozzle into the end of the high-pressure gun until it clicks into place.
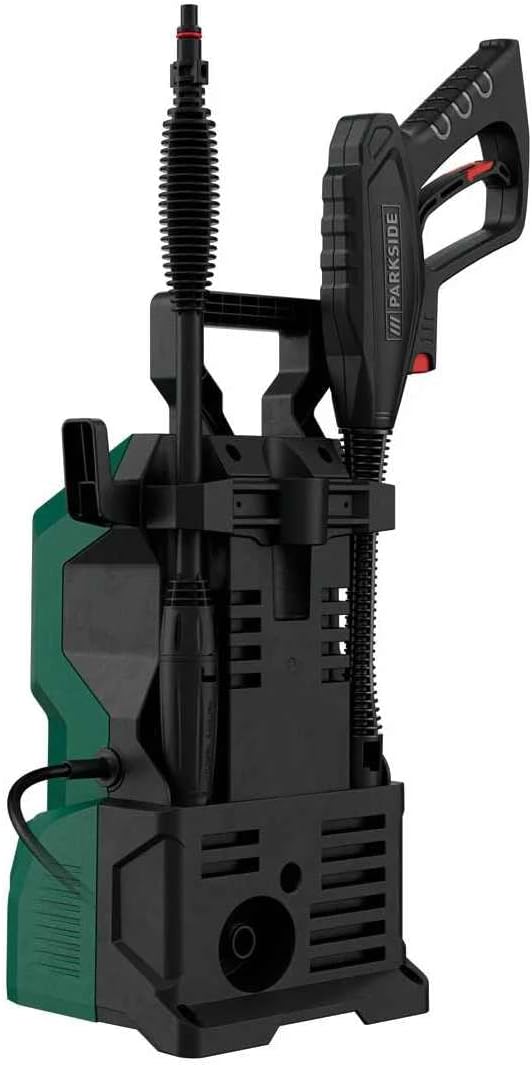
Figure 3.1: Side view of the high-pressure cleaner, showing how the spray gun and hose can be stored on the unit.
3.2 Connecting Water Supply
- Connect a standard garden hose (not included) to the water inlet connector on the high-pressure cleaner.
- Ensure the water inlet filter is clean and properly seated before connecting the hose.
- Connect the other end of the garden hose to a water tap.
- Turn on the water tap fully to ensure adequate water flow to the unit.

Figure 3.2: Detail of the water inlet connection on the high-pressure cleaner.
3.3 Connecting Power
- Uncoil the power cable completely.
- Plug the power cable into a suitable, grounded electrical outlet. Ensure the outlet matches the voltage requirements of the unit.
4. Operating Instructions
4.1 Starting the Unit
- Ensure all connections (water and power) are secure.
- Hold the high-pressure gun firmly and point it in a safe direction.
- Press the ON/OFF switch (red button) on the main unit to the "ON" position. The motor will start briefly to build pressure.
- Squeeze the trigger on the high-pressure gun to begin spraying. The Auto Start-Stop System will activate the motor when the trigger is squeezed and stop it when released.
4.2 Using the Spray Gun and Nozzle
- The Vario nozzle allows you to adjust the spray pattern from a concentrated jet to a wide fan spray by rotating the nozzle head.
- Always start cleaning from a distance and move closer to the surface as needed to avoid damage.
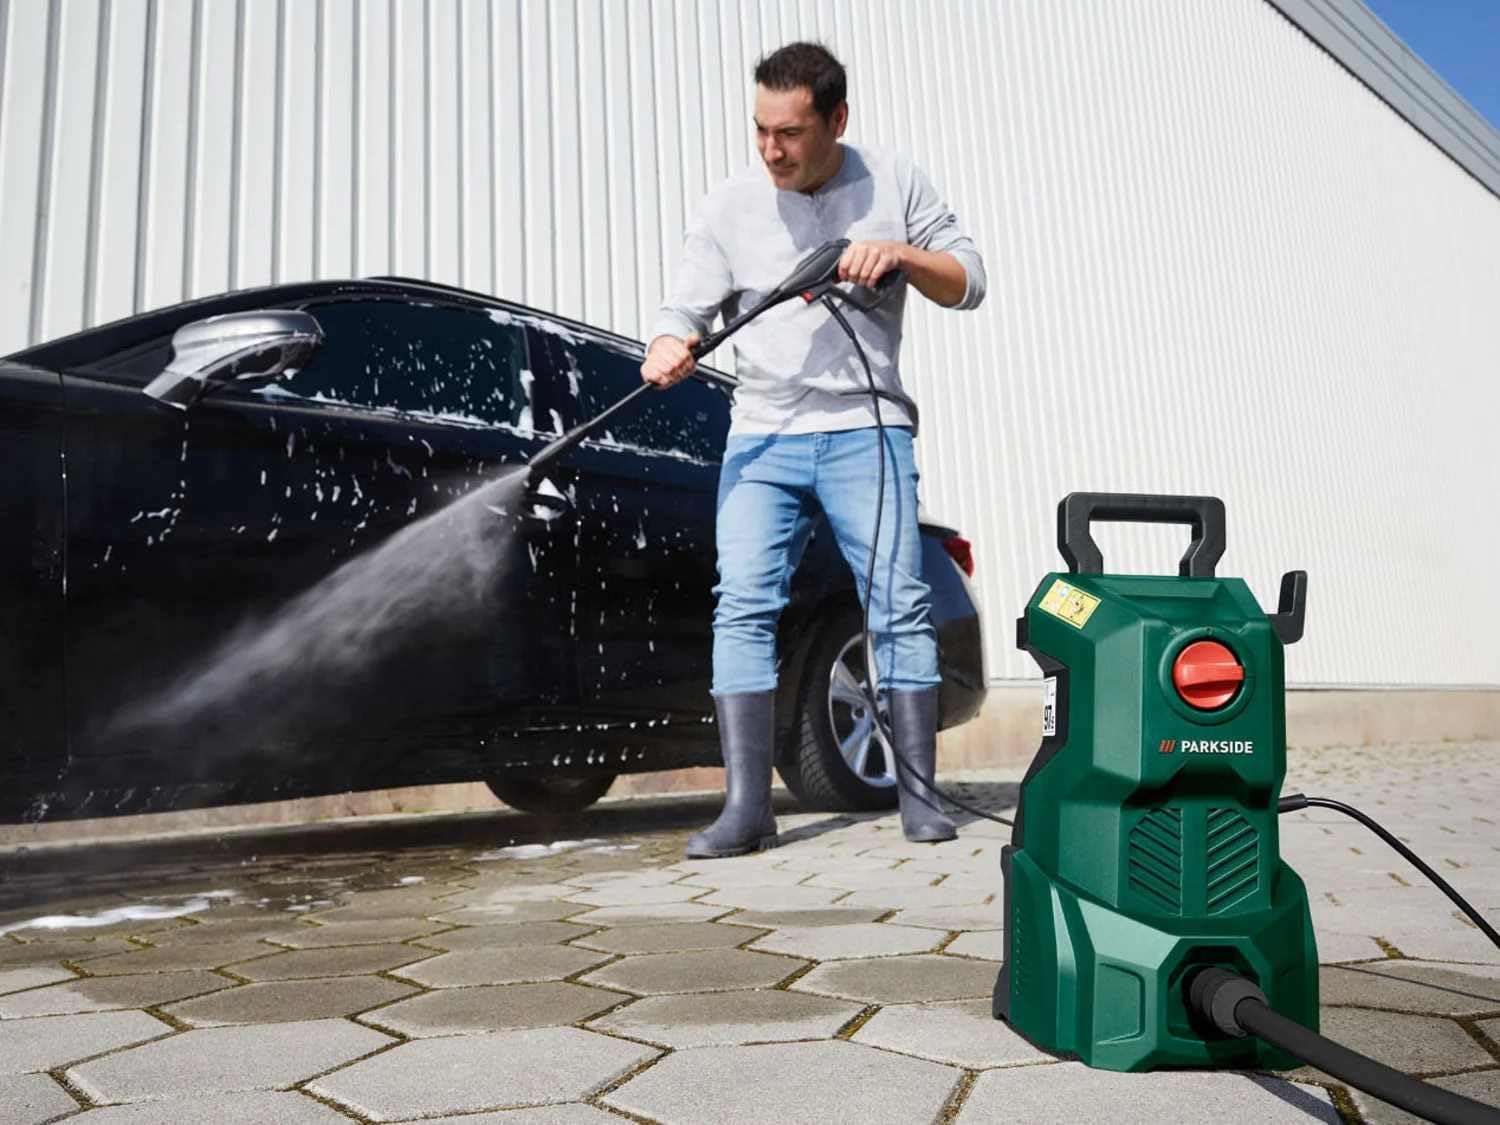
Figure 4.1: Operating the high-pressure cleaner to wash a car.

Figure 4.2: Detail of cleaning a car wheel with the high-pressure cleaner.
4.3 Auto Start-Stop System
The integrated Auto Start-Stop System automatically turns the motor on when the trigger is pressed and off when the trigger is released. This feature saves energy and extends the life of the motor.
4.4 Using Detergent (if applicable)
If your model includes a detergent tank (indicated by the 6-liter tank volume in specifications), fill it with a suitable high-pressure cleaner detergent. The detergent is typically applied at low pressure. Refer to the detergent manufacturer's instructions for dilution and application.
5. Maintenance
Regular maintenance ensures optimal performance and extends the lifespan of your high-pressure cleaner. Always disconnect the power supply before performing any maintenance.
5.1 Cleaning the Nozzle
- If the nozzle becomes clogged or the spray pattern is irregular, clean it using the provided nozzle cleaning tool (if included) or a thin wire.
- Remove the nozzle from the gun before cleaning.
5.2 Water Inlet Filter Maintenance
- Regularly check the water inlet filter for debris.
- Remove the filter and rinse it under running water to clear any blockages.
- Reinsert the filter securely before reconnecting the water supply.
5.3 Storage
- Before storing, drain all water from the pump, hose, and spray gun to prevent freezing damage in cold climates.
- Store the unit in a dry, frost-free location.
- Coil the high-pressure hose and power cable neatly.
6. Troubleshooting
Refer to the table below for common issues and their solutions.
| Problem | Possible Cause | Solution |
|---|---|---|
| Unit does not start. | No power supply. ON/OFF switch is off. | Check power connection and outlet. Turn switch to "ON". |
| No water pressure or low pressure. | Water supply off or restricted. Water inlet filter clogged. Air in pump. Nozzle clogged. | Turn on water tap fully. Check hose for kinks. Clean water inlet filter. Squeeze trigger with motor off until steady water flow. Clean nozzle. |
| Motor runs continuously when trigger is released. | Air in pump. Leak in system. | Bleed air from pump (see above). Check all connections for leaks. |
| Water leaks from connections. | Loose connections. Damaged O-rings. | Tighten all connections. Replace damaged O-rings. |
7. Specifications
| Feature | Value |
|---|---|
| Model | PHD 110 E1 |
| Power Consumption | 1300 W |
| Max. Pressure | 110 Bar |
| Hose Length | 3 Meters |
| Power Source | Corded Electric |
| Color | Yellow |
| Tank Volume (Detergent) | 6 Liters |
| Auto Start-Stop System | Yes |
8. Warranty and Support
This PARKSIDE® product comes with a standard manufacturer's warranty. Please refer to the warranty card included with your purchase for specific terms and conditions, including warranty period and coverage details.
For technical support, spare parts, or warranty claims, please contact the authorized service center or your retailer. Keep your proof of purchase for any warranty-related inquiries.