Introduction
This instruction manual provides detailed guidance for the safe and effective use of The Office Oasis Office Chair Cylinder Removal Tool. This tool is designed to assist in the removal of gas lift pistons from office chairs, facilitating replacement or repair. Please read all instructions carefully before beginning the removal process.
Safety Information
- Always wear appropriate personal protective equipment, such as gloves and eye protection, during the removal process.
- Ensure the work area is clear and stable.
- Do not apply excessive force beyond what is recommended in these instructions.
- Keep children and pets away from the work area.
- If the cylinder is severely stuck, consider applying a penetrating lubricant and allowing it to soak before attempting removal.
Package Contents
Verify that all components are present before starting:
- 2 x Shaft Collars (Split Rings)
- 2 x Long Hex Screws
- 2 x Short Hex Screws
- 1 x Allen Wrench
- Instruction Sheet

Image: The complete kit including shaft collars, screws, Allen wrench, and instructions.
Setup
- Prepare the Chair:
- Remove the chair's seat from the base. This usually involves unscrewing bolts that attach the seat mechanism to the chair base.
- Invert the chair base to access the gas lift cylinder.
- Ensure the gas lift cylinder is fully extended to provide maximum working space.
- Inspect the Cylinder:
- Clean any dirt or debris from the cylinder shaft where the tool will be placed.
- If the cylinder appears corroded or extremely stuck, apply a penetrating lubricant to the joint where the cylinder meets the chair base and allow it to soak for several minutes.
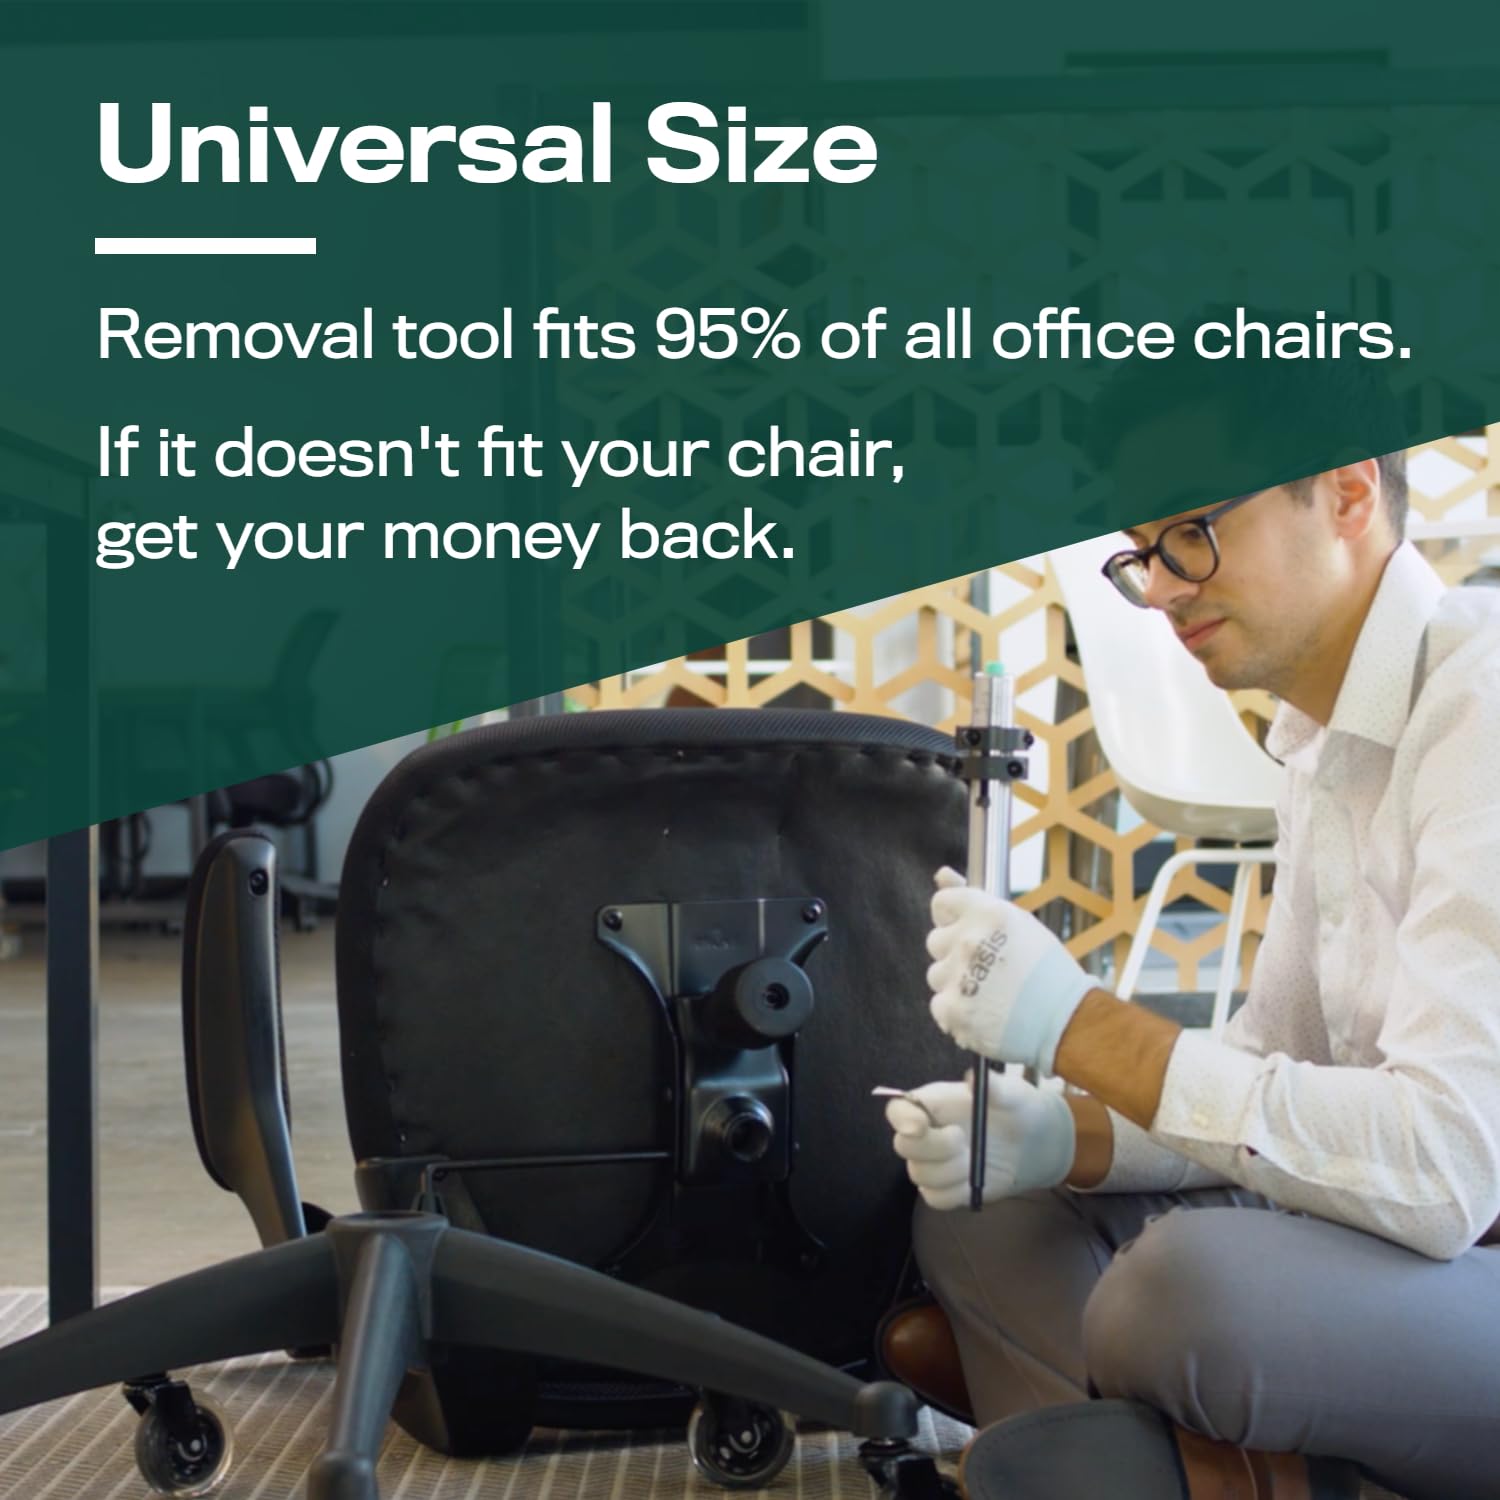
Image: Preparing the office chair for cylinder removal.
Operating Instructions: Cylinder Removal
Follow these steps carefully to remove the gas lift cylinder:
- Attach the First Collar:
- Place one shaft collar around the gas lift cylinder, as close as possible to the chair base.
- Insert the two short hex screws into the collar and tighten them evenly with the Allen wrench until the collar is securely clamped onto the cylinder. Do not overtighten.
- Attach the Second Collar:
- Place the second shaft collar directly below the first collar, ensuring there is a small gap between them.
- Insert the two long hex screws into the second collar. Do not tighten them fully yet.
- Apply Pressure to Separate:
- Gradually and evenly tighten the two long hex screws on the second collar. As you tighten, these screws will push against the first collar, creating downward pressure on the cylinder.
- Continue tightening the screws in small increments, alternating between them, until the cylinder begins to separate from the chair base. You may hear a popping sound as the seal breaks.
- If the cylinder is stubborn, apply more penetrating lubricant and allow it to work. You can also gently tap the chair base around the cylinder with a rubber mallet while maintaining pressure from the tool.
- Complete Removal:
- Once the cylinder has moved sufficiently, loosen the screws and remove the collars.
- The cylinder should now be free from the chair base.

Image: The removal tool in action, applying pressure to the gas lift cylinder.

Image: Visual representation of the cylinder removal process.
Troubleshooting
| Problem | Possible Cause | Solution |
|---|---|---|
| Cylinder not separating | Insufficient pressure; cylinder is severely stuck; collars not tight enough. | Ensure screws are tightened evenly and incrementally. Apply penetrating lubricant and allow more soak time. Gently tap the chair base with a rubber mallet. Verify collars are securely clamped. |
| Collars slipping on cylinder | Cylinder surface is oily or dirty; collars not tightened sufficiently. | Clean the cylinder surface thoroughly. Retighten the short hex screws on the first collar. |
| Screws are difficult to turn | Cross-threading; debris in threads. | Ensure screws are aligned correctly before tightening. Clean threads if necessary. Do not force screws. |
Maintenance
To ensure the longevity and effectiveness of your Office Chair Cylinder Removal Tool:
- After each use, clean the shaft collars and screws to remove any grease, dirt, or metal shavings.
- Store the tool in a dry place to prevent rust.
- Periodically check the screws for any signs of wear or damage. Replace if necessary.
Specifications
- Product Name: The Original Office Chair Cylinder Removal Tool
- Model Number: B0CC3TYZDN
- Brand: The Office Oasis
- Compatibility: Fits approximately 95% of standard office chair gas lift cylinders.
- Material: Durable metal construction.
- Package Dimensions: 5.2 x 2.68 x 1.22 inches
- Weight: 14.11 ounces
Warranty and Support
The Office Oasis offers a Cylinder Removal Guarantee. If you use the tool, follow the steps, and your cylinder remains stuck, please contact The Office Oasis customer support for assistance. They are available to answer any questions and provide further guidance.
For support, please visit the official The Office Oasis Store on Amazon or refer to the contact information provided with your product packaging.