Introduction
This manual provides detailed instructions for the setup, operation, and maintenance of your Lancoon Digital Alarm Clock, Model LK-AE17White. Please read this manual thoroughly before using the device to ensure proper function and longevity.
Product Overview
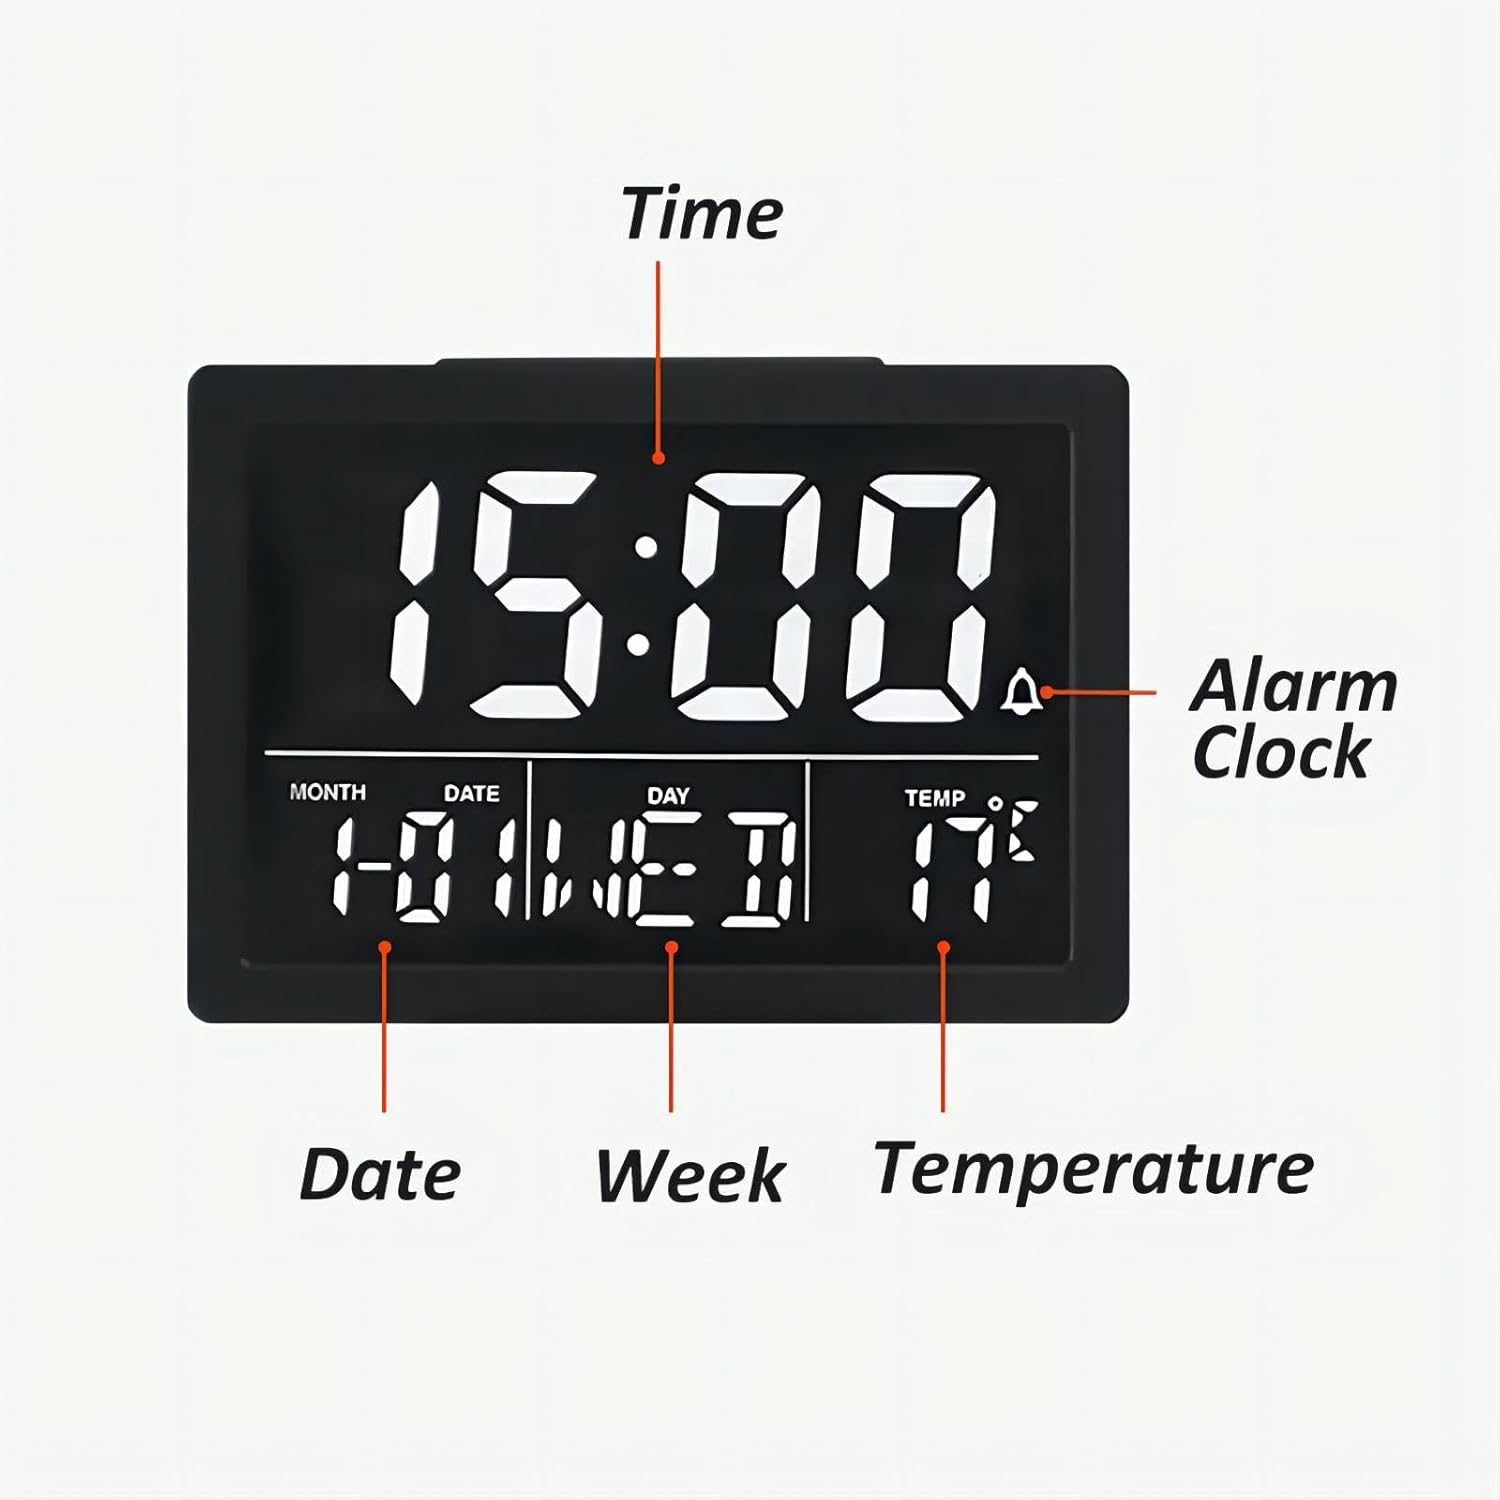
The Lancoon Digital Alarm Clock features a large LCD screen that clearly displays the time, date, day of the week, and indoor temperature. It supports both 12-hour and 24-hour time formats, includes a convenient snooze function, adjustable display brightness with 6 levels, and offers 8 distinct alarm ringtones with adjustable volume.
Setup
1. Powering the Device
- USB Power: Connect the included USB cable to the clock and a compatible USB power adapter (not included). When powered by USB, the display remains continuously on.
- Battery Power: Insert 3 AAA batteries (not included) into the battery compartment. When powered by batteries, the display will turn off automatically after 10 seconds to conserve energy. Press any button to illuminate the screen for 10 seconds.
2. Initial Setup
Before first use, ensure the clock is powered. The clock will power on, and you can proceed with setting the time and other functions as described in the 'Operating Instructions' section.
Operating Instructions
Button Functions Overview

- ALARM Button: Used to set and activate/deactivate the alarm.
- TIME Button: Used to set the current time.
- MUSIC Button (Ringtone Selection): Used to select alarm ringtones.
- UP Button (°C/°F): Used to increase values during setting and switch temperature units.
- DOWN Button (12/24H): Used to decrease values during setting and switch time format.
- Volume Setting Button (Speaker Icon): Adjusts alarm volume.
- Brightness Setting Button (Sun Icon): Adjusts display brightness.
- SNOOZE Button (Top): Activates the snooze function when the alarm sounds.
1. Setting the Time
- Press the 'TIME' button. The hour digits will flash.
- Use the 'UP' or 'DOWN' buttons to adjust the hour.
- Press 'TIME' again. The minute digits will flash.
- Use the 'UP' or 'DOWN' buttons to adjust the minutes.
- Press 'TIME' once more to confirm and exit time setting mode.
- To switch between 12-hour and 24-hour format, press and hold the 'DOWN' button.
2. Setting Date and Week
The date and day of the week are typically set automatically once the time is configured. If manual adjustment is needed, it is usually integrated within the 'TIME' setting sequence or automatically updates based on the set time.
3. Setting the Alarm
- Press the 'ALARM' button. The alarm hour digits will flash.
- Use the 'UP' or 'DOWN' buttons to adjust the alarm hour.
- Press 'ALARM' again. The alarm minute digits will flash.
- Use the 'UP' or 'DOWN' buttons to adjust the alarm minutes.
- Press 'ALARM' once more to confirm the alarm time.
- To activate or deactivate the alarm, briefly press the 'ALARM' button. An alarm icon will appear/disappear on the display.
4. Selecting Alarm Ringtone

Press the 'MUSIC' button on the back of the clock to cycle through the 8 available alarm ringtones. The selected ringtone will play briefly for preview. There are 6 natural tones and 2 'DIDI' sounds.
5. Using the Snooze Function
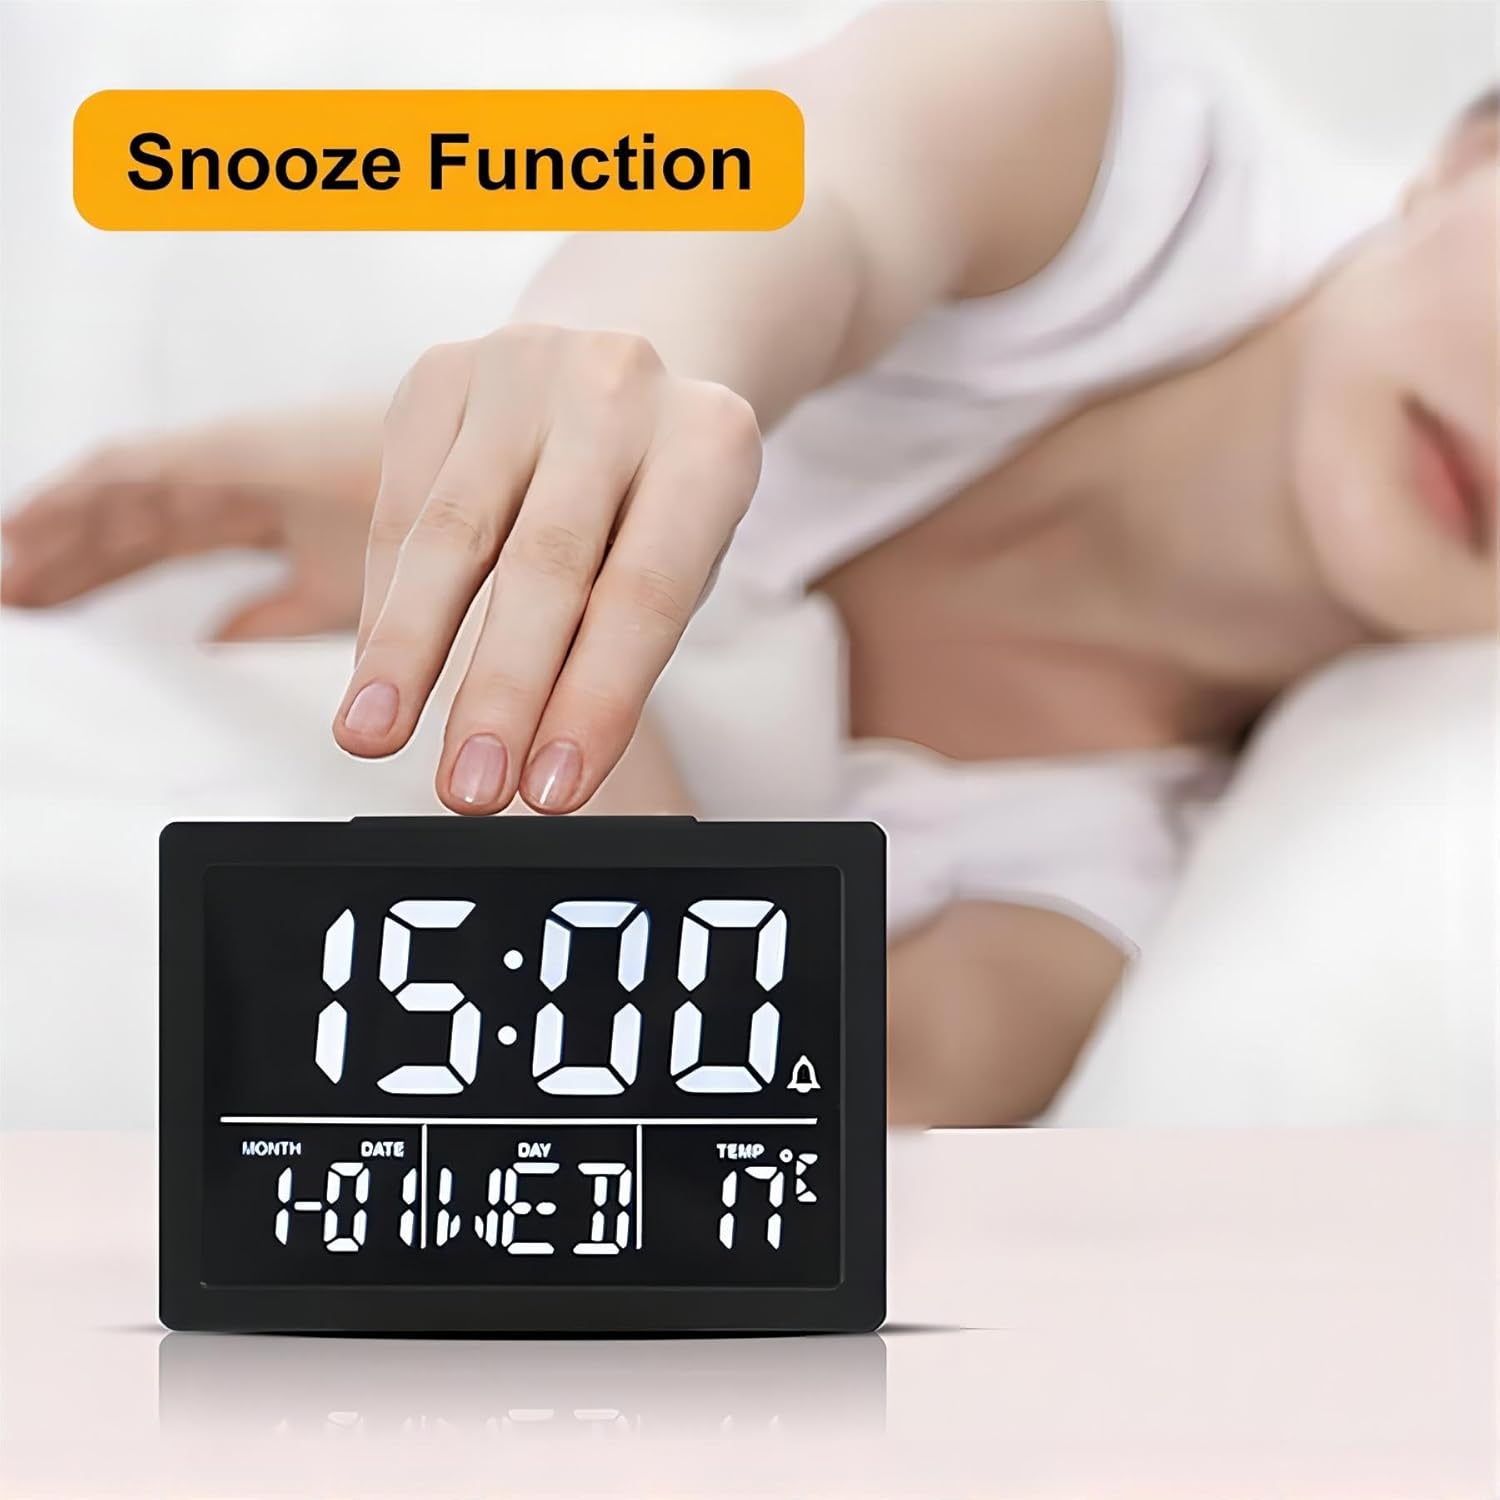
When the alarm sounds, press the large 'SNOOZE' button located on the top of the clock. The alarm will pause for 9 minutes and then sound again. The snooze duration is fixed at 9 minutes and cannot be adjusted.
6. Adjusting Display Brightness
Press the 'Brightness Setting' button (sun icon) on the back of the clock to cycle through 6 levels of display brightness, from L1 (dimmest) to L6 (brightest).
7. Adjusting Alarm Volume
Press the 'Volume Setting' button (speaker icon) on the back of the clock to cycle through 6 levels of alarm volume.
8. Temperature Display
The clock displays the current indoor temperature. To switch between Celsius (°C) and Fahrenheit (°F), press and hold the 'UP' button for 3 seconds.
Maintenance
- To clean the alarm clock, use a soft, dry cloth. Do not use abrasive cleaners, solvents, or chemical sprays, as these may damage the surface.
- Ensure the device is disconnected from power (both USB and batteries) before cleaning.
- Replace AAA batteries when the display becomes dim, functions are erratic, or the clock fails to keep accurate time in battery mode.
- Avoid placing the clock in direct sunlight, near heat sources, or in areas with high humidity.
Troubleshooting
- Display is off (battery mode): This is normal behavior to conserve energy. Press any button to activate the display for 10 seconds. For continuous display, connect the clock via the USB cable.
- Alarm not sounding: Ensure the alarm is activated (check for the alarm icon on the display). Verify that the alarm volume is not set to minimum.
- Incorrect temperature reading: The built-in sensor measures ambient room temperature. Ensure the clock is not placed near heat sources, in direct sunlight, or in drafts that could affect its reading.
- Buttons unresponsive: Disconnect all power sources (USB cable and batteries), wait a few seconds, then reconnect power. If the issue persists, contact customer support.
- Time/Date incorrect: Re-enter the time and date settings as described in the 'Operating Instructions' section. Ensure stable power supply.
Specifications
| Feature | Detail |
|---|---|
| Brand | Lancoon |
| Model | LK-AE17White |
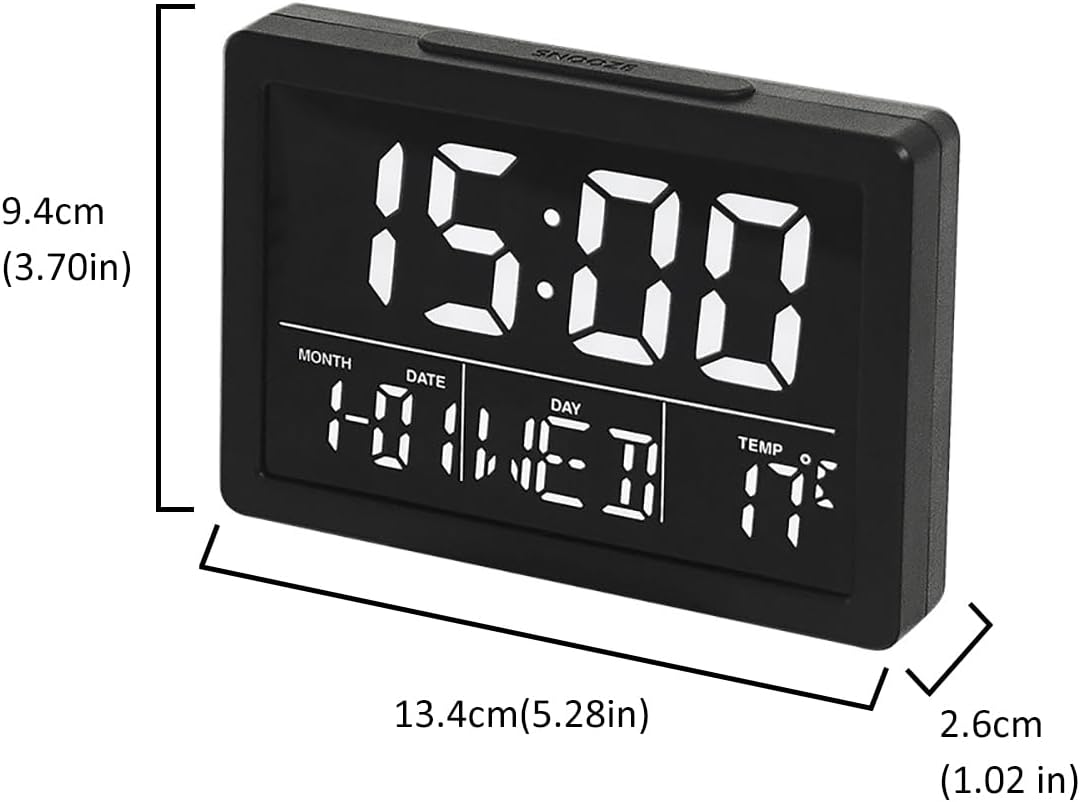
| Dimensions (L x H x D) | 13.4 x 9.4 x 2.6 cm (5.3 x 3.7 x 1.0 in) |
| Weight | 120g (4.2oz) |
| Material | Acrylonitrile Butadiene Styrene (ABS) |
| Display Type | Digital LED |
| Power Source | USB Cable (included), 3 x AAA Batteries (not included) |
| Special Features | Adjustable Brightness (6 levels), Snooze Function (9 min fixed), Temperature Display (°C/°F), Adjustable Alarm Volume (6 levels), 8 Ringtones, 12/24H Time Format |
Warranty and Support
This Lancoon Digital Alarm Clock comes with a 12-month warranty from the date of purchase. For any questions, technical assistance, or warranty claims, please contact Lancoon customer support through the retailer's platform where you purchased the product. You may also visit the official Lancoon store online for additional information and support resources.