1. Introduction
This manual provides detailed instructions for the installation, operation, and maintenance of your EWLSAC Android 13.0 Double Din Car Stereo Multimedia Receiver, Model QA1436X. This unit is specifically designed for Nissan Altima models from 2013 to 2018. Please read this manual thoroughly before installation and use to ensure proper function and safety.
2. Safety Information
- Professional Installation Recommended: Due to the complexity of car electrical systems, professional installation is highly recommended to prevent damage to the unit or your vehicle.
- Power Supply: Ensure the unit is connected to a 12V DC power supply with a negative ground.
- Wiring: Do not short-circuit any wires. Insulate all connections properly.
- Driving Safety: Do not operate the unit in a way that distracts you from driving. Always prioritize road safety.
- Temperature: Avoid exposing the unit to extreme temperatures or direct sunlight for prolonged periods.
- Moisture: Keep the unit away from water and excessive moisture.
3. Package Contents
Verify that all items listed below are included in your package:
- 1 x Android Stereo Radio (Main Unit)
- 2 x Power Cables
- 1 x GPS Antenna
- 1 x Rear Camera Input Cable
- 1 x RCA Cable
- 2 x USB Cables
- 1 x AHD Camera (Backup Camera)
- 1 x Microphone
- 1 x Canbus Box
- 1 x USB Adapter
- 1 x Radio Extension Cable
- 1 x Instruction Manual

Image: All components included in the package, laid out for identification.
4. Product Overview and Features
The EWLSAC Android 13.0 Double Din Car Stereo is a feature-rich multimedia system designed to enhance your driving experience. Key features include:
- Android 13.0 Operating System: Provides a modern, intuitive interface with access to a wide range of applications.
- 9-Inch HD Capacitive Touch Screen: Offers a clear display with 1024x600 resolution for easy interaction.
- Wireless CarPlay & Android Auto: Seamlessly integrates your smartphone for navigation, music, calls, and voice control.
- GPS Navigation: Built-in GPS module supports both online and offline maps (e.g., Google Maps, Waze, Here Maps).
- Wi-Fi Connectivity: Allows for internet access, app downloads, and online content streaming by sharing your phone's hotspot.
- Bluetooth Functionality: Enables hands-free calling, music streaming, and synchronized contacts.
- Rear View Camera & DVR Input: Supports an included backup camera for safer reversing and external DVR for recording driving conditions.
- FM/RDS Radio: Access to local radio stations with clear reception.
- Steering Wheel Control (SWC): Compatible with your vehicle's steering wheel controls for convenient operation.
- HiFi Audio & EQ: Advanced audio processing with a 16-band equalizer for a customizable listening experience.
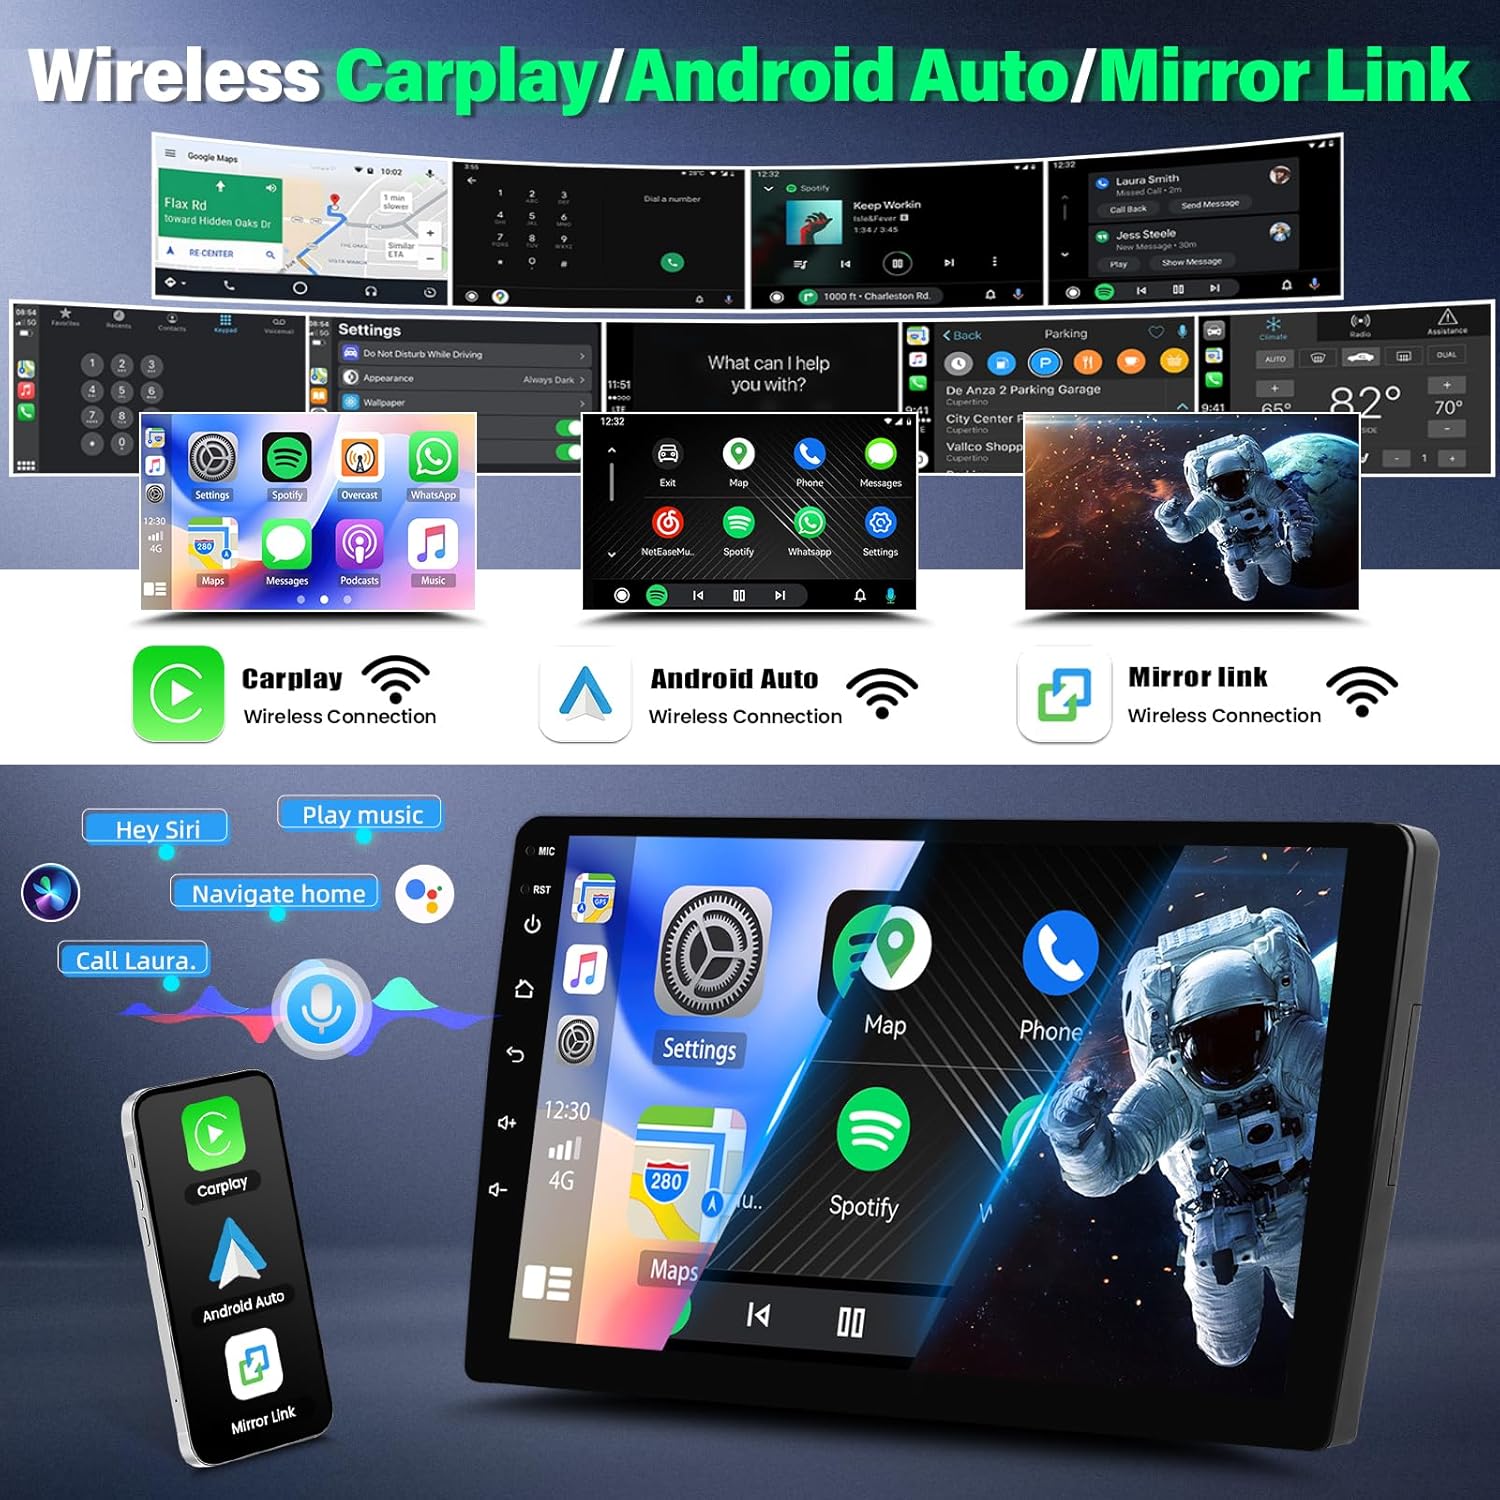
Image: Demonstrates the Wireless CarPlay and Android Auto features.
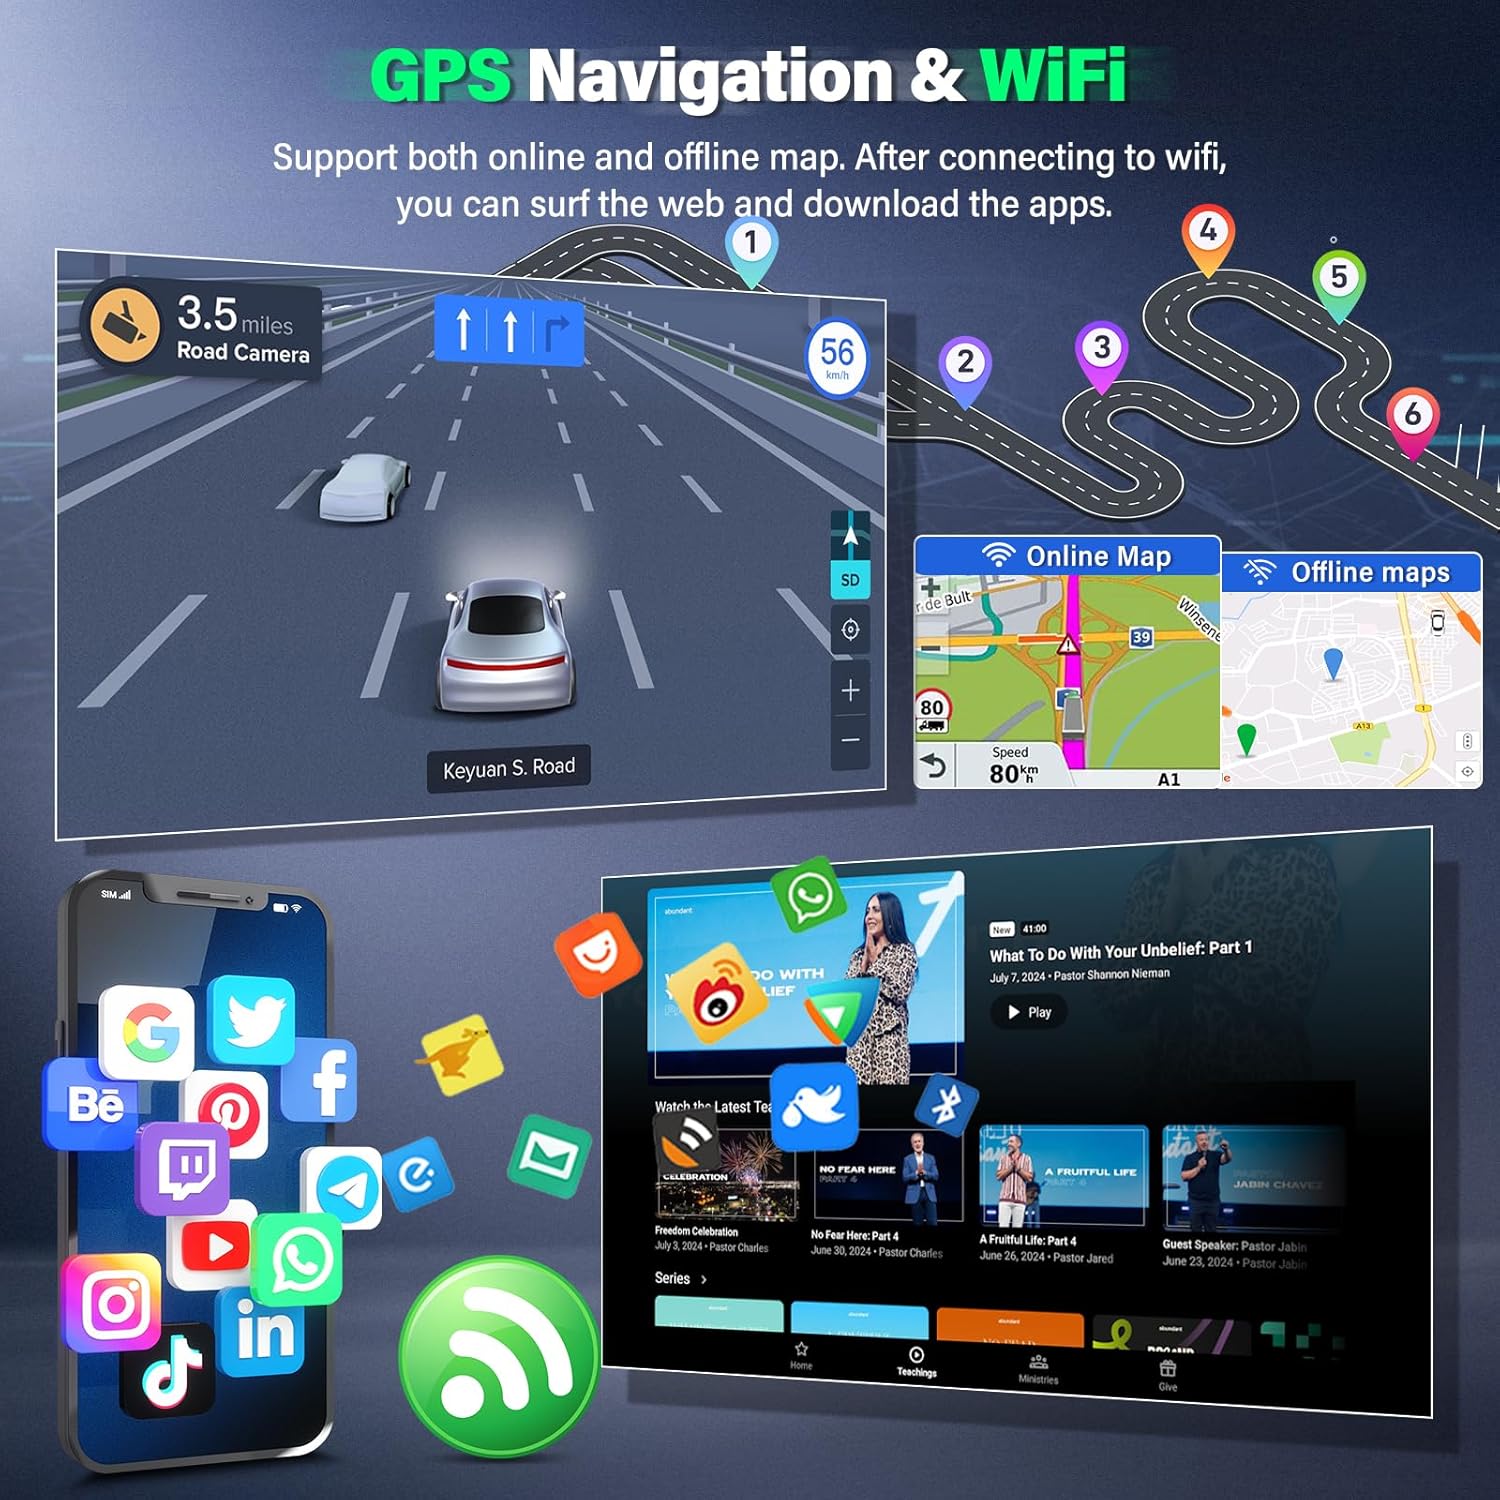
Image: Illustrates GPS navigation with online/offline maps and WiFi app access.
5. Installation Guide
This section provides a general overview of the installation process. Specific vehicle wiring may vary. It is highly recommended to consult a professional installer.
5.1 Vehicle Compatibility
This unit is designed for Nissan Altima models from 2013 to 2018. Please ensure your vehicle's dashboard matches the compatible configurations shown below.

Image: Visual guide for Nissan Altima dashboard compatibility.
5.2 Wiring Connections
Refer to the wiring diagram and included cables for proper connections. Ensure all connections are secure and insulated.
- Power Cables: Connect the main power harness to your vehicle's wiring. Ensure correct positive (B+) and ground (GND) connections.
- GPS Antenna: Mount the GPS antenna in a location with a clear view of the sky, typically on the dashboard or under the windshield.
- Rear Camera Input: Connect the provided AHD camera to the dedicated input. Ensure the reverse trigger wire is connected to your vehicle's reverse light circuit.
- USB Cables: Connect the USB extension cables for external devices or wired CarPlay/Android Auto.
- RCA Cables: Use for external audio/video input/output if required.
- Canbus Box: Connect the Canbus box as per the vehicle-specific wiring instructions to enable steering wheel controls and other vehicle data integration.
- Microphone: Connect the external microphone for improved call quality.
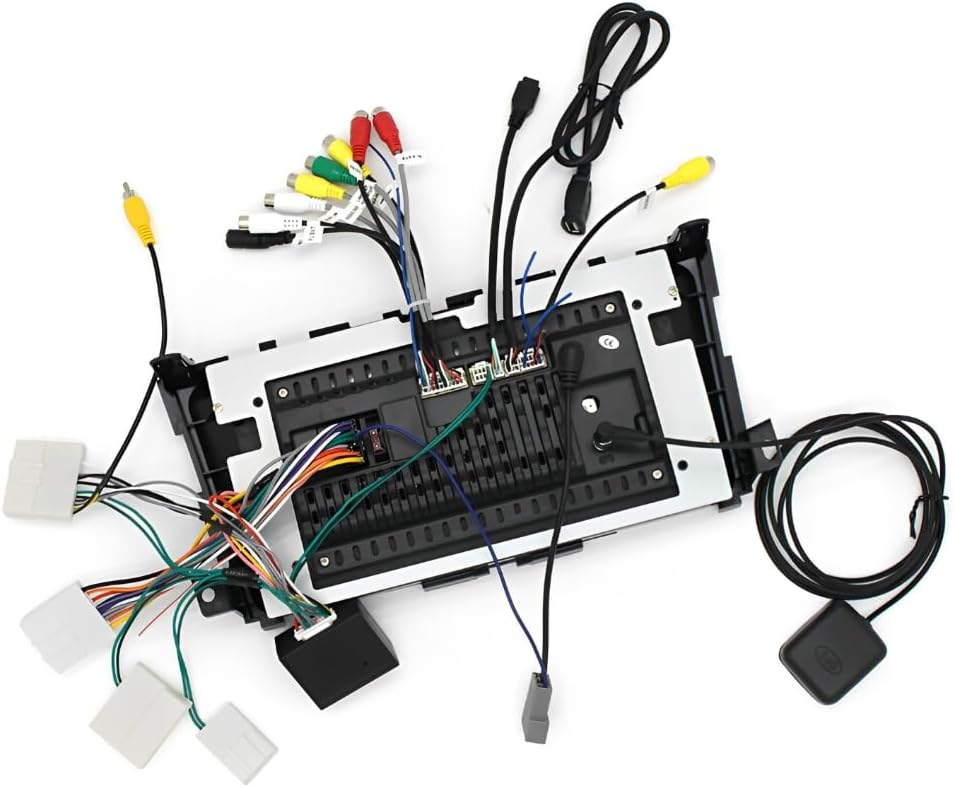
Image: Rear view of the stereo unit with all wiring harnesses connected.
5.3 Mounting the Unit
Carefully integrate the stereo unit into your vehicle's dashboard opening. Secure it using the provided mounting brackets and screws. Ensure all cables are routed safely and do not interfere with vehicle operation.
6. Operating Instructions
6.1 Power On/Off
The unit will typically power on automatically when the vehicle's ignition is turned on. To manually power off/on, press and hold the power button on the front panel or use the corresponding option in the system settings.
6.2 Touch Screen Operation
The 9-inch capacitive touch screen responds to finger gestures similar to a smartphone. Tap to select, swipe to scroll, and pinch to zoom (where applicable).
6.3 Wireless CarPlay & Android Auto
To use Wireless CarPlay or Android Auto:
- Ensure Bluetooth and Wi-Fi are enabled on your smartphone.
- On the car stereo, navigate to the CarPlay or Android Auto application.
- Follow the on-screen prompts to pair your phone via Bluetooth. Once paired, the system will establish a Wi-Fi connection for wireless operation.
- For wired connection, connect your phone via a USB cable to one of the unit's USB ports.
6.4 GPS Navigation
The unit comes with pre-installed navigation apps. To use:
- Tap the 'Navigation' icon on the home screen.
- Select your preferred navigation application (e.g., Google Maps).
- For online maps, ensure the unit is connected to Wi-Fi (via phone hotspot). For offline maps, download them in advance.
- Enter your destination and follow the voice and visual prompts.
6.5 Bluetooth Functions
To pair your phone via Bluetooth:
- Go to 'Settings' > 'Bluetooth' on the car stereo.
- Enable Bluetooth and make the unit discoverable.
- On your phone, search for available Bluetooth devices and select the car stereo (e.g., "EWLSAC_CarStereo").
- Confirm the pairing code on both devices.
Once paired, you can make/receive calls and stream audio.
6.6 FM/RDS Radio
Tap the 'Radio' icon to access the FM tuner. You can manually tune, auto-scan for stations, and save presets. RDS (Radio Data System) will display station information where available.
6.7 Steering Wheel Control (SWC)
After proper Canbus connection, you may need to configure SWC settings:
- Go to 'Settings' > 'Steering Learn' or 'SWC Settings'.
- Follow the on-screen instructions to map your vehicle's steering wheel buttons to the stereo functions (e.g., volume up/down, track skip).
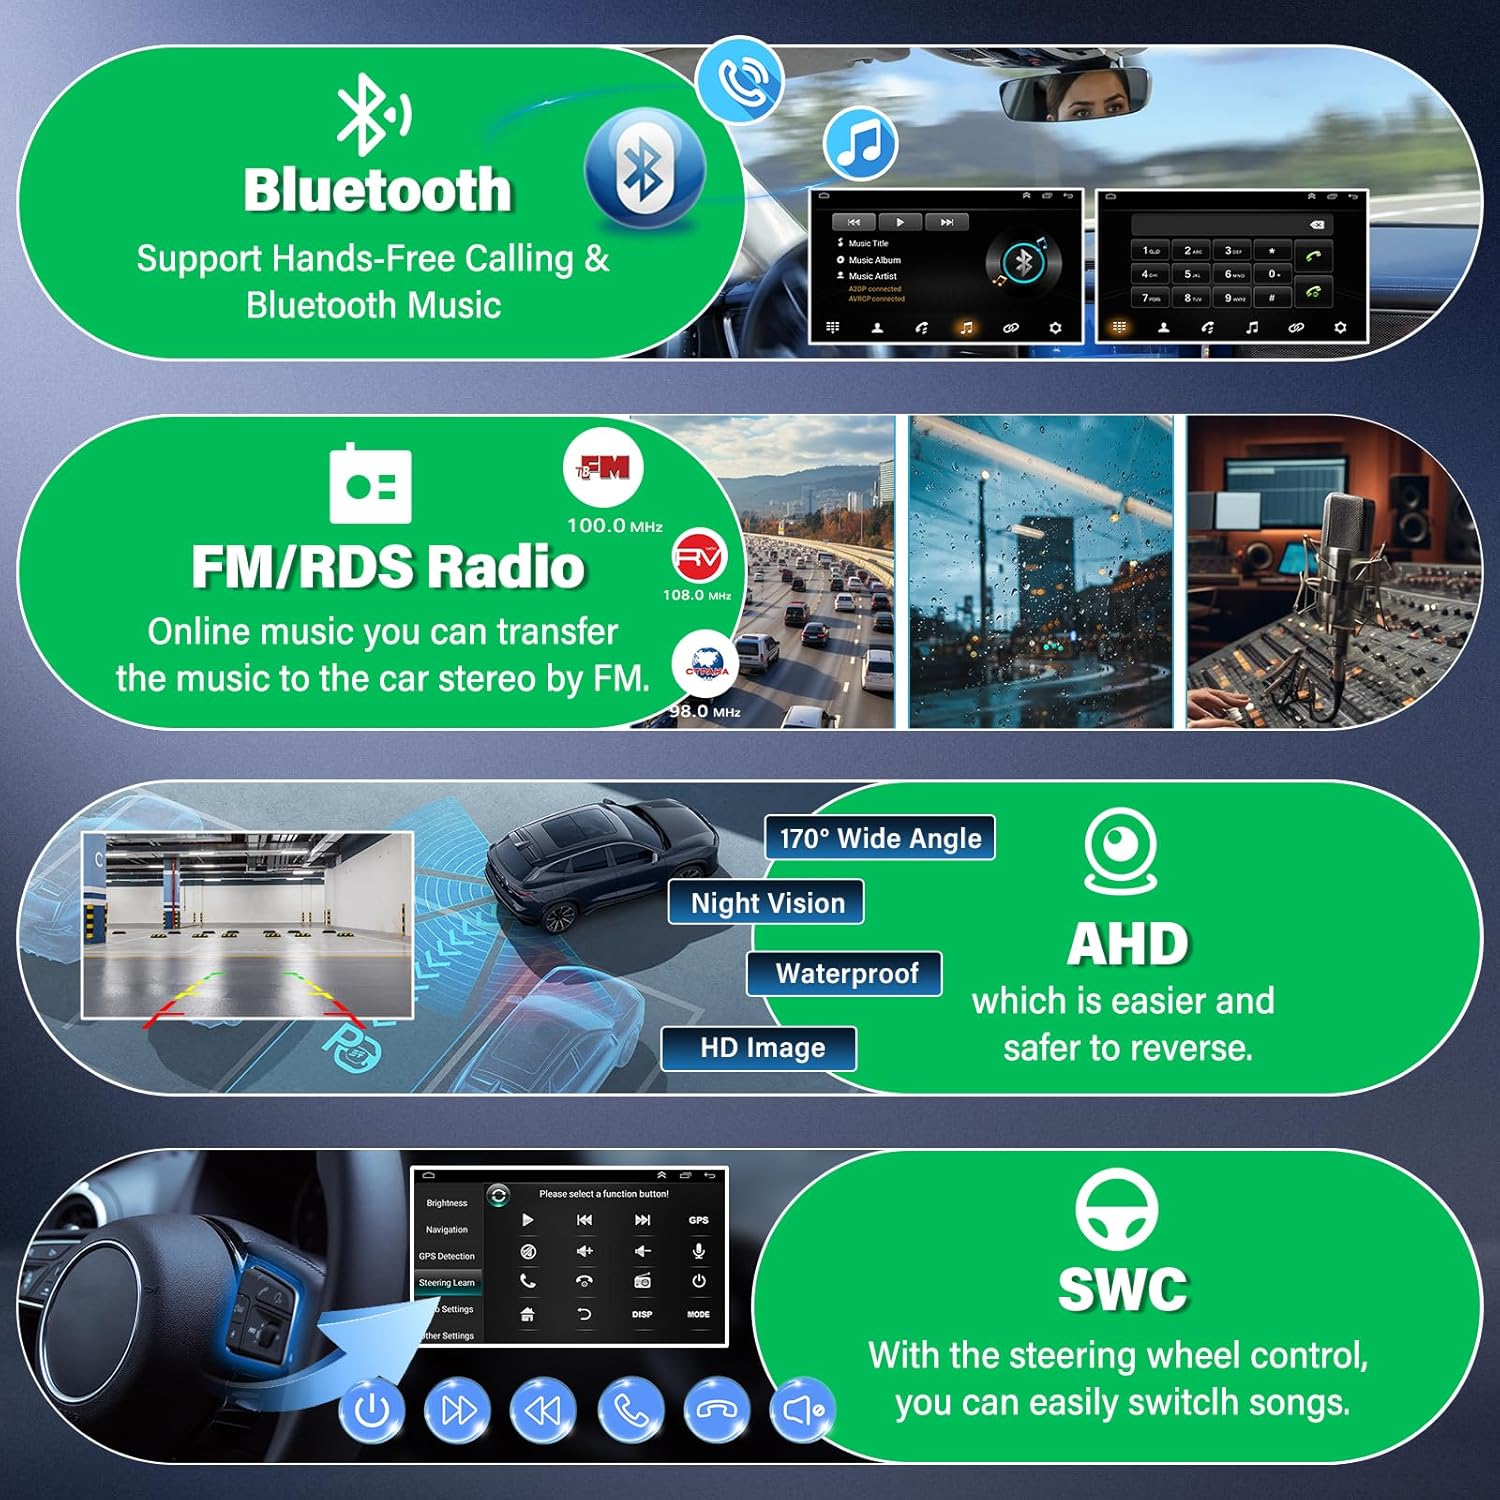
Image: Overview of Bluetooth, FM/RDS Radio, Rear View Camera, and Steering Wheel Control functions.
6.8 Rear View Camera
When the vehicle is shifted into reverse gear, the stereo screen will automatically display the feed from the connected rear view camera, providing a clear view of the area behind your vehicle.
6.9 Mirror Link
Mirror Link allows you to display your smartphone's screen directly on the car stereo. This feature is typically found as an app on the stereo's main menu. Follow the app's instructions to connect your phone via USB or Wi-Fi.
6.10 Split Screen
The split-screen function allows you to run two applications simultaneously, such as navigation on one side and music playback on the other. To activate, long-press the recent apps button or drag an app to one side of the screen.
6.11 HiFi Audio & EQ
Access the Equalizer (EQ) settings from the audio menu to customize sound output. Adjust frequency bands, select preset sound modes (e.g., Pop, Rock, Jazz), or create custom profiles for optimal audio quality.
7. Maintenance
- Cleaning: Use a soft, dry cloth to clean the screen and unit. Avoid abrasive cleaners or solvents.
- Software Updates: Periodically check for system software updates via the 'Settings' menu to ensure optimal performance and access to new features. A Wi-Fi connection is required for updates.
- Avoid Overheating: Ensure proper ventilation around the unit. Do not block any vents.
8. Troubleshooting
If you encounter issues, refer to the following common problems and solutions:
| Problem | Possible Cause | Solution |
|---|---|---|
| Unit does not power on | Incorrect power wiring, blown fuse, vehicle ignition off. | Check power connections, inspect vehicle fuses, ensure ignition is on. |
| No sound output | Speaker wires disconnected, volume too low, incorrect audio source. | Verify speaker connections, increase volume, select correct audio source. |
| GPS not working or inaccurate | GPS antenna not properly connected or obstructed, outdated maps. | Ensure GPS antenna is securely connected and has a clear view of the sky. Update maps if necessary. |
| Bluetooth connection issues | Phone not discoverable, incorrect pairing, interference. | Ensure phone Bluetooth is on and discoverable. Re-pair the device. Move away from other Bluetooth devices. |
| Rear camera not displaying | Camera not connected, reverse trigger wire incorrect, faulty camera. | Check camera connections and reverse trigger wire. Test camera functionality. |
| Steering Wheel Controls not responding | Canbus box not connected, SWC settings not configured. | Verify Canbus box connection. Perform SWC learning/configuration in settings. |
If problems persist after attempting these solutions, please contact customer support.
9. Specifications
| Feature | Specification |
|---|---|
| Model Number | QA1436X |
| Operating System | Android 13.0 |
| Screen Size | 9 Inches |
| Resolution | 1024 x 600 |
| RAM | 2GB |
| ROM | 32GB |
| Processor | 4 Core |
| Connectivity | Bluetooth, USB, Wi-Fi |
| Special Features | Touchscreen, GPS, Wireless CarPlay, Android Auto, Rear Camera Input, DVR Input, FM/RDS Radio, Steering Wheel Control, Mirror Link, Split Screen, HiFi Audio EQ |
| Audio Output Mode | Stereo |
| Map Type | Worldwide |
| Mounting Type | Panel Mount |
| Item Weight | 3.7 pounds |
| Package Dimensions | 14.1 x 8.6 x 4.7 inches |
10. Warranty and Support
Your EWLSAC Android Car Stereo is covered by a manufacturer's warranty. For specific warranty details, please refer to the documentation provided with your purchase or contact the seller directly.
For technical support, troubleshooting assistance, or any questions regarding your product, please contact EWLSAC customer service through the platform where you purchased the item. Our support team is dedicated to resolving any issues you may encounter.