1. Safety Information
Please read and understand all safety instructions before using this product. Keep this manual for future reference.
- Battery Safety: Use only the specified battery type (2 x AAA batteries). Do not mix old and new batteries, or different types of batteries. Insert batteries with correct polarity. Remove batteries if the device will not be used for an extended period to prevent leakage.
- Water and Moisture: Do not expose the radio to rain, moisture, or immerse it in water. This can cause electric shock or damage.
- Heat Sources: Keep the radio away from heat sources such as radiators, heat registers, stoves, or other apparatus (including amplifiers) that produce heat.
- Cleaning: Clean only with a dry cloth. Do not use liquid cleaners or aerosol cleaners.
- Servicing: Do not attempt to service this product yourself. Refer all servicing to qualified service personnel.
- Earphone Usage: Avoid listening at high volume levels for long periods to prevent hearing damage.
2. Product Overview
The OHM AudioComm Digital Pocket Radio (Model: RAD-P300S-K) is a compact and portable radio featuring digital tuning and DSP technology for enhanced reception. It supports AM, FM, and Wide FM broadcasts, offering long battery life and convenient memory presets.

Image: Front view of the OHM AudioComm Digital Pocket Radio, highlighting its slim design, digital display, and included earphones. The display shows "FM 80.0 MHz".
Key Features:
- Digital Tuning: Precise station selection with DSP (Digital Signal Processor) for high sensitivity.
- Long Battery Life: Approximately 85 hours of AM reception with earphones, and 80 hours for FM.
- Slim Design: Ultra-thin profile, approximately 16mm.
- Memory Presets: Store up to 20 AM and 20 FM stations (total 40).
- Wide FM Support: Compatible with FM supplementary broadcasting.
- Backlit LCD Display: Clear display with illumination for easy viewing.
- Digital Volume Control: Precise adjustment of audio output.
- Built-in Speaker: Monaural speaker for listening without earphones.
- FM Rod Antenna: Extendable antenna for improved FM reception.
- Included Earphones: Detachable stereo earphones for private listening.
Product Components:

Image: Front view diagram of the radio with labeled parts. Key components include the LCD screen, speaker, power button, tuning buttons, volume buttons, memory buttons, earphone jack, and FM rod antenna. Labels indicate: 1. Stereo/Mono/Lock button, 2. Scan/Time Setting button, 3. Band/Alarm button, 4. Power/Sleep button.

Image: Multiple views of the radio (front, top, right side) showing its compact size and button layout. The top view shows the earphone jack and memory buttons. The right side shows tuning and volume buttons. Also displays the included earphones and wrist strap.
- LCD Screen: Displays frequency, time, and other information.
- Speaker: Built-in monaural speaker.
- Power/Sleep Button: Turns the radio on/off and activates sleep timer.
- Scan/Time Setting Button: Initiates automatic scanning and sets the clock.
- Band/Alarm Button: Switches between AM/FM bands and sets the alarm.
- Stereo/Mono/Lock Button: Toggles stereo/mono mode and locks buttons.
- Tuning Buttons (+/-): Adjusts frequency up or down.
- Volume Buttons (+/-): Adjusts sound volume.
- Memory Buttons (+/-): Recalls stored stations.
- Earphone Jack: 3.5mm stereo jack for earphones.
- FM Rod Antenna: Extendable antenna for FM reception.
- Battery Cover: Located on the back for battery installation.
3. Setup
3.1 Battery Installation
The radio requires two AAA batteries (sold separately).
- Locate the battery cover on the back of the radio.
- Slide the battery cover open.
- Insert two AAA batteries, ensuring correct polarity (+ and - ends match the markings inside the compartment).
- Close the battery cover securely.
Note: If the radio does not power on, check battery polarity and ensure batteries are fresh.
3.2 Earphone Connection
To listen privately, connect the included stereo earphones.

Image: A person holding the radio with earphones connected to the earphone jack at the top. The included stereo earphones are also shown separately, emphasizing their detachable nature.
- Locate the earphone jack on the top of the radio.
- Insert the 3.5mm plug of the earphones firmly into the jack.
Note: When earphones are connected, the radio will output stereo sound for FM stereo broadcasts. The built-in speaker will be muted.
3.3 Antenna Adjustment
For optimal FM reception, extend and adjust the FM rod antenna.
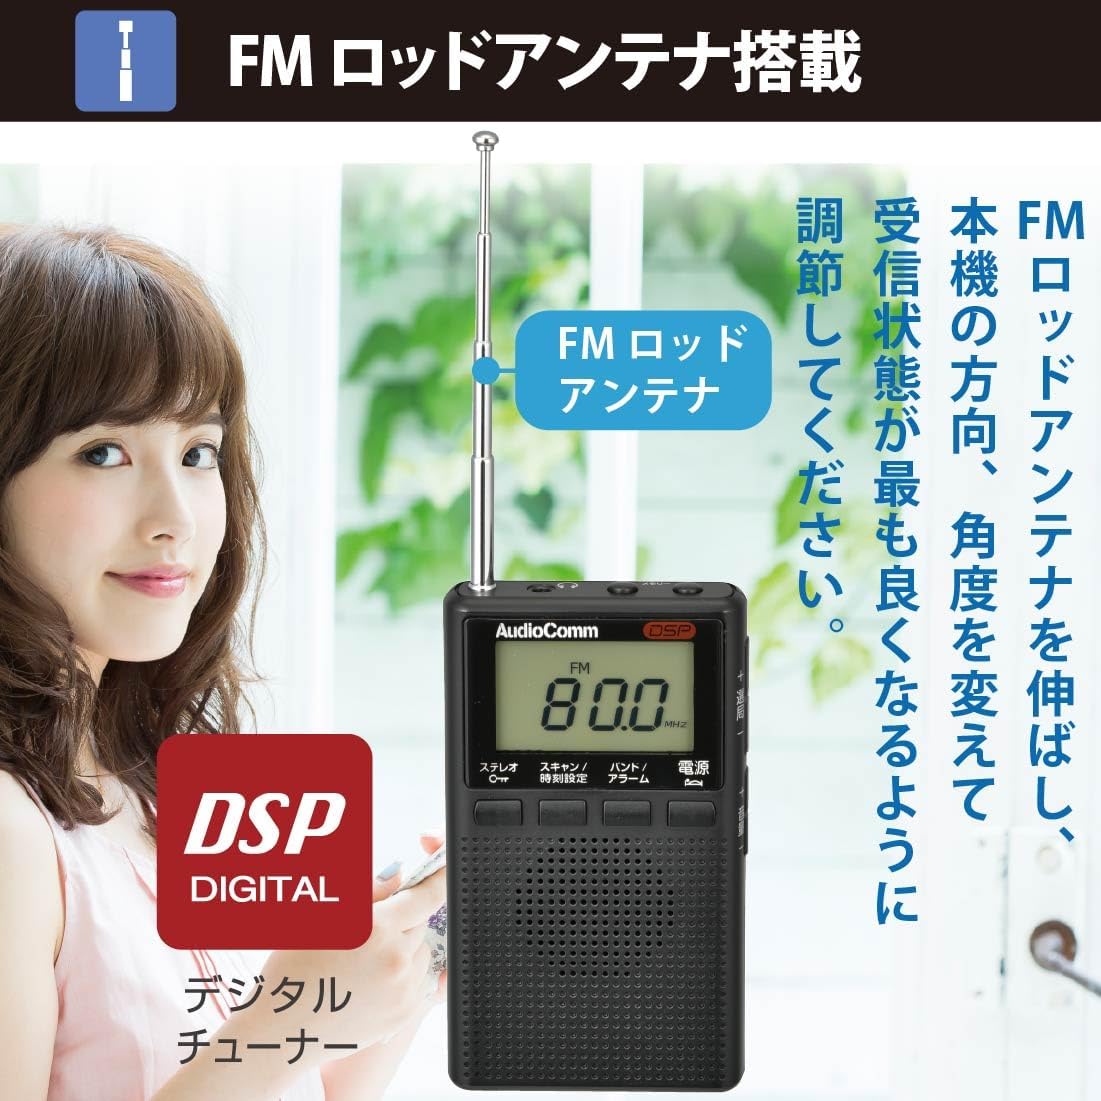
Image: A person extending and rotating the FM rod antenna on the radio to improve signal reception. Text on the image instructs to extend the FM rod antenna and change its direction and angle for the best reception.
- For FM reception, fully extend the FM rod antenna.
- Rotate and adjust the angle of the antenna until you achieve the clearest reception.
- For AM reception, the radio uses an internal antenna. Rotate the entire radio for best AM reception.
4. Operating Instructions
4.1 Power On/Off
- To turn on the radio, press the Power button.
- To turn off the radio, press the Power button again.
4.2 Band Selection (AM/FM/Wide FM)
- Press the Band/Alarm button to cycle through AM, FM, and Wide FM bands. The selected band will be displayed on the LCD.
4.3 Tuning to Stations
Manual Tuning:
- Press the Tuning (+) or Tuning (-) buttons to adjust the frequency step by step.
- Press and hold the Tuning (+) or Tuning (-) buttons to scan for the next available station.
Automatic Tuning System (ATS):

Image: The radio display showing "ATS" and "80.0 MHz". Text on the image explains that pressing and holding the "Scan/Time Setting" button for about 2 seconds activates ATS, which automatically scans and saves stations with good reception.
- While receiving a radio station, press and hold the Scan/Time Setting button for approximately 2 seconds.
- The ATS function will activate, automatically scanning for and saving stations with good reception.
4.4 Memory Presets (Saving and Recalling)
Saving a Station:
- Tune to the desired station using manual or automatic tuning.
- Press and hold the Memory (+) or Memory (-) button until the memory number flashes on the display.
- Use the Tuning (+) or Tuning (-) buttons to select the desired memory preset number (1-20 for each band).
- Press the Scan/Time Setting button to confirm and save the station.
Recalling a Stored Station:
- Press the Memory (+) or Memory (-) button briefly to cycle through your stored stations.
4.5 Volume Control
- Press the Volume (+) button to increase the volume.
- Press the Volume (-) button to decrease the volume.
- The digital volume level will be displayed on the LCD.
4.6 Stereo/Mono Mode and Button Lock
- Stereo/Mono: Briefly press the Stereo/Mono/Lock button to toggle between FM stereo and monaural sound. "ST" will appear on the display for stereo.
- Button Lock: Press and hold the Stereo/Mono/Lock button to lock the radio's buttons, preventing accidental operation. Repeat to unlock.
4.7 Sleep Timer, Alarm, and Clock
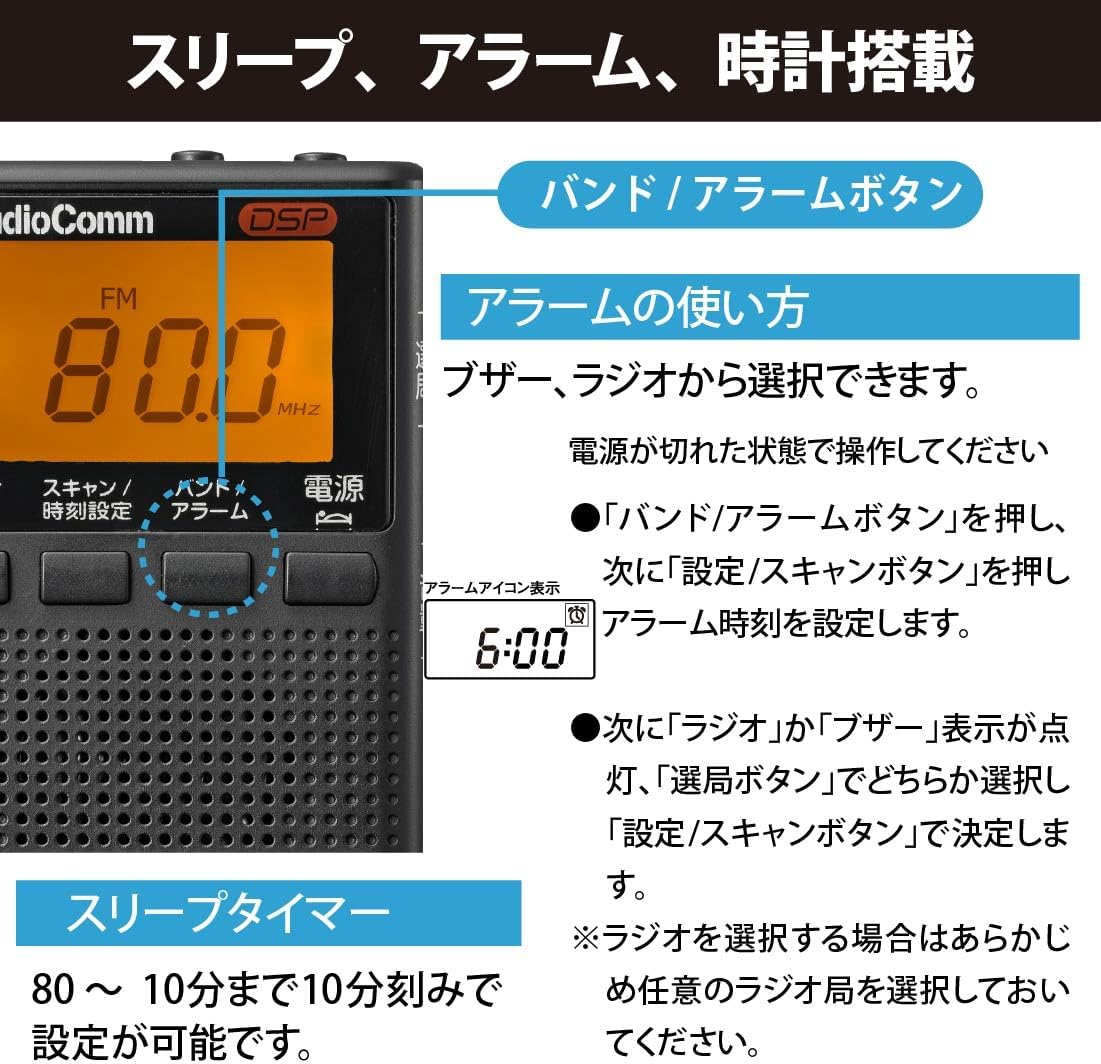
Image: The radio display showing "FM 80.0 MHz" and an alarm icon with "6:00". Text on the image describes how to set the alarm (buzzer or radio) and the sleep timer (80 to 10 minutes in 10-minute increments).
Setting the Clock:
- With the power off, press and hold the Scan/Time Setting button.
- Use the Tuning (+) or Tuning (-) buttons to set the hour, then press Scan/Time Setting to confirm.
- Repeat for minutes.
Setting the Alarm:
- Ensure the power is off.
- Press the Band/Alarm button, then press the Scan/Time Setting button to enter alarm time setting mode.
- Use the Tuning (+) or Tuning (-) buttons to set the alarm hour, then press Scan/Time Setting.
- Repeat for minutes.
- Next, select either "Radio" or "Buzzer" using the Tuning (+) or Tuning (-) buttons, then press Scan/Time Setting to confirm.
- Note: If selecting "Radio", ensure a station is preset or tuned to beforehand.
Setting the Sleep Timer:
- With the radio on, press the Power/Sleep button repeatedly to cycle through sleep timer settings (80, 70, 60, ..., 10 minutes, OFF). The radio will automatically turn off after the set time.
5. Maintenance
Proper maintenance ensures the longevity and optimal performance of your radio.
- Cleaning: Wipe the radio's exterior with a soft, dry cloth. Do not use abrasive cleaners, solvents, or chemical sprays, as these can damage the finish or internal components.
- Battery Replacement: Replace batteries when the display indicates low power or when the radio's performance degrades. Always replace both batteries at the same time with new ones of the same type.
- Storage: If storing the radio for an extended period, remove the batteries to prevent leakage and corrosion. Store in a cool, dry place away from direct sunlight and extreme temperatures.
- Antenna Care: Handle the FM rod antenna gently. Do not bend or force it, as this can cause damage.
6. Troubleshooting
If you experience issues with your radio, refer to the following common problems and solutions:
| Problem | Possible Cause | Solution |
|---|---|---|
| No power / Radio does not turn on. | Batteries are dead or inserted incorrectly. | Replace with new batteries, ensuring correct polarity. |
| Poor reception / Static sound. | Weak signal; antenna not properly adjusted; interference. | Extend and adjust the FM rod antenna. For AM, rotate the radio. Move away from electronic devices that may cause interference. |
| No sound from speaker/earphones. | Volume is too low; earphones not fully plugged in; speaker muted by earphones. | Increase volume. Ensure earphones are fully inserted. If using earphones, the speaker is intentionally muted. Check if earphones are faulty. |
| Buttons are unresponsive. | Button lock function is active. | Press and hold the Stereo/Mono/Lock button to unlock the controls. |
| Display is dim or blank. | Low battery power. | Replace batteries. |
7. Specifications

Image: A detailed table listing the technical specifications of the radio, including reception frequencies, memory capacity, power source, battery life, dimensions, weight, and included accessories.
| Feature | Detail |
|---|---|
| Model Number | RAD-P300S-K |
| Reception Frequency | AM: 522 - 1620 kHz FM: 76 - 108 MHz (Wide FM compatible) |
| Memory Presets | FM: 20 stations AM: 20 stations (Total 40 stations) |
| Power Source | DC 3V (AAA batteries x 2, sold separately) |
| Battery Life (approx.) |
|
| External Dimensions (approx.) | Width 56 x Height 96 x Depth 16 mm (excluding protrusions) |
| Weight (approx.) | 62 g (excluding batteries) |
| Included Accessories | Detachable stereo earphones, Instruction Manual, Warranty Card |
| Display Type | LCD (Liquid Crystal Display) with backlight |
| Tuner Type | Digital DSP Tuner |
8. Warranty & Support
This product comes with a manufacturer's warranty. Please refer to the included Warranty Card for details regarding the warranty period and conditions.
- Warranty Claims: In case of a defect or malfunction during the warranty period, please contact the retailer where you purchased the product or the OHM customer support center.
- Customer Support: For technical assistance, troubleshooting not covered in this manual, or general inquiries, please visit the official OHM website or contact their customer service department. Contact information can typically be found on the warranty card or the product packaging.
- Proof of Purchase: Always retain your proof of purchase (receipt or invoice) as it may be required for warranty service.