1. Introduction
Thank you for choosing the DXRacer AIR-PRO V2 Gaming Chair. This manual provides essential information for the safe and efficient assembly, operation, and maintenance of your new chair. Please read these instructions carefully before use and retain them for future reference.
The DXRacer AIR-PRO V2 Series is an advanced gaming chair featuring a full air mesh design for superior breathability and comfort. This updated model incorporates a new magnetic detachable lumbar support, a robust metal 4D armrest, and a fixed seat angle with tilt lock function, all built on an aluminum alloy base for enhanced durability and stability.

Image 1.1: DXRacer AIR-PRO V2 Gaming Chair (Black/Red)
2. Safety Information
- Read all instructions thoroughly before assembly and use.
- Do not stand on the chair. Use the chair only for its intended purpose of sitting.
- Keep children and pets away from the chair during assembly to prevent injury.
- Ensure all bolts, screws, and connections are securely tightened before using the chair. Periodically check and re-tighten as necessary.
- Do not use the chair if any parts are damaged or missing. Contact DXRacer support for replacement parts.
- Avoid exposing the chair to direct sunlight or extreme temperatures for prolonged periods, as this may damage the materials.
- Do not exceed the maximum weight recommendation of 330 pounds (150 kg).
3. Package Contents
Verify that all components are present before beginning assembly. If any parts are missing or damaged, please contact DXRacer customer service.
- Chair Backrest
- Seat Base
- Armrests (pre-attached to seat base)
- Gas Lift Cylinder
- Gas Lift Cover
- Star Base (Aluminum Alloy)
- Casters (Wheels)
- Magnetic Lumbar Support Cushion
- Headrest Cushion
- Mechanism Plate
- Side Covers
- Assembly Tools (Allen wrenches, screws)
- User Manual (this document)
4. Setup and Assembly
Assembly of the DXRacer AIR-PRO V2 chair requires careful attention to detail. Follow these general steps. For detailed visual instructions, refer to the included assembly guide or the manufacturer's website.
- Attach Casters to Star Base: Insert each caster into the holes at the end of the star base legs until they click securely into place.
- Insert Gas Lift: Place the gas lift cylinder into the center hole of the assembled star base. Cover it with the gas lift cover.
- Attach Mechanism Plate to Seat Base: Align the mechanism plate with the pre-drilled holes on the underside of the seat base. Secure it with the provided screws, ensuring the front of the mechanism faces the front of the seat.
- Connect Seat Base to Gas Lift: Carefully place the assembled seat base onto the gas lift cylinder, ensuring it is centered and stable.
- Attach Backrest to Seat Base: Align the backrest's mounting brackets with the corresponding holes on the seat base. Secure with screws, then attach the plastic side covers.
- Attach Cushions: Place the headrest cushion onto the top of the backrest. Position the magnetic lumbar support cushion on the backrest at your desired height.

Image 4.1: Key features and components of the DXRacer AIR-PRO V2 Gaming Chair.
5. Operating Instructions
Your DXRacer AIR-PRO V2 chair offers multiple adjustment options for personalized comfort and ergonomic support.
5.1 Seat Height Adjustment
To adjust the seat height, pull the lever located on the right side of the seat upwards. While pulling the lever, lift your body weight off the seat to raise it, or apply weight to the seat to lower it. Release the lever to lock the height.
5.2 Reclining Function and Tilt Lock
The chair features a maximum 150° reclining function. Pull the lever on the left side of the seat upwards to recline the backrest. Release the lever at your desired angle to lock it in place. The chair also has a tilt lock system to fix the seat angle.
5.3 4D Armrest Adjustment
The metal 4D armrests provide extensive adjustability:
- Height Adjustment: Press the button on the side of the armrest and move it up or down.
- Front/Back Slide: Slide the armrest pad forward or backward.
- Left/Right Oscillation (Swivel): Rotate the armrest pad left or right.
- Horizontal Slide: Slide the entire armrest assembly left or right.
5.4 Magnetic Lumbar Support
The memory foam lumbar support attaches magnetically to the backrest. Simply place it on the air mesh at your preferred height for optimal lower back support. Its magnetic design allows for easy repositioning or removal.
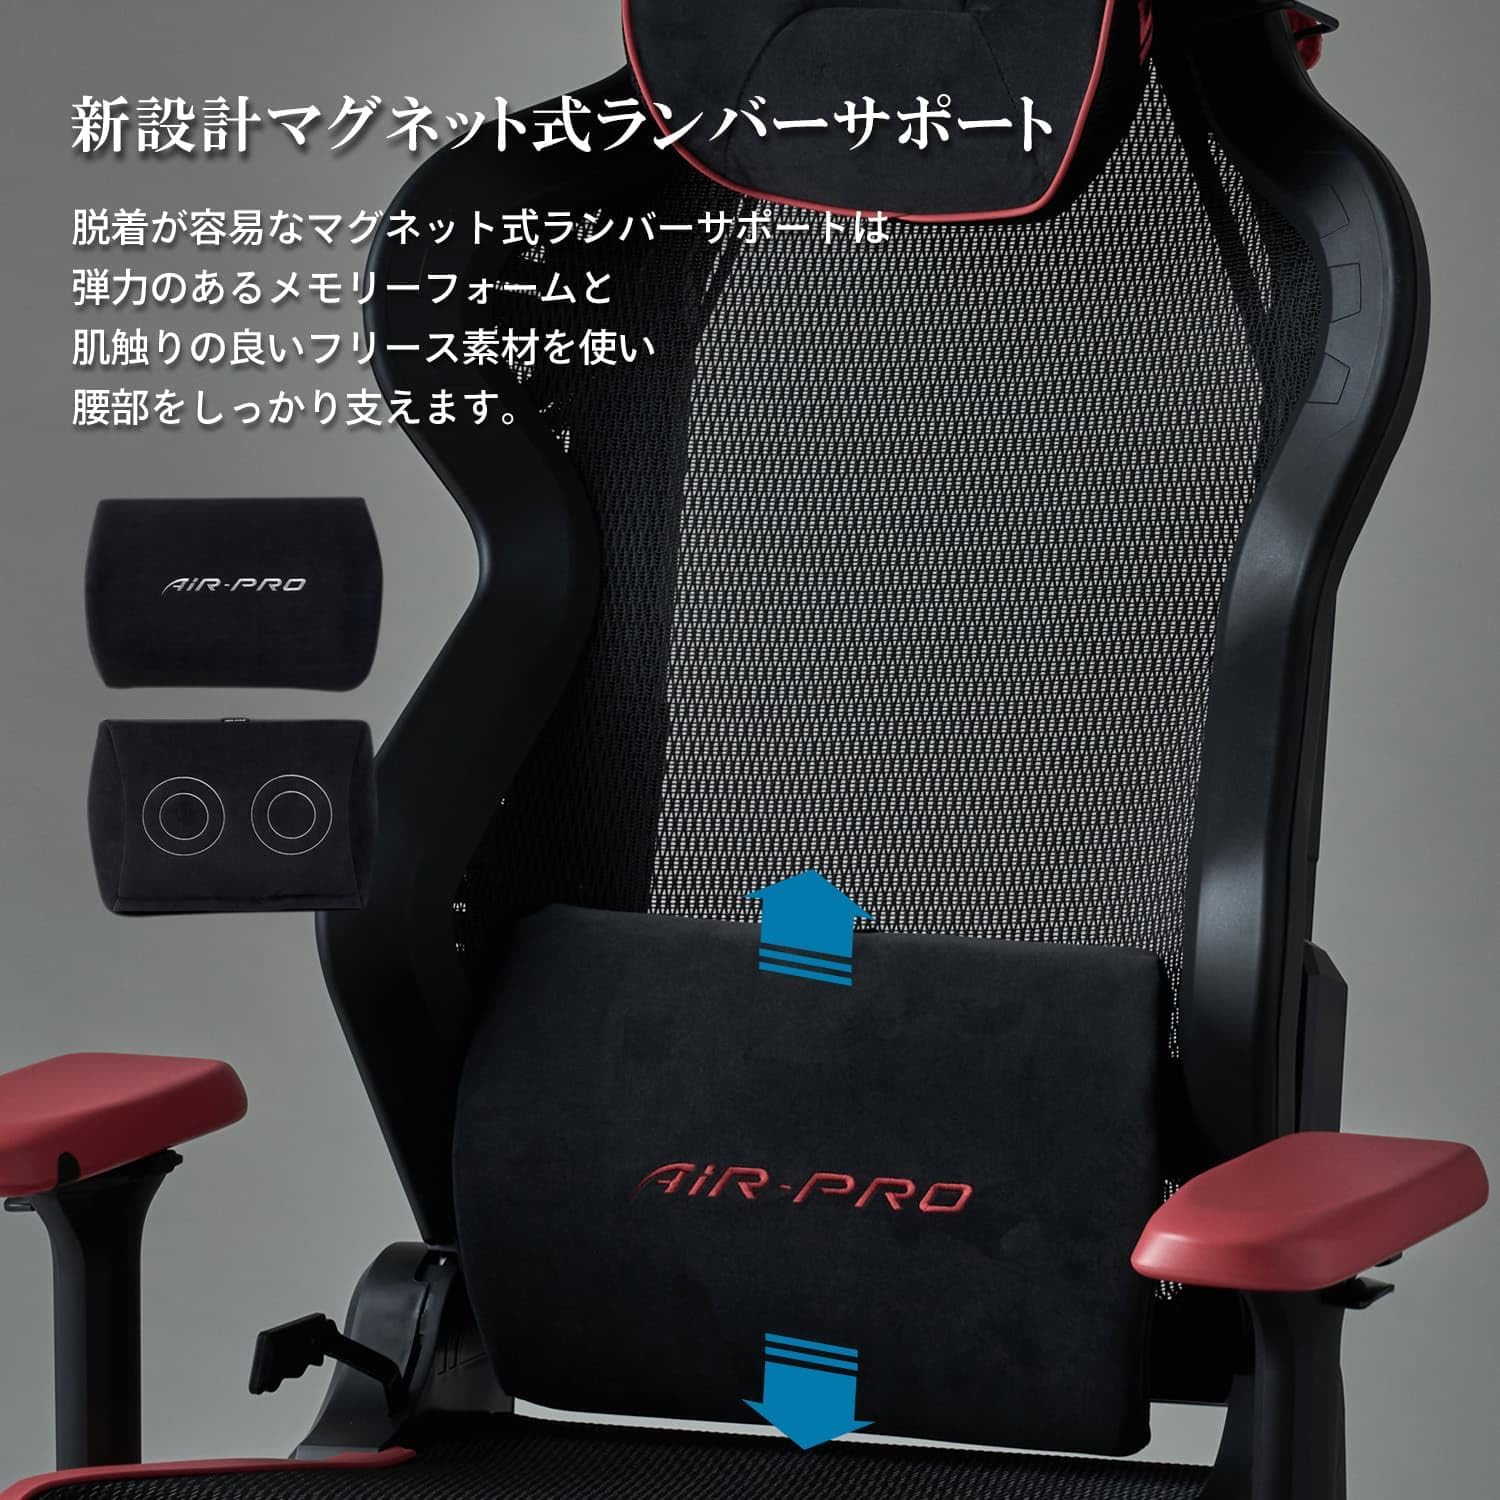
Image 5.1: Magnetic detachable lumbar support.
5.5 Headrest Adjustment
The memory foam headrest can be moved up and down along the backrest to provide optimal neck and head support. Adjust its position to align with the natural curve of your neck.
6. Maintenance
Regular maintenance will extend the life and appearance of your DXRacer AIR-PRO V2 Gaming Chair.
- Cleaning the Air Mesh: Use a soft brush or vacuum cleaner with a brush attachment to remove dust and debris from the air mesh. For spills, gently blot with a damp cloth and mild soap solution, then wipe with a clean, dry cloth. Do not use harsh chemicals or abrasive cleaners.
- Cleaning the Base and Casters: Wipe the aluminum alloy base and casters with a damp cloth. Remove any hair or debris from the caster wheels to ensure smooth movement.
- Checking Fasteners: Periodically check all screws and bolts to ensure they are tight. Re-tighten as needed to maintain stability and prevent squeaking.
- Cushion Care: The memory foam cushions can be spot cleaned. Avoid saturating them with liquid.
7. Troubleshooting
If you encounter any issues with your DXRacer AIR-PRO V2 chair, refer to the following common problems and solutions:
- Chair is unstable or wobbly:
Solution: Check all assembly screws and bolts, especially those connecting the backrest to the seat and the mechanism to the seat. Ensure they are fully tightened. Verify casters are securely inserted into the star base. - Gas lift not adjusting height:
Solution: Ensure the gas lift lever is fully engaged when attempting to adjust. If the issue persists, the gas lift cylinder may be faulty and require replacement. Contact DXRacer support. - Chair makes squeaking noises:
Solution: Re-tighten all screws and bolts. Apply a small amount of silicone lubricant to moving parts or connection points if the noise persists. - Armrests are loose or difficult to adjust:
Solution: Check the screws securing the armrests to the seat base. For internal adjustment mechanisms, ensure no debris is obstructing movement.
If these solutions do not resolve the issue, please contact DXRacer customer support for further assistance.
8. Specifications
| Feature | Detail |
|---|---|
| Brand | DXRacer |
| Model Name | AIR-PRO V2 |
| Item Model Number | AH-7200BKR V2 |
| Color | Multicolor (Black / Red) |
| Product Dimensions | 28.35 x 28.35 x 52.76 inches (72 x 72 x 134 cm) |
| Item Weight | 60.7 pounds (27.6 kg) |
| Maximum Weight Recommendation | 330 Pounds (150 kg) |
| Material | Air Mesh, Memory Foam (cushions), Aluminum Alloy (base) |
| Special Features | 4D Armrest, Ergonomic Design, Full Air Mesh, Headrest Lifting, Magnetic Detachable Lumbar Support, Tilting Function |
| Assembly Required | Yes |

Image 8.1: Detailed dimensions of the DXRacer AIR-PRO V2 Gaming Chair.
9. Warranty and Support
For warranty information, please refer to the warranty card included with your product or visit the official DXRacer website. DXRacer provides customer support for product inquiries, replacement parts, and technical assistance.
DXRacer Official Website: www.dxracer.com
Please have your model number (AH-7200BKR V2) and purchase information ready when contacting support.