1. Introduction
This manual provides essential information for the safe and efficient operation of your VEVOR 43CC Gas Powered Post Hole Digger. Designed for various earth drilling tasks, this powerful tool is equipped with a 43CC engine, robust alloy steel auger, and user-friendly features. Please read this manual thoroughly before assembly, operation, or maintenance to ensure proper use and longevity of the equipment.

Figure 1: VEVOR 43CC Gas Powered Post Hole Digger with 8-inch auger bit.
2. Safety Information
Always prioritize safety when operating power tools. Failure to follow these instructions may result in serious injury or property damage.
- Personal Protective Equipment (PPE): Always wear appropriate PPE, including safety glasses, hearing protection, heavy-duty gloves, and sturdy footwear.
- Fuel Handling: Handle fuel in a well-ventilated area away from ignition sources. Use a proper fuel mixing bottle and funnel to prevent spills.
- Secure Grip: Maintain a firm grip on the handles with both hands during operation to control the auger and prevent kickback.
- Clear Work Area: Ensure the work area is clear of bystanders, pets, and any obstacles that could interfere with operation or cause injury.
- Underground Utilities: Before digging, always check for underground cables, pipes, or other utilities. Contact local utility services to mark lines if unsure.
- Emergency Stop: Familiarize yourself with the emergency stop switch location and operation for quick shutdown.
- Engine Heat: The engine and muffler become very hot during operation. Avoid contact to prevent burns.
- Ventilation: Operate the engine in a well-ventilated outdoor area. Exhaust fumes contain carbon monoxide, which is dangerous.
3. Package Contents
Verify that all items listed below are included in your package:
- 1 x 8" Auger Bit
- 1 x Spark Plug
- 1 x Oil Mixing Bottle
- 1 x Tool Kit (includes various wrenches, screwdriver, hex keys)
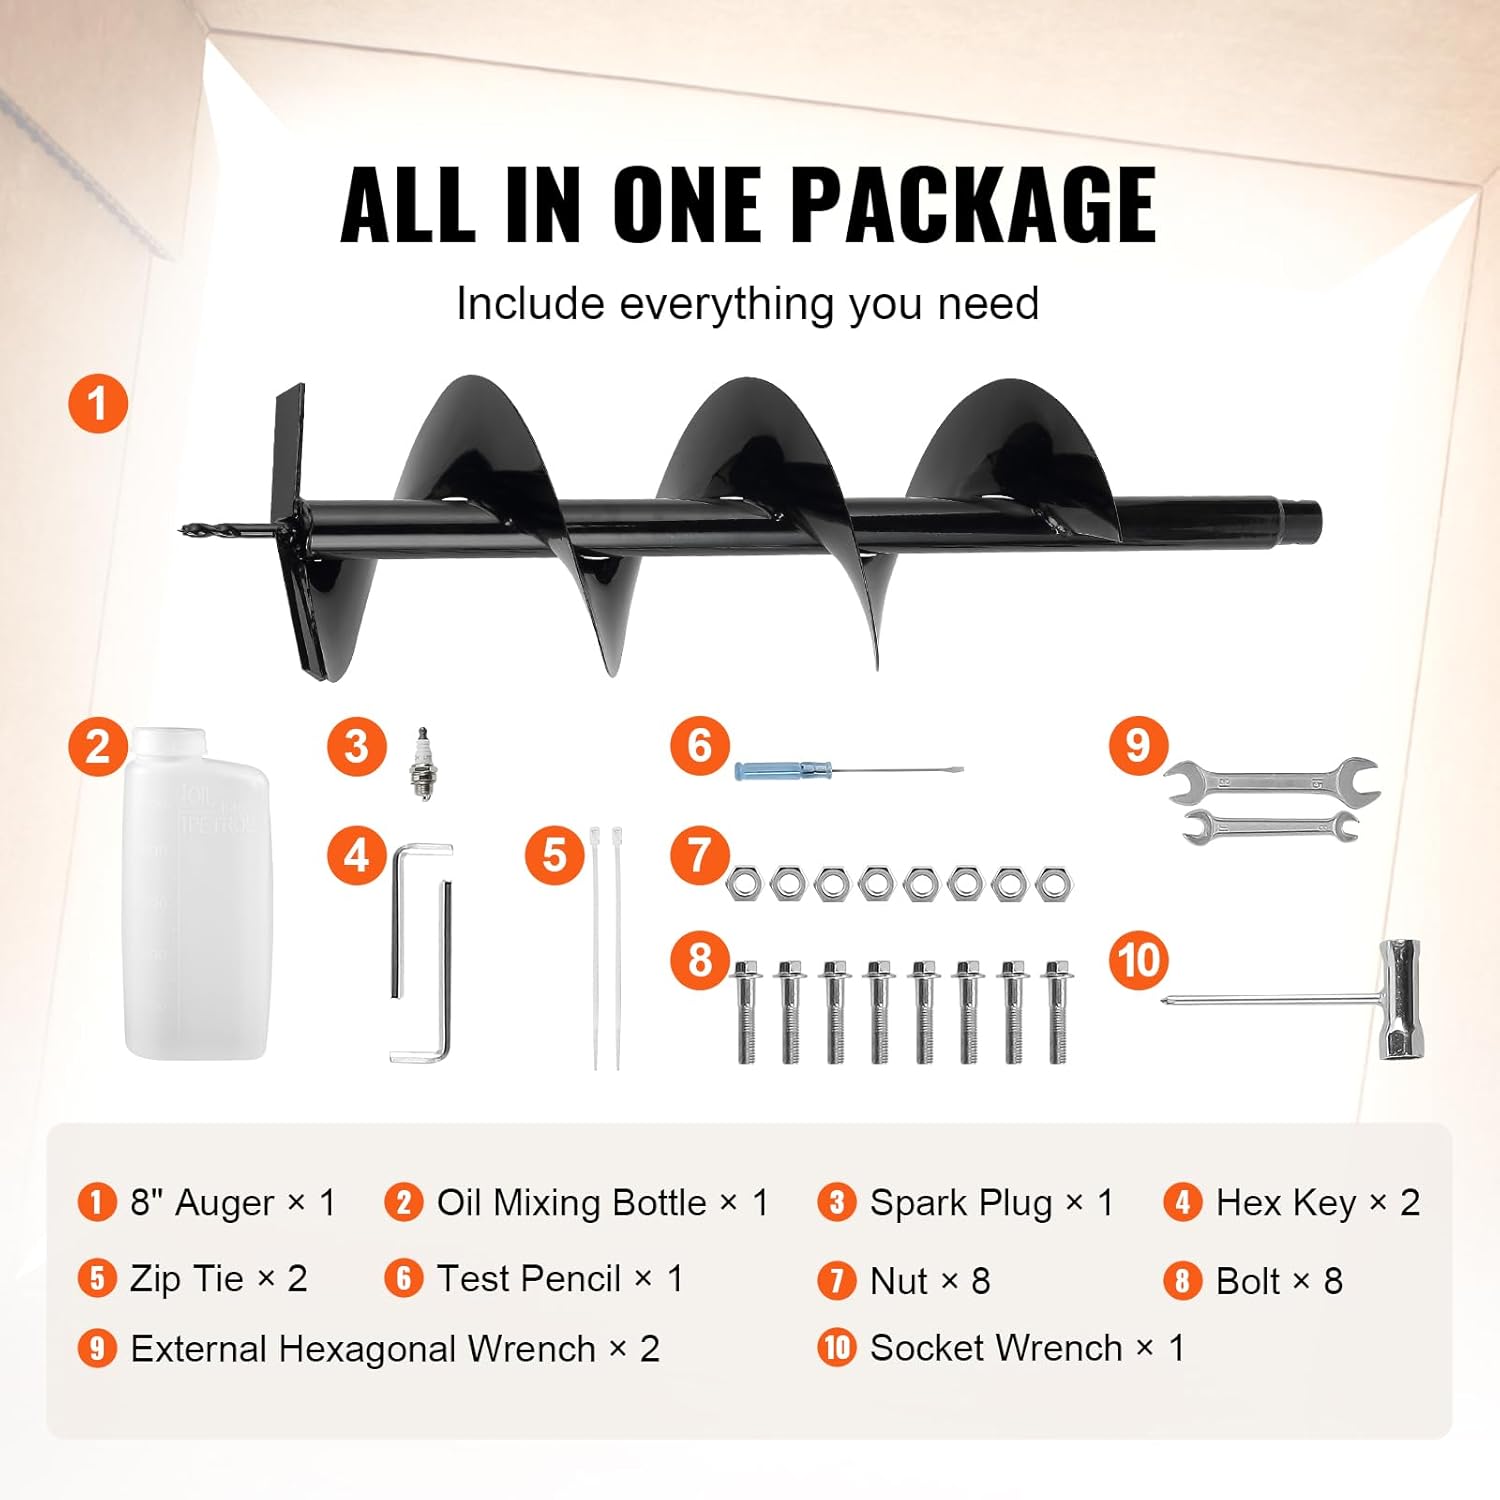
Figure 2: Included accessories for the VEVOR Post Hole Digger.
4. Specifications
| Specification | Value |
|---|---|
| Item Model Number | D43-F |
| Displacement | 43CC |
| Power | 1250W |
| Engine Speed | 9350RPM |
| Drill Speed | 320RPM |
| Drill Specification | 8” (ø200*800mm) |
| Fuel Tank Capacity | 1.2L |
| Fuel Mixture Ratio (Oil:Gasoline) | 1:25 |
| Item Weight | 33 pounds (14.97 kg) |
| Product Dimensions | 21.65 x 11.8 x 43.78 inches (55 x 30 x 111.2 cm) |

Figure 3: Product dimensions and key specifications.
5. Setup
5.1 Handle Assembly
Attach the handles to the main engine unit using the provided bolts and wrenches from the tool kit. Ensure all bolts are securely tightened for safe operation. The handles are designed with shock-absorbing foam for comfortable grip.
5.2 Auger Bit Attachment
To attach the auger bit:
- Align the auger bit shaft with the output shaft of the gearbox.
- Insert the locking pin through the aligned holes.
- Secure the locking pin with the provided screw or clip.

Figure 4: Auger bit attachment steps.
5.3 Fuel Mixing
The VEVOR Post Hole Digger requires a fuel mixture of gasoline and 2-stroke oil at a 1:25 ratio. Use unleaded petrol with synthetic 2-stroke oil. Never use pure petrol.
- Use the provided oil mixing bottle for accurate measurement.
- Fill the bottle with the correct amount of unleaded gasoline.
- Add the appropriate amount of 2-stroke oil to achieve the 1:25 ratio.
- Securely close the bottle and shake well to thoroughly mix the fuel.
5.4 Fuel Tank Filling
Carefully pour the mixed fuel into the digger's 1.2L fuel tank. Use a funnel to prevent spills. Do not overfill the tank. Securely replace the fuel tank cap.
6. Operating Instructions
6.1 Starting the Engine
- Place the digger on a flat, stable surface.
- Ensure the emergency stop switch is in the 'ON' position.
- Move the choke lever to the 'START' or 'CHOKE' position.
- Press the primer bulb several times until fuel is visible in the return line.
- Pull the starter cord firmly and smoothly until the engine attempts to start (usually 1-3 pulls).
- Once the engine attempts to start, move the choke lever to the 'RUN' position.
- Pull the starter cord again until the engine starts and runs smoothly.

Figure 5: Thickened pull cord for easier starting.
6.2 Drilling Technique
Maintain a firm, balanced stance with both hands on the handles. Apply steady, downward pressure while the auger rotates. If the auger encounters resistance, lift it slightly to clear debris, then continue drilling. Avoid excessive force, which can cause kickback.

Figure 6: Proper operating stance for drilling.
6.3 Emergency Stop
In case of an emergency or if the auger binds, immediately release the throttle and press the emergency stop switch located on the handle to shut down the engine.

Figure 7: Key operational features including the emergency stop switch.
7. Maintenance
Regular maintenance ensures optimal performance and extends the lifespan of your post hole digger.
- Spark Plug: Inspect the spark plug periodically. Clean or replace it if it's fouled or worn. Use the provided tool kit for removal and installation.
- Air Filter: Clean the air filter regularly, especially in dusty conditions. A clogged air filter can reduce engine performance.
- Fuel System: For long-term storage, drain the fuel tank and run the engine until it stops to clear the carburetor of fuel. This prevents fuel degradation issues.
- Auger Bit: Inspect the auger bit for wear or damage before each use. Replace dull or bent bits to maintain digging efficiency and safety.
- General Cleaning: Keep the engine and auger free of dirt and debris. Use a brush or compressed air to clean cooling fins and moving parts.
8. Troubleshooting
| Problem | Possible Cause | Solution |
|---|---|---|
| Engine won't start | No fuel, incorrect choke position, fouled spark plug, old fuel. | Check fuel level and mix, adjust choke, clean/replace spark plug, use fresh fuel. |
| Loss of power during operation | Clogged air filter, improper fuel mix, worn spark plug. | Clean air filter, verify fuel mix ratio, inspect/replace spark plug. |
| Auger binds or gets stuck | Hard soil, roots, rocks, excessive downward pressure. | Lift auger to clear, reduce pressure, clear obstructions manually if necessary. |
9. Warranty and Support
For warranty information, technical support, or to purchase replacement parts, please visit the official VEVOR website or contact their customer service department. Keep your purchase receipt as proof of ownership.