1. Introduction
Thank you for choosing the VASAGLE LNT111B01 Console Table. This instruction manual provides essential information for the safe assembly, operation, and maintenance of your new console table. Please read this manual thoroughly before assembly and retain it for future reference.
This console table features integrated power outlets (2 AC, 2 USB) and two storage compartments, designed to be a space-saving and functional addition to your entryway, living room, or other areas.

This image shows the assembled VASAGLE LNT111B01 console table in an entryway, highlighting its slim design and functional top surface with a lamp and decorative items.
2. Safety Information
- Anti-Tipping Protection: Always install the provided anti-tipping device to secure the table to a wall. This prevents accidental tipping and ensures safety, especially in households with children or pets.
- Weight Limit: Do not exceed the maximum recommended load of 100 kg (220 lbs) for the table. Distribute weight evenly.
- Electrical Safety: Ensure the power strip is connected to a properly grounded outlet. Do not overload the outlets. Keep liquids away from the power strip.
- Corner Protectors: Apply the provided corner protectors to mitigate injury from accidental bumps.
- Assembly: Follow all assembly instructions carefully. Do not use power tools for assembly unless explicitly stated, as this may damage the product.
- Placement: Place the table on a flat, stable surface. Use the adjustable feet to ensure stability on uneven floors.

An image showing the anti-tipping hardware, which is essential for safely securing the console table to a wall to prevent accidental tipping.

This image highlights the safety features: transparent corner protectors to prevent accidental bumps and adjustable feet for stability on uneven floors.
3. Package Contents
Before starting assembly, please verify that all parts listed below are present and undamaged. If any parts are missing or damaged, please contact customer support.
- Tabletop with integrated power strip
- Leg frames (left and right)
- Bottom support bar
- Storage compartment dividers
- Assembly hardware (screws, bolts, etc.)
- Anti-tipping kit
- Corner protectors
- Instruction manual
4. Setup and Assembly Instructions
Assembly is required for this product. Please follow the steps below carefully. A screwdriver is recommended for assembly.
- Unpack and Identify Parts: Carefully unpack all components and lay them out on a clean, soft surface to prevent scratches. Identify each part using the provided diagram in the separate assembly guide.
- Assemble Leg Frames: Attach the leg frames to the bottom support bar using the designated hardware. Ensure all connections are secure but do not overtighten yet.
- Attach Tabletop: Carefully place the tabletop onto the assembled leg frames. Align the pre-drilled holes and secure the tabletop using the appropriate screws.
- Install Compartment Dividers: Insert the storage compartment dividers into their designated slots on the tabletop.
- Install Power Strip: The power strip is pre-installed in its compartment. Ensure its cable is routed through the cable management hole at the back of the table.
- Tighten All Connections: Once all parts are assembled, gently tighten all screws and bolts to ensure the table is stable. Do not overtighten.
- Install Anti-Tipping Device: Secure the table to a wall using the provided anti-tipping kit. This is a critical safety step.
- Apply Corner Protectors: Place the transparent corner protectors on the table's corners as desired for added safety.
- Adjust Feet: Adjust the leveling feet at the bottom of the legs to ensure the table stands stable and level on your floor.

A diagram illustrating the key dimensions of the console table: 120 cm length, 25 cm depth, 81.1 cm height, with internal compartment measurements and a 2-meter power cord.
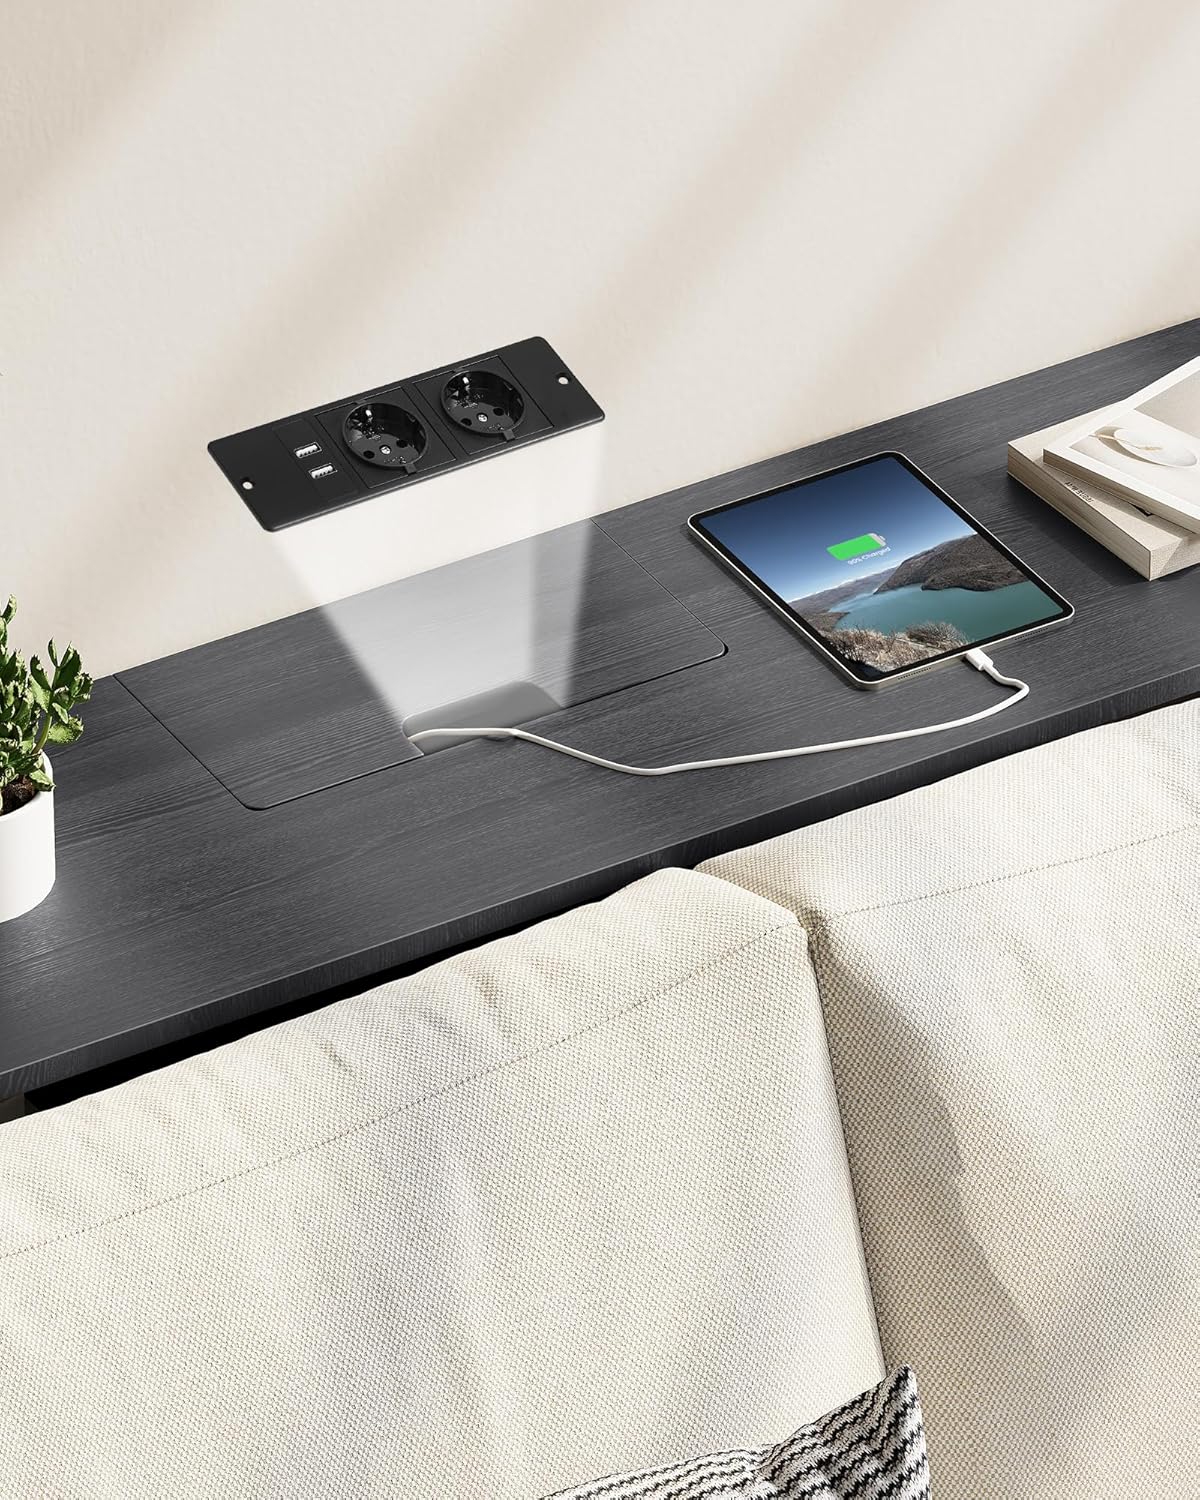
This image details the integrated power strip with two AC outlets and two USB ports, located within a hidden compartment on the table's surface for convenient device charging.
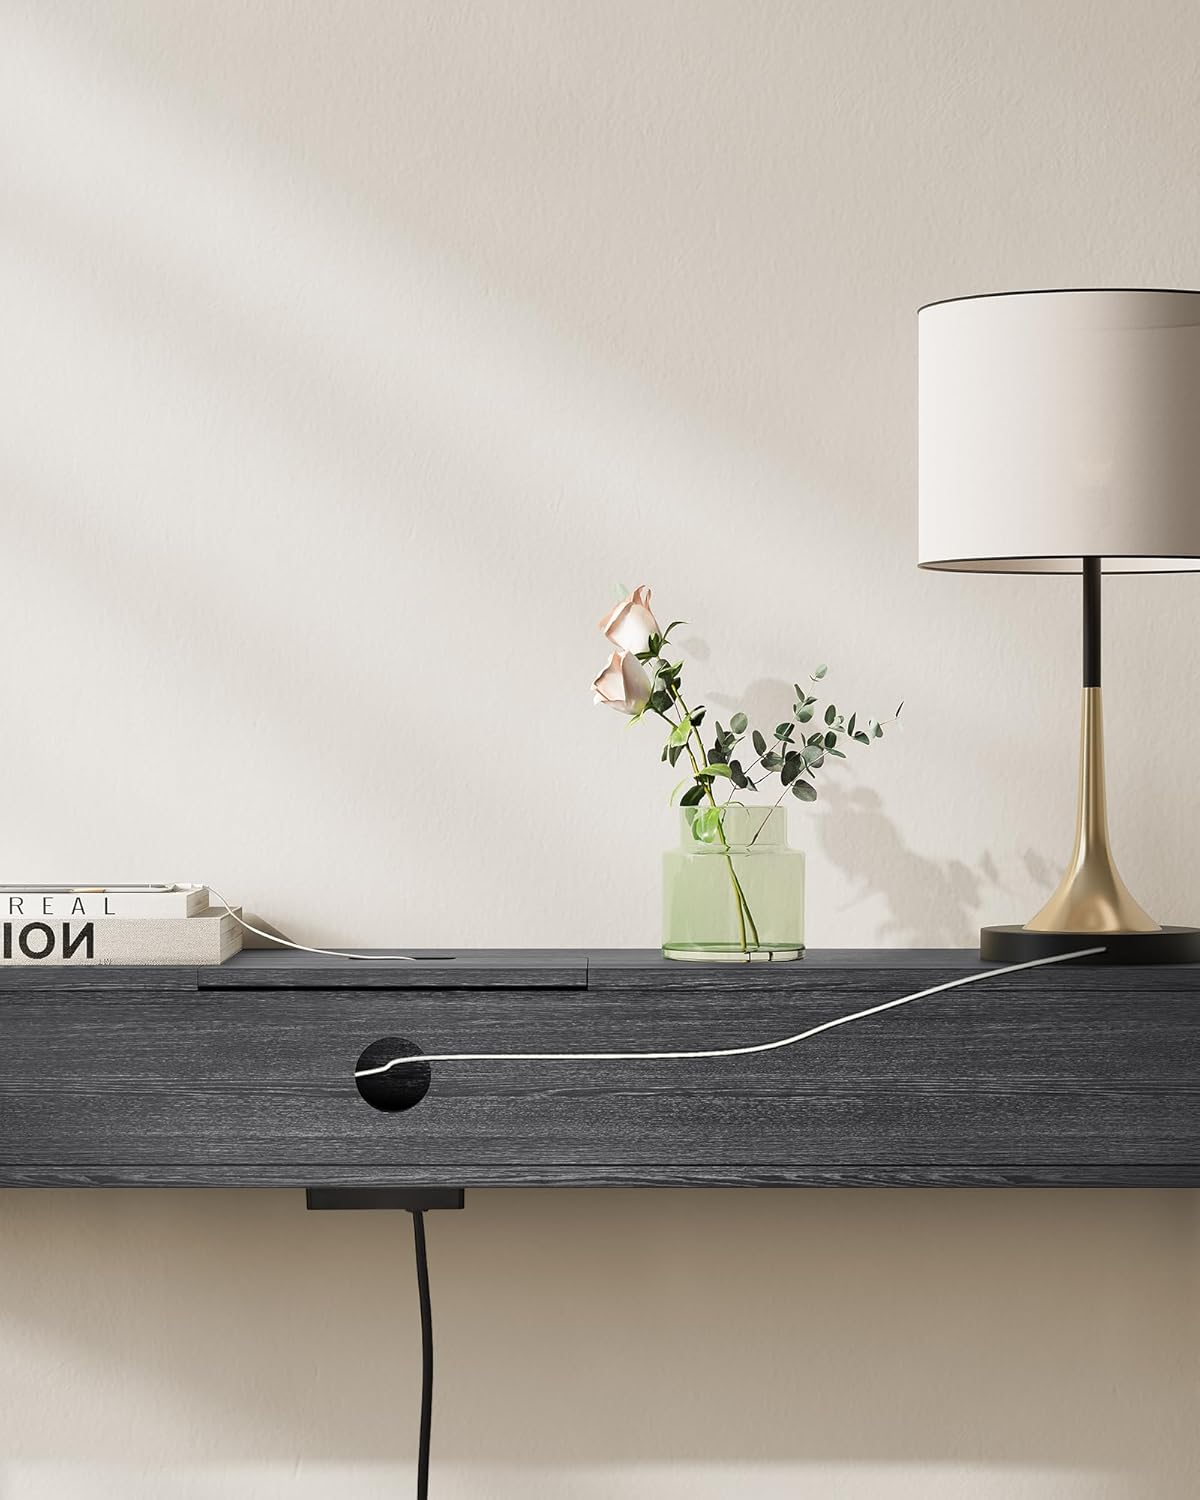
A view of the circular cable management hole at the back of the table, designed to route power cords neatly and keep the tabletop clutter-free.
5. Operating Instructions
The VASAGLE LNT111B01 Console Table is designed for convenient use in various settings.
- Using the Power Outlets: Plug the table's power cord into a wall outlet. Open the lid of the hidden compartment to access the 2 AC outlets and 2 USB ports. Connect your devices (e.g., lamps, phones, tablets, game consoles) for charging.
- Cable Management: Utilize the cable management hole at the back of the table to route device cables neatly, keeping the tabletop organized and free from clutter.
- Storage Compartments: Use the two open compartments to store books, remote controls, small electronics, or decorative items.
- Versatile Placement: This narrow table is suitable for entryways to hold keys and mail, behind a sofa for charging devices, or against a wall to display decorations.

The console table in use, demonstrating how a laptop and tablet can be conveniently charged using the integrated power outlets, with cables neatly routed.

Visual representation of the power features: standard AC outlet, USB charging port, and a symbol for organized cable routing.
6. Maintenance
To ensure the longevity and appearance of your console table, follow these simple maintenance guidelines:
- Cleaning: Wipe the table surfaces with a dry, soft cloth. Avoid using harsh chemicals or abrasive cleaners, which can damage the finish.
- Spills: In case of spills, wipe them immediately with a dry cloth to prevent staining or damage to the wood surface.
- Inspection: Periodically check all screws and connections to ensure they remain tight. Retighten if necessary.
- Avoid Direct Sunlight: Prolonged exposure to direct sunlight may cause fading or discoloration of the finish.
- Heat Protection: Use coasters or protective pads under hot items to prevent heat damage to the tabletop.
7. Troubleshooting
- Table is Wobbly:
- Ensure all assembly screws are securely tightened.
- Adjust the leveling feet at the bottom of the legs to compensate for uneven floors.
- Power Outlets Not Working:
- Check if the table's power cord is securely plugged into a functional wall outlet.
- Ensure the wall outlet itself is receiving power (test with another device).
- Avoid overloading the power strip. Unplug some devices and try again.
- Missing or Damaged Parts:
- Refer to the package contents list. If parts are missing or damaged upon arrival, contact customer support immediately for assistance.
8. Specifications
| Feature | Detail |
|---|---|
| Model Name | VASAGLE LNT111B01 |
| Product Dimensions (L x W x H) | 120 x 25 x 81 cm (47.2 x 9.8 x 31.9 inches) |
| Item Weight | 10.7 kg (23.6 lbs) |
| Maximum Weight Recommendation | 100 kg (220 lbs) |
| Material Type | Wood (Particleboard), Metal (Alloy Steel Frame) |
| Color | Anthracite Grey + Ink Black |
| Power Outlets | 2 AC Outlets, 2 USB Ports |
| Assembly Required | Yes |
| Recommended Tools for Assembly | Screwdriver |
| Care Instructions | Wipe with a dry cloth |
9. Warranty and Support
For warranty information or if you encounter any issues not covered in this manual, please contact VASAGLE customer support. Please have your model number (LNT111B01) and purchase details ready when contacting support.
You can typically find contact information on the VASAGLE official website or through your retailer's customer service portal.


